
NZXT CM-H71FW-R1
Contents
NZXT H7 Flow RGB PC Gaming Case - Instruction Manual
Model: CM-H71FW-R1
Introduction
Welcome to the comprehensive instruction manual for your NZXT H7 Flow RGB Compact ATX Mid-Tower PC Gaming Case. This manual provides essential information for setting up, operating, and maintaining your new PC case to ensure optimal performance and longevity. Please read through all sections carefully before beginning the assembly process.

Figure 1: NZXT H7 Flow RGB PC Gaming Case (White)
Key Features
- High-Performance Airflow: Perforated front and top panels are designed to direct filtered air efficiently through the case, optimizing cooling for internal components and enhancing overall system performance.
- Vivid RGB Lighting: Includes three pre-installed F140 RGB Core fans that connect to a standard 5V ARGB header, providing customizable and vibrant lighting effects.
- Dedicated GPU Fan: An angled 120mm fan is strategically placed to draw air from below the case, delivering direct and effective cooling for high-performance graphics cards.
- Spacious Cooling Support: Offers extensive support for cooling solutions, accommodating up to a 360mm radiator in both the top and front panels. It supports 3 x 140mm fans in the front and a 140mm fan in the rear for comprehensive airflow.
- Ready for Performance: Designed to fit most NVIDIA GeForce RTX 40 Series graphics cards with a generous 365mm clearance. Vertical GPU mounting is also supported with an optional kit (sold separately), which reduces clearance to 349mm.
Package Contents
Upon unboxing, please verify that all items listed below are present and in good condition:
- NZXT H7 Flow RGB PC Gaming Case
- Instruction Manual (this document)
- Accessory Box (containing screws, zip ties, and other small parts for assembly)
Setup Guide
Follow these steps to properly set up your NZXT H7 Flow RGB PC Gaming Case and install your components.
1. Preparing the Case
- Place the case on a flat, stable surface.
- Remove the tempered glass side panel by gently pulling it from the top edge. The panel is secured with tool-less snaps for easy access.
- Remove the rear side panel to access the cable management area.

Figure 2: Internal view of the H7 Flow RGB case with panels removed.
2. Motherboard Installation
- Install the I/O shield (if not pre-installed on your motherboard) into the rear opening of the case.
- Carefully align your ATX motherboard with the standoffs inside the case. The H7 Flow RGB features a fixed pin for easy alignment.
- Secure the motherboard with the provided screws.
3. Power Supply Installation
- Mount your power supply unit (PSU) into the dedicated bay at the bottom rear of the case.
- Secure the PSU with screws from the rear of the case.
- Route necessary power cables through the cable management cutouts.
4. Graphics Card (GPU) Installation
- Remove the necessary PCIe slot covers from the rear of the case.
- Insert your graphics card into the primary PCIe slot on your motherboard, ensuring it clicks into place.
- Secure the GPU with screws.
- Connect the appropriate power cables from your PSU to the GPU.

Figure 3: Graphics card installation area and clearance.
5. Storage Drive Installation
The case supports various storage configurations. Refer to your motherboard manual for M.2 SSD installation. For 2.5-inch and 3.5-inch drives:
- Locate the drive cages or mounting brackets behind the motherboard tray or in the PSU shroud area.
- Secure your SSDs or HDDs to the appropriate brackets using the provided screws.
- Slide the brackets back into their designated slots.
6. Fan and Radiator Installation
The H7 Flow RGB comes with three pre-installed F140 RGB Core fans in the front. Additional fans or radiators can be installed as follows:
- Top Panel: Supports up to a 360mm radiator or 3 x 120mm/2 x 140mm fans.
- Rear Panel: Supports 1 x 120mm or 1 x 140mm fan (one 140mm fan is typically pre-installed).
- Dedicated GPU Fan: An angled 120mm fan mount is available at the bottom for direct GPU cooling.

Figure 4: Cooling support and fan configurations.
7. Cable Management
Utilize the wide cable channels, hooks, and straps located behind the motherboard tray to organize your cables. This ensures optimal airflow and a clean build appearance.

Figure 5: Cable management features.
8. Front Panel Connections
Connect the front panel headers (USB, audio, power, reset, RGB) to their corresponding pins on your motherboard. The H7 Flow RGB simplifies this with a combined front panel connector for basic functions.
Operating Instructions
Powering On/Off
Press the power button located on the top panel of the case to turn your system on or off. Ensure all components are properly connected before powering on.
RGB Lighting Control
The pre-installed F140 RGB Core fans connect to a standard 5V ARGB header on your motherboard. You can control and personalize the lighting effects using your motherboard's RGB software (e.g., ASUS Aura Sync, MSI Mystic Light, Gigabyte RGB Fusion) or NZXT CAM software if you have an NZXT RGB controller.
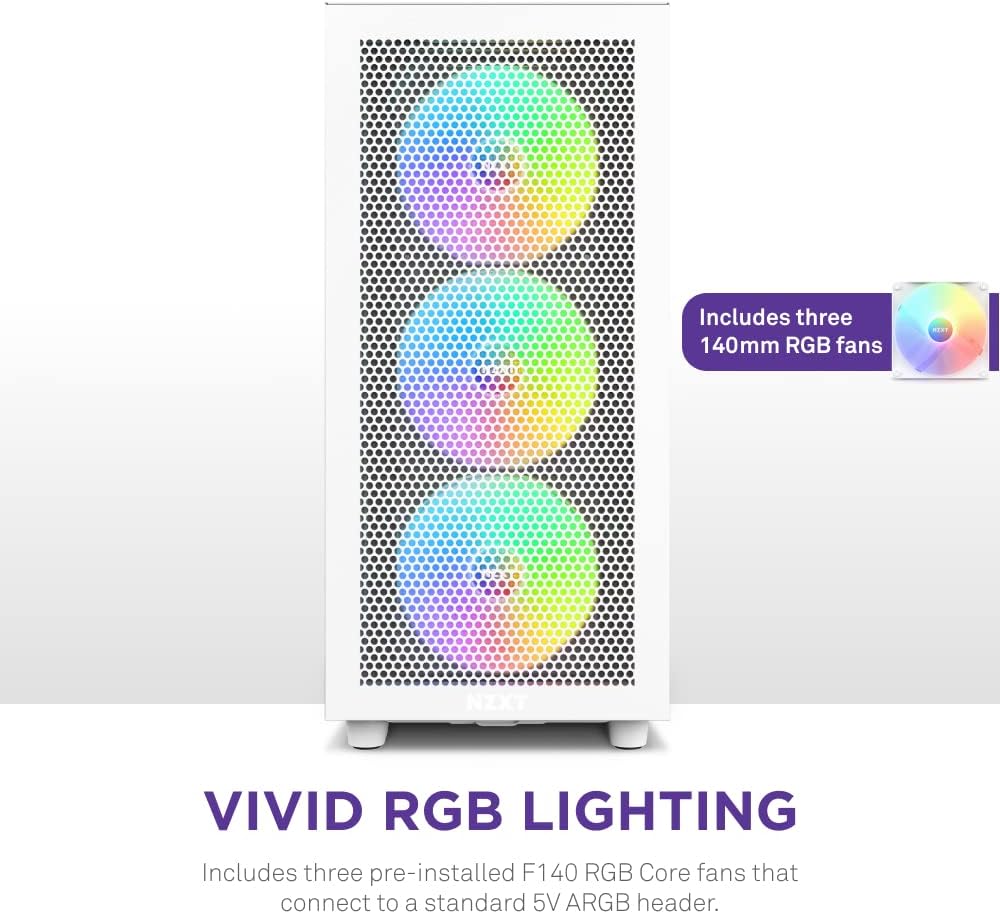
Figure 6: Vivid RGB lighting of the F140 Core fans.
Maintenance
Regular maintenance ensures the longevity and optimal performance of your PC components.
Dust Filter Cleaning
- The H7 Flow RGB features removable dust filters on the front and top panels.
- Gently slide out the filters.
- Clean them using compressed air or by rinsing with water (ensure they are completely dry before re-installing).
- It is recommended to clean dust filters every 1-3 months, depending on your environment.
General Case Cleaning
- Use a microfiber cloth to wipe down the exterior surfaces of the case.
- For internal cleaning, use compressed air to remove dust from fans, heatsinks, and other components. Always hold fan blades when using compressed air to prevent over-spinning.
- Ensure the system is powered off and unplugged before performing any internal cleaning.
Troubleshooting
If you encounter any issues with your NZXT H7 Flow RGB case, consider the following common solutions:
- No Power: Double-check all power connections from the PSU to the motherboard and components. Ensure the PSU switch is in the 'On' position. Verify front panel power button connection to the motherboard.
- Fans Not Spinning/RGB Not Working: Confirm that all fan and RGB cables are securely connected to the motherboard headers or RGB controller. Check your motherboard's BIOS/UEFI settings or RGB software for fan speed and lighting control.
- Overheating: Ensure all fans are spinning correctly and are oriented for proper airflow (intake/exhaust). Clean dust filters and internal components. Verify CPU cooler and GPU cooler are properly seated.
- Noise Issues: Check for loose cables or components that might be vibrating against the case. Ensure fans are securely mounted and not obstructed.
For further assistance, please refer to the NZXT support website or contact their customer service.
Specifications
| Feature | Detail |
|---|---|
| Brand | NZXT |
| Model Name | NZXT H7 Flow RGB - white (2023) |
| Item Model Number | CM-H71FW-R1 |
| Case Type | Mid Tower |
| Motherboard Compatibility | ATX |
| Color | White |
| Material | Tempered Glass |
| Product Dimensions (LxWxH) | 18.9 x 9.06 x 19.88 inches |
| Item Weight | 27.4 pounds |
| Cooling Method | Air |
| Number of USB 3.0 Ports | 2 |
| Light Color | Multicolor (RGB) |
Product Overview (360 Degree View)
Watch this official video for a detailed 360-degree view of the NZXT H7 Flow RGB PC Gaming Case, highlighting its design and features.
Video 1: 360 Degree View of NZXT H7 Flow RGB Case. This video provides a comprehensive visual tour of the case's exterior and interior design, showcasing its various angles and features.
Warranty and Support
For detailed warranty information, technical support, and frequently asked questions, please visit the official NZXT support website. You can also find updated drivers and software for your NZXT products there.
Official NZXT Support: www.nzxt.com/support
Ask a question about this manual
Ask about setup, troubleshooting, compatibility, parts, safety, or missing instructions. Manuals+ will review the question and use this page’s manual context to help answer it.