
maXpeedingrods MXR1500
maXpeedingrods MXR1500 1200W Portable Inverter Generator
User Manual
Product Overview
The maXpeedingrods MXR1500 is a lightweight and compact 1200W portable inverter generator designed for various applications, including outdoor camping, RV travel, garden parties, and home emergency power. It provides a maximum output of 1200W and a rated output of 1000W, capable of powering sensitive electronics and essential appliances.

Image: The maXpeedingrods MXR1500 portable inverter generator, showcasing its compact design and control panel.
Key features include its ultra-light design at only 11.5 kg, quiet operation with a noise level of 58 dB at 25% load (7m distance), and an ECO mode for extended run times. The generator also supports parallel operation to double the power output (parallel cable sold separately).
Important Safety Information
⚠ DANGER: Carbon Monoxide Hazard
Using a generator indoors CAN KILL YOU IN MINUTES. Generator exhaust contains carbon monoxide, a poisonous gas you cannot see or smell.
- ✘ NEVER use in a home or garage, even if doors and windows are open.
- ✔ ONLY use outdoors and far away from windows, doors, and vents.
To avoid other generator hazards, PLEASE READ THE OWNER'S MANUAL BEFORE USE.
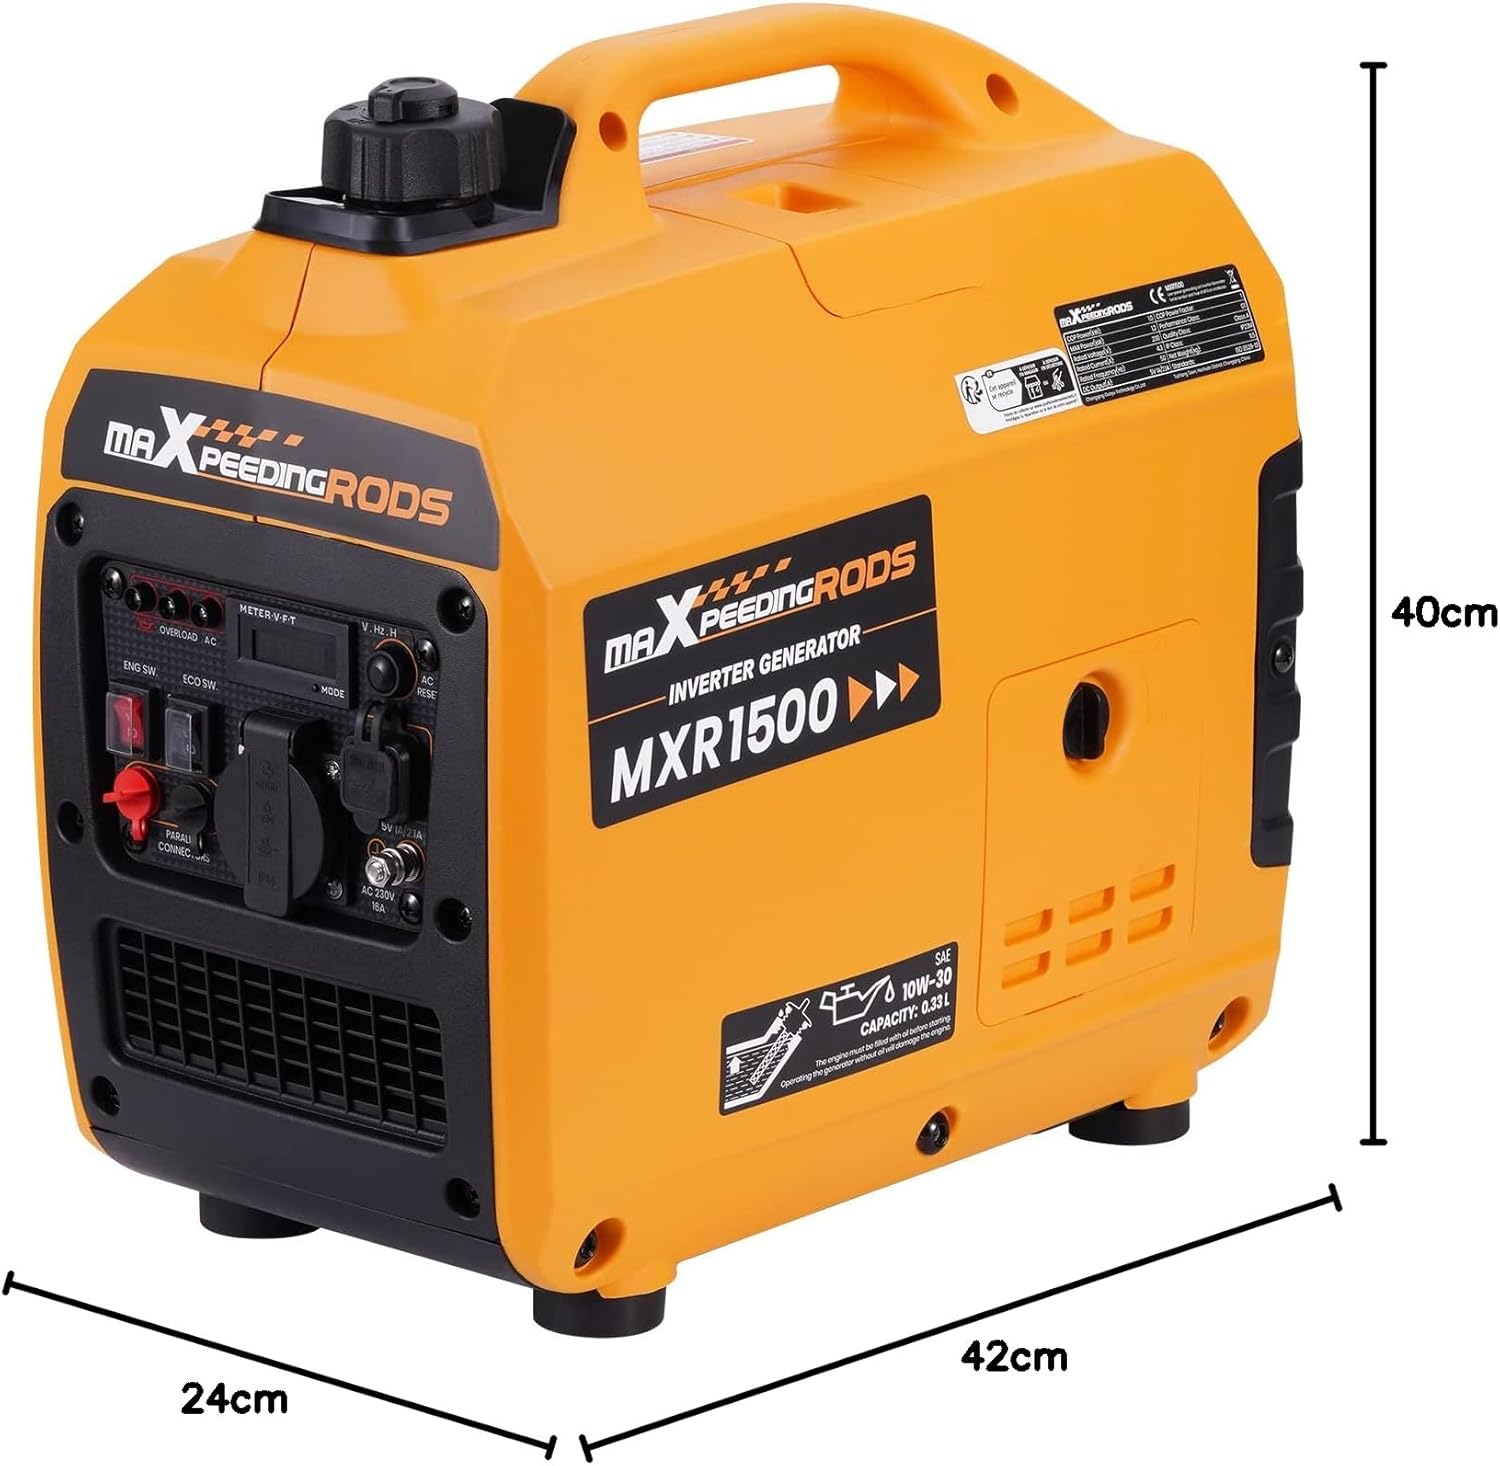
Image: Visual representation of carbon monoxide safety warnings, emphasizing outdoor use only.
⚠ WARNING: Electrical Shock Hazard
The generator produces powerful voltage which can cause death or serious injury.
- If using the generator as a backup power source, inform your utility company. Use an approved transfer switch.
- NEVER connect the unit to a building's electrical system unless a qualified electrician has installed a transfer switch.
- NEVER touch bare wires or receptacles.
- NEVER use the generator with worn, frayed, or otherwise damaged power cords.
- NEVER operate the generator in rain or snow, or when the generator is on wet ground.
Components Overview
Familiarize yourself with the main components and controls of your MXR1500 generator.
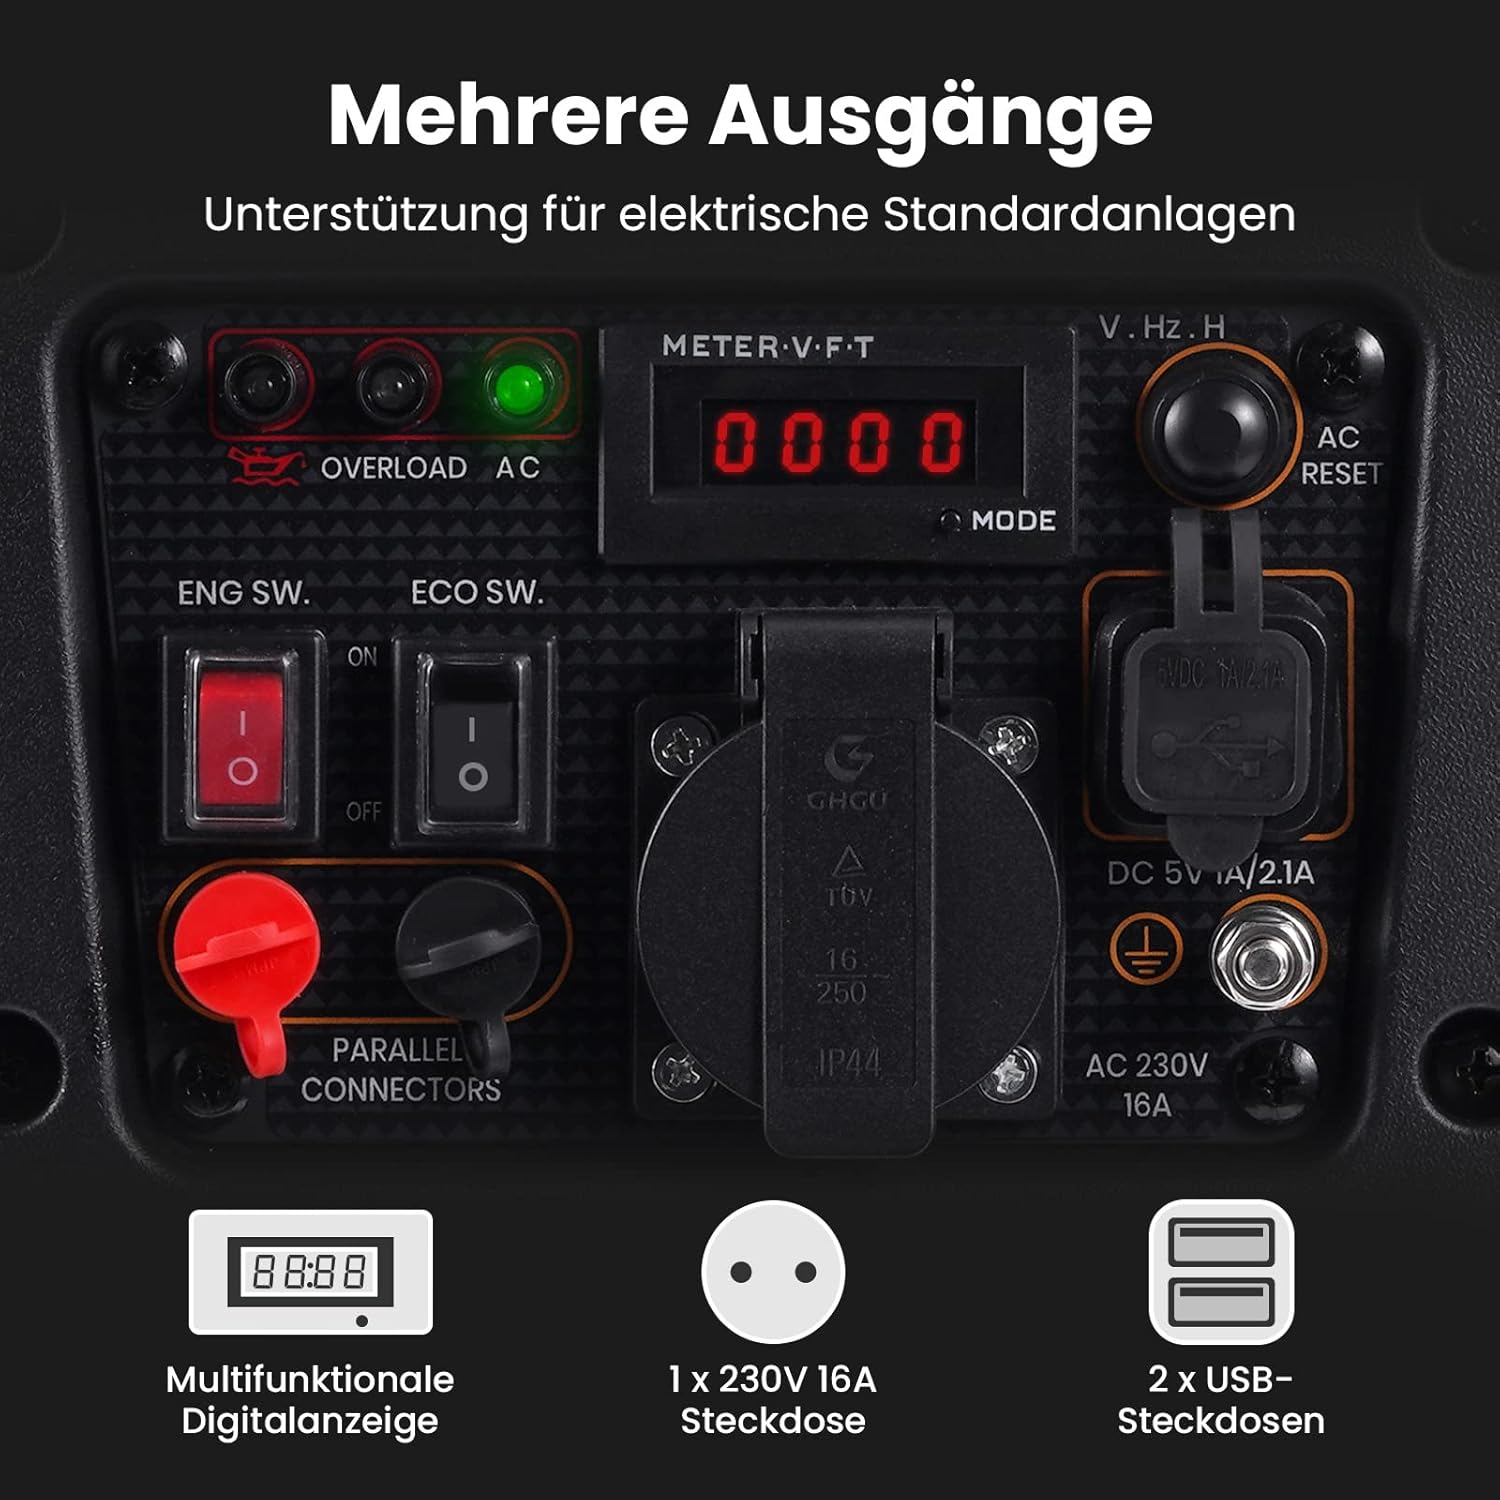
Image: Detailed view of the generator's control panel, showing the multifunctional digital display, AC outlets, and USB ports.
- Fuel Switch: Controls fuel flow to the engine.
- Starter: Manual recoil starter for engine ignition.
- Engine Switch (ENG SW): Turns the engine ON/OFF.
- ECO Switch (ECO SW): Activates economy mode for fuel efficiency.
- Overload LED: Indicates an overload condition.
- AC Output LED: Indicates AC power is being generated.
- Low Oil LED: Warns of low engine oil level.
- AC Reset Button: Resets the AC circuit breaker after an overload.
- Multifunctional Digital Display: Shows voltage, frequency, and accumulated runtime.
- AC 230V 16A Sockets: Standard power outlets.
- DC 5V/1A / 2.1A USB Ports: For charging USB devices.
- Parallel Connectors: For connecting two generators in parallel.
Setup
1. Unpacking and Initial Inspection
Carefully remove the generator from its packaging. Inspect for any damage that may have occurred during shipping. Ensure all included accessories are present:
- 1x User Manual
- 1x Spark Plug Wrench
- 1x Oil Funnel
- 1x Screwdriver
- 1x EU Plug
- 1x Generator Dust Cover
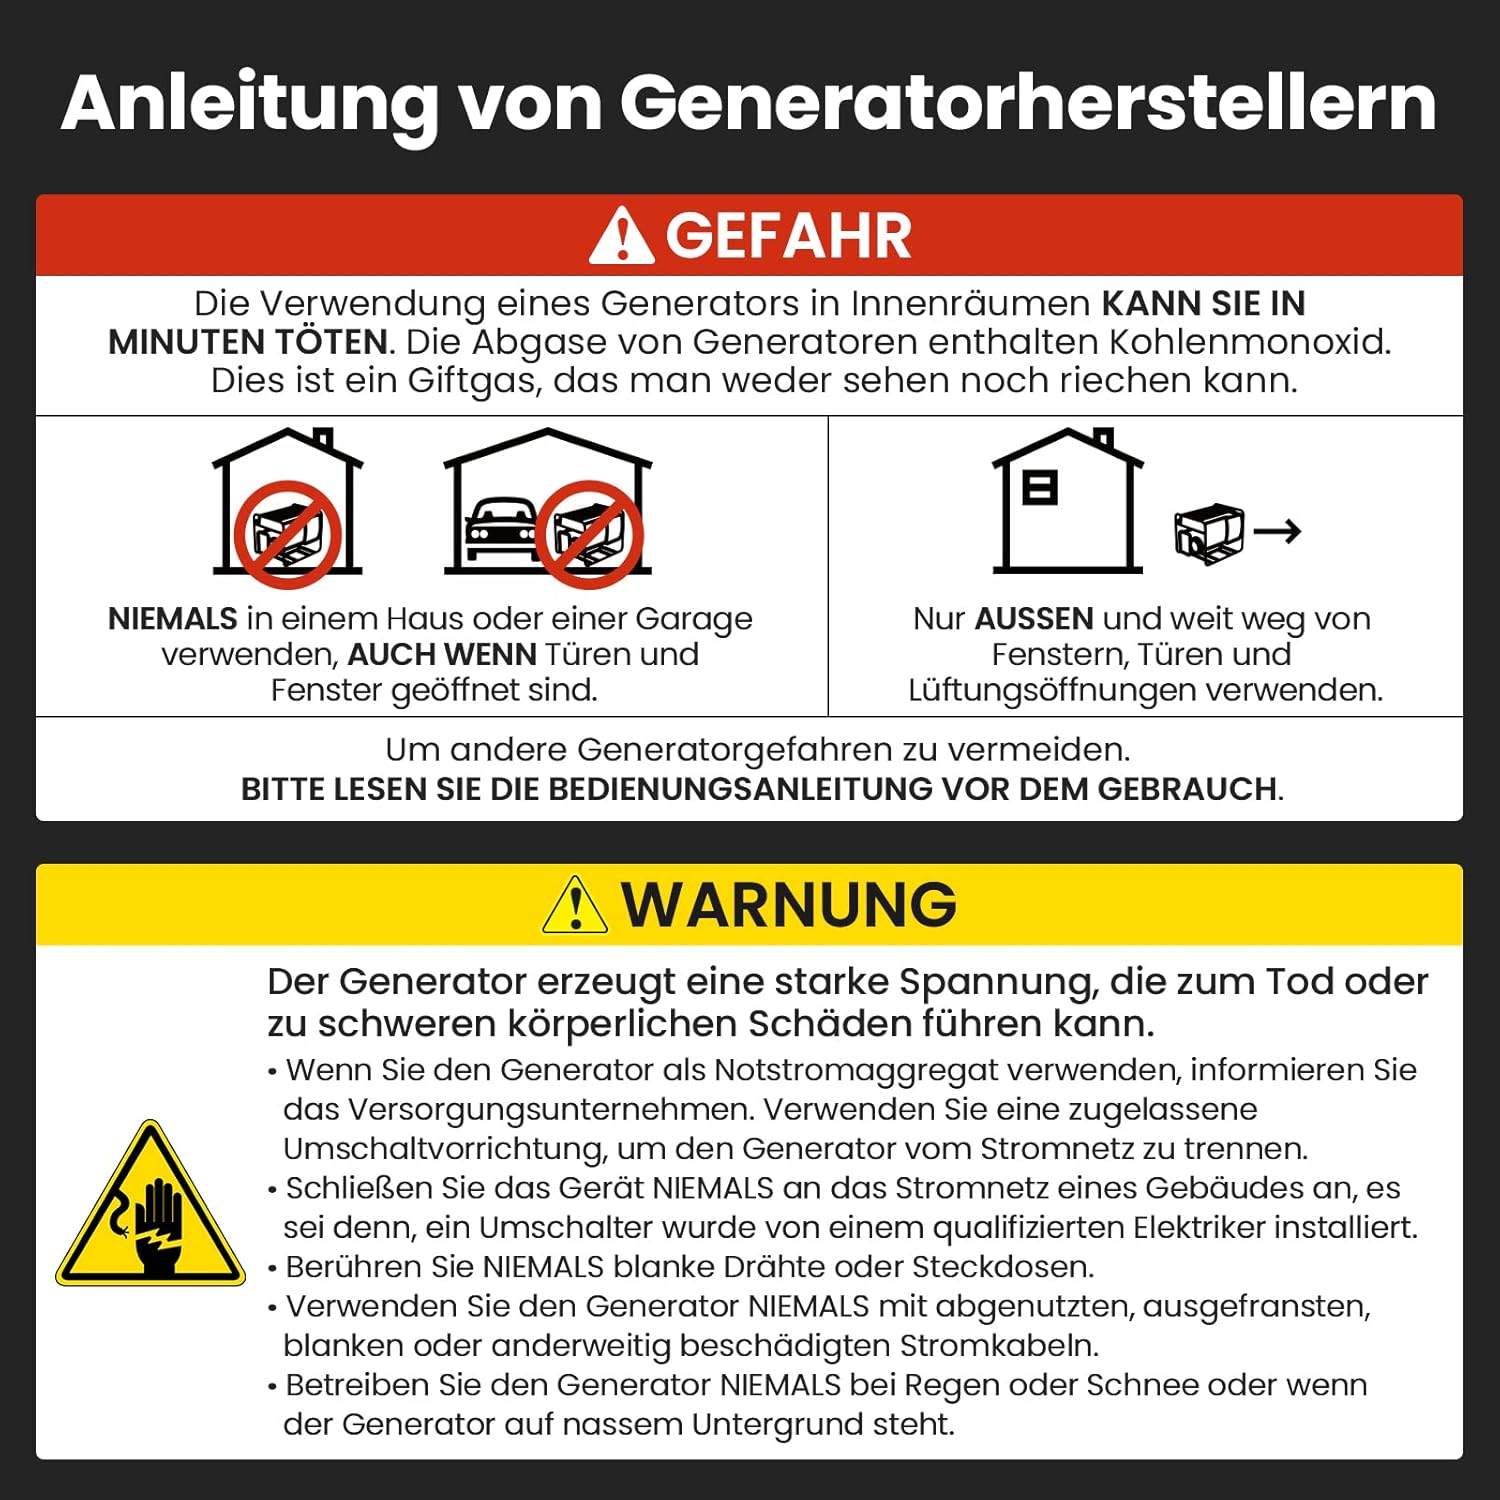
Image: A visual display of the accessories included with the generator, such as the spark plug, EU plug, spark plug wrench, screwdriver, oil funnel, and dust cover.
2. Adding Engine Oil
The generator is shipped without engine oil. Before first use, you must add the recommended engine oil. Use a 4-stroke engine oil, such as SAE 10W-30. The oil capacity is approximately 0.38 liters.
- Place the generator on a level surface.
- Locate and remove the oil filler cap/dipstick.
- Using the provided oil funnel, slowly pour the recommended oil into the engine until it reaches the upper mark on the dipstick. Do not overfill.
- Replace the oil filler cap/dipstick securely.
3. Adding Fuel
Use unleaded gasoline with an octane rating of 87 or higher. The fuel tank capacity is approximately 2.5 liters.
- Ensure the generator is turned OFF and cool.
- Open the fuel tank cap.
- Carefully pour gasoline into the fuel tank, avoiding spills. Do not fill above the red indicator line inside the tank.
- Securely close the fuel tank cap.
Note: Always refuel in a well-ventilated area away from open flames or sparks.
Operation
1. Starting the Generator
- Ensure the generator is on a firm, level surface outdoors, away from any windows or vents.
- Turn the Fuel Switch to the "ON" position.
- Turn the Engine Switch (ENG SW) to the "ON" position.
- If the engine is cold, pull the choke lever to the "CHOKE" position.
- Firmly pull the Starter handle until the engine starts.
- Once the engine starts, slowly push the choke lever back to the "RUN" position.
- Allow the generator to run for a few minutes to warm up before connecting electrical loads.
2. Connecting Electrical Devices
Once the generator is running stably and the AC Output LED is illuminated, you can connect your electrical devices.
- Plug your devices into the appropriate AC 230V 16A sockets or DC 5V USB ports.
- Ensure the total wattage of connected devices does not exceed the generator's rated output (1000W) or maximum output (1200W).
- If the Overload LED illuminates, disconnect some devices and press the AC Reset button.
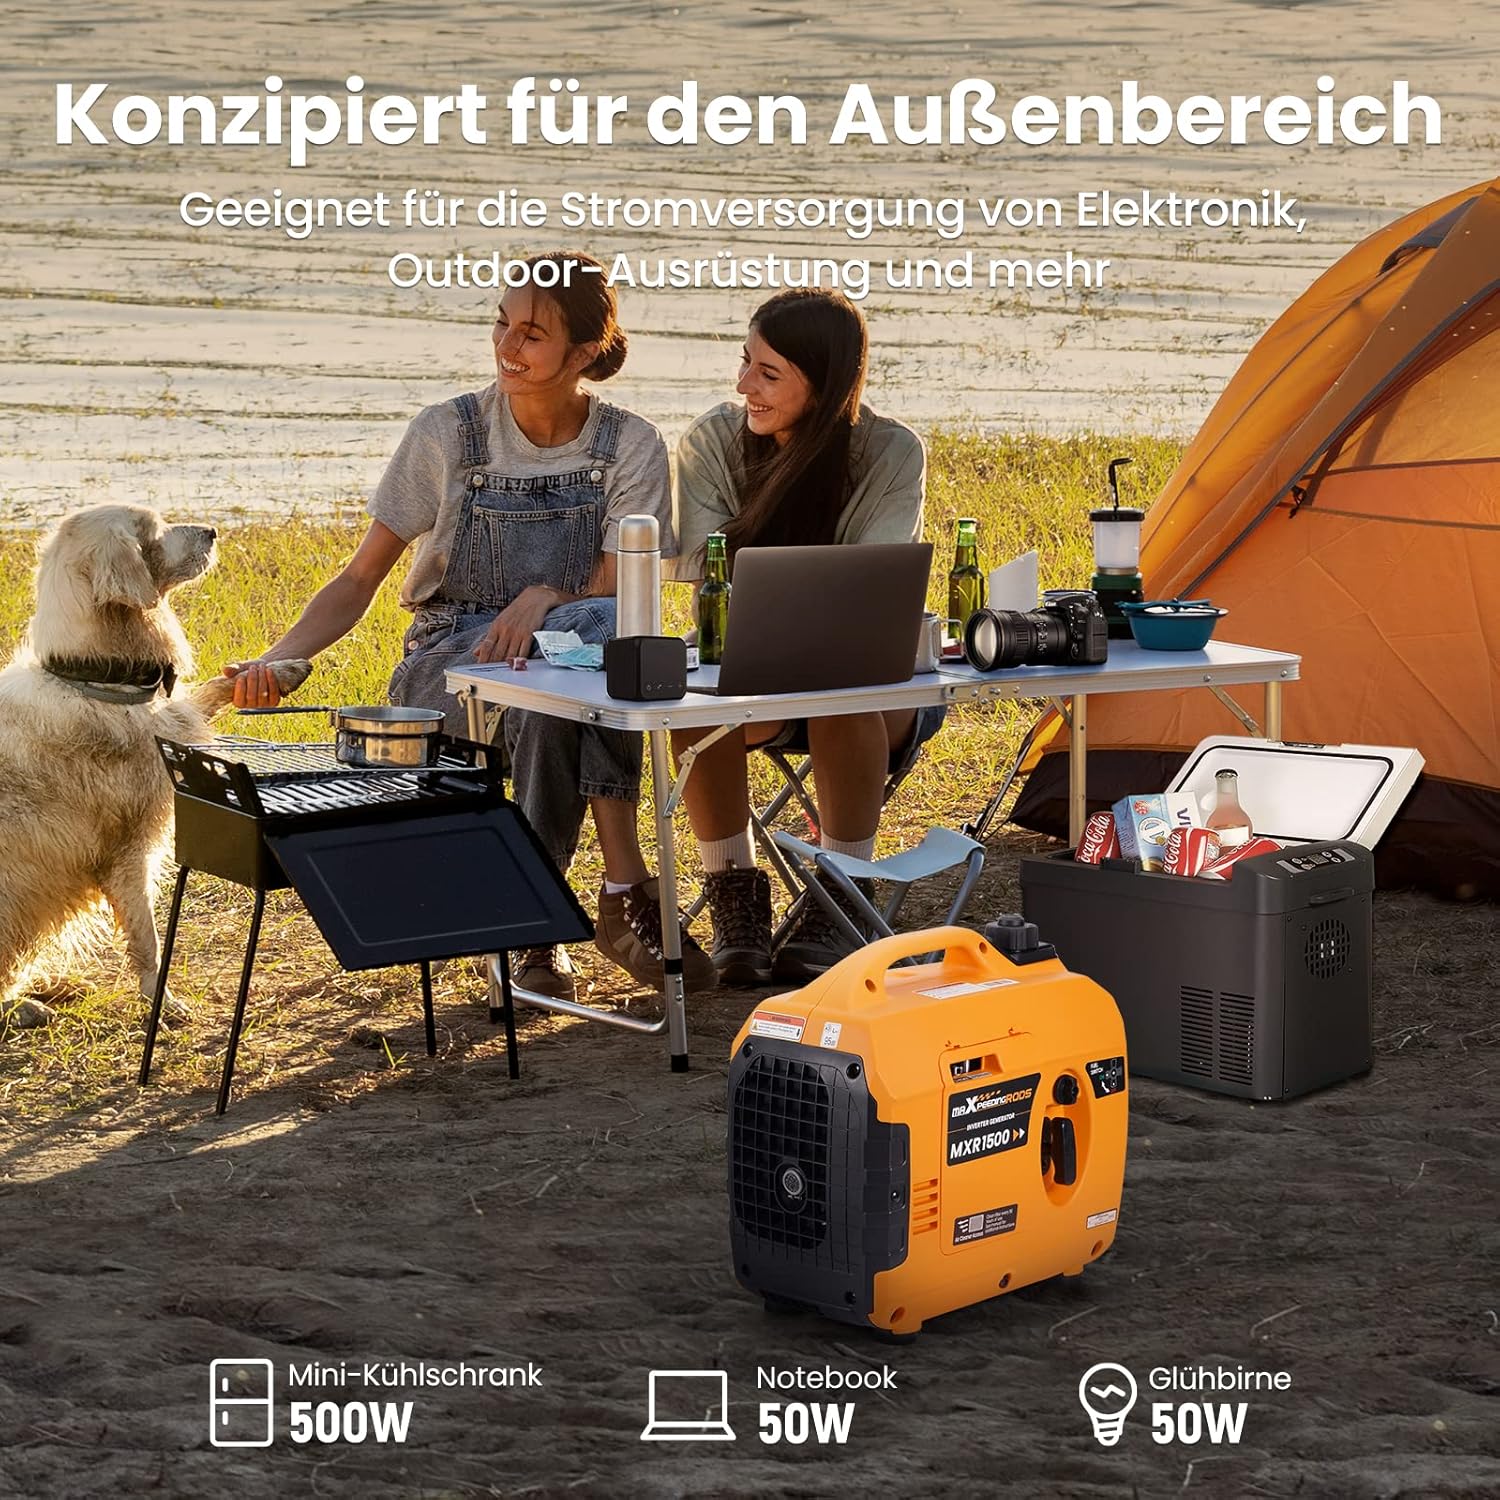
Image: The generator in an outdoor camping setting, demonstrating its use for powering various electronics like a mini-fridge (500W), notebook (50W), and light bulb (50W).
3. ECO Mode Operation
The ECO mode automatically adjusts engine speed to match the load, improving fuel efficiency and reducing noise levels.
- To activate ECO mode, press the ECO Switch to the "ON" position.
- The generator will run quieter and consume less fuel when operating at lower loads.
- For maximum power output, ensure ECO mode is turned "OFF".

Image: A graphic illustrating the low noise output of the MXR1500 (50-60dB) compared to a sewing machine (60dB) and a vacuum cleaner (60-85dB), highlighting its quiet operation.
4. Parallel Operation
You can connect two maXpeedingrods MXR1500 generators in parallel to achieve up to 1800W of power. A parallel cable kit (sold separately) is required for this function.
- Ensure both generators are turned OFF and cool.
- Connect the parallel cable to the designated parallel connectors on both generators.
- Start both generators following the standard starting procedure.
- Once both generators are running stably, they will operate in sync, providing increased power output.

Image: Two MXR1500 generators set up for parallel operation, demonstrating how to achieve higher power output for demanding applications.
Maintenance
Regular maintenance is crucial for the longevity and optimal performance of your generator. Always ensure the generator is turned OFF and cool before performing any maintenance.
Routine Maintenance Schedule
| Item | Before Each Use | Every 50 Hours / Monthly | Every 100 Hours / 6 Months | Every 300 Hours / Annually |
|---|---|---|---|---|
| Check Engine Oil Level | ✓ | |||
| Clean Air Filter | ✓ | |||
| Inspect Spark Plug | ✓ | |||
| Change Engine Oil | ✓ | |||
| Clean Fuel Filter | ✓ |
Air Filter Cleaning
A dirty air filter can reduce engine performance and increase fuel consumption. Clean the air filter every 50 hours of operation or monthly, more often in dusty conditions.
- Remove the air filter cover.
- Remove the foam air filter element.
- Wash the element in warm, soapy water, then rinse thoroughly.
- Squeeze out excess water and allow it to air dry completely.
- Lightly apply engine oil to the foam element and squeeze out any excess oil.
- Reinstall the air filter element and cover.
Oil Change
Change the engine oil after the first 20 hours of operation, then every 100 hours or every 6 months thereafter.
- Place a suitable container under the oil drain plug.
- Remove the oil drain plug and oil filler cap/dipstick to allow the oil to drain completely.
- Once drained, reinstall the oil drain plug.
- Refill with fresh, recommended engine oil (SAE 10W-30) using the oil funnel.
- Replace the oil filler cap/dipstick.
Storage Guidelines
For long-term storage (more than 30 days), proper preparation is essential to prevent fuel degradation and engine damage.
- Add a fuel stabilizer to the fuel tank and run the engine for a few minutes to circulate it.
- Drain the fuel from the carburetor by loosening the drain screw.
- Change the engine oil.
- Remove the spark plug and pour a tablespoon of clean engine oil into the cylinder. Crank the engine a few times to distribute the oil, then reinstall the spark plug.
- Store the generator in a clean, dry, well-ventilated area, covered with the provided dust cover.
Troubleshooting
This section provides solutions to common issues you might encounter with your generator.
| Problem | Possible Cause | Solution |
|---|---|---|
| Engine does not start | No fuel or low fuel level | Add fresh fuel to the tank. |
| Engine does not start | Fuel switch OFF | Turn fuel switch to ON. |
| Engine does not start | Engine switch OFF | Turn engine switch to ON. |
| Engine does not start | Low engine oil | Add engine oil to the correct level. |
| Engine does not start | Spark plug fouled or faulty | Clean or replace the spark plug. |
| No AC output | Overload condition | Reduce load, press AC Reset button. |
| No AC output | Circuit breaker tripped | Press AC Reset button. |
| Generator runs rough | Stale fuel | Drain old fuel and add fresh fuel. |
| Generator runs rough | Dirty air filter | Clean or replace air filter. |
Technical Specifications
| Specification | Value |
|---|---|
| Model Number | MXR1500 |
| Maximum Output | 1200 W |
| Rated Output | 1000 W |
| Voltage | 230 V |
| Noise Level (25% load, 7m) | 58 dB |
| Engine Type | 4-stroke |
| Fuel Type | Gasoline |
| Fuel Tank Capacity | Approx. 2.5 Liters |
| Oil Capacity | Approx. 0.38 Liters |
| Run Time (50% load) | 6 hours |
| Run Time (ECO mode) | Up to 10-12 hours |
| Product Dimensions (L x W x H) | 46 x 28 x 44 cm |
| Item Weight | 11.5 kg |

Image: A diagram showing the physical dimensions of the MXR1500 generator.
Warranty and Support
maXpeedingrods guarantees all inverter generators against manufacturing defects under normal use for a period of 2 years from the date of retail purchase by the original end-user. This warranty also includes lifetime free technical support and customer service.
For technical assistance, warranty claims, or any other inquiries, please refer to the contact information provided with your purchase documentation or visit the official maXpeedingrods website.
Online Resources:
- Official maXpeedingrods Store on Amazon: Visit Store
Related documentsMXR1500


Ask a question about this manual
Ask about setup, troubleshooting, compatibility, parts, safety, or missing instructions. Manuals+ will review the question and use this page’s manual context to help answer it.