1. Product Overview
The AQUANEAT LED Aquarium Light TXF-301 is an energy-efficient lighting fixture designed for freshwater aquariums, supporting low-to-mid light plants. It features long-lasting LEDs, adjustable brightness, multiple lighting modes, and a built-in timer for automated operation.

Figure 1: AQUANEAT LED Aquarium Light TXF-301 with integrated controller and mounting brackets.
2. Package Contents
- 1 x AQUANEAT LED Aquarium Light Fixture
- 2 x Extendable Mounting Brackets
- 1 x Power Adapter with Integrated Controller
- 1 x Instruction Manual
Unboxing and Components Overview
Video 1: An overview of the AQUANEAT LED Aquarium Light TXF-301's components and initial unboxing process.
3. Setup
3.1 Mounting the Light
- Attach the extendable mounting brackets to both ends of the light fixture.
- Place the light fixture on top of your aquarium. The brackets are adjustable to fit aquarium widths from 11 inches to 14 inches.
- Ensure the light is securely positioned and stable on the tank.

Figure 2: The extendable mounting brackets allow the light to fit various tank sizes, from 11 to 14 inches in length.
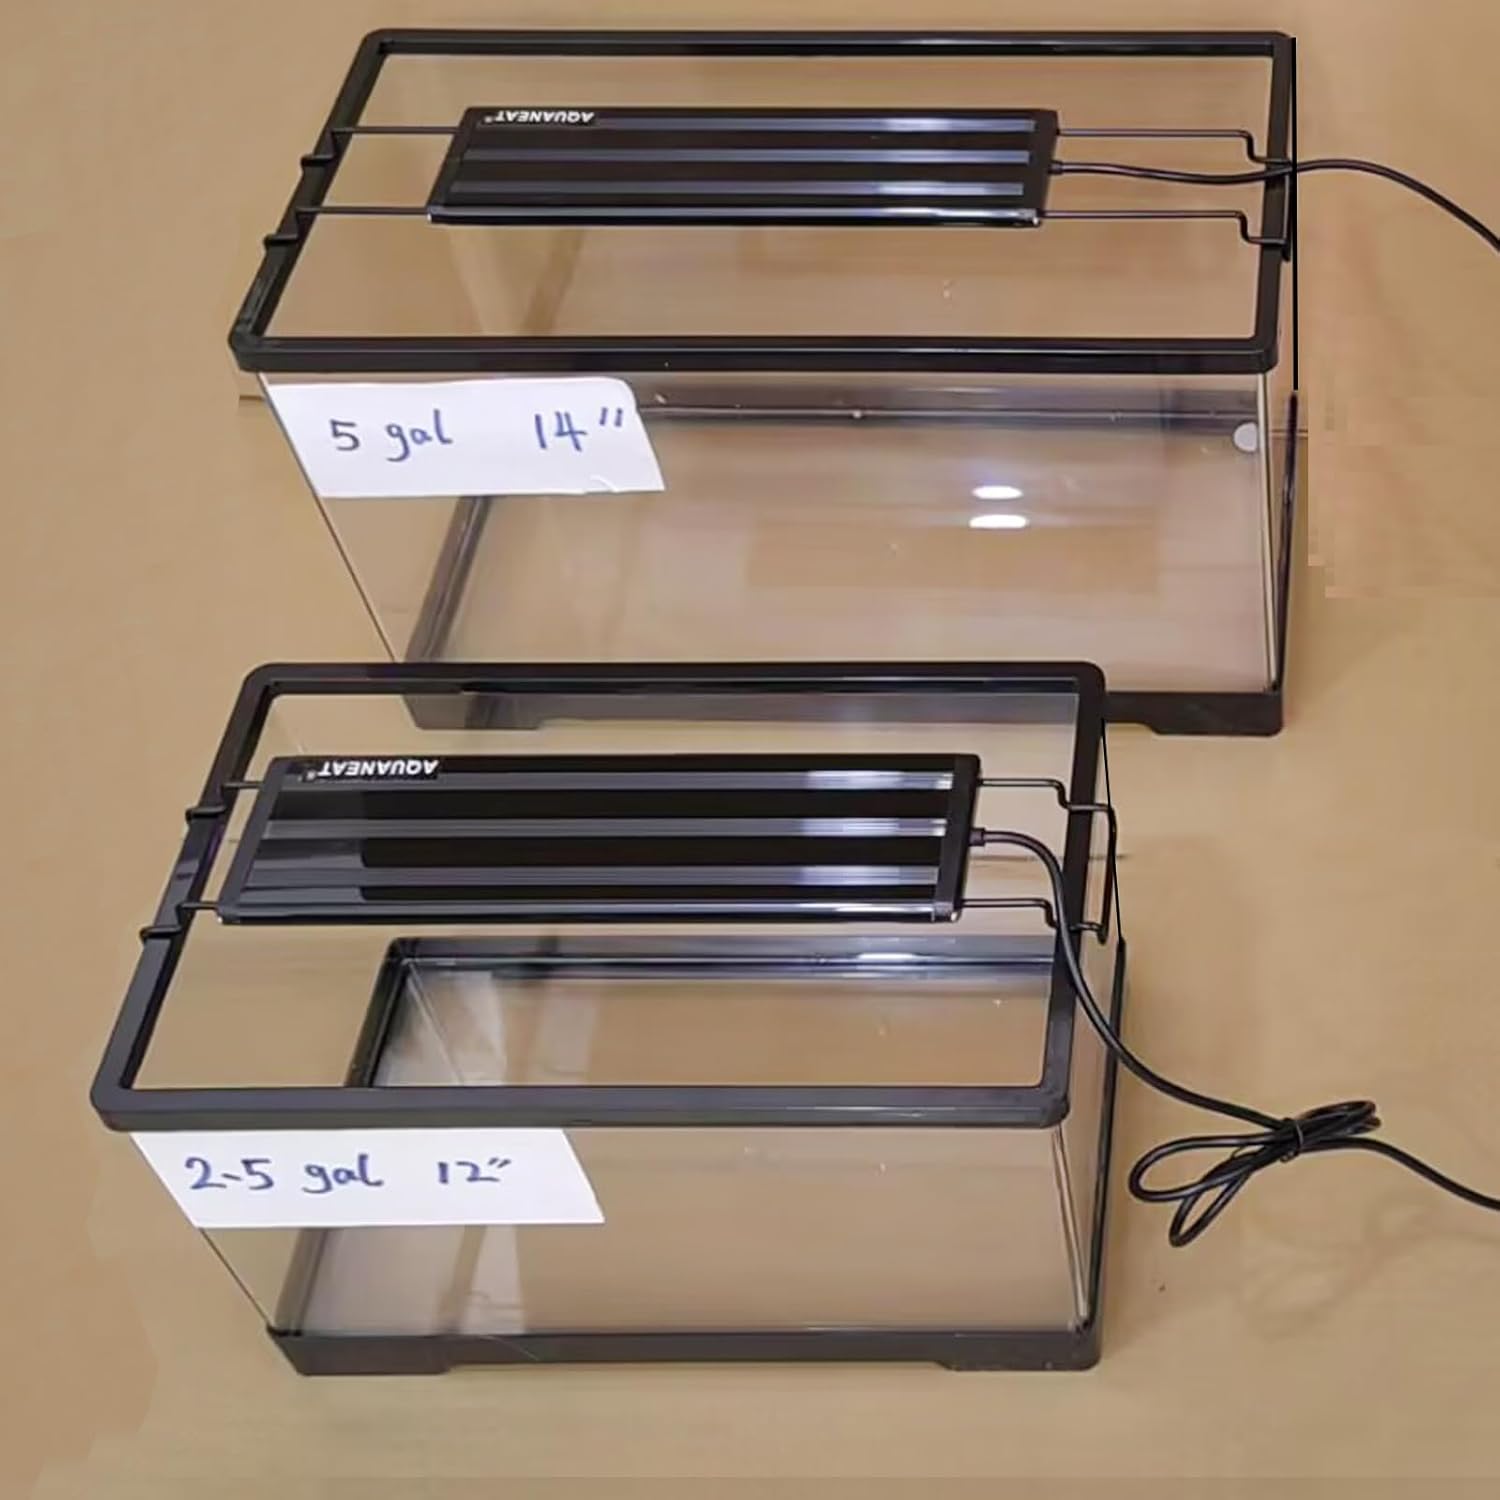
Figure 3: The light fixture shown mounted on a 2.5-gallon (12-inch) and a 5-gallon (14-inch) aquarium.
3.2 Connecting Power
- Connect the power adapter to the light fixture.
- Plug the power adapter into a standard 110V 60Hz electrical outlet.
- Ensure the controller is kept away from splashing water as it is not waterproof.
4. Operating Instructions
4.1 Controller Overview
The integrated controller allows for full customization of the light's functions.

Figure 4: Detailed view of the controller buttons for brightness, light modes, and timer settings.
4.2 Power On/Off and Brightness Adjustment
- Power On/Off: Press the power button (red circle) to turn the light on or off.
- Brightness Adjustment: Use the '+' and '-' buttons to adjust brightness. There are 5 levels of brightness, from 20% to 100%.
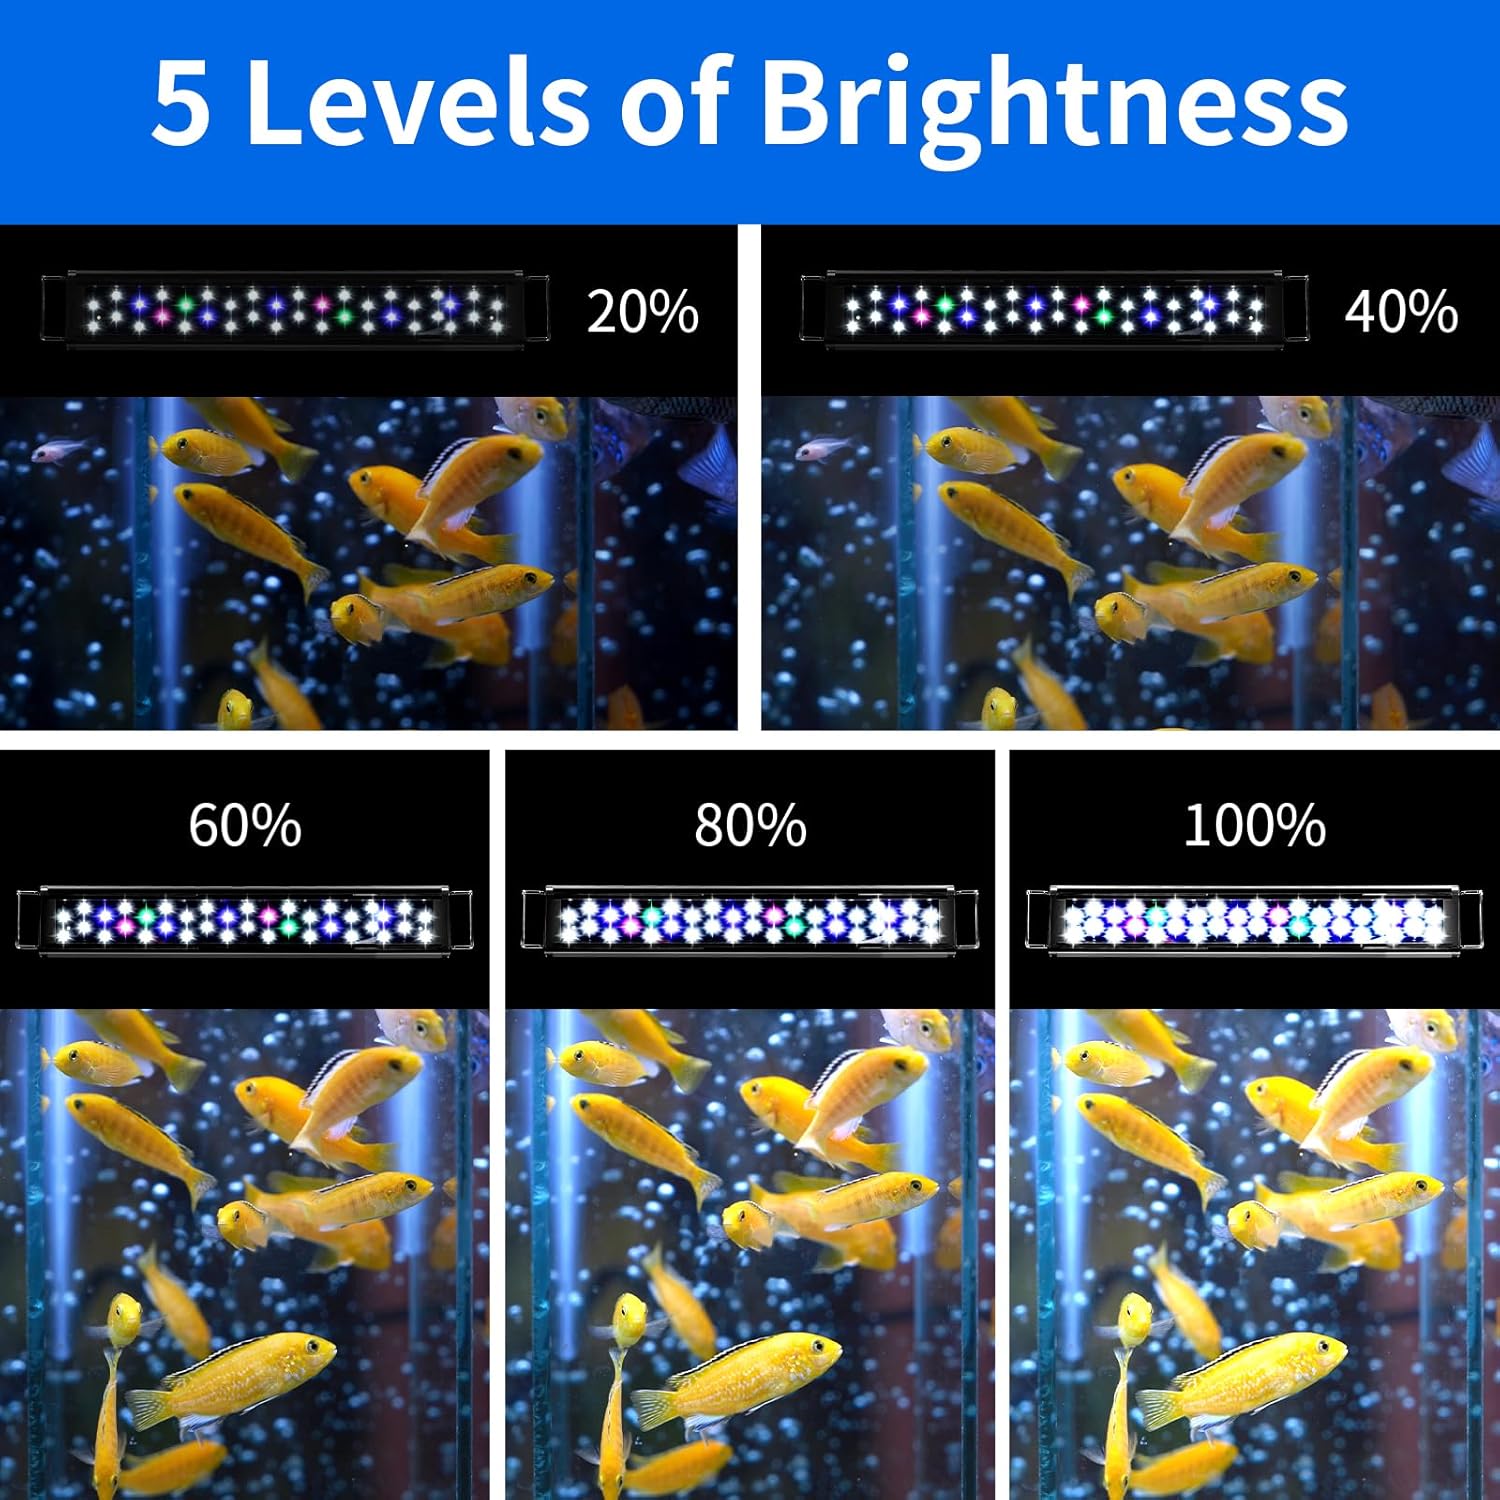
Figure 5: Visual representation of the 5 adjustable brightness levels (20%, 40%, 60%, 80%, 100%).
4.3 Lighting Modes
The light offers three distinct lighting modes:
- Cool Daylight Mode: All LEDs (White + Pink + Green + Blue) are on for a full spectrum effect.
- Warm Daylight Mode: All LEDs except blue lights (White + Pink + Green) are on for a warmer light effect.
- Moonlight Mode: Only the 3 blue LEDs are on for a night-time ambiance.

Figure 6: The three lighting modes: Cool Daylight, Warm Daylight, and Moonlight.
4.4 Timer Settings
The built-in timer allows for automated on/off cycles:
- Press the timer button (alarm clock icon) to cycle through the available timing modes: 4 hours, 8 hours, or 10 hours.
- Once a mode is selected, the light will automatically turn off and on at the designated time each day.
4.5 24/7 Mode and DIY Customization
The light supports a 24/7 mode that simulates a natural day-night cycle. This mode can also be customized.
Video 2: Demonstrates the 24/7 mode with day and night cycles, including color and brightness transitions.
Video 3: A tutorial on how to program and customize the 24/7 lighting cycle, including setting specific colors and brightness levels for different times of the day.
Video 4: Shows the light cycling through its demo mode, illustrating the various color and brightness changes over a simulated 24-hour period.
5. Maintenance
5.1 Cleaning
Regularly wipe the light fixture with a soft, dry cloth to remove dust or water spots. Do not use abrasive cleaners.
5.2 Safety Warnings
- The light fixture has a splash guard but is not waterproof. Keep the light away from splashing water.
- Do not submerge the light fixture in water.
- Ensure the power adapter is connected to a suitable electrical outlet (110V 60Hz).
- Do not look directly into the LEDs.
6. Troubleshooting
6.1 Remote Control Issues
If the remote control is unresponsive, ensure there is a clear line of sight between the remote and the controller. Check if the battery in the remote needs replacement.
6.2 Power Outage
In the event of a power outage, the light's customized 24/7 settings are saved. However, the internal clock may need to be reset. To reset the clock, simply re-enter the current time using the remote after power is restored.
7. Specifications
| Feature | Detail |
|---|---|
| Model Number | TXF-301 |
| Brand | AQUANEAT |
| Dimensions (Light Body) | 9.25" L x 2.7" W x 0.4" H |
| Adjustable Tank Widths | 11" to 14" |
| Total LEDs | 22 |
| LED Configuration | 15 x 6500K White, 3 x Actinic Blue, 2 x Pink, 2 x Green |
| Lumen Output | 1320 lumen |
| Brightness Levels | 5 (20% to 100%) |
| Timer Modes | 4, 8, 10 hours |
| Input Voltage | 110V 60Hz |
| Material | Plastic (Base), Matte (Finish) |
| Weight | 272 g |
8. Warranty and Support
AQUANEAT products typically carry a 12-month limited warranty from the date of purchase. If your product is within warranty and you require a replacement or more information, please contact AQUANEAT customer support.


