
Introduction
This manual provides comprehensive instructions for the setup, operation, maintenance, and troubleshooting of your MEWOOFUN Dog Communication Buttons. Please read this manual thoroughly before use to ensure proper functionality and a positive experience for both you and your pet.
Package Contents
Verify that all items listed below are included in your package:
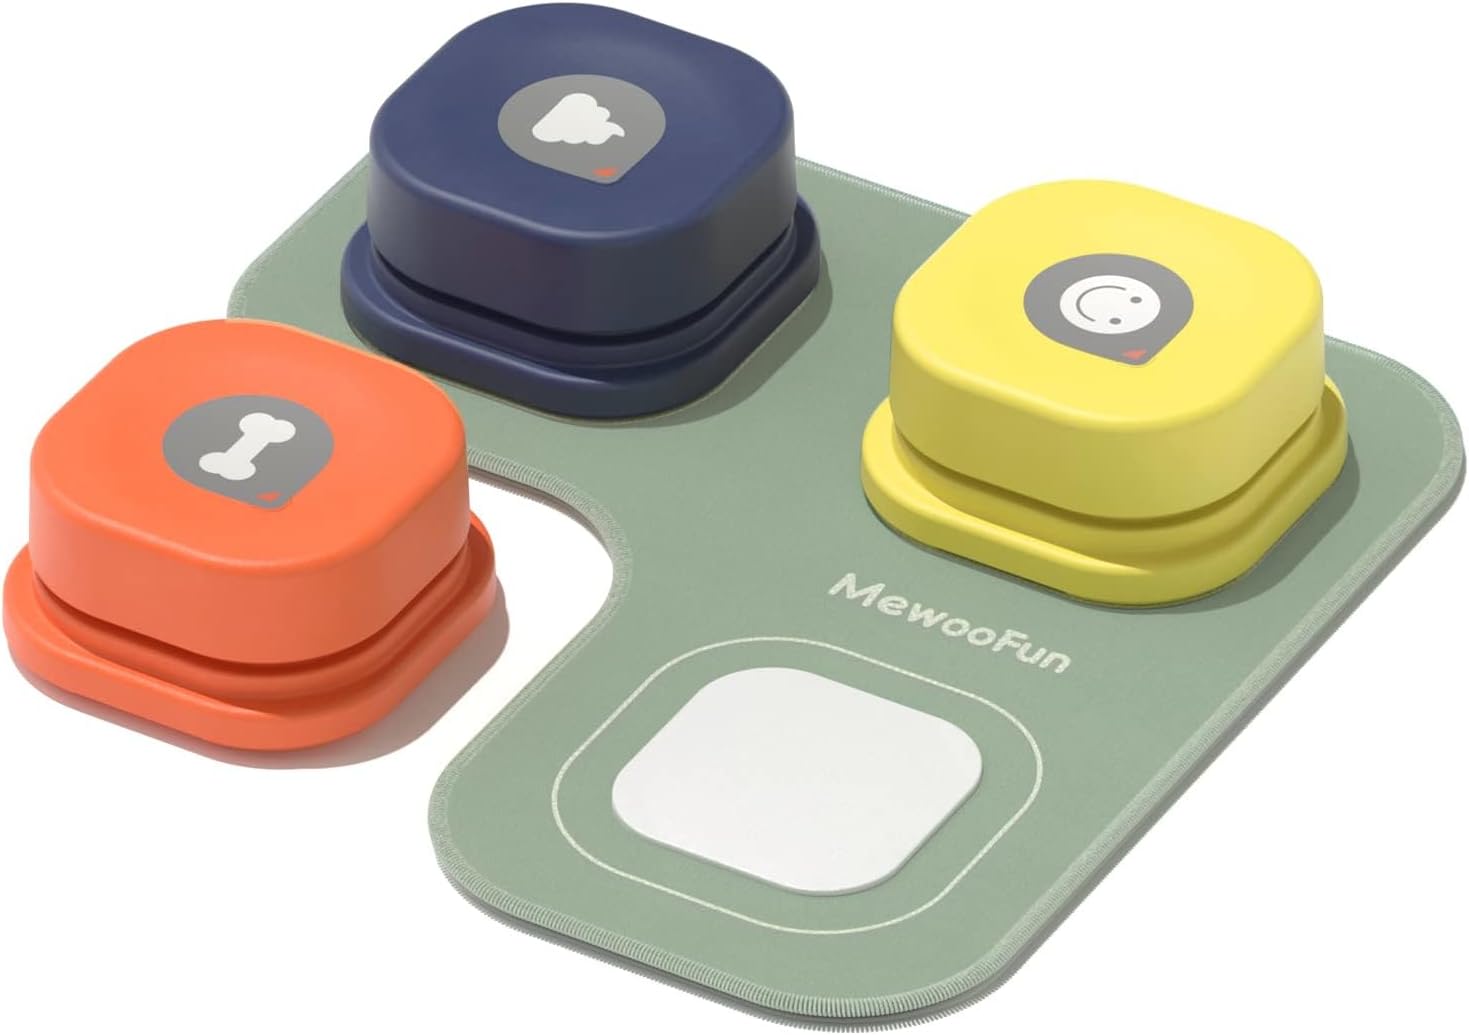
- Recordable Dog Communication Buttons (3 units)
- Non-skid Rubber Mat (1 unit)
- Sticker Sheet (1 unit)
- Mini Screwdriver (1 unit)
- Instruction Manual (this document)

Setup
1. Battery Installation
- Locate the battery compartment on the underside of each button.
- Use the provided mini screwdriver to open the battery compartment cover.
- Insert 2 AAA LR03 batteries into each button, ensuring correct polarity (+/-). (Batteries are not included and must be prepared separately.)
- Securely close the battery compartment cover with the screwdriver.

2. Recording a Voice Message
- Locate the 'REC' button on the underside of the button.
- Press and hold the 'REC' button. You will hear a single 'beep' sound, indicating that recording has started.
- Speak your desired word or phrase clearly into the microphone (located near the 'REC' button). The recording duration is up to 20 seconds.
- Release the 'REC' button when you have finished recording. You will hear two consecutive 'beep-beep' sounds, confirming the recording is saved.
- To play back the recorded message, press the top surface of the button.

3. Attaching Buttons to the Mat
The non-skid rubber mat helps keep the buttons in place during use.
- Peel off the protective film from the velcro pads on the bottom of each button.
- Align the velcro pads on the button with the designated areas on the rubber mat.
- Press firmly to secure the button to the mat.
- Use the provided stickers to label each button with its corresponding word or symbol. Blank stickers are included for custom labels.


Operating Instructions
The MEWOOFUN Dog Communication Buttons are designed to facilitate communication between pets and their owners. Consistent training is key to success.
Training Your Pet
- Choose a Word: Start with one simple, high-value word that your pet already understands, such as "Outside," "Food," or "Play."
- Associate the Word: Whenever you perform the action associated with the word, press the corresponding button and say the word clearly. For example, before going outside, press the "Outside" button and say "Outside."
- Encourage Interaction: Gently guide your pet's paw to press the button. Immediately reward them with praise or a treat when they press the correct button.
- Consistency is Key: Repeat this process consistently. Over time, your pet will associate the button press with the action and the reward.
- Expand Vocabulary: Once your pet consistently uses one button, gradually introduce new words and buttons.

Official Product Videos
Video 1: Teach your Pet to Talk. This video demonstrates the process of teaching a pet to use the communication buttons, from setup to initial training steps.
Video 2: How to Use Dog Buttons. This video provides a step-by-step guide on how to effectively use the dog communication buttons for training.
Video 3: How to Use Dog Talking Buttons Set. A detailed instructional video on setting up and utilizing the talking button set for pet communication.
Video 4: MEWOOFUN Dog Buttons for Communication. This video showcases the MEWOOFUN dog buttons in action, highlighting their role in enhancing pet communication.
Maintenance
Cleaning
- Wipe the buttons and mat with a damp cloth. Avoid submerging them in water.
- Do not use harsh chemicals or abrasive cleaners, as these may damage the product.
Battery Replacement
Replace batteries when the sound becomes faint or the button stops responding. Follow the battery installation steps in the Setup section.
Troubleshooting
| Problem | Possible Cause | Solution |
|---|---|---|
| Button does not make sound. | Low or dead batteries. Incorrect battery installation. | Replace batteries. Ensure batteries are inserted with correct polarity. |
| Recording is unclear or distorted. | Microphone too far or too close during recording. Background noise. | Re-record the message in a quiet environment, speaking clearly about 3 inches from the microphone. |
| Button slides on the floor. | Not using the non-skid mat. Velcro not properly attached. | Ensure buttons are securely attached to the non-skid mat. Verify velcro is clean and properly adhered. |
Specifications
| Feature | Detail |
|---|---|
| Model Number | LL-QS02F |
| Item Weight | 15.8 ounces |
| Item Package Dimensions | 10.87 x 4.96 x 2.32 inches |
| Power Source | 2 x AAA LR03 batteries per button (not included) |
| Recording Time | Up to 20 seconds per button |
| Material | High quality ABS plastic, non-slip rubber mat |
| Target Audience | Dogs |
Warranty and Support
MEWOOFUN products are designed for durability and performance. For any questions, concerns, or support needs regarding your Dog Communication Buttons, please refer to the contact information provided with your purchase or visit the official MEWOOFUN website.