
1. Introduction
This manual provides detailed instructions for the safe and effective use of your Godox E300 2x 300W Studio Strobe Light Kit. Please read this manual thoroughly before operating the equipment to ensure optimal performance and to prevent damage.
2. Safety Information
Always observe the following safety precautions to prevent electric shock, fire, or damage to the product and property:
- Do not disassemble or modify the unit.
- Keep the equipment dry. Do not handle with wet hands or immerse in water.
- Ensure the power supply voltage matches the unit's requirements.
- Unplug the power cord before cleaning or when not in use.
- Avoid direct eye exposure to the flash.
- Keep out of reach of children.
- Use only Godox-approved accessories.
3. Package Contents
Verify that all items listed below are included in your package:
- 2x Godox E300 300W Monolights
- 2x 50x70cm Softboxes
- 2x Light Stands (Max 190cm extension)
- 2x Power Cables
- 1x RT-16 Flash Trigger Set (Transmitter)
- 1x RTR-16 Trigger Receiver (for orders after Jan/2025)

Image 3.1: Overview of the Godox E300 2x 300W Studio Strobe Light Kit components, including two monolights, two softboxes, two light stands, power cables, and the wireless flash trigger set.
4. Product Overview
4.1 Godox E300 Monolight
- Flash Output: 300W, 5600K daylight balanced. Adjustable from 1.0 to 3.0 (1/8 to 1/1 power).
- Modeling Lamp: 75W, 3200K. Features 9 levels of brightness adjustment (L1-L9).
- Recycle Time: 0.3-2 seconds.
- Flash Duration: 1/2000 to 1/800 seconds.
- Guide Number (GN): 58.
- Built-in light sensor for optical slave triggering.
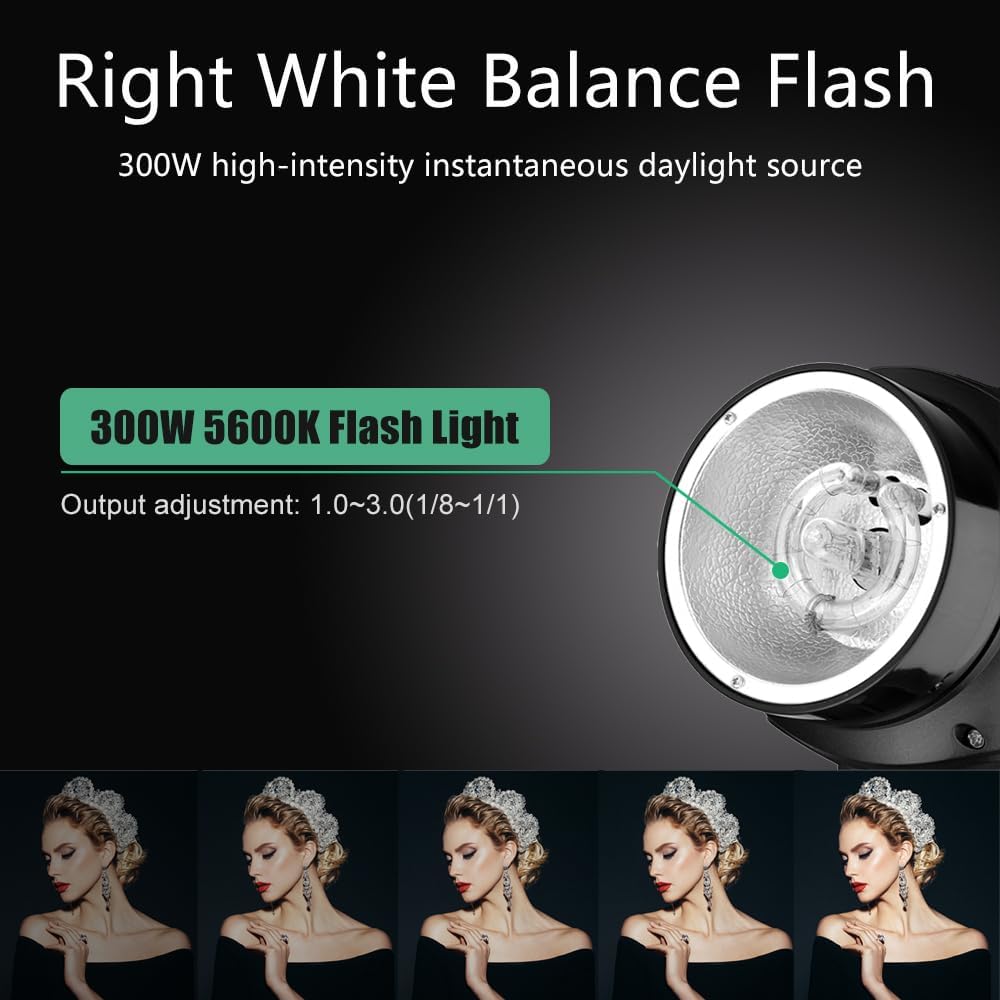
Image 4.1: Close-up of the Godox E300 monolight illustrating the 300W 5600K flash output and adjustment range.

Image 4.2: Demonstration of the 75W 3200K modeling lamp with 9 levels of brightness (L1-L9) on the Godox E300 monolight.
4.2 RT-16 Wireless Flash Trigger
- Compatibility: Nikon, Canon, Fujifilm, Olympus, Pentax hot shoe cameras.
- Working Distance: Up to 30 meters.
- Allows synchronous firing of multiple strobes.

Image 4.3: A photographer utilizing the wireless flash trigger to activate the studio strobes.
4.3 Softbox
- Size: 20"x28" (50x70cm).
- Designed to diffuse light, creating soft, even illumination and reducing harsh shadows.

Image 4.4: The included 50x70cm softboxes, designed for light diffusion.
4.4 Light Stand
- Maximum Extension: 190cm.
- Adjustable height for versatile lighting setups.

Image 4.5: The light stand shown in both extended (190cm) and collapsed (67cm) positions.
5. Setup Instructions
5.1 Assembling Light Stands
- Unfold the legs of the light stand until they are fully extended and stable.
- Loosen the height adjustment knobs and extend the central column to the desired height. Tighten the knobs securely.
5.2 Attaching Monolights
- Mount the Godox E300 monolight onto the top stud of the light stand.
- Secure the monolight by tightening the locking screw on the stand's receiver.
- Adjust the angle of the monolight using its tilt mechanism and secure it.
5.3 Assembling Softboxes
- Insert the softbox rods into the speedring.
- Attach the speedring to the monolight's mount, ensuring it clicks into place.
- Attach the inner baffle and outer diffuser fabric to the softbox.
5.4 Connecting Power
- Connect the power cable to the monolight's power input.
- Plug the other end of the power cable into a suitable AC power outlet.
5.5 Setting up the RT-16 Wireless Flash Trigger
- Install Batteries: Insert appropriate batteries into the RT-16 transmitter and receiver.
- Mount Transmitter: Slide the RT-16 transmitter onto your camera's hot shoe.
- Connect Receiver: If using the RTR-16 receiver, connect it to the monolight's sync port (6.35mm jack). For older monolights without a built-in receiver, ensure the RTR-16 is connected.
- Set Channel: Use the DIP switches on both the RT-16 transmitter and receiver (or monolight if it has built-in receiver) to set them to the same channel. There are 16 possible channels.

Image 5.1: Illustration of the RT-16 flash trigger and receiver, showing the DIP switches for channel selection and the 6.35mm jack connection.
5.6 Camera Compatibility
The RT-16 trigger is compatible with various camera hot shoes. Refer to the compatibility chart for specific models and any necessary adapters.

Image 5.2: Detailed compatibility list for the RT-16 flash trigger with various camera brands and models, including notes on specific requirements.
6. Operating Instructions
6.1 Powering On/Off
Flip the power switch on the back of each monolight to the 'ON' position to power it on. Flip to 'OFF' to power down.
6.2 Adjusting Flash Output
Use the control dial or buttons on the monolight to adjust the flash output from 1.0 (1/8 power) to 3.0 (1/1 full power).
6.3 Using the Modeling Lamp
The 75W modeling lamp can be adjusted through 9 brightness levels (L1-L9) to preview lighting effects. Use the dedicated modeling lamp button or dial on the monolight to control its intensity.
6.4 Wireless Trigger Operation
- Ensure the RT-16 transmitter is securely mounted on your camera's hot shoe and both transmitter and monolights are set to the same channel.
- When you press your camera's shutter button, the transmitter will send a signal to the monolights, triggering them to flash synchronously.
6.5 Synchronous Flash (Optical Slave Mode)
The Godox E300 monolights feature a built-in light sensor, allowing them to fire synchronously when one monolight (master) triggers the others (slaves) via its flash. For this to work effectively, ensure the light sensor on the slave units can detect the flash from the master unit. For setups where direct line-of-sight is not possible, an additional RTR-16 receiver is recommended for each slave unit.

Image 6.1: Diagram illustrating correct and incorrect placement for optical slave triggering. For optimal synchronous flash, ensure the light sensor on the slave unit can 'see' the master flash. An RTR-16 receiver is recommended for non-line-of-sight setups.
7. Maintenance
- Cleaning: Use a soft, dry cloth to clean the exterior of the monolights and accessories. Do not use abrasive cleaners or solvents.
- Storage: Store the kit in a cool, dry place away from direct sunlight and moisture. Disassemble softboxes and stands for compact storage.
- Bulb Replacement: If the flash tube or modeling lamp needs replacement, contact qualified service personnel or Godox customer support.
8. Troubleshooting
| Problem | Possible Cause | Solution |
|---|---|---|
| Monolight does not power on. | Power cable not connected; power outlet faulty; power switch off. | Check power cable connection; try a different outlet; ensure power switch is ON. |
| Flash does not fire. | Trigger channel mismatch; trigger batteries low; camera hot shoe connection poor; monolight in standby. | Verify trigger and monolight channels match; replace trigger batteries; ensure trigger is seated correctly on hot shoe; wake monolight from standby. |
| Monolight recycle time is slow. | High power output setting; unit overheating. | Reduce flash power; allow unit to cool down. |
| Optical slave not triggering. | Sensor blocked; insufficient light from master flash; incorrect mode. | Ensure clear line of sight to sensor; increase master flash power; check monolight mode settings. |
9. Specifications
| Feature | Detail |
|---|---|
| Model | HZY2E300KIT |
| Flash Output (each monolight) | 300W |
| Color Temperature | 5600K |
| Modeling Lamp | 75W, 3200K (9 levels) |
| Flash Output Adjustment | 1.0~3.0 (1/8~1/1) |
| Flash Duration | 1/2000 to 1/800s |
| Recycle Time | 0.3-2s |
| Guide Number (GN) | 58 |
| Wireless Trigger | RT-16 (30m range, 16 channels) |
| Softbox Size | 20"x28" (50x70cm) |
| Light Stand Max Height | 190cm |
| Product Dimensions (packaged) | 7.87 x 19.69 x 27 inches |
| Item Weight (packaged) | 19.31 pounds |
10. Warranty and Support
Godox provides a one-year customer support period for this product. For any issues, questions, or warranty claims, please contact Godox customer support via Amazon message. Please retain your proof of purchase for warranty validation.