
SHIMANO RD-R9250
Shimano Dura-Ace RD-R9250 Di2 12-Speed Rear Derailleur User Manual
Model: RD-R9250
Introduction
The Shimano Dura-Ace RD-R9250 Di2 12-Speed Rear Derailleur is a high-performance component designed for advanced cycling applications. This manual provides essential information for the proper installation, operation, maintenance, and troubleshooting of your derailleur to ensure optimal performance and longevity.
Safety Information
Always read and understand all instructions before attempting installation or operation. Failure to follow safety guidelines may result in injury or damage to the product. Always wear appropriate safety gear when working on your bicycle.
- Ensure all components are securely fastened before riding.
- Regularly inspect the derailleur for any signs of wear or damage.
- Keep hands and clothing clear of moving parts during operation.
- Consult a professional bicycle mechanic if you are unsure about any installation or adjustment procedures.
Package Contents
Verify that all items listed below are present in your package:
- 1 x Shimano Dura-Ace RD-R9250 Di2 12-Speed Rear Derailleur
- Instruction Manual (this document)
- Mounting Hardware (if applicable, refer to specific packaging)
- Plug tool (as mentioned in a review, typically included for Di2 components)
Setup and Installation
The RD-R9250 Di2 rear derailleur requires precise installation for optimal electronic shifting performance. It is recommended that installation be performed by a qualified bicycle mechanic.
- Mounting the Derailleur:
Attach the derailleur to the derailleur hanger on your bicycle frame. Ensure the mounting bolt is tightened to the manufacturer's specified torque. This derailleur supports direct mounting options.
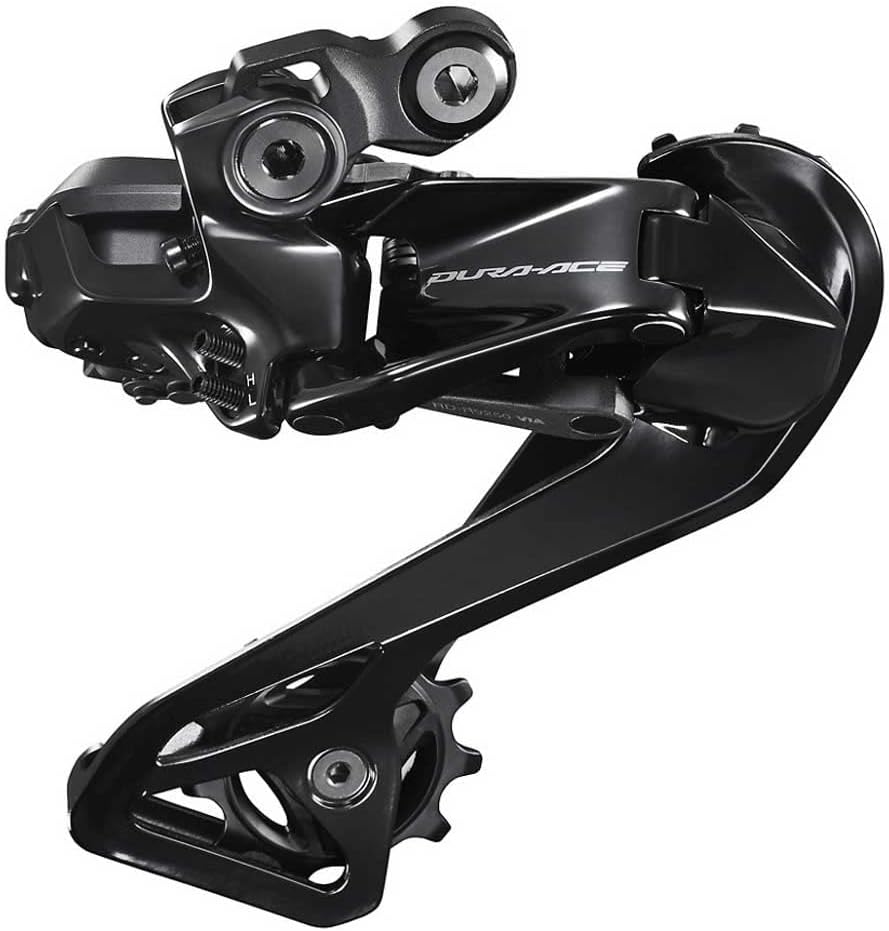
Image: Front view of the Shimano Dura-Ace RD-R9250 Di2 12-Speed Rear Derailleur, showing its sleek black design and the Dura-Ace branding.
- Connecting Di2 Cables:
Connect the Di2 E-Tube wires to the appropriate ports on the derailleur. Ensure connections are secure and protected from environmental elements. Refer to the Shimano E-Tube Project software for detailed wiring diagrams specific to your setup.

Image: Angled view of the Shimano Dura-Ace RD-R9250 Di2 12-Speed Rear Derailleur, highlighting the electronic cable connection ports on the body.
- Chain Installation:
Install a 12-speed compatible chain, ensuring proper length for your drivetrain configuration. Thread the chain through the derailleur's cage and over the jockey wheels.

Image: The Shimano Dura-Ace RD-R9250 Di2 12-Speed Rear Derailleur shown mounted on a bicycle, with a chain properly routed through its cage and engaged with a cassette.
- Initial Setup and Adjustment:
Perform initial setup and fine-tuning using the Shimano E-Tube Project software. This includes setting limit screws (if applicable for the specific model variant), B-tension, and performing gear indexing adjustments electronically. The system offers precise and reliable shifting performance.

Image: Top-down view of the Shimano Dura-Ace RD-R9250 Di2 12-Speed Rear Derailleur, illustrating its compact profile and the alignment of the cage.
Operating Instructions
The Di2 system provides intuitive and precise electronic shifting. Ensure your Di2 battery is charged before riding.
- Shifting Gears: Use the electronic shift levers (sold separately) to command gear changes. A light press of the button will initiate a shift.
- Multi-Shift Function: The Di2 system allows for multiple shifts by holding down the shift button. This can be customized via the E-Tube Project software.
- Synchronized Shift: If configured, the system can automatically shift the front derailleur when the rear derailleur reaches certain gears, optimizing chain line and efficiency.
- Battery Status: Check the battery indicator on your Di2 junction box or display unit regularly.
Maintenance
Regular maintenance ensures the longevity and optimal performance of your derailleur. This component offers excellent stability and durability.
- Cleaning: Keep the derailleur clean from dirt, mud, and road grime. Use a soft brush and mild detergent, then rinse thoroughly and dry.
- Lubrication: Periodically lubricate the jockey wheel bearings and pivot points with appropriate bicycle lubricant. Avoid over-lubrication, which can attract dirt.
- Inspection: Regularly inspect the derailleur for any signs of damage, bent components, or loose bolts. Pay close attention to the derailleur hanger alignment.
- Firmware Updates: Connect your Di2 system to the E-Tube Project software periodically to check for and install any available firmware updates.
Troubleshooting
This section addresses common issues you might encounter with your Di2 rear derailleur.
| Problem | Possible Cause | Solution |
|---|---|---|
| Shifting is slow or inconsistent. | Low battery, misaligned derailleur hanger, incorrect B-tension, outdated firmware. | Charge Di2 battery. Check and align derailleur hanger. Adjust B-tension. Update firmware via E-Tube Project. |
| Derailleur not shifting at all. | Dead battery, disconnected E-Tube wire, system error. | Charge Di2 battery. Check all E-Tube connections. Perform a system reset (refer to Shimano Di2 manual). |
| Noise from derailleur. | Dirty jockey wheels, insufficient lubrication, bent derailleur hanger, chain rub. | Clean and lubricate jockey wheels. Check and align derailleur hanger. Ensure chain is clean and properly lubricated. |
If issues persist, consult a certified Shimano service center or a professional bicycle mechanic.
Specifications
| Feature | Detail |
|---|---|
| Model Name | RD-R9250 |
| Part Number | IRDR9250F |
| Speed Compatibility | 12-Speed |
| Shifting Technology | Di2 Electronic |
| Material | Aluminum |
| Item Weight | 0.3 Kilograms (300g) |
| Item Dimensions (LxWxH) | 3.94 x 1.97 x 3.15 inches |
| Color | Multicolor (primarily black) |
| Manufacturer | Shimano Inc. |
| Model Year | 2022 |
Warranty and Support
Shimano products are covered by a limited warranty against defects in materials and workmanship. For specific warranty terms and conditions, please refer to the official Shimano website or the warranty card included with your product.
For technical support, service, or warranty claims, please contact your authorized Shimano dealer or visit the official Shimano support portal. Always provide your product model number (RD-R9250) and part number (IRDR9250F) when seeking support.
No official product videos from the seller were found to be included in this manual.
Related Documents - RD-R9250
 |
Shimano Di2 Rear Derailleur Dealer's Manual Comprehensive dealer's manual for Shimano Di2 electronic rear derailleurs, covering installation, adjustment, maintenance, and troubleshooting for DURA-ACE, ULTEGRA, and 105 series. Includes guidance on E-TUBE PROJECT connectivity and safety procedures. |
 |
SHIMANO Di2 Rear Derailleur Dealer's Manual: DURA-ACE, ULTEGRA, 105 Comprehensive dealer's manual for SHIMANO Di2 rear derailleurs, including DURA-ACE R9250, ULTEGRA R8150, and 105 R7150. Covers installation, adjustment, maintenance, troubleshooting, and E-TUBE PROJECT connectivity. |
 |
SHIMANO ROAD Di2 Series Dealer's Manual General Guide Comprehensive dealer's manual for SHIMANO's ROAD Di2 series electronic shifting systems, covering installation, wiring diagrams, component compatibility, maintenance, and troubleshooting for professional bicycle mechanics. |
 |
Shimano DI2 Rear Derailleur and Battery Charger User Manual Comprehensive user manual for the Shimano DI2 rear derailleur and battery charger, covering installation, operation, maintenance, safety precautions, and troubleshooting. |
 |
Shimano Di2 Rear Derailleur and Battery Charger User Manual User manual for the Shimano Di2 rear derailleur and battery charger, covering important safety information, charging methods, wireless connection, troubleshooting, and specifications. |
 |
SHIMANO Rear Derailleur (Di2) / Battery Charger - Important Product Information and Safety Guide Important product information, safety warnings, and specifications for the SHIMANO Rear Derailleur (Di2) and Battery Charger. Includes guidance on safe usage, charging, and pre-ride checks. |
Ask a question about this manual
Ask about setup, troubleshooting, compatibility, parts, safety, or missing instructions. Manuals+ will review the question and use this page’s manual context to help answer it.