
1. Introduction
Thank you for choosing the Cecotec Cremmaet Compact Steam Super Automatic Coffee Maker. This manual provides essential information for the safe and efficient operation, maintenance, and troubleshooting of your new coffee machine. Please read this manual thoroughly before first use and keep it for future reference.
This fully automatic coffee machine is designed to prepare high-quality espressos and Americanos from freshly ground coffee beans, featuring a powerful 19-bar pump and a rapid Thermoblock heating system. It also includes a steam generator for milk frothing.
2. Safety Instructions
Always observe the following safety precautions to reduce the risk of fire, electric shock, personal injury, or damage to the appliance.
- Ensure the voltage indicated on the appliance corresponds to your local mains voltage before connecting.
- Do not immerse the appliance, power cord, or plug in water or any other liquid.
- Unplug the appliance from the power outlet when not in use, before cleaning, and before performing any maintenance.
- Keep the appliance out of reach of children. This appliance is not intended for use by persons with reduced physical, sensory, or mental capabilities unless supervised.
- Do not operate the appliance if the power cord or plug is damaged, or if the appliance malfunctions or has been damaged in any way. Contact authorized service personnel for repair.
- Use only original accessories and spare parts.
- Avoid contact with hot surfaces, especially the steam nozzle and coffee dispenser, during and immediately after operation.
- Only fill the water tank with fresh, cold water. Do not use hot water or other liquids.
- Do not place the appliance on or near a hot gas or electric burner, or in a heated oven.
3. Product Components
Familiarize yourself with the main parts of your Cecotec Cremmaet Compact Steam coffee machine.

Figure 3.1: Front view of the coffee machine, showing the coffee dispenser and control panel. Coffee is being dispensed into a glass with frothed milk.

Figure 3.2: Top view of the coffee machine, illustrating the bean hopper access. A user is opening the lid to add coffee beans.
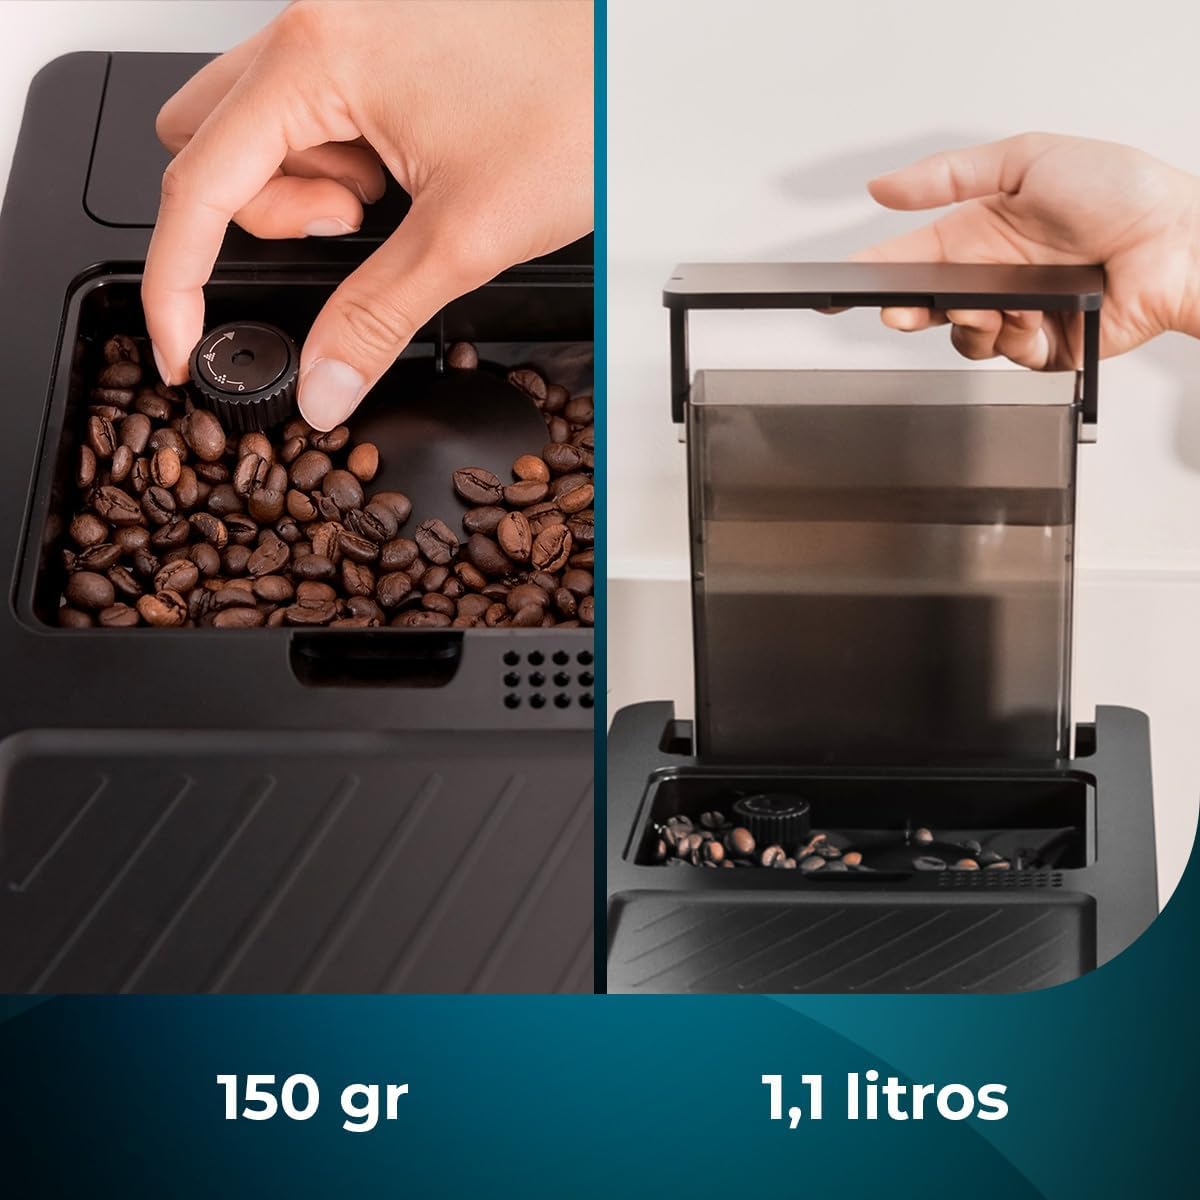
Figure 3.3: Detailed view of the 150g coffee bean container with adjustable grind setting and the 1.1 liter removable water tank.
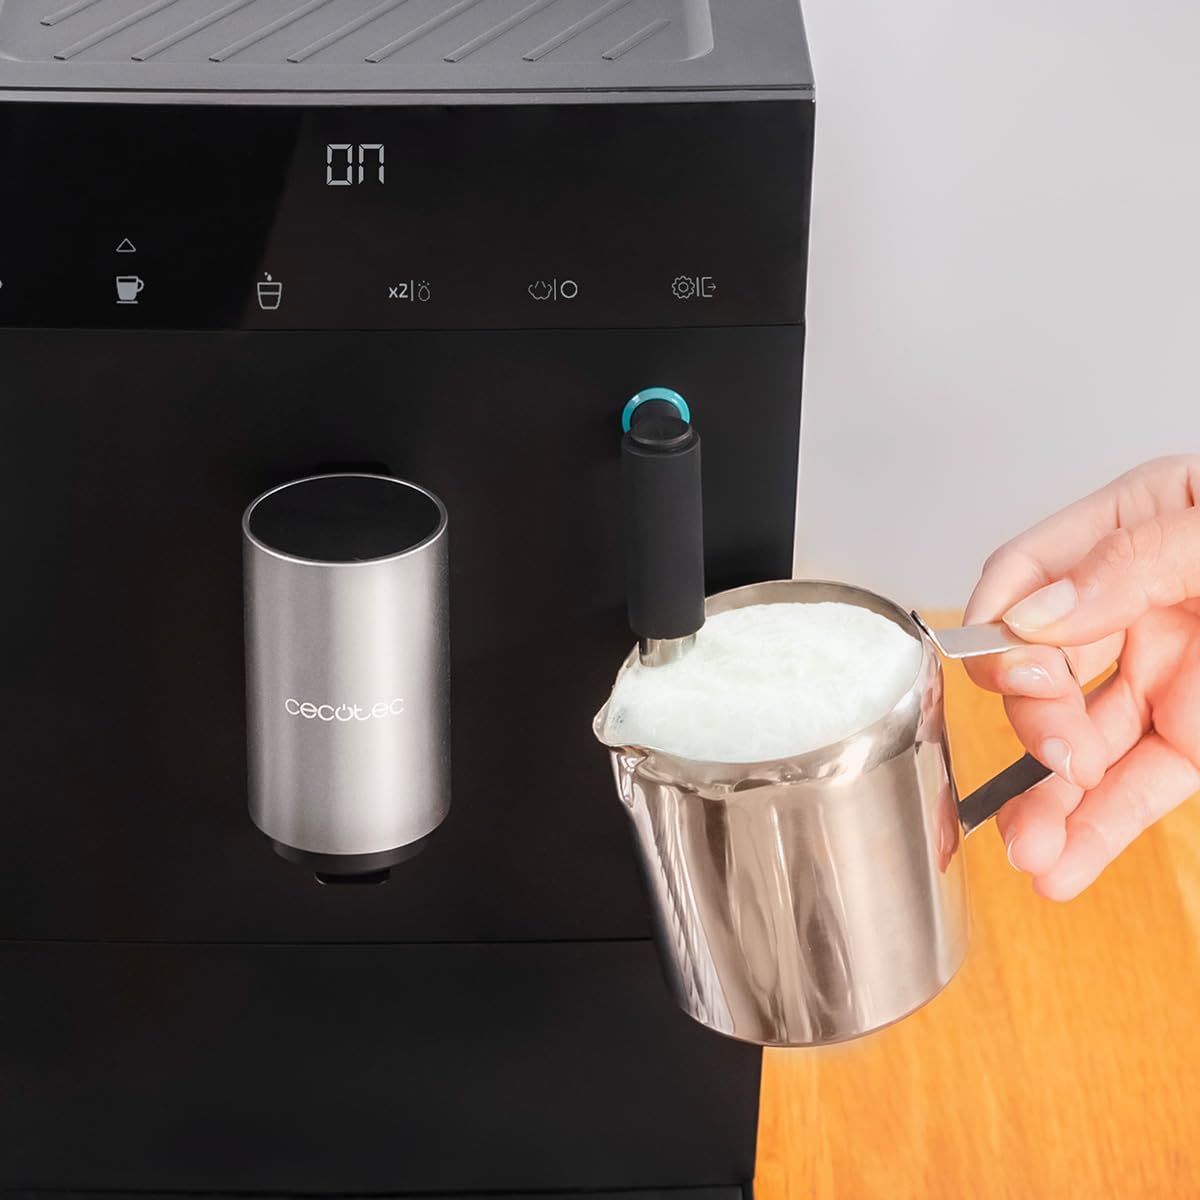
Figure 3.4: The integrated steam frother in use, demonstrating its capability to create frothed milk for various coffee beverages.
- Control Panel: Intuitive interface for selecting coffee types and adjusting settings.
- Coffee Bean Container: Airtight container with a capacity of 150g for fresh coffee beans.
- Water Tank: Removable tank with a capacity of 1.1 liters.
- Coffee Dispenser: Adjustable height to accommodate various cup sizes.
- Steam Nozzle: For frothing milk and dispensing hot water.
- Drip Tray: Collects excess water and coffee spills, removable for easy cleaning.
- Grounds Container: Collects used coffee grounds.
4. Setup
- Unpacking: Carefully remove the coffee machine and all accessories from the packaging. Retain packaging for future transport or storage.
- Placement: Place the appliance on a stable, flat, heat-resistant surface, away from water sources and direct sunlight. Ensure adequate ventilation around the machine.
- Initial Cleaning: Before first use, clean the water tank, drip tray, and grounds container with warm water and a mild detergent. Rinse thoroughly and dry.
- Fill Water Tank: Fill the 1.1-liter water tank with fresh, cold drinking water up to the MAX level. Ensure the tank is properly seated.
- Fill Bean Container: Open the lid of the coffee bean container and fill it with up to 150g of whole coffee beans. Close the lid securely to maintain freshness.
- Power Connection: Plug the power cord into a grounded electrical outlet. The machine will perform an initial self-check.
- First Use Rinse Cycle: It is recommended to perform a rinse cycle before brewing your first coffee. Follow the instructions on the control panel for the initial rinse. This primes the system and cleans internal components.
5. Operating Instructions
5.1 Brewing Coffee (Espresso/Americano)
- Ensure the water tank is filled and the bean container has sufficient coffee beans.
- Place a cup under the coffee dispenser.
- Select your desired coffee type (Espresso or Americano) from the control panel.
- Adjust the coffee intensity and volume if desired using the programmable settings. The machine will remember your preferences.
- Press the start button. The machine will grind the beans, brew the coffee, and dispense it into your cup.
5.2 Frothing Milk (Vaporisator Model)
- Fill a metal pitcher with cold milk (dairy or non-dairy).
- Position the pitcher under the steam nozzle.
- Activate the steam function on the control panel. Wait for the steam to build up (a light or indicator will confirm readiness).
- Submerge the steam nozzle just below the surface of the milk. Angle the pitcher slightly to create a vortex.
- Move the pitcher up and down slowly to incorporate air and heat the milk. Continue until desired foam consistency and temperature are reached.
- Turn off the steam function. Immediately wipe the steam nozzle with a damp cloth to prevent milk residue from drying.
5.3 Adjusting Grind Settings
The integrated coffee grinder allows for adjustment of the grind fineness. Finer grind for stronger espresso, coarser for lighter coffee. Adjust the dial inside the bean hopper only when the grinder is operating to prevent damage.
6. Maintenance and Cleaning
Regular cleaning and maintenance ensure optimal performance and longevity of your coffee machine.
6.1 Daily Cleaning
- Drip Tray: Empty and rinse the drip tray daily.
- Grounds Container: Empty the grounds container when prompted or daily. Rinse and dry.
- Steam Nozzle: After each use, wipe the steam nozzle immediately with a damp cloth. Perform a short steam burst to clear any internal milk residue.
- Coffee Dispenser: Wipe the coffee dispenser area with a damp cloth.
6.2 Weekly/Bi-Weekly Cleaning
- Water Tank: Remove and clean the water tank with warm soapy water. Rinse thoroughly.
- Brew Unit: The machine features automatic cleaning. Refer to the machine's display for prompts regarding brew unit cleaning cycles.
6.3 Descaling
The machine will indicate when descaling is required. Use a descaling solution specifically designed for coffee machines. Follow the instructions provided with the descaling solution and the machine's display prompts for the descaling process.
7. Troubleshooting
This section addresses common issues you might encounter. For problems not listed here, contact customer support.
| Problem | Possible Cause | Solution |
|---|---|---|
| Machine does not turn on. | Not plugged in; power outlet issue. | Check power cord connection; try a different outlet. |
| No coffee is dispensed. | Water tank empty; bean container empty; brew unit clogged. | Fill water tank; fill bean container; perform a cleaning cycle. |
| Coffee tastes weak. | Grind setting too coarse; insufficient coffee quantity; old beans. | Adjust grind to finer setting; increase coffee intensity; use fresh beans. |
| Milk not frothing properly. | Steam nozzle clogged; insufficient steam pressure; milk too warm. | Clean steam nozzle thoroughly; ensure machine is heated; use cold milk. |
| "Descale" indicator on. | Limescale buildup. | Perform a descaling cycle as per manual instructions. |
8. Specifications
| Feature | Detail |
|---|---|
| Brand | Cecotec |
| Model Number | 01459 |
| Color | Black |
| Product Dimensions (L x W x H) | 39.5 x 18.5 x 31.8 cm |
| Item Weight | 7.35 kg |
| Water Tank Capacity | 1.1 Liters |
| Bean Container Capacity | 150 g |
| Power / Wattage | 1350 Watts |
| Pressure | 19 Bar |
| Voltage | 135 Volts |
| Material | Kunststoff (Plastic) |
| Auto Shutoff | No |
| Special Features | Integrated Coffee Grinder, Programmable, Thermal (Thermoblock System) |
9. Warranty and Support
Your Cecotec Cremmaet Compact Steam Super Automatic Coffee Maker is covered by a manufacturer's warranty. Please refer to the warranty card included in your product packaging for specific terms and conditions.
For technical assistance, troubleshooting beyond this manual, or to inquire about spare parts and repairs, please contact Cecotec customer support. Contact information can typically be found on the official Cecotec website or on your purchase receipt.
Please have your model number (01459) and purchase date ready when contacting support.


