
1. Introduction
This manual provides comprehensive instructions for the installation, operation, and maintenance of your new Greenote GSC50 Cordless Vacuum Cleaner Dust Bin. This replacement part is designed to seamlessly integrate with your existing Greenote GSC50 vacuum cleaner, restoring its optimal performance. Please read this manual carefully before proceeding with installation to ensure proper handling and longevity of the product.
2. Product Overview
The Greenote GSC50 replacement dust bin is a crucial component for your cordless vacuum cleaner, designed to collect dust and debris efficiently. It features a durable PETG construction and a capacity of 600 ml, ensuring ample storage before emptying is required.
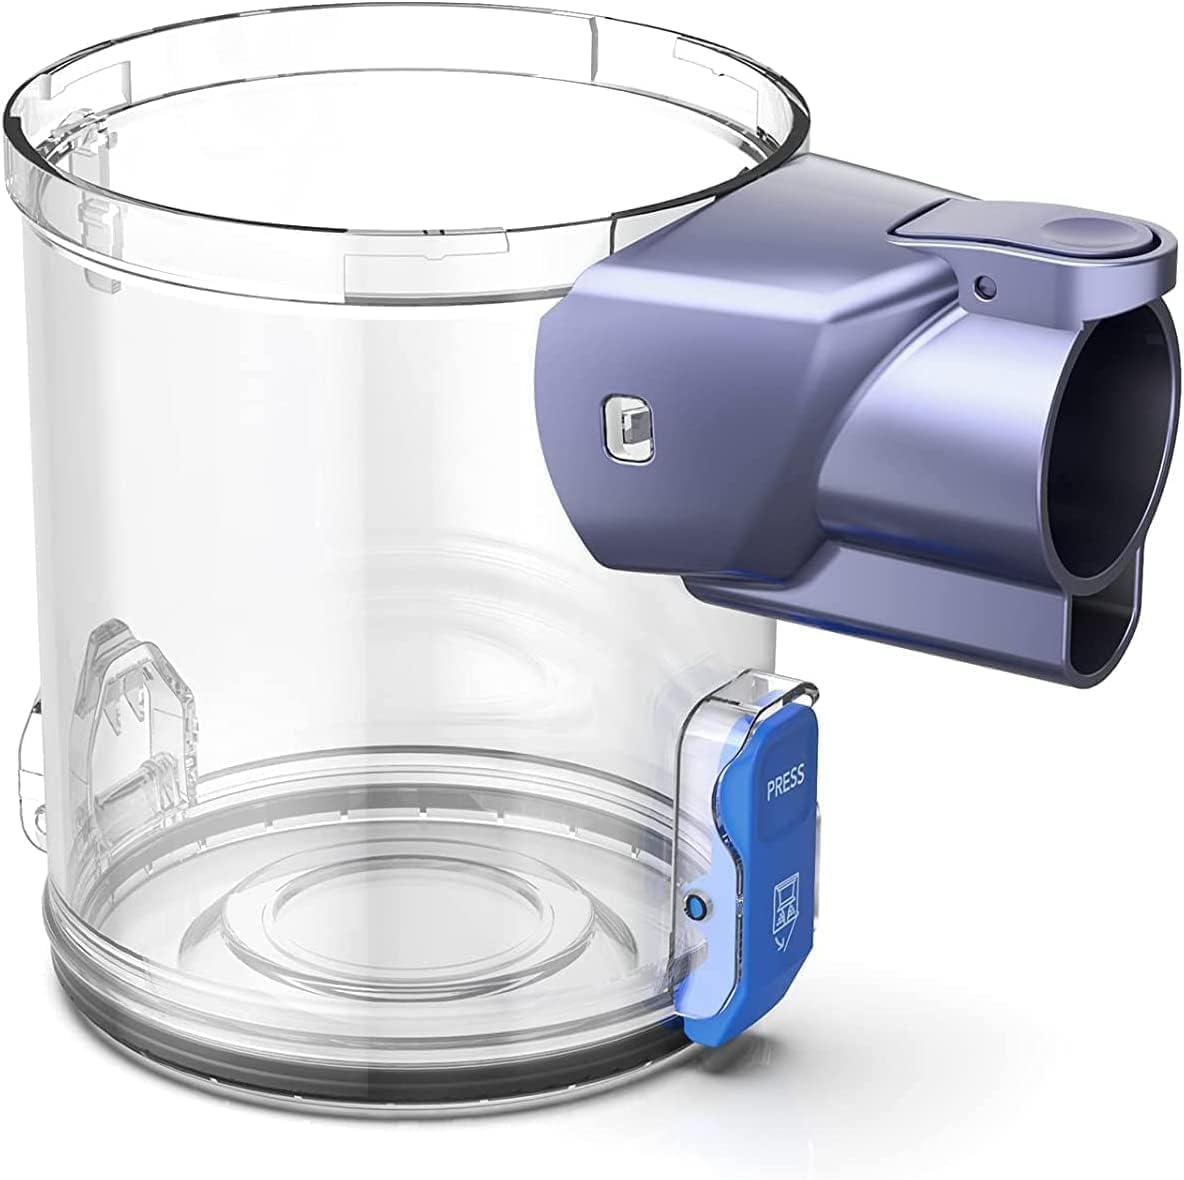
Figure 2.1: Greenote GSC50 Cordless Vacuum Cleaner Dust Bin. This image shows the transparent dust bin with its integrated grey and blue release mechanisms.
2.1 Package Contents
Upon opening the package, verify that all components are present and undamaged:
- 1 x Greenote GSC50 Cordless Vacuum Cleaner Dust Bin
- (Optional: Any pre-installed filters or seals)

Figure 2.2: Packaging box for the Greenote GSC50 Dust Bin. The image displays a plain brown cardboard box with a label on top, indicating product information.
3. Installation Guide
Follow these steps to replace the dust bin on your Greenote GSC50 Cordless Vacuum Cleaner.
- Power Off: Ensure your Greenote GSC50 vacuum cleaner is turned off and disconnected from any power source before beginning the installation process.
- Locate Release Mechanism: Identify the release button or latch on your existing dust bin. This is typically located near the connection point to the main vacuum body.
- Remove Old Dust Bin: Press the release button and gently pull the old dust bin away from the vacuum cleaner body. If there is resistance, check for any additional clips or locks.
- Inspect Connection Point: Before installing the new dust bin, inspect the connection point on the vacuum cleaner for any debris or damage. Clean if necessary.
- Install New Dust Bin: Align the new Greenote GSC50 dust bin with the connection point on the vacuum cleaner. Push it firmly into place until you hear a click, indicating it is securely latched.
- Verify Secure Fit: Gently tug on the dust bin to ensure it is properly seated and will not detach during operation.
Note: Refer to your original Greenote GSC50 vacuum cleaner manual for specific instructions on removing and attaching accessories if you encounter difficulties.
4. Operating the Dust Bin (Emptying)
To maintain optimal suction and performance, the dust bin should be emptied regularly, ideally after each use or when the MAX fill line is reached.
- Detach Dust Bin: Press the dust bin release button (as described in Section 3, Step 3) to detach the dust bin from the vacuum cleaner body.
- Locate Emptying Button: The Greenote GSC50 dust bin features a convenient emptying button, typically located on the underside or side of the bin. (Refer to Figure 2.1 for visual reference of the blue "PRESS" button).
- Empty Contents: Position the dust bin over a trash receptacle. Press the emptying button to release the bottom flap, allowing collected dust and debris to fall out.
- Close Flap: Once emptied, firmly close the bottom flap until it clicks securely into place.
- Reattach Dust Bin: Reattach the dust bin to the vacuum cleaner body as described in Section 3, Step 5.
5. Maintenance and Cleaning
Regular cleaning of your dust bin will prevent blockages and ensure efficient operation of your vacuum cleaner.
5.1 Cleaning the Dust Bin
- Empty Dust Bin: Follow the steps in Section 4 to empty the dust bin.
- Separate Components: Depending on your model, you may be able to separate the filter assembly from the main dust bin. Refer to your vacuum's main manual for detailed disassembly.
- Rinse (if applicable): The transparent dust bin can typically be rinsed with cool water. Do not wash the motor housing or any electrical components.
- Dry Thoroughly: Allow all washed components to air dry completely for at least 24 hours before reassembling and reattaching to the vacuum. Ensure no moisture remains, as this can damage the vacuum's motor or electrical parts.
- Wipe Exterior: Use a soft, damp cloth to wipe the exterior of the dust bin.
Caution: Do not use harsh detergents, abrasive cleaners, or solvents, as these can damage the PETG material.
6. Troubleshooting
If you encounter issues with your new dust bin, refer to the following common problems and solutions:
| Problem | Possible Cause | Solution |
|---|---|---|
| Dust bin does not attach securely. | Incorrect alignment; debris in connection; damaged latch. | Ensure proper alignment and push firmly until it clicks. Check for and remove any debris. If damaged, contact Greenote support. |
| Dust bin flap does not close. | Debris caught in hinge; damaged latch. | Clear any debris from the hinge area. Ensure the flap is pushed firmly until it clicks. If damaged, contact Greenote support. |
| Reduced suction after replacement. | Dust bin not fully sealed; filter issues (if applicable). | Ensure the dust bin is securely attached and the bottom flap is closed. Check and clean or replace any filters associated with the dust bin. |
7. Specifications
| Feature | Detail |
|---|---|
| Brand | Greenote |
| Model Compatibility | Greenote GSC50 Cordless Vacuum Cleaner |
| Capacity | 600 ml (0.6 liters) |
| Material | PETG |
| Product Dimensions | 12 x 12 x 12 cm |
| Item Weight | 140 g |
8. Warranty and Support
For warranty information or technical support regarding your Greenote GSC50 Cordless Vacuum Cleaner Dust Bin, please contact Greenote customer service. You can typically find contact details on the official Greenote website or through your original purchase platform.
Greenote Official Website: Visit Greenote Store on Amazon
Please have your product model number (GSC50) and purchase details ready when contacting support.