1. Introduction
This manual provides essential information for the installation, operation, and maintenance of the Cisco Catalyst C9124AXI Dual Band 802.11ax Wireless Access Point. This device is designed for outdoor environments, offering high-performance wireless connectivity with Wi-Fi 6 (802.11ax) capabilities.
The Catalyst 9124AX Series is engineered to support high-density networks and IoT deployments, providing robust security, resilience, and operational flexibility. It offers flexible deployment options for service providers and enterprise networks requiring fast links for mobile clients and wireless backhaul.
2. Safety Information
Before installing or operating this device, please read all safety warnings and instructions carefully. Failure to comply with safety guidelines may result in injury or damage to the equipment.
- Ensure proper grounding for the device.
- Do not install during a lightning storm.
- Use only Cisco-approved power supplies and accessories.
- Installation should be performed by qualified personnel.
- Observe all local and national electrical codes.
3. Package Contents
Verify that all items are present and undamaged. If any items are missing or damaged, contact your vendor.
- Cisco Catalyst C9124AXI Wireless Access Point
- Mounting bracket (if included with specific model variant)
- Documentation (Quick Start Guide, Safety Information)
- Note: Power adapter and Ethernet cables are typically sold separately.
4. Product Overview
The Cisco Catalyst C9124AXI is an outdoor-rated wireless access point. It features dual-band 802.11ax (Wi-Fi 6) connectivity, offering high-speed data transfer and robust performance in challenging environments. This model includes internal antennas for reliable connectivity.
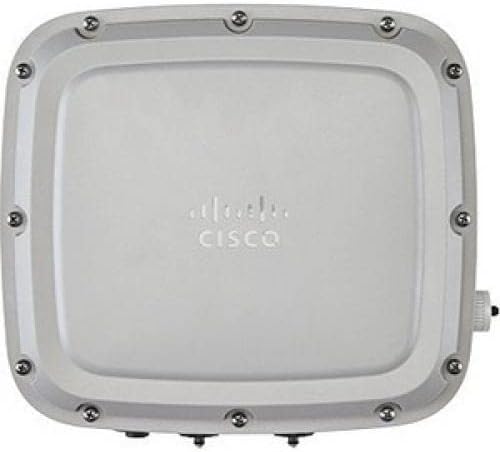
Figure 1: Front view of the Cisco Catalyst C9124AXI Wireless Access Point. The device is a rectangular, light-colored unit with the Cisco logo centrally embossed. Multiple screws are visible around the perimeter, securing the casing. A small connector is visible on the right side.
Key Features:
- 802.11ax (Wi-Fi 6) Standard: Provides enhanced capacity, efficiency, and performance.
- Dual Band Operation: Supports both 2.4 GHz and 5 GHz frequencies.
- Outdoor Rated: Designed for deployment in outdoor environments.
- Internal Antennas: Integrated antennas for streamlined installation.
- 2.5 Gigabit Ethernet: High-speed wired connectivity.
- Data Encryption: Enhanced security features.
5. Setup and Installation
Proper installation is crucial for optimal performance and device longevity. This section outlines the general steps for setting up your access point.
5.1 Site Preparation
- Location Selection: Choose a location that provides optimal wireless coverage and is protected from direct physical impact. Consider line-of-sight for best performance.
- Power Source: Ensure a suitable power source (e.g., Power over Ethernet - PoE) is available within reach of the installation site.
- Cabling: Plan for necessary Ethernet cabling runs, ensuring outdoor-rated cables are used if exposed to elements.
5.2 Mounting the Access Point
- Attach the mounting bracket (if applicable) to the desired surface (pole or wall) using appropriate hardware.
- Securely attach the access point to the mounting bracket. Ensure all fasteners are tightened according to manufacturer specifications.
- Verify the access point is stable and correctly oriented for optimal signal propagation.
5.3 Connecting Cables
- Connect an Ethernet cable from your network switch (with PoE capabilities) to the Ethernet port on the access point.
- If using an external power adapter (not typically included), connect it to the power input port.
- Ensure all connections are secure and weatherproofed if exposed to outdoor conditions.
5.4 Initial Power-Up
Once all connections are made, power on the device. Observe the LED indicators for status. Refer to the operating section for LED status interpretations.
6. Operation
After successful installation, the access point will begin its operational sequence. Configuration is typically performed via a network controller or standalone web interface.
6.1 LED Indicators
The access point features LED indicators to provide status information. Consult the official Cisco documentation for a detailed breakdown of LED patterns and their meanings. Generally:
- Solid Green: Normal operation, device is powered and functioning.
- Flashing Green: Booting up or performing a firmware upgrade.
- Solid Amber/Orange: Warning or minor error.
- Flashing Amber/Orange: Major error or fault.
- Off: Device is powered off or experiencing a power issue.
6.2 Network Configuration
The Cisco Catalyst 9124AXI can be managed through a Cisco Wireless LAN Controller (WLC) or configured in standalone mode via its web-based interface. Refer to the Cisco documentation for specific configuration procedures, including:
- Setting up SSIDs (Wireless Network Names)
- Configuring security protocols (WPA3, WPA2)
- Adjusting radio settings (channels, power levels)
- Integrating with RADIUS servers for authentication
7. Maintenance
Regular maintenance ensures optimal performance and extends the lifespan of your access point.
7.1 Firmware Updates
Periodically check the Cisco support website for new firmware versions. Firmware updates often include performance enhancements, security patches, and new features. Follow Cisco's recommended procedures for firmware upgrades to avoid service interruptions.
7.2 Physical Inspection
For outdoor deployments, conduct periodic visual inspections:
- Check for any physical damage to the casing or mounting hardware.
- Ensure all cable connections are secure and free from corrosion or damage.
- Clean any accumulated dirt or debris from the device surface, using a soft, damp cloth. Do not use harsh chemicals.
7.3 Configuration Backup
Regularly back up your access point's configuration settings. This allows for quick restoration in case of a device failure or misconfiguration.
8. Troubleshooting
This section provides solutions to common issues you might encounter.
8.1 No Power / Device Not Turning On
- Check Power Source: Ensure the Ethernet cable is connected to a PoE-enabled port on a switch or a functional PoE injector.
- Cable Integrity: Inspect the Ethernet cable for damage. Try a different cable.
- Switch Port: Verify the switch port is active and providing power.
8.2 No Wireless Connectivity
- LED Status: Check the LED indicators. If they show an error, refer to the operating section or Cisco documentation.
- Configuration: Verify that SSIDs are broadcasted and security settings are correctly configured.
- Client Device: Ensure client devices are within range and have the correct Wi-Fi password.
- Interference: In outdoor environments, check for potential sources of wireless interference.
8.3 Slow Performance
- Signal Strength: Check the signal strength at the client device's location.
- Channel Congestion: Use network analysis tools to identify congested Wi-Fi channels and adjust the access point's channel settings if necessary.
- Firmware: Ensure the access point is running the latest firmware.
- Network Load: Assess the number of connected devices and their bandwidth usage.
9. Specifications
| Feature | Detail |
|---|---|
| Model | C9124AXI |
| Wireless Standard | 802.11ax (Wi-Fi 6) |
| Frequency Band | Dual-Band (2.4 GHz, 5 GHz) |
| Max Wireless Speed | 5.38 Gbit/s |
| Ethernet Connectivity | 2.5 Gigabit Ethernet |
| Antenna Type | Internal |
| Operating System | Cisco IOS |
| Dimensions (L x W x H) | 16 x 13.9 x 7.9 inches |
| Item Weight | 8.9 pounds |
| Connectivity Technologies | Ethernet, Bluetooth |
| Manufacturer | Cisco Systems, Inc |
10. Warranty Information
Cisco products typically come with a limited hardware warranty. For detailed warranty terms and conditions, including duration and coverage, please refer to the official Cisco warranty statement available on their website or contact Cisco support directly. Keep your proof of purchase for warranty claims.
11. Technical Support
For technical assistance, additional documentation, or to report issues, please contact Cisco Technical Support. You can find support resources, including knowledge bases, forums, and contact information, on the official Cisco website:
Cisco Support Website: www.cisco.com/c/en/us/support/index.html
When contacting support, have your product model (C9124AXI) and serial number ready.


