
1. Introduction
This manual provides detailed instructions for the safe and efficient use of your Luqeeg Mini Portable Projector. Please read this manual thoroughly before operating the device and retain it for future reference.
2. Package Contents
Verify that all items listed below are included in your package:
- Luqeeg Mini LED Projector
- Charging Cable (USB)
- Remote Control
- User Manual (this document)

Image: The Luqeeg Mini Portable Projector, its remote control, and a USB charging cable, as included in the package.
3. Product Overview
3.1 Key Features
- Compact and Portable Design: Easily transportable for various viewing environments.
- Wired Screen Synchronization: Supports direct connection to iOS and Android phones/tablets using their charging cables for screen mirroring.
- Diffuse Reflection Imaging: Designed to reduce eye strain, suitable for extended viewing.
- Built-in Speaker: Integrated 4Ω 2W speaker for audio output.
- Multiple Connectivity Options: USB input for media playback.
- Power Supply Flexibility: Can be powered by a standard 5V 2A power adapter or a compatible mobile power bank.
3.2 Projector Components and Controls

Image: Top-down view of the projector highlighting the built-in speaker, USB port, headphone connection, and charging power input.

Image: A detailed diagram of the projector's top panel and side ports, indicating the power input (5V 2A), USB signal input, sound output, infrared window, and control buttons (Turn on/off, Confirm, Left, Right, Back, Channel).
- Power Input (5V 2A): Connect the charging cable here for power.
- USB Signal Input: For connecting USB storage devices.
- Sound Output: 3.5mm jack for external headphones or speakers.
- Infrared Window: For receiving signals from the remote control.
- Control Buttons: Located on the top panel for basic navigation and power control.
4. Setup
4.1 Powering the Projector
The projector requires a stable 5V 2A power supply to function correctly. Use the provided USB charging cable and connect it to a compatible power source.
- Connect the small end of the USB charging cable to the "Power input (5V 2A)" port on the projector.
- Connect the larger end of the USB charging cable to a standard 5V 2A USB wall adapter or a mobile power bank that provides 5V 2A output.
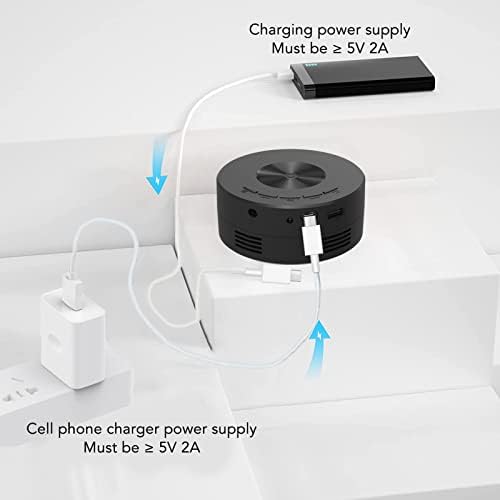
Image: A diagram illustrating the correct power connection for the projector, emphasizing the requirement for a 5V 2A charging head or power bank.
Important: Using a power source with less than 5V 2A may prevent the projector from operating or cause instability.
4.2 Placement and Projection Adjustment
Place the projector on a stable, flat surface. The projection size varies with the distance from the screen or wall.

Image: A visual guide demonstrating the relationship between projection distance and screen size, ranging from 0.6m (14 inches) to 4m (100 inches).
- Throw Distance: The optimal throw distance ranges from 0.6 meters (2.0 feet) to 4.0 meters (13.1 feet).
- Projection Size: This corresponds to a projection size of 14 inches to 100 inches.
- Focus Adjustment: Use the focus ring on the projector lens to achieve a clear image.
5. Operating Instructions
5.1 Power On/Off
Press the power button on the projector or the remote control to turn the device on or off.
5.2 Connecting Mobile Devices (Wired Screen Synchronization)
The projector supports wired screen mirroring for iOS and Android phones/tablets. This method uses your device's standard charging cable, eliminating the need for a separate adapter.

Image: A smartphone connected to the projector using its charging cable, illustrating the wired screen synchronization feature for iOS and Android devices.
- Ensure the projector is powered on.
- Connect your iOS or Android phone/tablet to the projector's USB signal input port using your device's original charging cable.
- The projector should automatically detect the connection and display your device's screen. Follow any on-screen prompts on your mobile device to allow screen mirroring.
Note: Some mobile devices may require enabling USB debugging or screen mirroring options in their settings for this feature to work.
5.3 Connecting USB Storage Devices
Insert a USB flash drive into the USB signal input port to play media files directly from the drive.
- Insert your USB flash drive into the USB port on the projector.
- Navigate the projector's menu using the control buttons or remote control to select the USB input source.
- Browse and select your desired media files for playback.
5.4 Audio Output
The projector has a built-in 4Ω 2W speaker. For enhanced audio, you can connect external headphones or speakers.
- Plug 3.5mm headphones or external speakers into the "Sound Output" jack on the projector.
- The built-in speaker will automatically mute when external audio devices are connected.
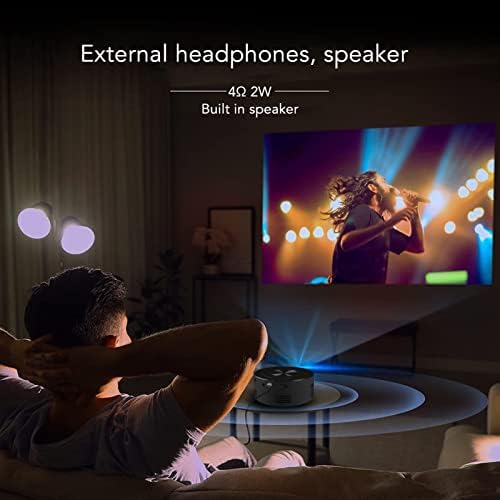
Image: A person enjoying content projected by the Luqeeg Mini Portable Projector, with a visual representation of external headphones and speaker connectivity.
6. Maintenance
- Cleaning the Lens: Use a soft, lint-free cloth specifically designed for optical lenses to gently wipe the projector lens. Avoid abrasive materials or harsh chemicals.
- Cleaning the Exterior: Wipe the projector's exterior with a soft, dry cloth. Do not use liquid cleaners directly on the device.
- Storage: When not in use, store the projector in a cool, dry place, away from direct sunlight and excessive dust.
- Ventilation: Ensure the projector's ventilation openings are not blocked during operation to prevent overheating.
7. Troubleshooting
| Problem | Possible Cause | Solution |
|---|---|---|
| Projector does not power on. | Insufficient power supply; loose cable connection. | Ensure a 5V 2A power adapter is used. Check all cable connections are secure. |
| No image projected. | Incorrect input source selected; device not connected properly. | Verify the input source matches the connected device. Reconnect the mobile device's charging cable. Check mobile device settings for screen mirroring. |
| Image is blurry. | Focus not adjusted. | Rotate the focus ring on the projector lens until the image is clear. |
| No sound. | Volume too low; external audio device connected; audio format not supported. | Increase volume. Disconnect external audio devices if using built-in speaker. Ensure media file audio format is supported. |
| Mobile device screen mirroring not working. | Mobile device settings; incompatible cable. | Ensure you are using the original charging cable for your phone/tablet. Check your mobile device's settings for screen mirroring or USB debugging options. Restart both devices. |
8. Specifications
| Feature | Detail |
|---|---|
| Image System | TFT LCD |
| Contrast Ratio | 3000:1 |
| Native Resolution | 320 x 180 pixels |
| Maximum Supported Resolution | 1920 x 1080 pixels (Full HD) |
| Throw Distance | 0.6 - 4.0 meters (2.0 - 13.1 feet) |
| Projection Size | 14 - 100 inches |
| Built-in Speaker | 4Ω 2W |
| Power Input | 5V 2A (USB) |
| Connectivity | USB, 3.5mm Audio Out, Wired Mobile Screen Sync |
| Dimensions | Approx. 6.06 x 5.47 x 2.83 inches |
| Weight | Approx. 11.3 ounces |
9. Warranty and Support
For product support, troubleshooting assistance, or warranty inquiries, please contact Luqeeg customer service. Refer to your purchase documentation for specific warranty terms and contact information.
Contact Information: Please refer to the seller's contact details on your purchase platform or the official Luqeeg website for support.