
GODOX SK400II-V
Contents
Godox SK400II-V Studio Flash Light User Manual
Model: SK400II-V | Brand: GODOX
1. Introduction
This user manual provides detailed instructions for the safe and effective operation of the Godox SK400II-V Studio Flash Light. The SK400II-V is an upgraded studio flash designed for professional photography, featuring a 400Ws power output, 5600±200K color temperature, and an LED modeling lamp with adjustable power levels. It is equipped with a standard Bowens mount for compatibility with various light accessories.
2. Safety Information
- Do not expose the unit to rain or damp environments to prevent fire or electric shock.
- Keep out of reach of children.
- Always disconnect the power cable before cleaning or performing maintenance.
- Do not disassemble the unit. Repairs should only be performed by authorized service personnel.
- Ensure proper ventilation during operation to prevent overheating.
- Avoid direct eye exposure to the flash light, as it can cause temporary vision impairment.
3. Product Overview
The Godox SK400II-V Studio Flash Light is a compact and powerful strobe designed for various photographic applications, including e-commerce product shooting, studio portraits, and lifestyle photography. It integrates a 2.4G wireless X system for remote control capabilities.
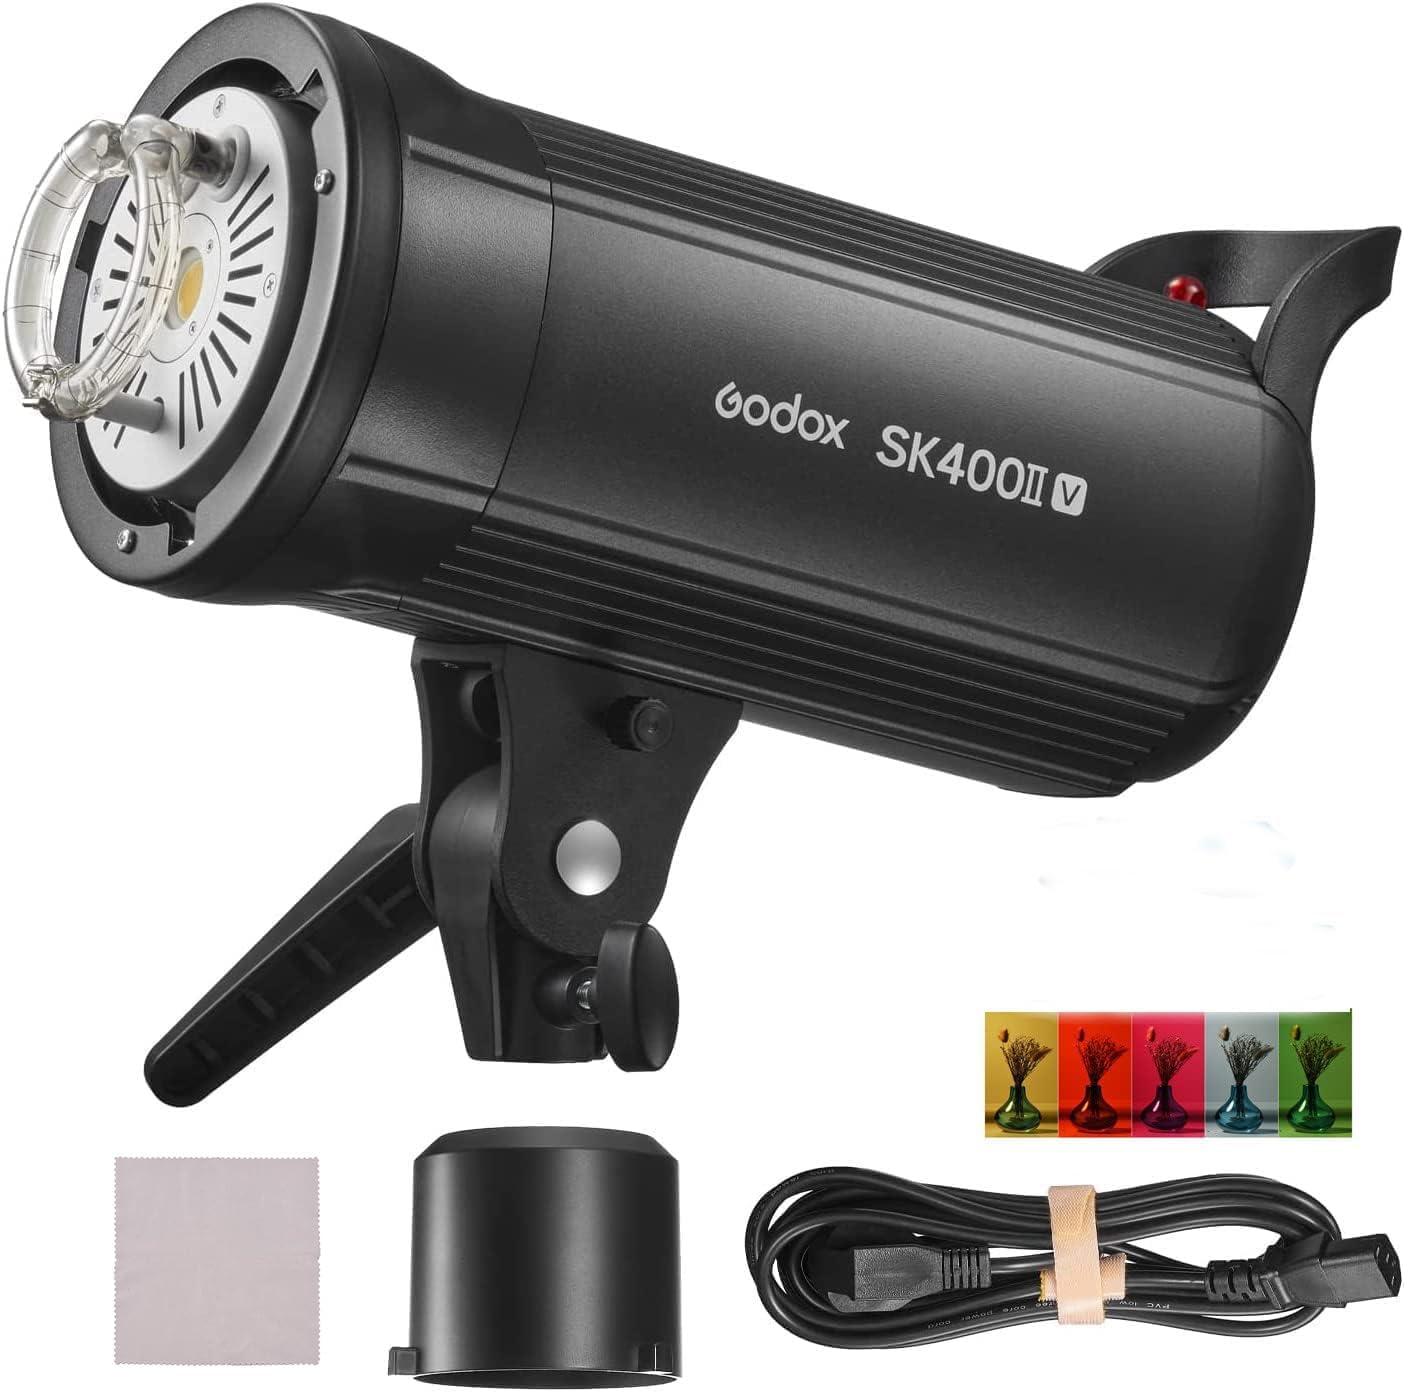
Figure 3.1: Godox SK400II-V Studio Flash Light and included accessories, including the flash unit, lamp cover, power cable, and a cleaning cloth.
3.1 Key Components
- Flash Body: Main unit housing the flash tube, modeling lamp, and electronics.
- LED Modeling Lamp: Adjustable 5% to 100% power level for continuous lighting.
- Bowens Mount: Standardized mount for attaching light modifiers like softboxes and reflectors.
- Control Panel: Features an LCD display and buttons for adjusting settings.
- Carry Handle: Integrated handle for easy transport and adjustment.
- Power Input: For connecting the power cable.
- Sync Port: For wired synchronization with cameras.
- USB Port: For firmware upgrades or connecting wireless triggers.

Figure 3.2: Detailed view of the Control Panel, showing the LCD display, function buttons (GR/CH, S1/S2, BUZZ, MOD/OFF, TEST), power switch, sync port, and USB port.

Figure 3.3: Close-up of the LED Modeling Lamp, which provides continuous light for previewing lighting effects.

Figure 3.4: The sturdy Carry Handle, designed for easy portability and adjustment of the flash unit's position.
3.2 Features
- Upgraded LED modeling lamp with 5% to 100% adjustable power.
- Integrated Godox 2.4G Wireless X System for remote control with X-Pro, X1, XT32, XT16, or FT-16 triggers.
- LCD panel for clear display of parameters and settings.
- 40 steps of precise power output adjustment from 1/16 to 1/1.
- Auto memory and recovery of adjusted panel settings.
- Anti-Preflash function for synchronization with cameras using a single pre-flash system.
- Stable output with less than 2% shift under the same power setting.
- Standard Bowens mount for wide compatibility with accessories.

Figure 3.5: Illustration of the built-in Godox 2.4G Wireless X System, detailing its ability to control 16 groups, 32 channels, 3 modeling lamp modes, and flash power levels.
4. Setup
4.1 Unpacking
Carefully remove all components from the packaging. Ensure the following items are present:
- Godox SK400II-V Studio Flash
- Lamp Cover
- Power Cable

Figure 4.1: The SK400II-V unit with its lamp cover detached and the power cable, illustrating the main components included in the package.
4.2 Attaching Accessories
- Mounting to a Light Stand: Secure the flash unit onto a compatible light stand using the mounting bracket. Tighten the knob to ensure stability.
- Attaching Light Modifiers (Bowens Mount):
- Align the Bowens mount of your desired accessory (e.g., softbox, reflector) with the mount on the flash unit.
- Insert the accessory and rotate it clockwise until it clicks into place, securing it firmly.
- To remove, press the release button on the flash unit's mount and rotate the accessory counter-clockwise.

Figure 4.2: The SK400II-V with a standard reflector attached, demonstrating the use of the Bowens mount for light shaping accessories.
4.3 Power Connection
Connect the provided power cable to the power input port on the flash unit, then plug the other end into a suitable AC power outlet (100-120V ~ 50/60Hz).
5. Operating Instructions
5.1 Powering On/Off
Locate the power switch on the control panel and toggle it to the "ON" position to power on the unit. Toggle to "OFF" to power off.
5.2 Adjusting Flash Power
Use the dial on the control panel to adjust the flash power output. The power can be adjusted in 40 steps from 1/16 to 1/1. The current power level will be displayed on the LCD screen.
5.3 Modeling Lamp Control
Press the MOD/OFF button to cycle through modeling lamp modes: OFF, PROPORTIONAL, and PERCENTAGE. In PERCENTAGE mode, use the dial to adjust the brightness from 5% to 100%.
5.4 Wireless Control (2.4G X System)
The SK400II-V features a built-in Godox 2.4G Wireless X System. To use this feature:
- Ensure your Godox X-Pro, X1, XT32, XT16, or FT-16 wireless trigger is set to the same group and channel as the flash unit.
- Use the GR/CH button on the flash unit to set the group (0-9, A-F) and channel (1-32).
- You can now control flash power ratio, modeling lamp, and buzzer settings remotely from your trigger.
5.5 Sync Modes (S1/S2)
Press the S1/S2 button to activate optical slave modes:
- S1 Mode: The flash will fire in response to a single flash from another unit. Ideal for manual flash or TTL flash without pre-flash.
- S2 Mode (Anti-Preflash): The flash will ignore the first pre-flash from a camera's TTL system and fire on the second flash. Useful for cameras with pre-flash functions.
5.6 Test Button
Press the TEST button to manually fire the flash and check its output.

Figure 5.1: Examples of the SK400II-V in use for wedding, portrait, fashion, advertising, and product photography, highlighting its versatility.
6. Maintenance
- Cleaning: Use a soft, dry cloth to clean the exterior of the flash unit. For stubborn dirt, a slightly damp cloth can be used, followed by a dry cloth. Do not use harsh chemicals or abrasive cleaners.
- Storage: When not in use, store the flash unit in a cool, dry place, away from direct sunlight and excessive humidity. Use the lamp cover to protect the flash tube and modeling lamp.
- Lamp Replacement: The flash tube and modeling lamp are user-replaceable. Refer to the specific instructions for lamp replacement if needed. Ensure the unit is unplugged and cooled down before attempting replacement.
- Firmware Updates: Periodically check the Godox official website for any available firmware updates for your model. Updates can be installed via the USB port.
7. Troubleshooting
| Problem | Possible Cause | Solution |
|---|---|---|
| Flash not firing. |
|
|
| Modeling lamp not working. |
|
|
| Inconsistent flash output. |
|
|
| Wireless trigger not working. |
|
|
8. Specifications
| Feature | Detail |
|---|---|
| Model | SK400II-V |
| Power Output | 400Ws |
| Color Temperature | 5600±200K |
| Modeling Lamp | LED, 5% to 100% adjustable |
| Power Adjustment | 40 steps (1/16 - 1/1) |
| Recycle Time | Not specified in input, but typically fast for studio flashes. |
| Flash Duration | Not specified in input. |
| Sync Speed | 1/200s or slower |
| Wireless Control | Godox 2.4G Wireless X System |
| Mount Type | Bowens Mount |
| Item Weight | 7.3 pounds |
| Package Dimensions | 16.5 x 11 x 7.25 inches |
| Included Components | Studio Flash, Lamp Cover, Power Cable |
9. Warranty and Support
For warranty information and technical support, please refer to the official GODOX website or contact your local distributor. Keep your purchase receipt as proof of purchase for warranty claims.
Manufacturer: GODOX
Date First Available: December 9, 2022
For further assistance, visit the official GODOX store: GODOX Store on Amazon
Ask a question about this manual
Ask about setup, troubleshooting, compatibility, parts, safety, or missing instructions. Manuals+ will review the question and use this page’s manual context to help answer it.