
BITFENIX BFC-NSM-150-KKGSK-3A
Contents
Bitfenix Nova Mesh SE M-ATX ARGB Mini Tower Computer Case Instruction Manual
Model: BFC-NSM-150-KKGSK-3A | Brand: BITFENIX
1. Overview
This manual provides instructions for the installation, operation, and maintenance of your Bitfenix Nova Mesh SE M-ATX ARGB Mini Tower Computer Case. This case is designed for Micro-ATX motherboards and offers features such as pre-installed ARGB fans, high-density mesh for airflow, and tempered glass side panels.

Figure 1: Bitfenix Nova Mesh SE M-ATX ARGB Mini Tower Computer Case.
2. Setup and Installation
Follow these steps to set up your computer components within the Bitfenix Nova Mesh SE case.
2.1. Motherboard Installation
The case supports Micro-ATX motherboards. Ensure proper standoffs are in place before mounting the motherboard. Secure the motherboard with screws provided in the accessory kit.

Figure 2: Case dimensions and pre-installed 120mm ARGB fans with 4+4 controller.
2.2. GPU and Air Cooler Installation
The case accommodates GPUs up to 345mm in length and air coolers up to 160mm in height. Install your graphics card into the appropriate PCIe slot and secure it. Mount your CPU air cooler according to its manufacturer's instructions, ensuring it fits within the 160mm height limit.

Figure 3: Clearance for Graphics Card (up to 340mm) and Air Cooler (up to 160mm).
2.3. Radiator Support
For liquid cooling, the case supports a 240mm radiator at the top (radiator thickness within 27mm, fans on radiator thickness up to 25mm, with memory height up to 38mm). Front radiator support includes 120mm, 240mm, and 280mm options. Rear support is for a 120mm radiator.

Figure 4: Radiator and fan placement options within the case.
2.4. Storage Drive and Power Supply Installation
The modular HDD cage supports 3+1 2.5" SSD mounts and 2 x 3.5" HDD trays. Install your storage drives into the appropriate bays. The PSU length support is up to 180mm. Secure your power supply unit in the designated bottom mount area.

Figure 5: Modular HDD cage for 2.5" SSDs and 3.5" HDDs, and PSU installation area.
2.5. ARGB Fan Connections
The case comes with 3 pre-installed ARGB fans and a built-in ARGB LED/PWM system controller. Connect the fans to the controller and the controller to your motherboard's addressable RGB 3-pin connector and a SATA power cable for power. This allows for synchronized lighting effects.

Figure 6: ARGB fan and controller wiring diagram.
3. Operation
After all components are installed and connected, you can power on your system. The front I/O panel includes power and reset buttons, USB 3.0 ports, and audio jacks.
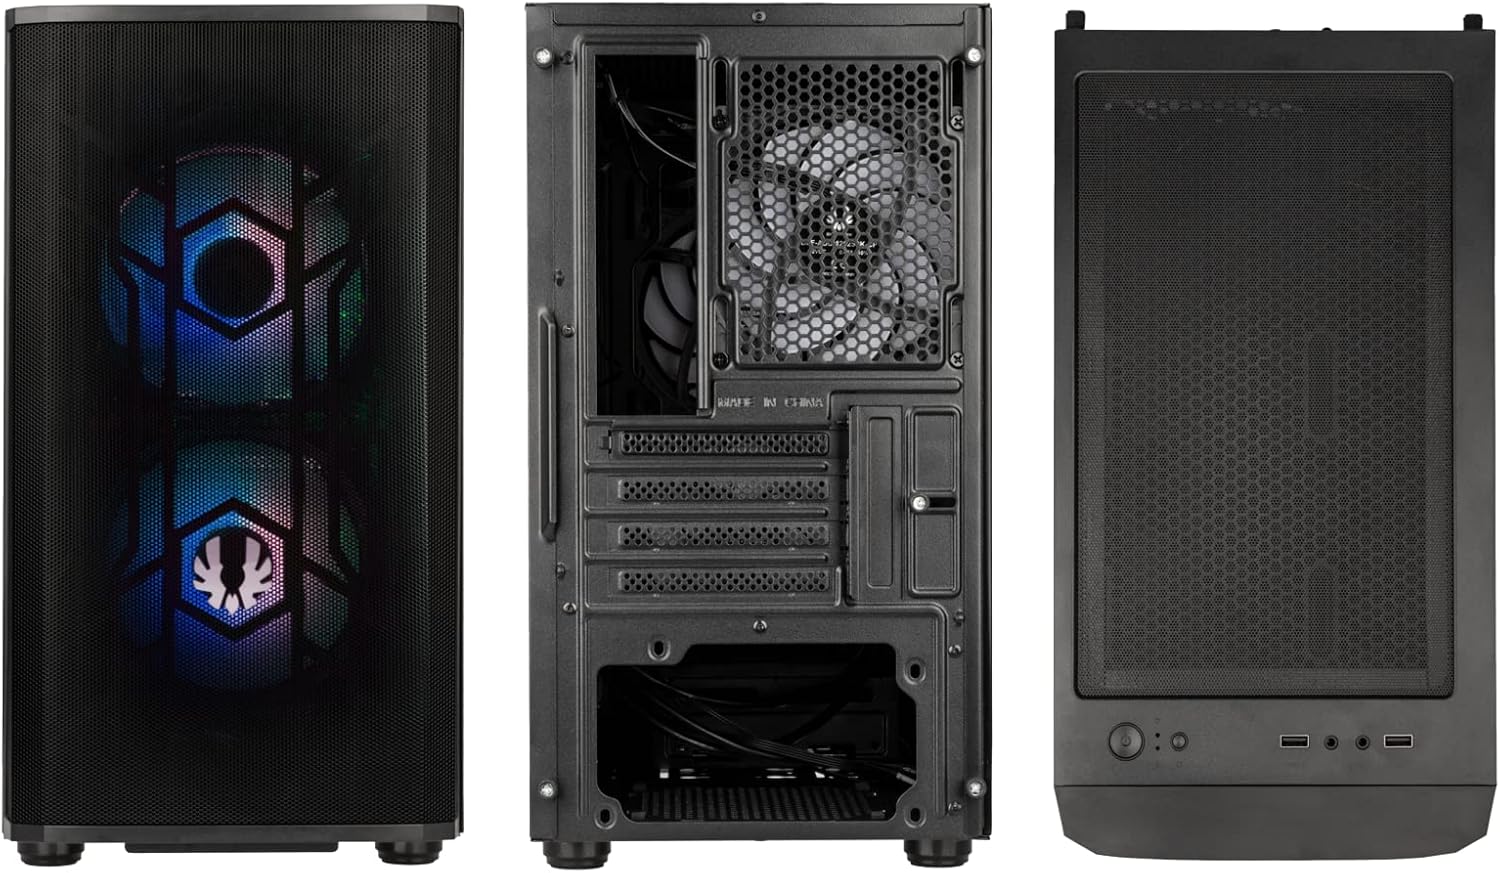
Figure 7: Front, rear, and top views of the case, highlighting I/O ports.
4. Maintenance
Regular maintenance ensures optimal performance and longevity of your computer case.
4.1. Dust Filter Cleaning
The case features BitFenix High Density Mesh & Dust Filters, including a removable front panel, a PSU dust filter, and a magnetic dust filter on top. These are designed for easy cleaning to maintain optimal airflow and prevent dust buildup.

Figure 8: Exploded view of the front panel and various dust filters for easy cleaning.
To clean, gently remove the magnetic top filter and the front panel. The PSU filter can be slid out from the bottom. Use compressed air or a soft brush to remove accumulated dust. Reattach all filters securely after cleaning.
4.2. Side Panel Removal
The case features a 4mm screwless tempered glass side panel for easy access to internal components. To remove, simply unlatch or unscrew the panel (depending on the specific model's mechanism) and carefully lift it away. Reinstall by aligning and securing the panel.

Figure 9: View of the 4mm screwless tempered glass side panel.
5. Troubleshooting
This section addresses common issues you might encounter.
- Fans Not Spinning/Lighting Up:
- Check if the ARGB controller is properly connected to the motherboard's ARGB header and receiving SATA power.
- Ensure all fan cables are securely connected to the ARGB controller.
- Verify that your motherboard's RGB software is installed and configured correctly.
- Poor Airflow:
- Clean all dust filters (front, top, PSU) as described in the Maintenance section.
- Ensure fans are oriented correctly for optimal intake and exhaust.
- Verify no cables or components are obstructing airflow paths.
- Front I/O Ports Not Functioning:
- Check all front panel connectors (USB 3.0, audio, power, reset) are correctly plugged into the motherboard headers.
6. Specifications
| Feature | Detail |
|---|---|
| Brand | BITFENIX |
| Model Name | BFC-NSM-150-KKGSK-3A |
| Case Type | Mini-Tower |
| Motherboard Compatibility | Micro ATX |
| Dimensions (LxWxH) | 15.16 x 8.07 x 15.75 inches (385 x 205 x 400 mm) |
| GPU Length Support | Up to 345mm |
| Air Cooler Height Support | Up to 160mm |
| PSU Length Support | Up to 180mm |
| Radiator Support (Top) | 240mm (thickness < 27mm, fan thickness < 25mm, memory height < 38mm) |
| Drive Bays | 3+1 2.5" SSD Mounts, 2 x 3.5" HDD Trays |
| Pre-installed Fans | 3 x ARGB Fans with Built-in ARGB LED/PWM System Controller |
| Front I/O | 2 x USB 3.0, Audio In/Out |
| Material | Tempered Glass, Steel, Plastic |
7. Warranty & Support
For warranty information and technical support, please refer to the official Bitfenix website or contact their customer service directly. Keep your proof of purchase for warranty claims.
Official Bitfenix Website: www.bitfenix.com
Ask a question about this manual
Ask about setup, troubleshooting, compatibility, parts, safety, or missing instructions. Manuals+ will review the question and use this page’s manual context to help answer it.