1. Introduction
This manual provides detailed instructions for the installation, operation, and maintenance of your AINAVI Car Audio Equipment, designed specifically for BMW 3 Series E90, E91, E92, and E93 models manufactured between 2005 and 2011. This 9-inch touchscreen stereo system integrates advanced features such as Wireless Apple CarPlay, Android Auto, GPS Navigation, and support for a backup camera, enhancing your driving experience.
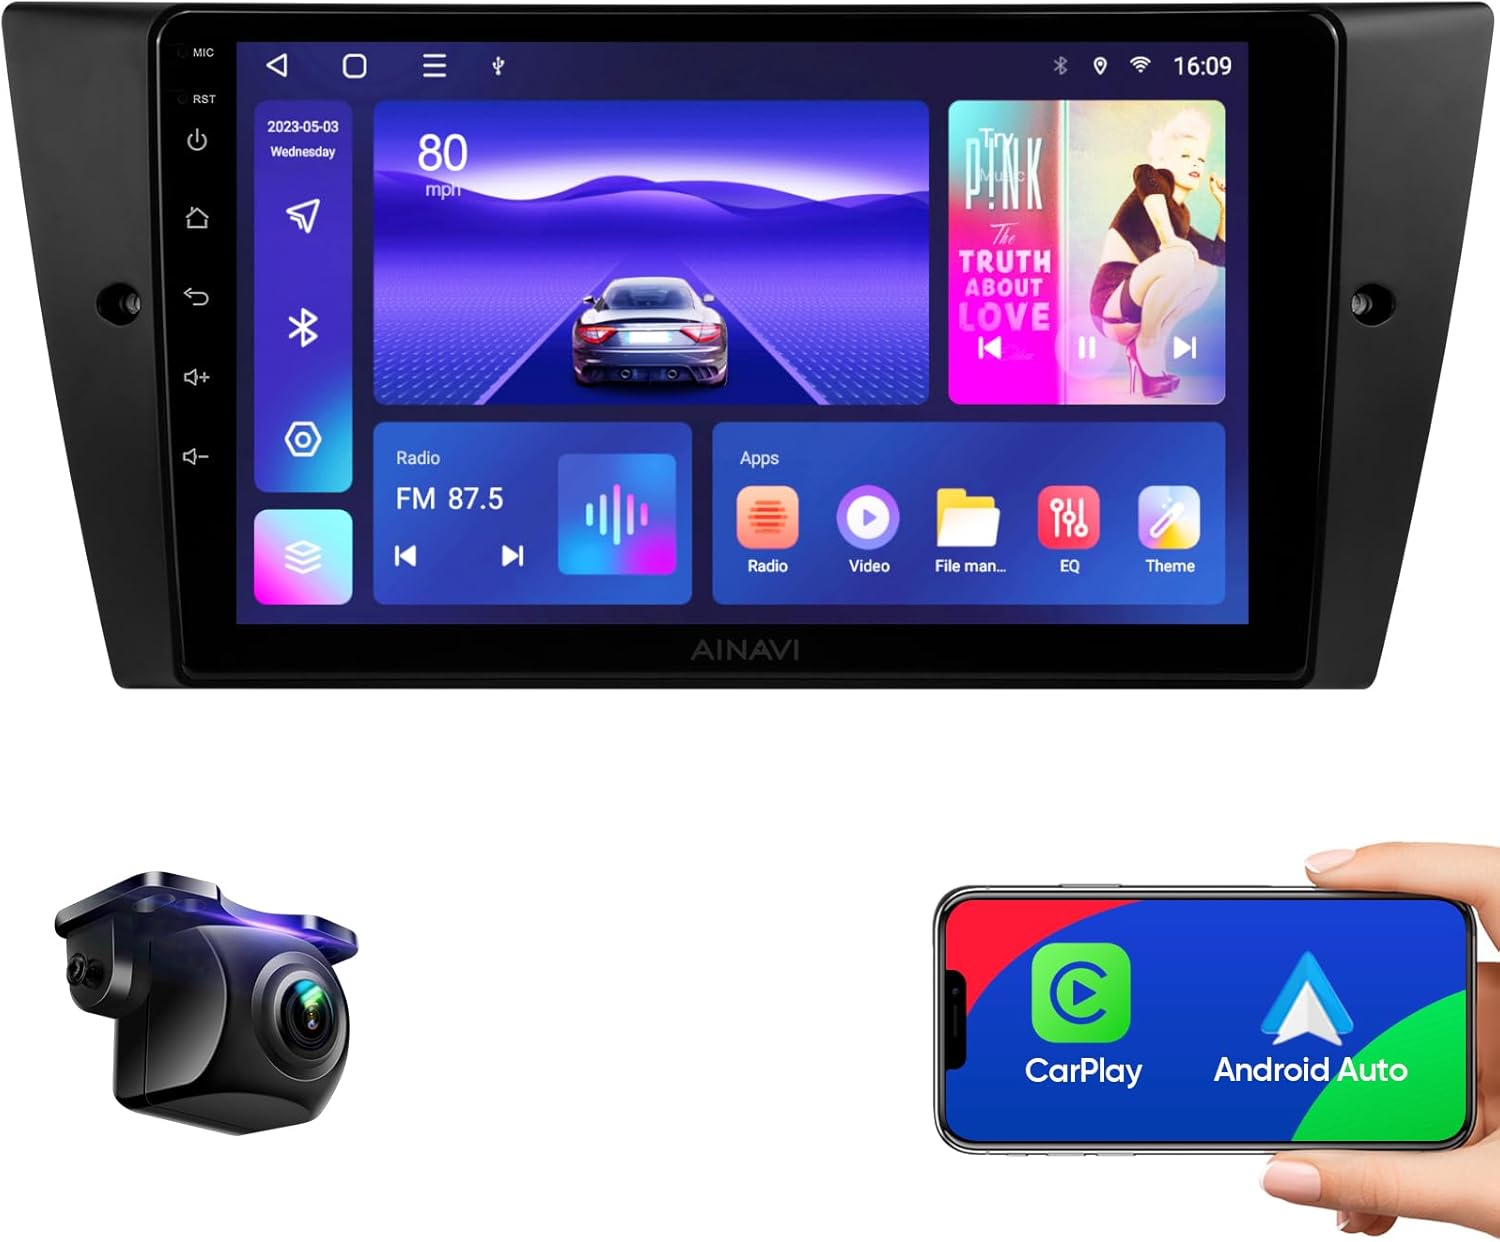
Figure 1: AINAVI 9-inch Car Stereo with included backup camera and smartphone integration.
2. Product Features
The AINAVI Car Audio Equipment offers a range of features designed for convenience and performance:
- Wireless Apple CarPlay & Android Auto: Stable signal flow for seamless smartphone integration, supporting 1080P video playback.
- MirrorLink & Airplay: Wired/wireless mirroring function for displaying smartphone content on the 1280x720 resolution screen.
- Advanced Navigation: Supports most satellite services with 5G WiFi for accurate navigation. Includes Google Maps with 2D/3D perspectives, various route options, and voice guidance.
- High-Performance Hardware: Features a 5G WiFi (2.4GHz & 5GHz) network for fast connectivity and an 8-Core CPU with Dual-Core GPU for smooth operation and 3D rendering.
- Memory & Storage: Equipped with 3GB RAM for multitasking and 32GB ROM for app downloads and media storage.
- QLED Screen: An upgraded ultra HD QLED screen provides a high-resolution visual experience.
- 1080P Rear View Camera Support: Provides clear reversing scenes with an astern ruler line. Supports car trajectory display if available.
- Customizable Panel Light: 7 color button lights that can be changed or set to a specific color.
- 48-Band EQ & Professional DSP: Built-in 48-band equalizer with Digital Sound Processing (DSP) for customizable audio settings, including scene modes (Normal, Jazz, Heavy Metal, Pop, Classical, Vocal, Soft), surround sound patterns, bass boost, and individual speaker volume control.
- Split Screen Function: Allows two applications to run simultaneously on the screen.
- Bluetooth 5.0: For smooth connection and stable data transmission.
- USB to RCA Output: Enables video output to rear seat headrest monitors for passenger entertainment.
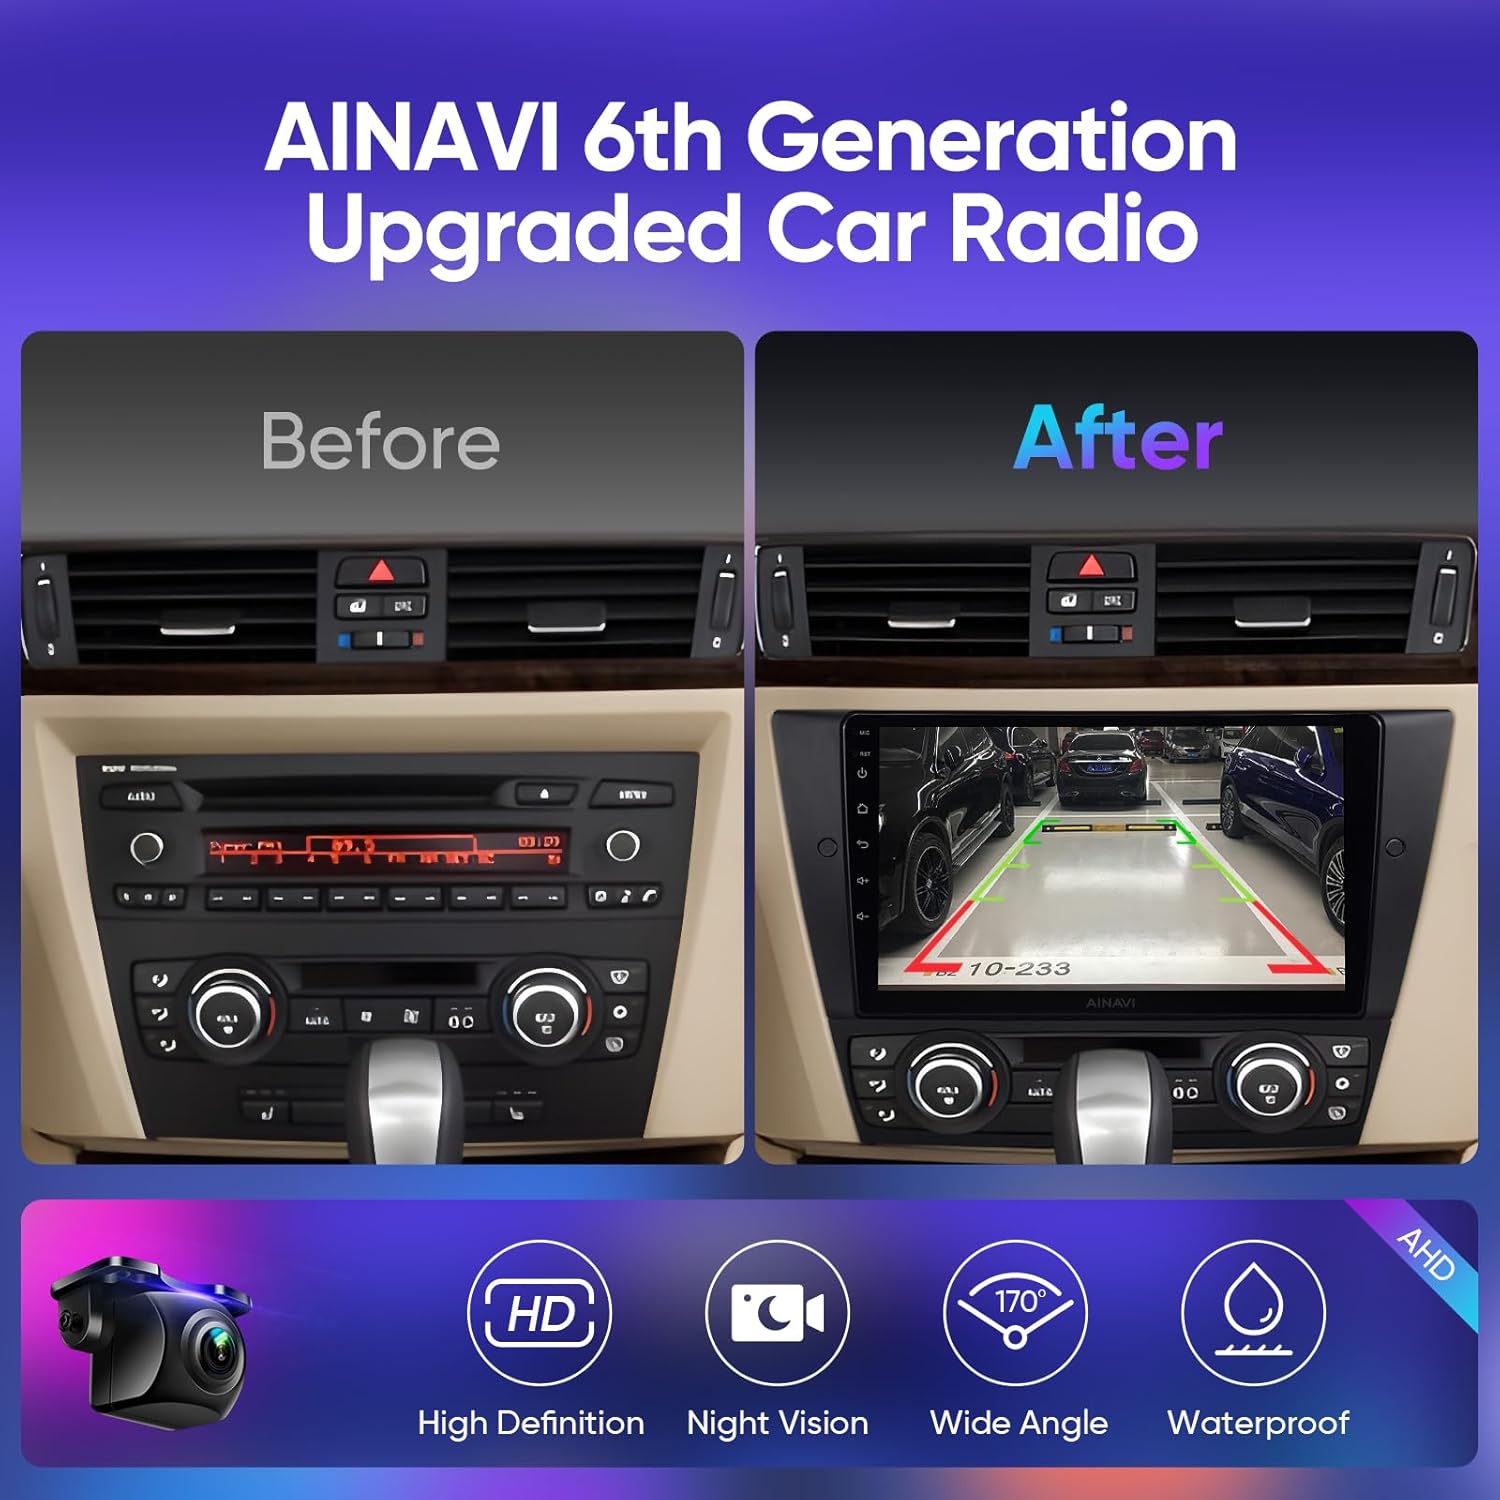
Figure 2: Comparison of the dashboard before and after installing the AINAVI car stereo, highlighting the integrated backup camera display.

Figure 3: Overview of key technical features including Android 12, 8-Core CPU, Dual-band WiFi, QLED display, and Bluetooth 5.0.
3. Setup and Installation
This section provides general guidance for installing your AINAVI Car Audio Equipment. Professional installation is recommended. Ensure your vehicle is compatible with the unit before proceeding.
3.1 Compatibility
This unit is compatible with the following BMW models:
- BMW 3 Series 328i, 335i, 325i (2005-2011)
- BMW E90 Sedan (2005-2012)
- BMW E91 Touring (2005-2012)
- BMW E92 Coupe (2006-2013)
- BMW E93 Convertible (2007-2013)
- BMW (E90/E92/E93) M3 (2007-2012)
If you are unsure about your car's compatibility, please contact AINAVI support before installation.
3.2 What's in the Box
Verify that all components are present before beginning installation:
- Car Stereo Radio Head Unit (1280*720) with Frame for BMW E90 E91 E92 E93 (2005-2011)
- User Manual
- Power Cable
- AHD 1080P Rear View Camera
- Microphone
- Blue Frame Removal Tool
- GPS Antenna
- USB 4Pin Cable
- USB 6Pin Cable
- RCA Cable
- Reversing Control Cable
- Mounting Bracket *1
- Air Conditioning Bracket *2

Figure 4: Contents of the AINAVI Car Stereo package.
3.3 Installation Steps (General)
- Preparation: Disconnect the vehicle's battery to prevent electrical shorts.
- Remove Existing Unit: Carefully remove the original car radio and trim using appropriate tools, such as the included frame removal tool.
- Connect Wiring: Connect the power cable, GPS antenna, USB cables, and any other necessary wiring (e.g., for the rearview camera, RCA output) to the new head unit. Ensure all connections are secure.
- Mounting: Install the new head unit into the dashboard using the provided mounting brackets and frame.
- Rear View Camera Installation: If installing the rearview camera, route the camera cable to the rear of the vehicle and connect it to the reversing control cable.
- Test Functionality: Reconnect the battery and power on the unit to test all functions (radio, navigation, CarPlay/Android Auto, camera, sound).
- Final Assembly: Secure all trim pieces and ensure a neat installation.
For detailed, model-specific installation instructions, please refer to the included user manual or contact AINAVI technical support.
4. Operating Instructions
4.1 Power On/Off
Press and hold the power button on the unit to turn it on or off. A short press typically mutes or unmutes the audio.
4.2 Wireless Apple CarPlay & Android Auto
To connect your smartphone:
- Ensure Bluetooth and Wi-Fi are enabled on your smartphone.
- On the car stereo, navigate to the CarPlay or Android Auto application.
- Follow the on-screen prompts to pair your phone via Bluetooth. Once paired, the system will automatically establish a Wi-Fi connection for CarPlay or Android Auto.
- For wired Android Auto, connect your Android phone via a USB cable.

Figure 5: Apple CarPlay interface shown on the AINAVI stereo, demonstrating seamless smartphone integration.
4.3 GPS Navigation
The unit supports various navigation applications. Ensure a stable 5G WiFi connection for optimal performance.
- Access navigation apps like Google Maps from the main menu.
- Input your destination using the touchscreen or voice commands.
- Utilize 2D or 3D map views and voice guidance for turn-by-turn directions.
4.4 Audio Settings (DSP & EQ)
Customize your audio experience using the built-in DSP and 48-band equalizer:
- Navigate to the "EQ" or "Sound Settings" menu.
- Scene Mode: Select from preset sound profiles such as Normal, Jazz, Heavy Metal, Pop, Classical, Vocal, or Soft.
- Surround Sound: Adjust settings for Full Car Mode, Driver Mode, Co-pilot Mode, or various Passenger Modes. You can also set sound delays and ranges.
- Zone Control: Adjust volume and frequency for individual speakers or zones within the vehicle.
- Sound Adjustments: Fine-tune High Freq, Compression, Voice, and Loudness.
- Bass Filter: Enhance bass levels (0-250) for a more impactful sound.

Figure 6: Detailed view of the DSP and 48-band Equalizer interface.
4.5 Split Screen Function
To use two applications simultaneously:
- Open the first application you wish to use.
- Access the recent apps menu (usually by swiping up from the bottom or pressing a dedicated button).
- Drag the first app to one side of the screen, then select the second app to fill the other side.

Figure 7: Split screen mode displaying a video and navigation simultaneously.
4.6 Rear View Camera
When the vehicle is shifted into reverse, the display will automatically switch to the rearview camera feed, showing a 1080P image with guiding lines.
4.7 Video Output to Headrest Monitors
To connect external headrest monitors:
- Connect the provided USB to RCA output cable to the head unit.
- Connect the RCA cables from the adapter to your headrest monitors.
- Ensure the headrest monitors are powered on and set to the correct input source.

Figure 8: Connecting the car stereo to rear seat headrest monitors for video output.
5. Maintenance
To ensure the longevity and optimal performance of your AINAVI Car Audio Equipment, follow these general maintenance guidelines:
- Cleaning the Screen: Use a soft, lint-free cloth specifically designed for electronics screens. Do not use abrasive cleaners or solvents. Gently wipe the screen to remove dust and fingerprints.
- Software Updates: Periodically check for available software updates from AINAVI to ensure you have the latest features and bug fixes. Follow the instructions provided with the update carefully.
- Environmental Conditions: Avoid exposing the unit to extreme temperatures, direct sunlight for prolonged periods, or excessive moisture.
- Cable Connections: Ensure all cables are securely connected and not pinched or damaged. Loose connections can lead to intermittent issues.
6. Troubleshooting
If you encounter issues with your AINAVI Car Audio Equipment, refer to the following common troubleshooting steps. For persistent problems, contact technical support.
6.1 Common Issues and Solutions
- No Power:
- Check all power cable connections.
- Verify the vehicle's fuse for the stereo system.
- Ensure the car battery is properly connected and charged.
- No Sound:
- Check volume levels on the unit and your smartphone (if connected).
- Verify speaker connections.
- Ensure the correct audio source is selected.
- Check DSP/EQ settings for any configurations that might mute sound.
- CarPlay/Android Auto Not Connecting:
- Ensure Bluetooth and Wi-Fi are enabled on your phone.
- Forget the device from your phone's Bluetooth settings and re-pair.
- Try a different USB cable for wired connections.
- Restart both the car stereo and your smartphone.
- GPS Signal Issues:
- Ensure the GPS antenna is properly installed and has a clear view of the sky.
- Check Wi-Fi connection for map data.
- Rear View Camera Not Displaying:
- Check the camera and reversing control cable connections.
- Ensure the vehicle is properly shifted into reverse.
6.2 Technical Support
For further assistance or complex issues, AINAVI provides professional technical support. You can reach them by following these steps:
- Click "HomeCar" (or similar support link on the product page/website).
- Click "Ask question".
- Provide pictures or videos detailing the technical or installation questions you have.
The support team aims to reply as soon as possible.
7. Specifications
| Feature | Detail |
|---|---|
| Model | BMW E90 Radio Upgrade |
| Display Size | 9 Inches |
| Resolution | 1280 x 720 |
| Operating System | Android 12 (implied from A+ content) |
| Processor | 8-Core CPU |
| RAM | 3GB |
| ROM | 32GB |
| Connectivity | Bluetooth 5.0, USB, Wi-Fi (2.4GHz & 5GHz), Wired, Wireless |
| Special Features | Android Auto, Apple CarPlay, Built-In Bluetooth, Built-In Wi-Fi, Touchscreen, RDS, Panel light, 48-Band EQ, Premium DSP, QLED Display, Split Screen, Equalizer, Voice Control, Volume Control, Hands-Free Calling, FM Tuner, Music Streaming, RCA Output, Screen Mirroring, Subwoofer, Spotify, Rear View Camera Input |
| Map Type | Europe, North America, South America, Worldwide |
| Audio Output Mode | Surround Stereo |
| Item Weight | 4.1 pounds |
| Package Dimensions | 13.99 x 9.69 x 5.28 inches |
8. Warranty and Support
8.1 Warranty Information
The AINAVI Car Audio Equipment comes with a 12-month warranty from the date of purchase. This warranty covers manufacturing defects and malfunctions under normal use. Please retain your proof of purchase for warranty claims.
For warranty service, please contact AINAVI customer support with your product details and a description of the issue.
8.2 Customer Support
AINAVI offers dedicated technical support for installation and operational queries. You can reach our support team by:
- Visiting the AINAVI store page on Amazon and clicking "Ask a question".
- Providing detailed descriptions, pictures, or videos of your issue to help the support team assist you efficiently.
Our professional technical support team is available to assist you with installation and any questions you may have.

Figure 9: AINAVI Customer Support is available to assist you.


