
Introduction
This manual provides detailed instructions for the installation, operation, and maintenance of your Tedeligo Wireless Switch Kit. This kit allows for convenient remote ON/OFF control of electrical devices without the need for complex wiring or wall modifications.
Key Features:
- Easy Installation: No wall destruction or junction box opening required. Receivers connect directly between the power source and the controlled device using terminal blocks, eliminating the need for screwdrivers.
- Long Lifespan & Stable Signal: Switch button lifespan of 100,000 presses. Low power consumption design with 2 included CR2016 batteries providing over 7,000 uses. Control range up to 50 meters indoors and 150 meters outdoors, effective even through walls.
- Programmable Extension: One receiver can be paired with multiple wireless switches, allowing control of the same light from various locations. Utilizing 433.92 MHz wireless radio frequency, one receiver can stably pair with up to 30 switches, or one switch can control up to 30 receivers simultaneously.

Setup Instructions
Follow these steps to correctly install and pair your Tedeligo Wireless Switch Kit.
1. Receiver Wiring
- Safety First: Before beginning any electrical work, ensure the main power supply to the circuit you are working on is turned OFF at the breaker.
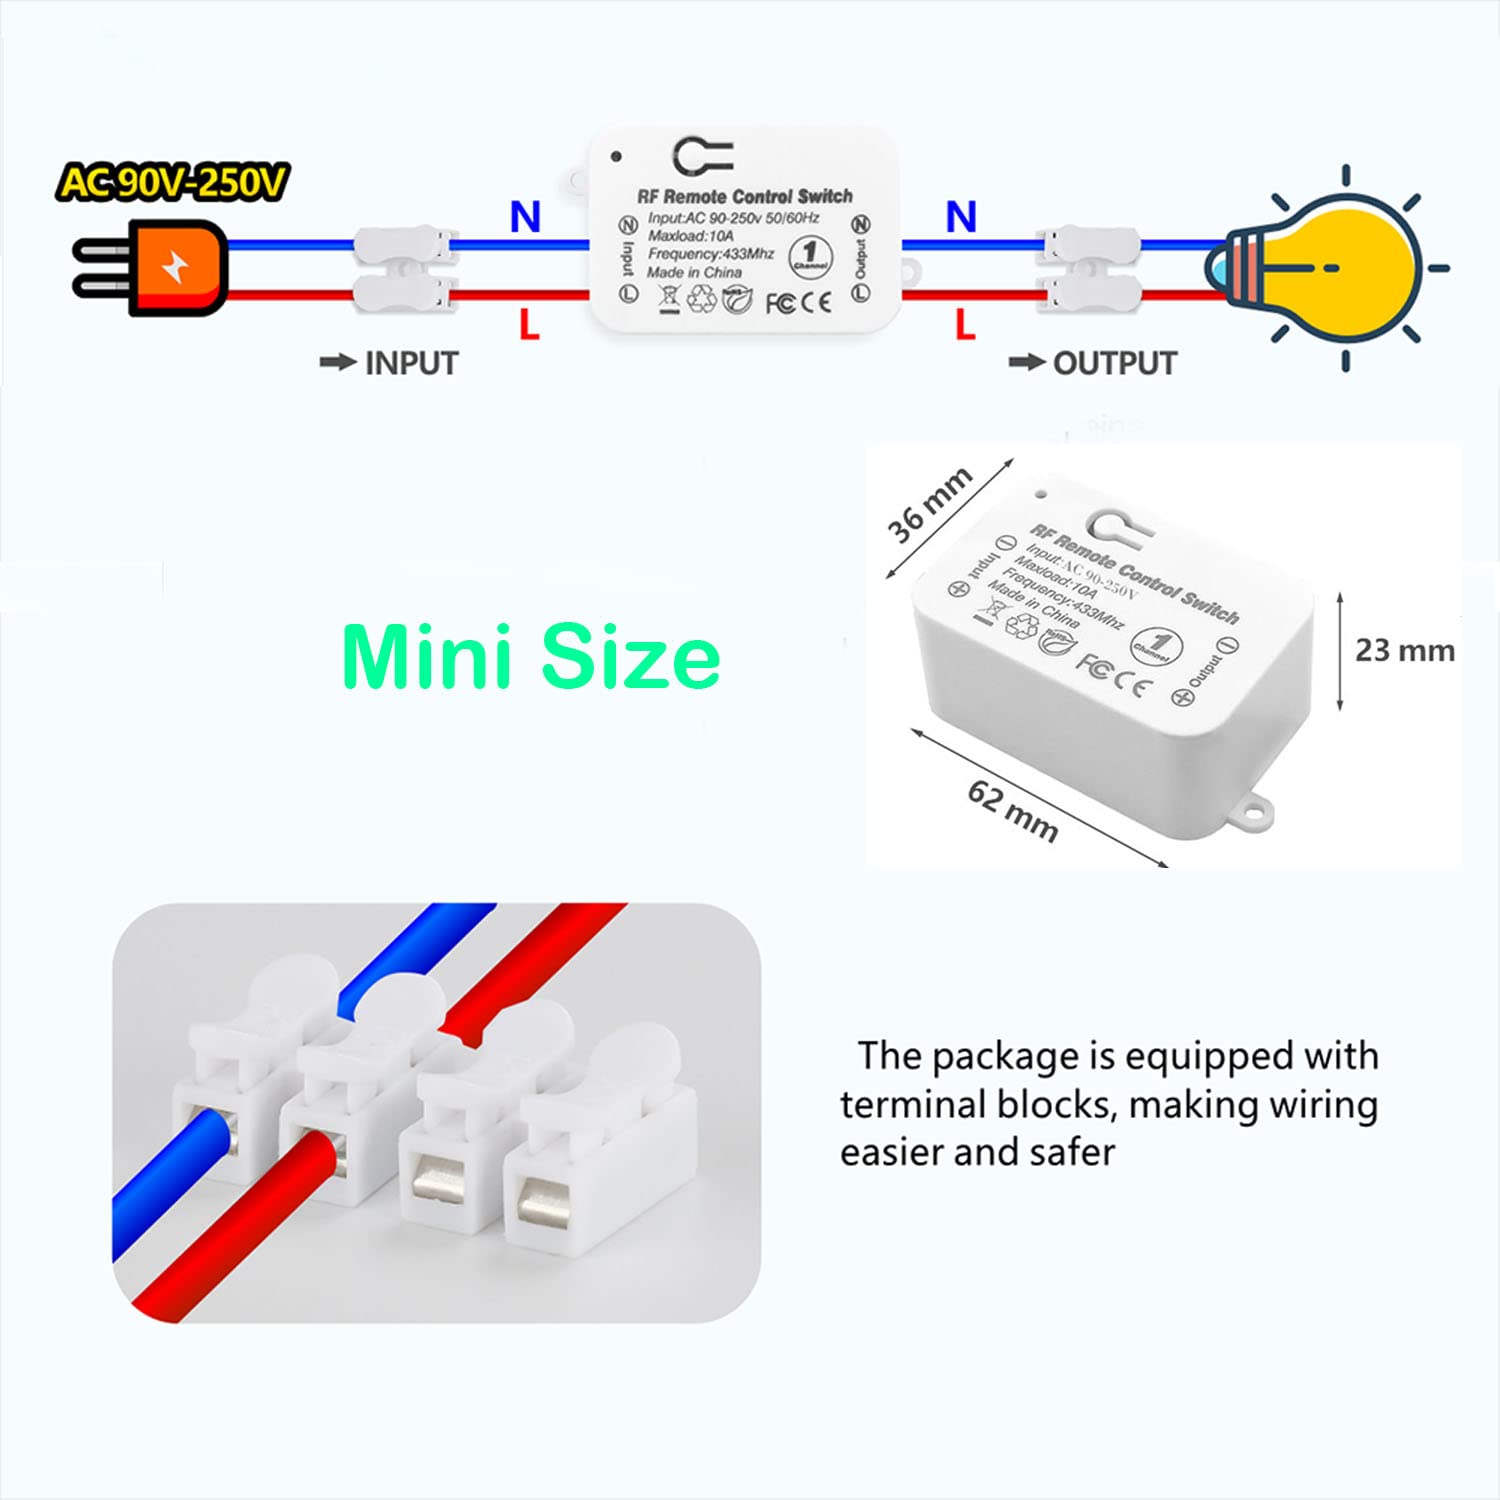
- Identify the input (AC 90-250V) and output (to the light/device) terminals on the receiver.
- Connect the Live (L) and Neutral (N) wires from your power source to the corresponding "INPUT" terminals on the receiver.
- Connect the Live (L) and Neutral (N) wires of your light fixture or appliance to the corresponding "OUTPUT" terminals on the receiver.
- The receiver is equipped with terminal blocks for secure and tool-free wiring. Simply press the lever, insert the wire, and release.
2. Pairing the Switch with the Receiver
- After wiring the receiver, turn the main power supply back ON.
- Press and hold the pairing button on the receiver (usually a small button, refer to the receiver itself for exact location) until the indicator light starts flashing.
- Within 5 seconds of the indicator light flashing, press any button on your wireless switch (e.g., "ON A").
- The receiver's indicator light will stop flashing, indicating successful pairing.
- Repeat this process for each switch button you wish to pair with the receiver. A single receiver can be paired with up to 30 switches.
3. Mounting the Wireless Switch
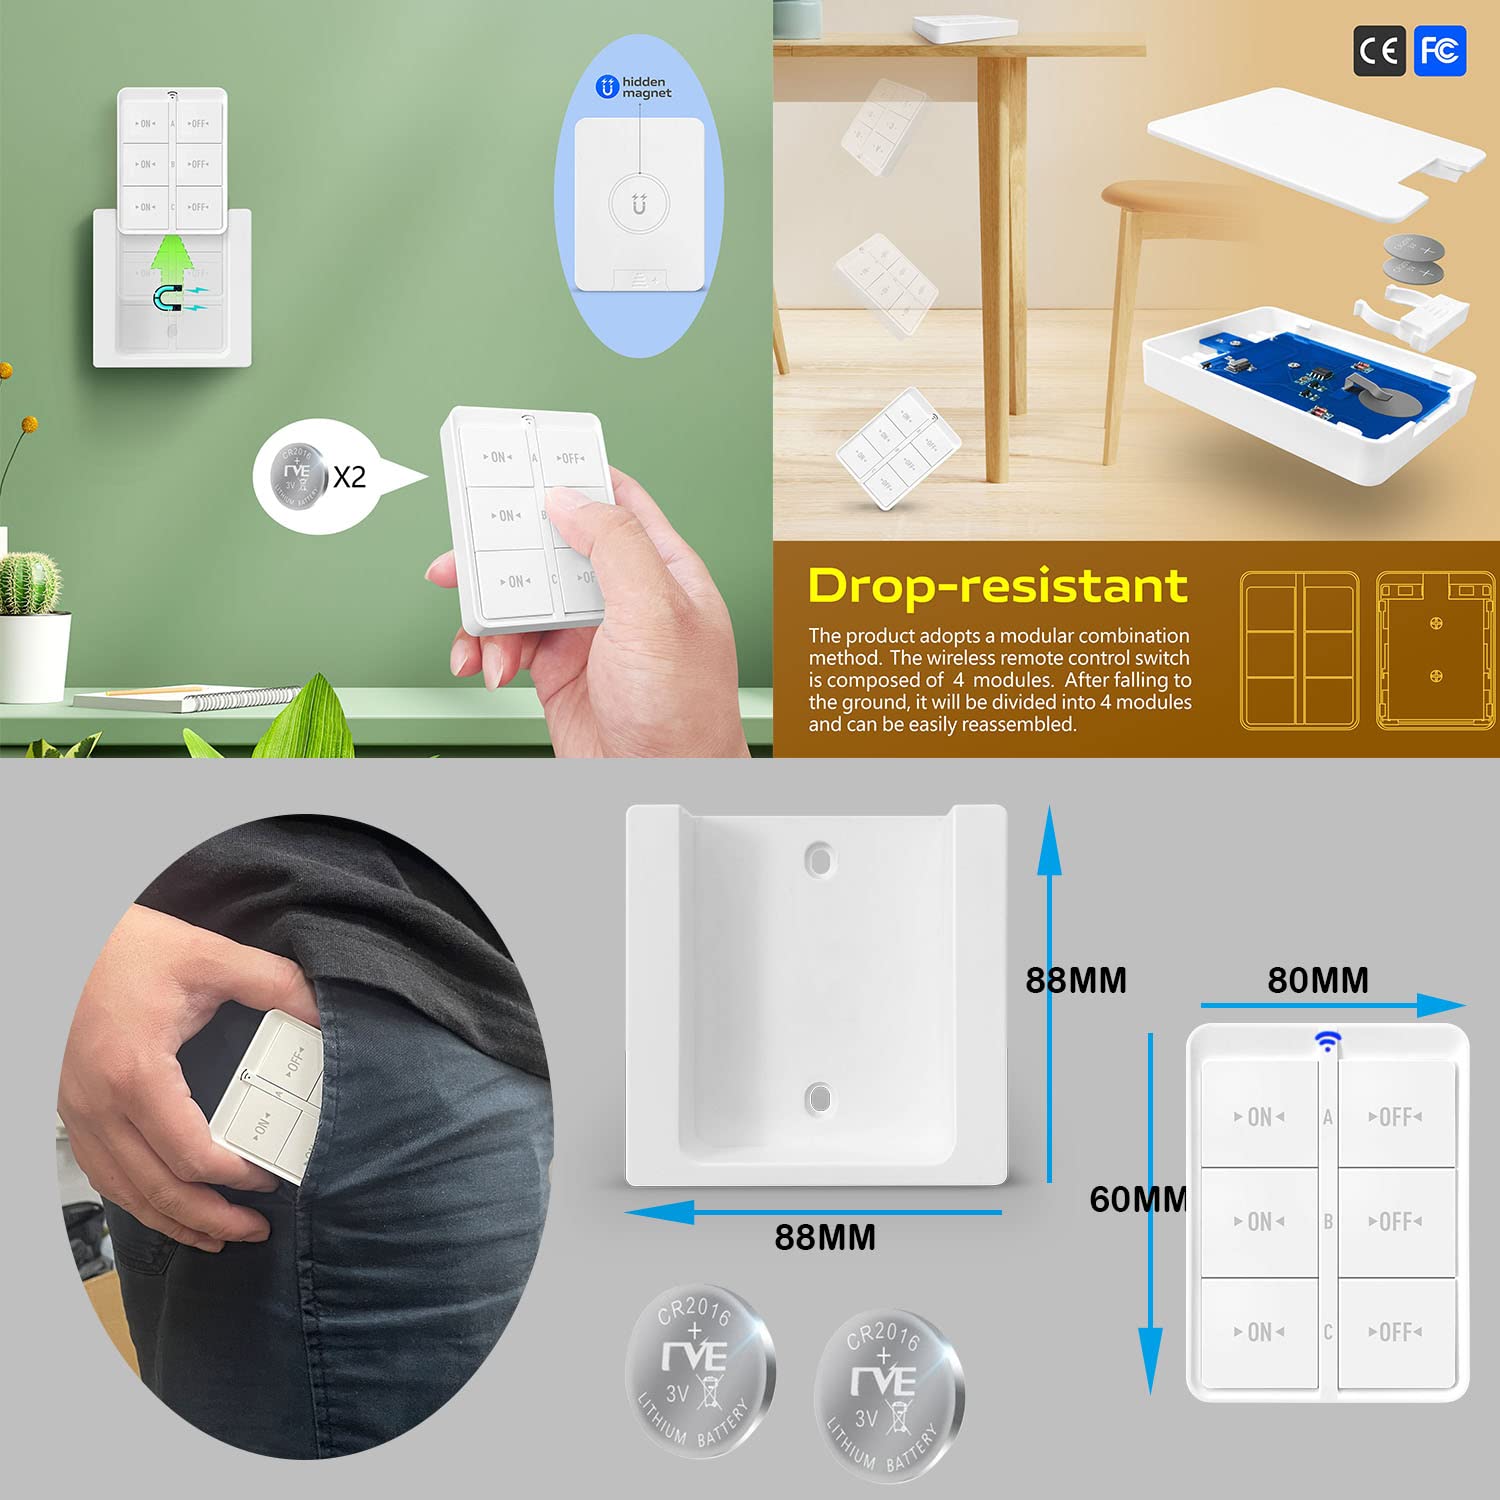
The wireless switch can be mounted on any flat surface using adhesive or screws. It features a hidden magnet for convenient placement on metallic surfaces.
Operating Instructions
Once installed and paired, operating the Tedeligo Wireless Switch Kit is straightforward.
- Basic ON/OFF: Press the "ON" button on the wireless switch to turn on the connected device. Press the "OFF" button to turn it off.
- Multiple Control Points: If you have paired multiple switches to a single receiver, any of the paired switches can control the connected device. This is ideal for creating 2-way or multi-way switching.
- Controlling Multiple Devices: If you have paired a single switch to multiple receivers, pressing the switch button will control all paired devices simultaneously.


Maintenance
Battery Replacement
The wireless switch is powered by two CR2016 lithium-ion batteries. These batteries are designed for long-term use (over 7,000 operations). If the switch becomes unresponsive or its range decreases significantly, it may be time to replace the batteries.
- Carefully pry open the back cover of the wireless switch. The switch has a drop-resistant modular design, allowing for easy disassembly and reassembly.
- Remove the old CR2016 batteries.
- Insert two new CR2016 batteries, ensuring correct polarity (+/-).
- Snap the back cover firmly back into place.
Cleaning
Wipe the surface of the switch and receiver with a soft, dry cloth. Do not use abrasive cleaners or solvents, as these may damage the finish or internal components.
Troubleshooting
- Device does not respond to switch:
- Ensure the receiver is correctly wired and receiving power.
- Verify that the switch and receiver are properly paired. If not, repeat the pairing process.
- Check the batteries in the wireless switch and replace them if necessary.
- Ensure the switch is within the effective operating range (50m indoor, 150m outdoor).
- Reduced control range:
- Replace the batteries in the wireless switch.
- Ensure there are no major metallic obstructions or strong electromagnetic interference between the switch and the receiver.
- Receiver indicator light not flashing during pairing:
- Confirm the receiver is powered on.
- Press and hold the pairing button firmly for the required duration.
Specifications
| Brand | Tedeligo |
| Model | 1 Switch 2 Receivers |
| Operating Voltage (Receiver) | AC 90-250V |
| Max Load (Receiver) | 10A / 2500 Watts |
| Wireless Frequency | 433 MHz / 433.92 MHz |
| Control Range | Up to 50m (Indoor), Up to 150m (Outdoor) |
| Switch Battery Type | 2 x CR2016 Lithium-ion (included) |
| Switch Button Lifespan | 100,000 presses |
| Receiver Dimensions (approx.) | 62 x 36 x 23 mm |
| Switch Dimensions (approx.) | 88 x 88 x 15 mm |
| Operating Mode | ON-OFF |
| Switch Type | Push-button |
Warranty Information
Specific warranty details for the Tedeligo Wireless Switch Kit are not provided in the product information. Please refer to the retailer or manufacturer's official website for warranty terms and conditions.
Customer Support
For technical assistance, troubleshooting, or further inquiries regarding your Tedeligo Wireless Switch Kit, please contact your point of purchase or visit the official Tedeligo website for support resources.