1. Introduction
This manual provides essential information for the safe and effective use of your NIYAMA PN-972H remote control, specifically designed for Panasonic VIERA LCD televisions. This remote is pre-configured and ready for immediate use upon battery installation, requiring no complex setup procedures.

Image: The NIYAMA PN-972H remote control, highlighting its immediate usability for Panasonic VIERA TVs.
2. Compatibility and Important Notes
The NIYAMA PN-972H remote control is designed for use with Panasonic VIERA LCD TVs. Please note the following compatibility restrictions:
- This remote is not compatible with Panasonic Private VIERA series.
- This remote is not compatible with Panasonic Plasma TVs.
- This remote is not compatible with portable TV series.
- This remote is not compatible with DVD/BD players or DIGA recorders.

Image: Visual representation of the remote's incompatibility with Private VIERA, Plasma, and portable TV models.
3. Setup: Battery Installation
Your NIYAMA PN-972H remote control is pre-configured for Panasonic VIERA LCD TVs and requires no additional setup beyond battery installation.
- Locate the battery compartment cover on the back of the remote control.
- Slide the cover downwards to open the compartment.
- Insert two AAA batteries (not included) according to the polarity indicators (+ and -) inside the compartment.
- Slide the battery compartment cover back into place until it clicks securely.
Important Battery Information:
- Do not mix new and used batteries.
- Always use batteries of the same type and brand.
- Ensure batteries are within their recommended use period.
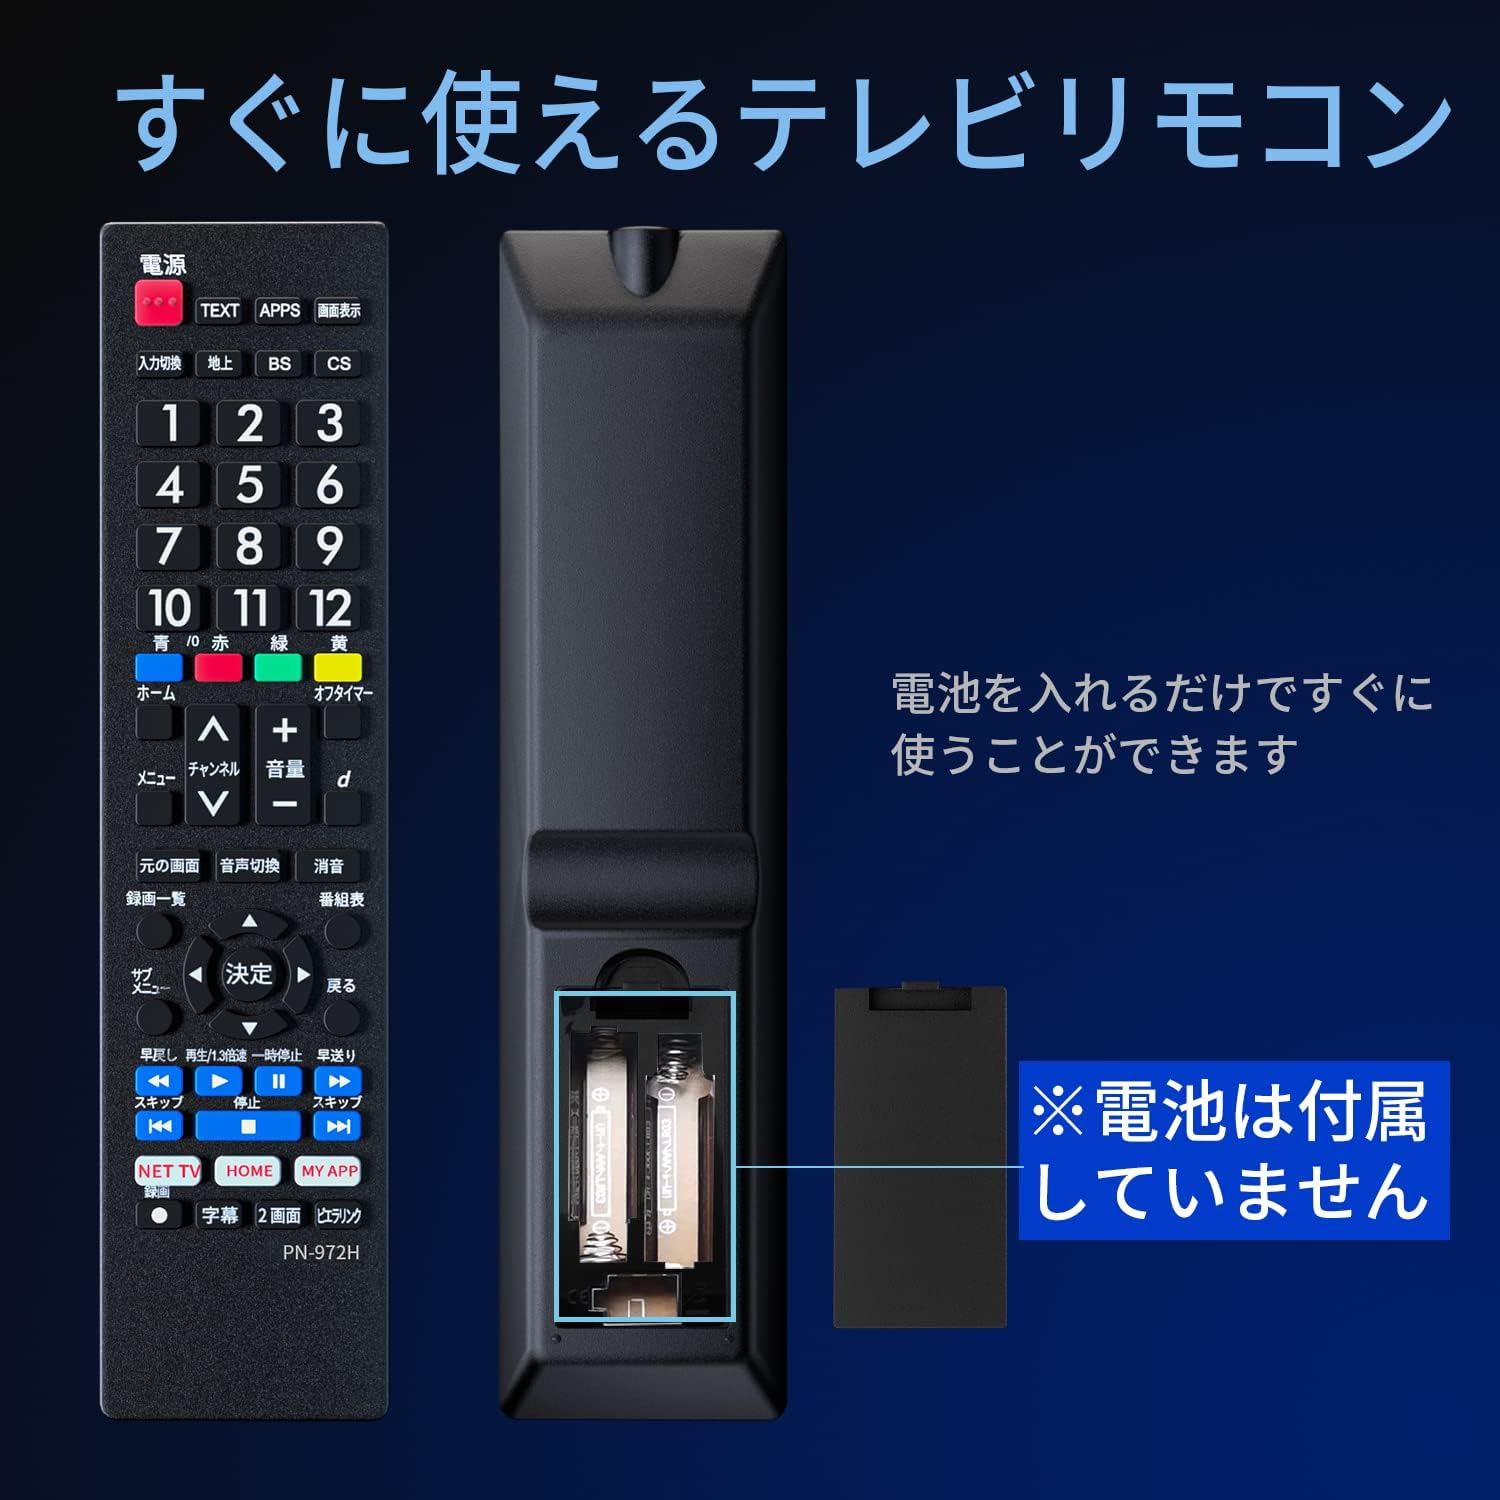
Image: Detailed view of the battery compartment and proper battery insertion.
4. Operating Instructions
The NIYAMA PN-972H remote control features an intuitive layout that mimics original Panasonic remote controls, ensuring a familiar and comfortable user experience.
4.1. Button Functions

Image: Annotated diagram of the remote control, illustrating the layout and function groups.
- Power Button: Turns the TV on or off.
- Input Switch: Cycles through available input sources (HDMI, AV, etc.).
- Number Buttons (0-12): Directly select TV channels.
- Color Buttons (Red, Green, Yellow, Blue): Used for specific functions within TV menus or interactive services.
- Channel Up/Down: Changes TV channels sequentially.
- Volume Up/Down: Adjusts the TV volume.
- Menu Button: Accesses the TV's main menu.
- Directional Pad (Up, Down, Left, Right) & OK/Enter Button: Navigates through menus and confirms selections.
- Return/Back Button: Returns to the previous screen or menu.
- Playback Controls (Play, Pause, Stop, Fast Forward, Rewind, Skip): Controls media playback if supported by the TV.
- NET TV / HOME / MY APP Buttons: Provides quick access to smart TV features or applications, depending on your TV model.
4.2. Ergonomic Design
The remote control is designed for comfortable handling, with grooves on the back and sides to enhance grip. Its size is optimized for stable operation, whether held, pinched, or used while resting on a surface.

Image: Illustrations of the remote's ergonomic design for various holding styles.
4.3. Infrared Transmission
The remote utilizes wide-angle infrared transmission for stable and reliable communication with your TV. It has an operational distance of 8-10 meters and a wide transmission angle of 120 degrees.

Image: Depiction of the remote's wide-angle infrared signal transmission.
5. Maintenance
To ensure the longevity and optimal performance of your remote control, follow these maintenance guidelines:
- Cleaning: Wipe the remote with a soft, dry cloth. Do not use liquid cleaners, aerosols, or abrasive materials, as these can damage the surface or internal components.
- Battery Replacement: Replace batteries when the remote's response becomes sluggish or stops working. Always replace both batteries simultaneously with new ones of the same type (AAA).
- Storage: If the remote will not be used for an extended period, remove the batteries to prevent leakage and potential damage. Store in a cool, dry place away from direct sunlight and extreme temperatures.
- Avoid Drops: Protect the remote from physical impact. Dropping it can damage internal circuits or buttons.
6. Troubleshooting
If you encounter issues with your remote control, please refer to the following common troubleshooting steps:
| Problem | Possible Cause | Solution |
|---|---|---|
| Remote is not working. |
|
|
| Buttons are unresponsive or sticky. |
|
|
| Remote works intermittently. |
|
|
If these steps do not resolve the issue, please contact NIYAMA customer support for further assistance.
7. Specifications
| Feature | Detail |
|---|---|
| Brand | NIYAMA |
| Model Number | PN-972H |
| Compatible Devices | Panasonic VIERA LCD TVs |
| Connectivity Technology | Infrared (IR) |
| Color | Black |
| Special Feature | Pre-configured (No setup required) |
| Power Source | 2 x AAA Batteries (not included) |
| Operating Distance | 8-10 meters |
| Transmission Angle | 120 degrees |
| Dimensions (L x W x H) | 21.5 x 5.8 x 2.2 cm |
| Weight | 80 g |
8. Warranty and Support
NIYAMA is committed to providing high-quality products made with environmentally friendly materials. We strive for complete customer satisfaction.
In the unlikely event of any product defect or issue, please do not hesitate to contact NIYAMA customer support. We offer a new product exchange for defective items.
When contacting customer support, please have your product details and order number ready to ensure a smooth and efficient process.
NIYAMA products are sold exclusively through authorized NIYAMA sales channels.

Image: NIYAMA brand logo, representing quality and support.


