Important Safety Instructions
Read all instructions thoroughly before operating this appliance. Failure to follow these instructions may result in electric shock, fire, or serious injury. Keep this manual for future reference.
- This appliance is intended for household use only. Do not use outdoors or on wet surfaces.
- Do not allow children to operate the vacuum. Close supervision is necessary when used near children.
- Use only as described in this manual. Use only manufacturer's recommended attachments.
- Do not handle the plug or appliance with wet hands.
- Keep hair, loose clothing, fingers, and all body parts away from openings and moving parts.
- Do not pick up large objects, hard or sharp objects, or anything that is burning or smoking.
- Do not use without the dust cup and filters properly installed.
- Store the appliance indoors in a cool, dry place.
Product Overview
The Shark UR2500SR AI Ultra Robot Vacuum is designed for automated home cleaning, featuring advanced AI Laser Navigation, a self-empty base, and convenient app control.
Components:
- Shark AI Ultra Robot Vacuum
- Self-Empty Base
- Side Brushes (2)
- Filter (pre-installed in robot and base)
- Power Cord

This image displays the Shark UR2500SR AI Ultra Robot Vacuum, its self-empty base, and a smartphone showing the SharkClean app, illustrating the complete product system.

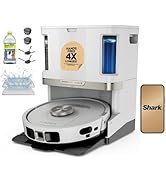
This diagram illustrates the contents of the product package, including the robot vacuum unit, the self-empty base, and two side brushes.
Setup
1. Unpacking and Placement
- Remove all packaging materials from the robot and the charging base.
- Place the self-empty base on a level surface against a wall, ensuring at least 3 feet (0.9 meters) of clear space on either side and 5 feet (1.5 meters) in front.
- Plug the power cord into the base and then into a wall outlet.

This image demonstrates the robot vacuum docked at its self-empty base, positioned against a wall in a living area, ready for operation.
2. Initial Charge
Place the robot onto the charging base. Ensure the charging contacts on the robot align with those on the base. The robot will begin charging. Allow for a full charge before first use (approximately 6 hours).
3. Install Side Brushes
Snap the two side brushes onto the square pegs located on the bottom of the robot.
4. Download the SharkClean App
Download the SharkClean app from your device's app store. Follow the in-app instructions to connect your robot to your home Wi-Fi network and complete the initial mapping process.

This image shows the SharkClean app on a smartphone, illustrating its mapping capabilities and how users can define cleaning areas within their home.
Operating the Robot Vacuum
1. First Run - Home Mapping
For the first cleaning cycle, allow the robot to complete a full mapping run of your home. This process helps the robot learn your floor plan for efficient future cleaning. Remove any obstacles that might impede its path during this initial run.

This image depicts the robot vacuum actively mapping a room, using its AI Laser Navigation to understand the layout and identify objects.
2. Cleaning Modes
- Standard Clean: The robot cleans your entire home or selected rooms based on your settings.
- UltraClean Mode: Activated via the SharkClean app, this mode performs two passes (back and forth, then side to side) for a deeper clean.
- Spot Clean: Direct the robot to clean a specific small area for targeted cleaning.
3. Using the SharkClean App
The SharkClean app provides comprehensive control over your robot vacuum. Through the app, you can:
- Schedule cleaning times.
- Select specific rooms or areas to clean.
- Set No-Go Zones to restrict access to certain areas.
- View cleaning history and detailed maps of your home.
- Activate UltraClean mode for enhanced cleaning.
4. Voice Control
The robot is compatible with Amazon Alexa and Google Assistant. Link your SharkClean account to your preferred voice assistant app to use voice commands for starting, stopping, or scheduling cleaning cycles.
Maintenance
Regular maintenance is crucial for ensuring the optimal performance and longevity of your robot vacuum.
1. Emptying the Dust Bin (Robot)
While the self-empty base handles most debris, it is advisable to occasionally check the robot's internal dust bin.
- Press the dust bin release button on the robot.
- Pull out the dust bin from the robot.
- Open the dust bin and empty its contents into a trash receptacle.
- Reinsert the dust bin into the robot until it clicks securely into place.
2. Cleaning the Self-Empty Base
The self-empty base features a bagless design. The collection bin should be emptied as needed, typically every 30 days, depending on usage and the volume of debris collected.
- Lift the lid of the self-empty base.
- Remove the internal dust bin from the base.
- Empty the contents of the bin.
- Wipe the interior of the base and the bin with a dry cloth.
- Reinsert the bin and securely close the lid.
This image visually explains how the robot vacuum automatically empties collected debris into its self-empty base.
3. Cleaning Filters
Both the robot and the self-empty base contain filters that require regular cleaning to maintain suction power.
- Robot Filter: Remove the filter from the robot's dust bin. Tap it gently over a trash can to remove loose debris. If necessary, rinse it with water and allow it to air dry completely for at least 24 hours before reinserting.
- Base Filter: Locate the filter in the self-empty base. Clean by tapping or rinsing as needed. Ensure it is completely dry before reinstallation.
4. Cleaning the Brushroll
Periodically check the brushroll for tangled hair, string, or other debris that may reduce cleaning effectiveness.
- Turn the robot over.
- Remove the brushroll guard.
- Lift out the brushroll.
- Use scissors or a cleaning tool to carefully cut away any hair or string wrapped around it.
- Reinsert the brushroll and secure the guard.
5. Cleaning Side Brushes and Sensors
Wipe the side brushes and all sensors (including cliff sensors and bumper sensors) with a clean, dry cloth to remove dust and debris. This ensures accurate navigation and prevents falls.
Troubleshooting
| Problem | Possible Cause | Solution |
|---|---|---|
| Robot not charging | Charging contacts are dirty or misaligned. Power cord not plugged in. | Clean charging contacts on both the robot and the base. Ensure the power cord is securely plugged into the base and a functional wall outlet. |
| Robot gets stuck frequently | Obstacles in cleaning path. Robot is navigating tight spaces. | Clear clutter from the floor. Use No-Go Zones in the app to restrict access to problem areas. |
| Poor cleaning performance | Dust bin full. Filters clogged. Brushroll tangled. | Empty the robot's dust bin. Clean or replace filters as needed. Remove any debris from the brushroll. |
| Robot cannot connect to Wi-Fi | Incorrect Wi-Fi password. Router issues. Robot too far from router. | Verify the Wi-Fi password. Reboot your router. Move the robot closer to the router during setup. Ensure you are connecting to a 2.4GHz network. |
| Self-empty base not emptying | Base dust bin full. Debris blockage in the base or robot's emptying port. | Empty the base's dust bin. Check for and clear any blockages in the debris transfer path between the robot and the base. |
Specifications
- Model: UR2500SR
- Brand: Shark
- Dimensions (Robot): 13.7"L x 13.7"W x 4.1"H
- Weight: 14.42 pounds (total product)
- Battery Type: Lithium Ion
- Battery Life: Up to 120 minutes
- Dust Bin Capacity (Base): Up to 30 days of debris
- Navigation: AI Laser Navigation
- Connectivity: Wi-Fi, Compatible with Amazon Alexa, Google Assistant
- Filter Type: Cartridge
Warranty and Support
For detailed warranty information and customer support, please refer to the official Shark website or contact their customer service directly. It is recommended to keep your purchase receipt as proof of purchase.
Online resources and frequently asked questions (FAQs) are available at www.sharkclean.com.