1. Introduction
Thank you for choosing the RYOBI P321 18-Gauge Cordless Brad Nailer. This tool is designed for precision fastening applications, utilizing AirStrike Technology to deliver consistent performance without the need for compressors or air hoses. This manual provides essential information for the safe and effective operation, maintenance, and troubleshooting of your brad nailer.
Note: Battery and charger are sold separately.

This image clarifies that the RYOBI P321 Brad Nailer is sold as a tool-only unit; the battery and charger must be purchased separately.
2. General Safety Information
Always read and understand all safety warnings, instructions, illustrations, and specifications provided with this power tool. Failure to follow all instructions listed below may result in electric shock, fire, and/or serious injury.
- Wear Eye Protection: Always wear appropriate eye protection that complies with ANSI Z87.1.
- Wear Hearing Protection: Prolonged exposure to noise from power tools can cause hearing damage.
- Keep Work Area Clear: Ensure your work area is well-lit and free from clutter to prevent accidents.
- Secure Workpiece: Always secure the material you are working on to prevent movement during nailing.
- Disconnect Power: Always remove the battery pack before making adjustments, changing accessories, or storing the tool.
- Avoid Accidental Firing: Keep fingers away from the trigger when not actively nailing.
- Inspect Tool: Before each use, inspect the tool for any damaged parts or loose fasteners. Do not use if damaged.
3. Components and Features
Familiarize yourself with the various parts of your RYOBI P321 Brad Nailer for safe and efficient operation.

This image displays the front-side view of the RYOBI P321 Brad Nailer, highlighting its compact design and AirStrike Technology branding.
- AirStrike Technology: Eliminates the need for noisy compressors, bulky hoses, or expensive gas cartridges, providing cordless convenience.
- 18GA (1.2 mm) Brad Capacity: Designed for 18-gauge brad nails ranging from 15-50 mm (0.59 - 1.97 inches) in length.
- Tool-Free Depth of Drive Adjustment: Allows for precise setting of nail heads without additional tools, protecting the work surface.
- Tool-Free Jam Release: Provides easy access to clear jammed nails quickly and efficiently.
- LED Light: Illuminates the work area for improved visibility.
- Belt Hook: Can be mounted on either the right or left side of the tool for user convenience.
- Non-Marring Pads: Two pads are included to prevent marks on delicate work surfaces.
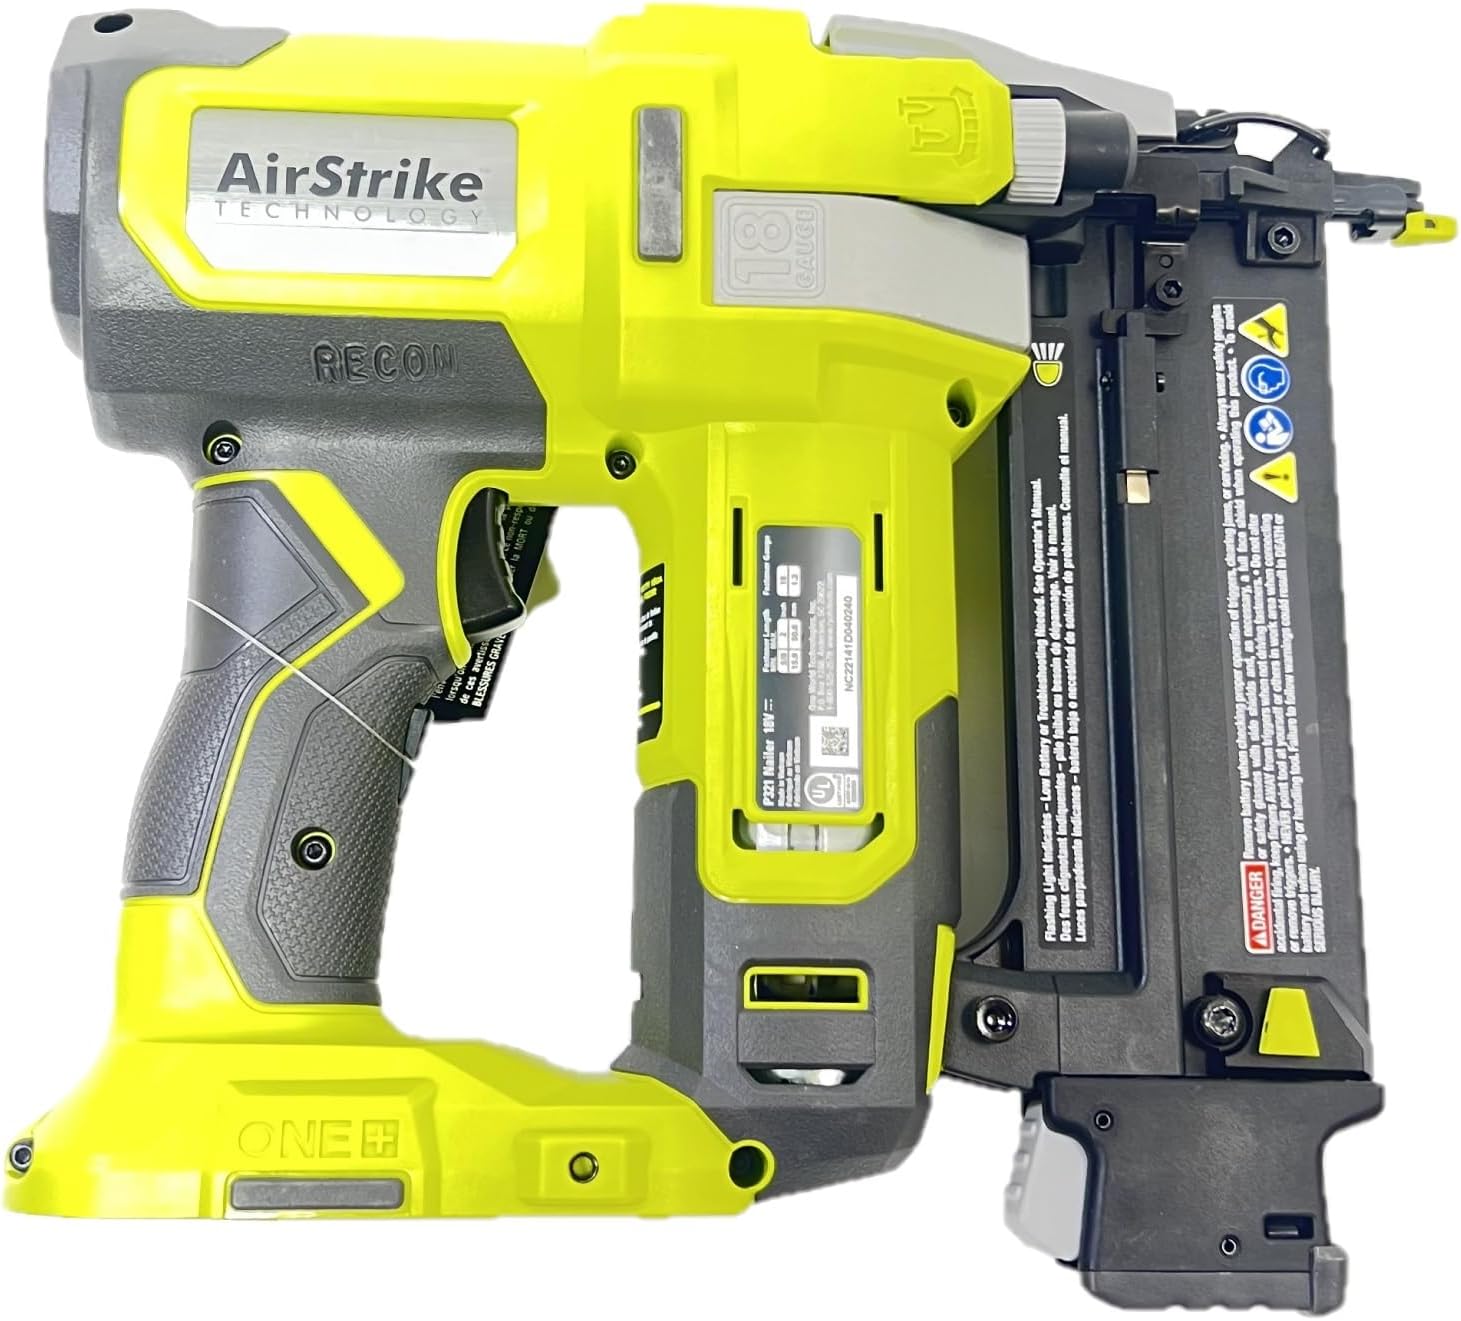
This image shows a side view of the nailer, including the product label with model information and safety warnings.
4. Setup
4.1 Battery Installation
- Ensure the battery pack is fully charged.
- Align the ribs on the battery pack with the grooves in the tool's battery port.
- Slide the battery pack into the tool until it latches securely in place.
- To remove, press the latch button and pull the battery pack out.

This image illustrates the side of the nailer where the battery pack is inserted, showing the battery port.
4.2 Loading Brad Nails
- Ensure the battery pack is removed from the tool.
- Pull the magazine follower back until it locks into place.
- Insert a strip of 18-gauge brad nails (15-50 mm length) into the magazine slot, ensuring the nail points are facing down. The magazine capacity is 105 nails.
- Release the magazine follower, allowing it to push the nails forward.
4.3 Adjusting Depth of Drive
The tool features a tool-free depth of drive adjustment. Rotate the depth adjustment dial located near the nose of the tool to set the desired nail depth. Test on a scrap piece of material to ensure proper setting of nail heads.
4.4 Attaching the Belt Hook
The belt hook can be attached to either side of the tool. Use a screwdriver to secure the belt hook to the desired location on the tool's housing.
5. Operating Instructions
5.1 Powering On/Off
The tool is powered on when a charged battery is inserted. There is no separate power switch. The tool will enter a standby mode after a period of inactivity to conserve battery life.
5.2 Nailing Procedure
- Ensure the battery is installed and nails are loaded.
- Place the nose of the nailer firmly against the workpiece where the nail is to be driven.
- Press the trigger to fire a nail. The LED light will illuminate the work area during operation.
- Maintain firm pressure on the tool against the workpiece until the nail is fully driven. Releasing pressure too early may result in incomplete nail drive or tool lock.
- The tool will lock once the magazine is empty, preventing dry firing.

This image provides a top-down view of the RYOBI P321 Brad Nailer, showing the magazine and depth adjustment dial.
5.3 Clearing Jams
If a nail jam occurs, the tool will stop firing. Follow these steps to clear the jam:
- Remove the battery pack from the tool.
- Locate the tool-free jam release lever near the nose of the tool.
- Open the jam release mechanism.
- Carefully remove any jammed nails or debris using pliers if necessary.
- Close the jam release mechanism securely.
- Reinsert the battery pack and resume operation.
6. Maintenance
Regular maintenance ensures the longevity and optimal performance of your RYOBI P321 Brad Nailer.
- Cleaning: Keep the tool's air vents clear and free of debris. Use a clean, dry cloth to wipe down the exterior. Do not use solvents or harsh chemicals.
- Inspection: Periodically check for loose screws, misaligned or binding moving parts, broken parts, or any other condition that may affect its safe operation.
- Storage: Store the tool in a dry, secure place out of reach of children. Remove the battery pack before storage.
7. Troubleshooting
| Problem | Possible Cause | Solution |
|---|---|---|
| Nailer does not fire. | Battery not installed or discharged. Magazine is empty. Nose not pressed firmly against workpiece. | Install a charged battery. Load brad nails into the magazine. Ensure the nose is fully depressed against the surface. |
| Nails are jamming frequently. | Incorrect nail size/type. Damaged nails. Tool not held firmly. | Use only 18-gauge brad nails (1.2 mm) between 15-50 mm. Replace with new, undamaged nails. Apply firm, consistent pressure to the tool. |
| Nails are not driven flush. | Depth of drive setting is too shallow. Battery charge is low. | Adjust the depth of drive dial to a deeper setting. Recharge or replace the battery pack. |
8. Specifications
| Feature | Specification |
|---|---|
| Model Number | P321 |
| Voltage | 18 Volts |
| Nail Gauge | 18 GA (1.2 mm) |
| Nail Length Capacity | 15-50 mm (0.59 - 1.97 inches) |
| Magazine Capacity | 105 nails |
| Power Source | Battery Powered |
| Item Weight | 5.95 pounds (2.7 kg) |
| Product Dimensions | 10.87 x 3.62 x 9.61 inches (27.6 x 9.2 x 24.4 cm) |
| Material | ABS Plastic |
| Sound Power Level (Lwa) | 85.5 dB(A) |
| Sound Pressure Level (Lpa) | 96.5 dB(A) |
| Vibration Level (Nailing) | 2.7 m/s² |
9. Warranty and Support
For detailed warranty information, product registration, or technical support, please refer to the documentation included with your purchase or visit the official RYOBI website. Contact information for customer service can typically be found on the product packaging or the manufacturer's website.