
JJC LED-ARM2-HF

JJC Macro Arm Light
Instruction Manual
Model: LED-ARM2-HF
1. Introduction
The JJC Macro Arm Light is a professional LED lighting solution designed specifically for macro photography. It features two independently adjustable LED lights to provide precise illumination for close-up subjects, ensuring optimal lighting conditions for detailed shots.

Image: The JJC Macro Arm Light attached to a camera, illuminating a small subject for macro photography.
Key Features:
- Professional LED Macro Light: Utilizes heat-free technology with two specially designed LED lights for macro photography.
- Flexible Lighting Angle: Two flexible arms, made of metal and soft silicone, allow for adjustable light direction. Maximum arm length is 29 cm (11.4 inches).
- Built-in Rechargeable Battery: Integrated 600 mAh lithium battery, rechargeable via the included 1.5m Type-C cable.
- 10 Adjustable Brightness Levels: Each LED light can operate independently or together, offering 10 lighting options. An integrated display screen indicates the lighting mode.
- Optimal Color Temperature: 5600K color temperature with a luminance of 24000 lux (at 8 cm), suitable for various macro subjects like insects, plants, and jewelry.
- Wide Compatibility: Features a cold shoe adapter with a 1/4-inch threaded hole, making it compatible with DSLR cameras, camcorders, tripods, and light stands.
2. Package Contents
Please check the package carefully to ensure all items are present and in good condition.
- JJC Macro Arm Light (Model: LED-ARM2-HF)
- Type-C Charging Cable (1.5m)
- Instruction Manual

Image: An illustration showing the JJC Macro Arm Light and its included Type-C charging cable.
3. Setup
3.1 Attaching the Macro Arm Light
The Macro Arm Light can be easily attached to your camera's hot shoe/cold shoe mount or any device with a 1/4-inch screw thread.
- Locate the cold shoe adapter on the bottom of the Macro Arm Light's main unit.
- Slide the cold shoe adapter into your camera's hot shoe or a compatible cold shoe mount until it clicks into place.
- Tighten the locking wheel on the cold shoe adapter to secure the light firmly.
- Alternatively, for tripod or light stand mounting, use the 1/4-inch threaded hole on the cold shoe adapter to screw it onto a compatible mount.

Image: Close-up view of the cold shoe mount design, illustrating how it attaches and detaches.
3.2 Charging the Battery
The Macro Arm Light has a built-in rechargeable lithium battery. Before first use, fully charge the device.
- Connect the provided Type-C charging cable to the Type-C port on the Macro Arm Light's main unit.
- Connect the other end of the cable to a 5V-1A USB power source (e.g., a USB wall adapter, computer USB port, or power bank).
- The charging indicator on the display screen will show the charging status. A full charge typically takes around 2 hours.
- Once fully charged, disconnect the charging cable. The light can be used while charging if connected to a power source.
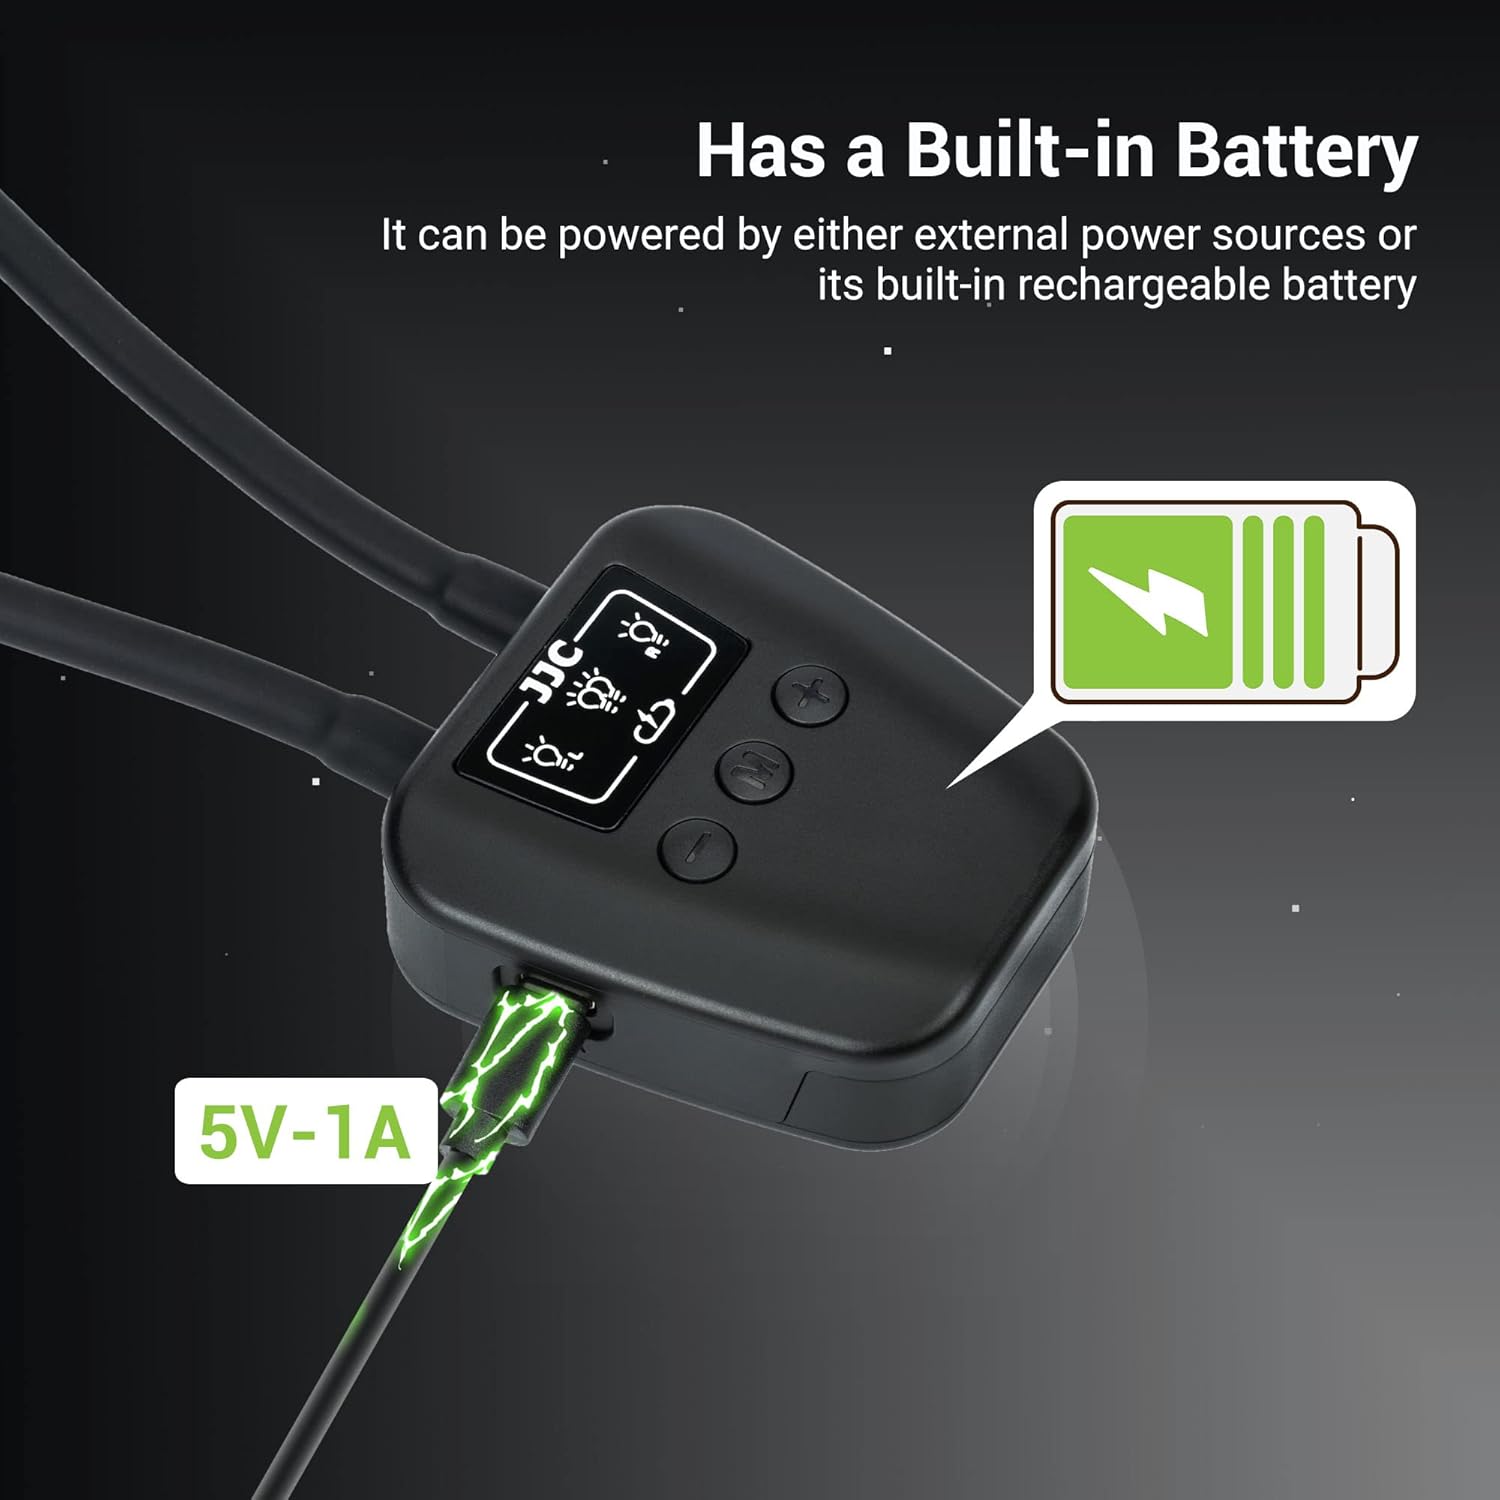
Image: Diagram showing the Type-C charging port and battery indicator on the Macro Arm Light.
4. Operating Instructions
4.1 Power On/Off
- To power on, press and hold the power button (usually marked with a power symbol) for at least three seconds until the display screen illuminates.
- To power off, press and hold the power button again for at least three seconds.
4.2 Adjusting Flexible Arms
The two flexible arms can be bent and positioned to direct light precisely where needed. The arms are covered in soft silicone for comfortable handling.

Image: The flexible arms of the Macro Arm Light, demonstrating their adjustability.
4.3 Selecting Lighting Modes
The Macro Arm Light offers three distinct lighting modes: Left Light, Right Light, and Double Lights (both lights on). Use the mode button (M) to cycle through these options.
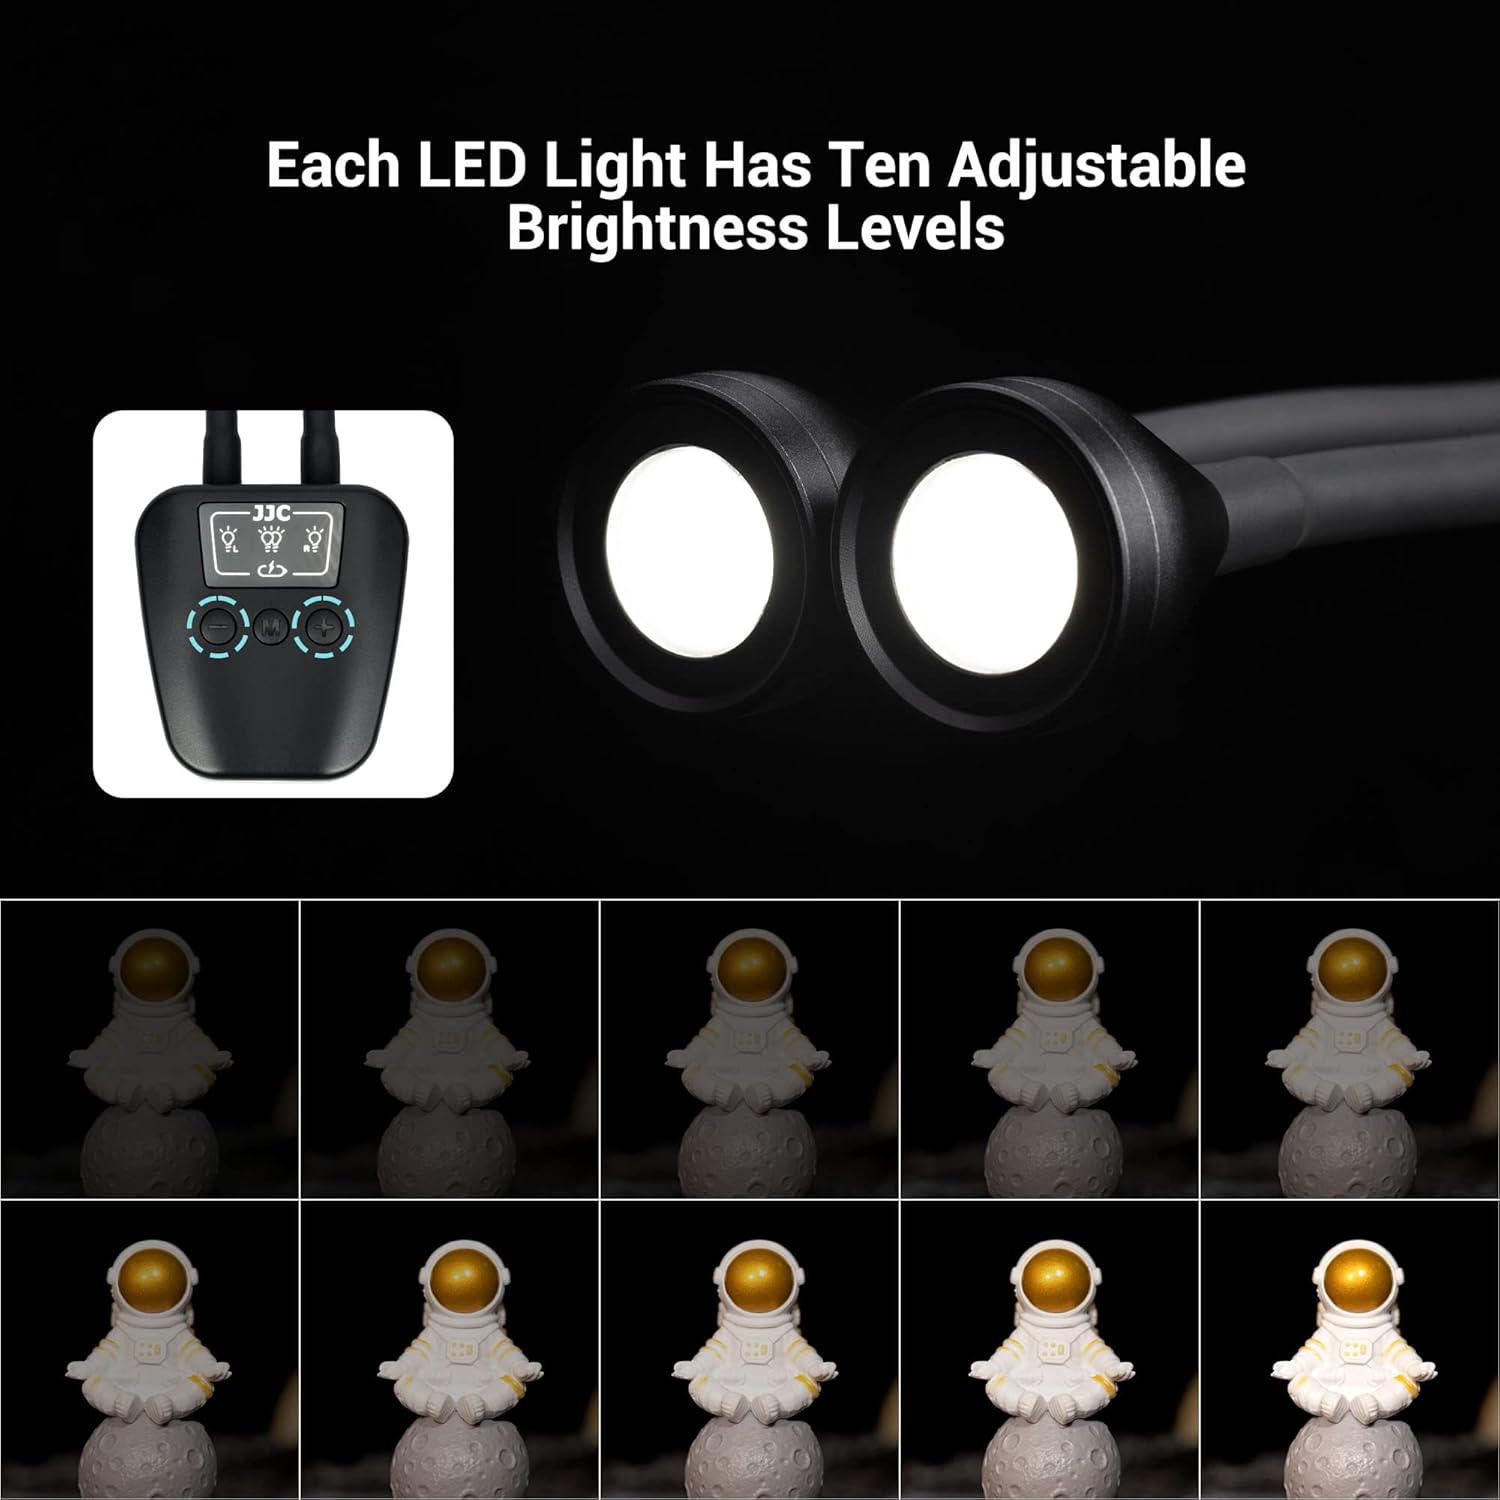
Image: Visual representation of the three lighting modes: Left Light, Right Light, and Double Lights, with corresponding display icons.
4.4 Adjusting Brightness Levels
Each LED light has 10 adjustable brightness levels. Use the '+' and '-' buttons to increase or decrease the brightness. The display screen will show the current brightness level.

Image: A grid showing the ten different brightness levels of the LED lights, from dimmest to brightest.
5. Specifications
| Feature | Specification |
|---|---|
| Brand | JJC |
| Model Number | LED-ARM2-HF |
| Connectivity Technology | Type-C Cable |
| Battery Composition | Alkaline (Built-in Lithium) |
| Compatible Devices | Cameras, Camcorders, Tripods, Light Stands |
| Product Dimensions (L x W x H) | 6.5 x 4.3 x 36 cm (2.6 x 1.7 x 14.2 inches) |
| Item Weight | 290 Grams |
| Included Components | Type-C Cable |
| Water Resistance Level | Not Waterproof |
| Color Temperature | 5600K |
| Luminance | 24000 lux (at 8 cm) |
| Battery Life (Lowest Brightness) | Approx. 13.5 hours |
| Charging Time | Approx. 2 hours |
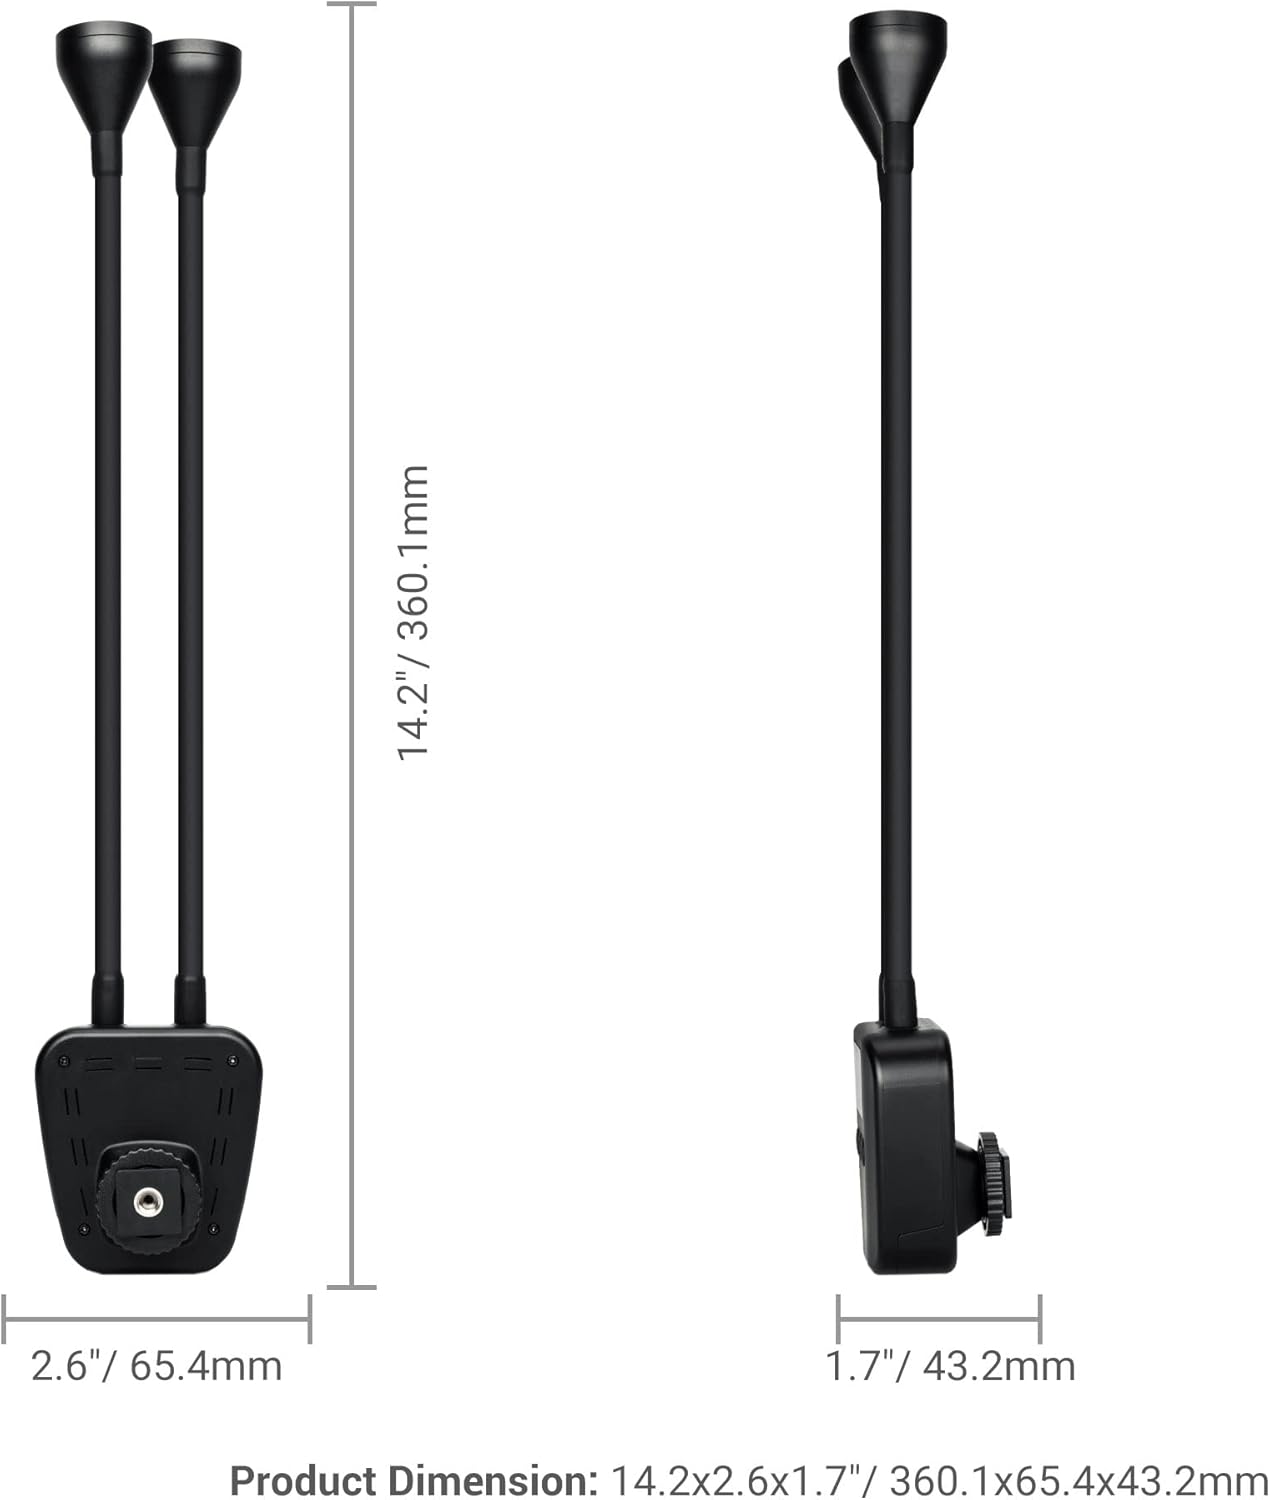
Image: Detailed diagram showing the dimensions of the JJC Macro Arm Light.
6. Maintenance
To ensure the longevity and optimal performance of your JJC Macro Arm Light, follow these maintenance guidelines:
- Cleaning: Use a soft, dry cloth to wipe the surface of the light. Do not use abrasive cleaners or solvents, as they may damage the finish or electronic components.
- Storage: When not in use, store the light in a cool, dry place away from direct sunlight and extreme temperatures.
- Battery Care: If storing for an extended period, charge the battery to about 50% every three months to prevent deep discharge and prolong battery life.
- Avoid Water: The device is not waterproof. Avoid exposure to rain, moisture, or submersion in water.
- Handle with Care: While the flexible arms are durable, avoid excessive force or sharp bends that could damage the internal wiring.
7. Troubleshooting
| Problem | Possible Cause | Solution |
|---|---|---|
| Light does not turn on. | Battery is depleted. Power button not pressed long enough. | Charge the device fully. Press and hold the power button for at least 3 seconds. |
| Light output is dim or inconsistent. | Low battery. Brightness level set too low. | Recharge the battery. Increase brightness using the '+' button. |
| Light does not stay securely attached to camera. | Cold shoe locking wheel is loose. Incompatible hot shoe/cold shoe. | Ensure the locking wheel is tightened firmly. Verify your camera's hot shoe is standard or use the 1/4-inch screw mount. |
| Battery life is shorter than expected. | Using at maximum brightness. Battery degradation over time. | Reduce brightness to conserve power. Ensure proper battery maintenance (charging to 50% for storage). |
8. Safety Information
- Do not disassemble, repair, or modify the device yourself. This may cause damage, electric shock, or fire.
- Keep the device away from water and other liquids. Do not operate with wet hands.
- Do not expose the device to extreme temperatures, direct sunlight, or high humidity.
- Keep out of reach of children.
- Dispose of the product and battery responsibly according to local regulations.
9. Warranty and Support
JJC products are manufactured to the highest quality standards. This product comes with a standard manufacturer's warranty against defects in materials and workmanship. For specific warranty terms and conditions, please refer to the warranty card included with your product or visit the official JJC website.
For technical support, troubleshooting assistance, or warranty claims, please contact JJC customer service through their official website or the retailer from whom you purchased the product.
Official JJC Website: www.jjc.cc
Related documentsLED-ARM2-HF


Ask a question about this manual
Ask about setup, troubleshooting, compatibility, parts, safety, or missing instructions. Manuals+ will review the question and use this page’s manual context to help answer it.