1. Introduction
This manual provides comprehensive instructions for the installation, operation, and maintenance of your TP-Link TL-SG3428XF 24-Port SFP L2+ Smart Managed Switch. This device is designed to deliver high-performance networking solutions for small to medium-sized businesses and enterprise environments, featuring advanced capabilities like Omada SDN integration, 10GE SFP+ uplinks, and robust security features.
2. Product Overview
The TP-Link TL-SG3428XF is a JetStream 24-Port SFP L2+ Managed Switch equipped with 4 10GE SFP+ slots. It offers full Gigabit fiber speeds with 20 Gigabit SFP ports and 4 Gigabit SFP/RJ45 Combo ports, ensuring high-speed and reliable connections for various network devices.
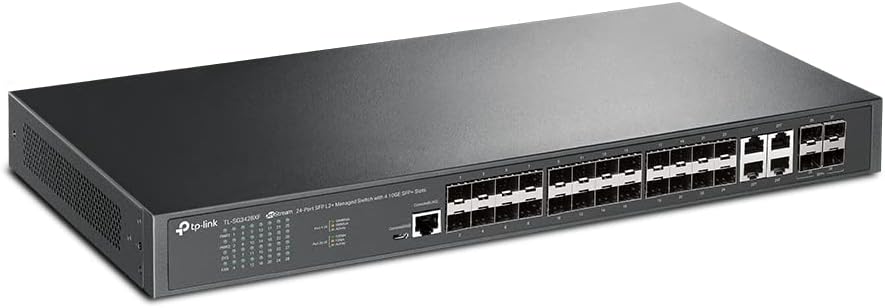
Figure 2.1: Front view of the TP-Link TL-SG3428XF switch, displaying the 24 SFP ports and 4 10GE SFP+ uplink ports, along with status LEDs and console ports.

Figure 2.2: Rear view of the TP-Link TL-SG3428XF switch, highlighting the dual AC power inputs (100-240V~ 50/60Hz 0.6A) and the grounding screw for electrical safety.
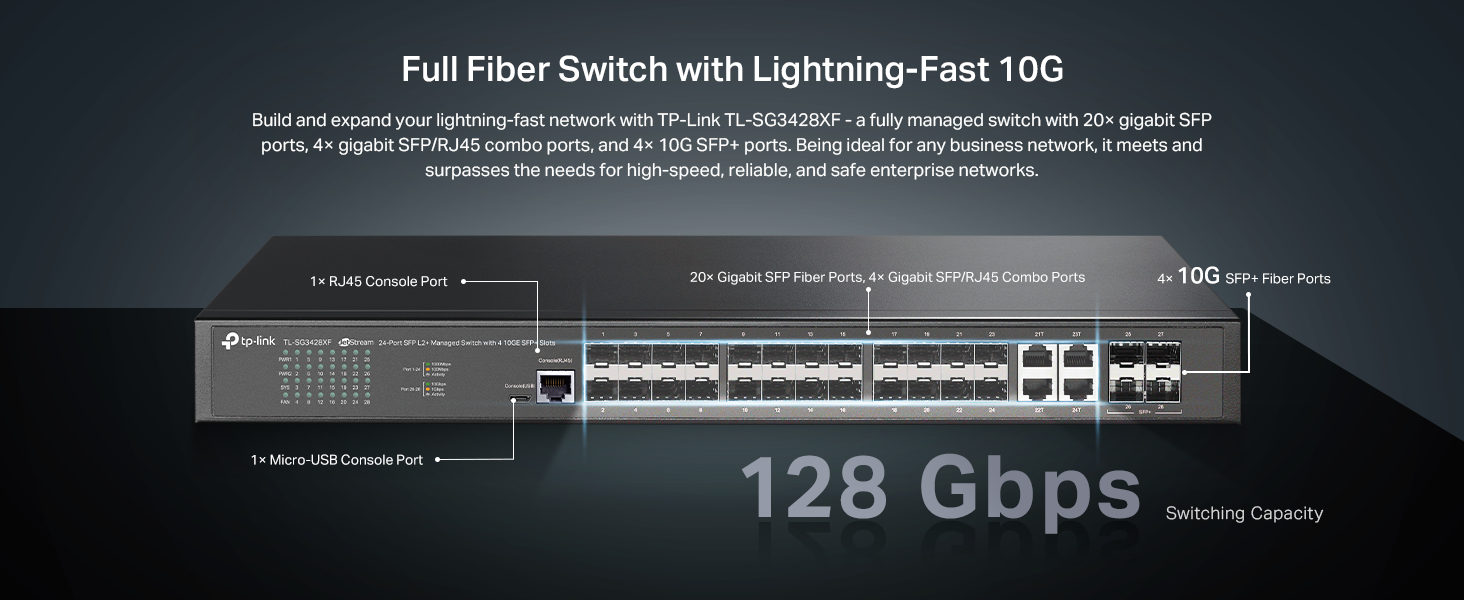
Figure 2.3: Detailed port layout of the TL-SG3428XF, indicating 20 Gigabit SFP ports, 4 Gigabit SFP/RJ45 Combo ports, 4 10G SFP+ Fiber Ports, and console ports.
3. Key Features
- 10G Lightning-Fast Connections: Equipped with 4 10Gbps SFP+ Ports for high-bandwidth connectivity and non-blocking switching capacity.
- Full Gigabit Fiber Speeds: Features 20 Gigabit SFP ports and 4 Gigabit SFP/RJ45 Combo ports for high-speed and reliable connections.
- Omada SDN Support: Integrates with Omada's Software Defined Networking (SDN) platform, allowing centralized cloud management of network devices including switches, access points, and gateways.
- Cloud Access: Enables remote cloud access and management via the Omada app, providing control from a single interface anywhere, anytime.
- Enhanced Network Security: Includes advanced security features such as 802.1Q VLAN, IP-MAC-Port binding, ACL, Port Security, DoS defend, Storm control, DHCP Snooping, and 802.1X radius authentication.
- L2+/L3 Features: Supports Static Routing, IPv6, DHCP Server, DHCP Relay, and IP Interfaces for advanced network management.
4. Setup Instructions
4.1 Package Contents
Before proceeding with the installation, verify that your package contains the following items:
- TP-Link TL-SG3428XF Switch
- Power Cord
- Rackmount Kit (brackets and screws)
- Installation Guide
4.2 Physical Installation
- Power Off: Ensure all network devices, including the switch, are powered off before installation.
- Mounting:
- Desktop Placement: Place the switch on a flat, stable surface. Ensure adequate ventilation around the device.
- Rack Mounting: Attach the provided rackmount brackets to the sides of the switch using the included screws. Secure the switch into a standard 19-inch equipment rack.
- Grounding: Connect a grounding wire from the grounding screw on the rear panel of the switch to a proper earth ground. This is crucial for protection against electrical surges.
- Power Connection: Connect the power cord to the switch's power inlet and then to a power outlet. It is highly recommended to use an Uninterruptible Power Supply (UPS) to protect against power fluctuations and outages.
- Network Connections:
- Connect your network devices (servers, workstations, access points, etc.) to the SFP or SFP/RJ45 Combo ports using appropriate fiber optic cables or Ethernet cables.
- For 10GE SFP+ uplinks, use compatible SFP+ transceivers and fiber optic cables to connect to your core network or other high-speed devices.
5. Operating Instructions
5.1 Powering On
After all physical connections are made, power on the switch. The Power LED on the front panel should illuminate, indicating that the device is receiving power. The Link/Act LEDs for connected ports will light up when a valid connection is established and blink during data transmission.
5.2 Initial Configuration (Omada SDN)
The TL-SG3428XF is designed for seamless integration with TP-Link's Omada SDN platform. For initial setup and advanced management:
- Ensure your Omada Controller (hardware or software) is set up and running on your network.
- Connect the switch to your network. The Omada Controller should automatically discover the switch.
- Adopt the switch within the Omada Controller interface.
- Once adopted, you can configure VLANs, QoS, port security, static routing, and other advanced features through the centralized Omada interface or Omada app.
For detailed configuration steps, refer to the Omada SDN Controller User Guide available on the TP-Link support website.
5.3 Standalone Mode
The switch can also operate in standalone mode. Access the web-based management interface by connecting a computer directly to one of the switch's ports and configuring your computer's IP address to be in the same subnet as the switch's default IP address (refer to the Installation Guide for default IP). Then, open a web browser and enter the switch's IP address.
6. Maintenance
- Regular Cleaning: Keep the switch and its ventilation openings clean and free from dust to ensure proper airflow and prevent overheating.
- Firmware Updates: Periodically check the TP-Link website for firmware updates. Keeping the firmware up-to-date ensures optimal performance, security, and access to new features.
- Environmental Conditions: Ensure the switch operates within its specified environmental conditions (temperature, humidity) to prolong its lifespan.
- Cable Management: Maintain organized cable routing to prevent accidental disconnections and improve airflow.
7. Troubleshooting
- No Power: If the Power LED is off, ensure the power cord is securely connected to both the switch and a working power outlet. Verify the power source is active.
- No Link/Activity: If a port's Link/Act LED is off, check the cable connection between the switch and the connected device. Ensure the connected device is powered on and functioning correctly. Verify cable type and length meet specifications.
- Slow Network Speed: Check for duplex mismatches between the switch port and the connected device. Ensure cables are not damaged and meet the required category (e.g., Cat5e or higher for Gigabit speeds). Verify network congestion or misconfigurations in Omada SDN.
- Accessing Management Interface: If you cannot access the web-based management interface, ensure your computer's IP address is in the same subnet as the switch. Clear your browser's cache or try a different browser.
- Intermittent Connectivity: Investigate potential sources of electromagnetic interference. Ensure the switch is adequately ventilated to prevent overheating.
8. Specifications
| Feature | Detail |
|---|---|
| Model Number | TL-SG3428XF |
| Brand | TP-Link |
| Number of Ports | 24 SFP Ports + 4 SFP/Ethernet Combo Ports |
| Uplink Ports | 4 x 10Gbps SFP+ Ports |
| Interface Type | RJ45 (for combo ports), SFP, SFP+ |
| Data Transfer Rate | 176 Gigabits Per Second (Switching Capacity) |
| Maximum Power Consumption | 50 Watts |
| Upper Temperature Rating | 75 Degrees Celsius |
| Product Dimensions | 17.32 x 8.66 x 1.73 inches |
| Item Weight | 6.55 pounds |
| Compatible Devices | Desktop (and Rackmount) |
| UPC | 840030708213 |
| ASIN | B0BNSTR8N4 |
9. Warranty and Support
The TP-Link TL-SG3428XF is backed by an industry-leading 5-year warranty. Free technical support is available from 6 AM to 6 PM PST, Monday to Friday.
For further assistance, please visit the official TP-Link support website or contact their technical support team.
- Support Website: myproducts.tp-link.com/us
- Email Support: support.USA@tp-link.com
- Phone Support: (866) 225-8139


