1. Introduction
The Zgrmbo F500 Digital Wall Clock is designed for clear visibility and ease of use, featuring large 4-inch digits suitable for various environments such as living rooms, classrooms, garages, and bedrooms. This manual provides detailed instructions for setting up, operating, and maintaining your clock, ensuring optimal performance and longevity.

Front view of the Zgrmbo F500 Digital Wall Clock, showing its large, clear digital display.
2. Package Contents
Please verify that all items are present in the package:
- 1 x Zgrmbo F500 Digital Wall Clock
- 1 x CR2302 Battery (pre-installed or separate)
- 1 x USB Power Cable
- 1 x User Manual
- 2 x Wall Nails
- 1 x Ruler (for wall mounting assistance)
Note: The CR2302 battery is for memory backup only and does not power the clock. It retains settings during power outages or when unplugged.
3. Setup
3.1 Powering the Clock
- Connect the provided USB power cable to the clock's power input port.
- Plug the other end of the USB cable into a compatible USB power adapter (not included), a laptop, computer, or power bank.
- The clock display will illuminate upon successful power connection.
3.2 Battery Installation (Memory Backup)
- Locate the battery compartment on the back of the clock.
- If not already installed, insert the CR2302 coin cell battery into the compartment, ensuring correct polarity (+ side up).
- Close the battery compartment securely. This battery ensures that your time and alarm settings are retained in case of a power interruption.
4. Operating Instructions

An illustration of the Zgrmbo F500 Digital Clock, detailing its dimensions and icons representing features.
4.1 Setting Time and Date
The clock typically has buttons on the side or back for setting. Refer to the labels next to the buttons (e.g., SET, UP, DOWN, MODE).
- Press the SET or MODE button to enter time setting mode. The hour digits will likely flash.
- Use the + (UP) and - (DOWN) buttons to adjust the hour.
- Press SET or MODE again to move to minute setting, then adjust minutes using +/-.
- Continue pressing SET or MODE to cycle through setting the year, month, and day.
- Once all settings are complete, press SET or MODE one last time, or wait a few seconds for the clock to exit setting mode automatically.
4.2 Brightness Adjustment

Visual representation of custom brightness levels and the automatic brightness mode.
- Custom Brightness: Press the LIGHT button repeatedly to cycle through different brightness levels (e.g., 100%, 80%, 60%, 20%, 0%).
- Automatic Dimming Mode: Long press the LIGHT button. Then, use the + or - buttons to toggle the automatic dimming mode ON or OFF. When ON, the clock will adjust brightness automatically based on the time of day:
- 07:00 - 19:00: 100% brightness
- 19:00 - 23:00: 60% brightness
- 23:00 - 07:00: 25% brightness
4.3 Alarm Settings
The clock supports one alarm with three operating modes.
- Press the ALARM button to enter alarm setting mode. The alarm time digits will flash.
- Use the + and - buttons to set the desired alarm hour and minute.
- Press ALARM again to select the alarm operating mode:
- 1-5: Alarm sounds Monday to Friday only.
- 1-6: Alarm sounds Monday to Saturday only.
- 1-7: Alarm sounds every day.
- Press ALARM one last time or wait for the clock to exit setting mode.
- To turn the alarm ON or OFF, short press the ALARM button outside of setting mode. An alarm icon will appear/disappear on the display.
4.4 Time Format (12/24 Hour)

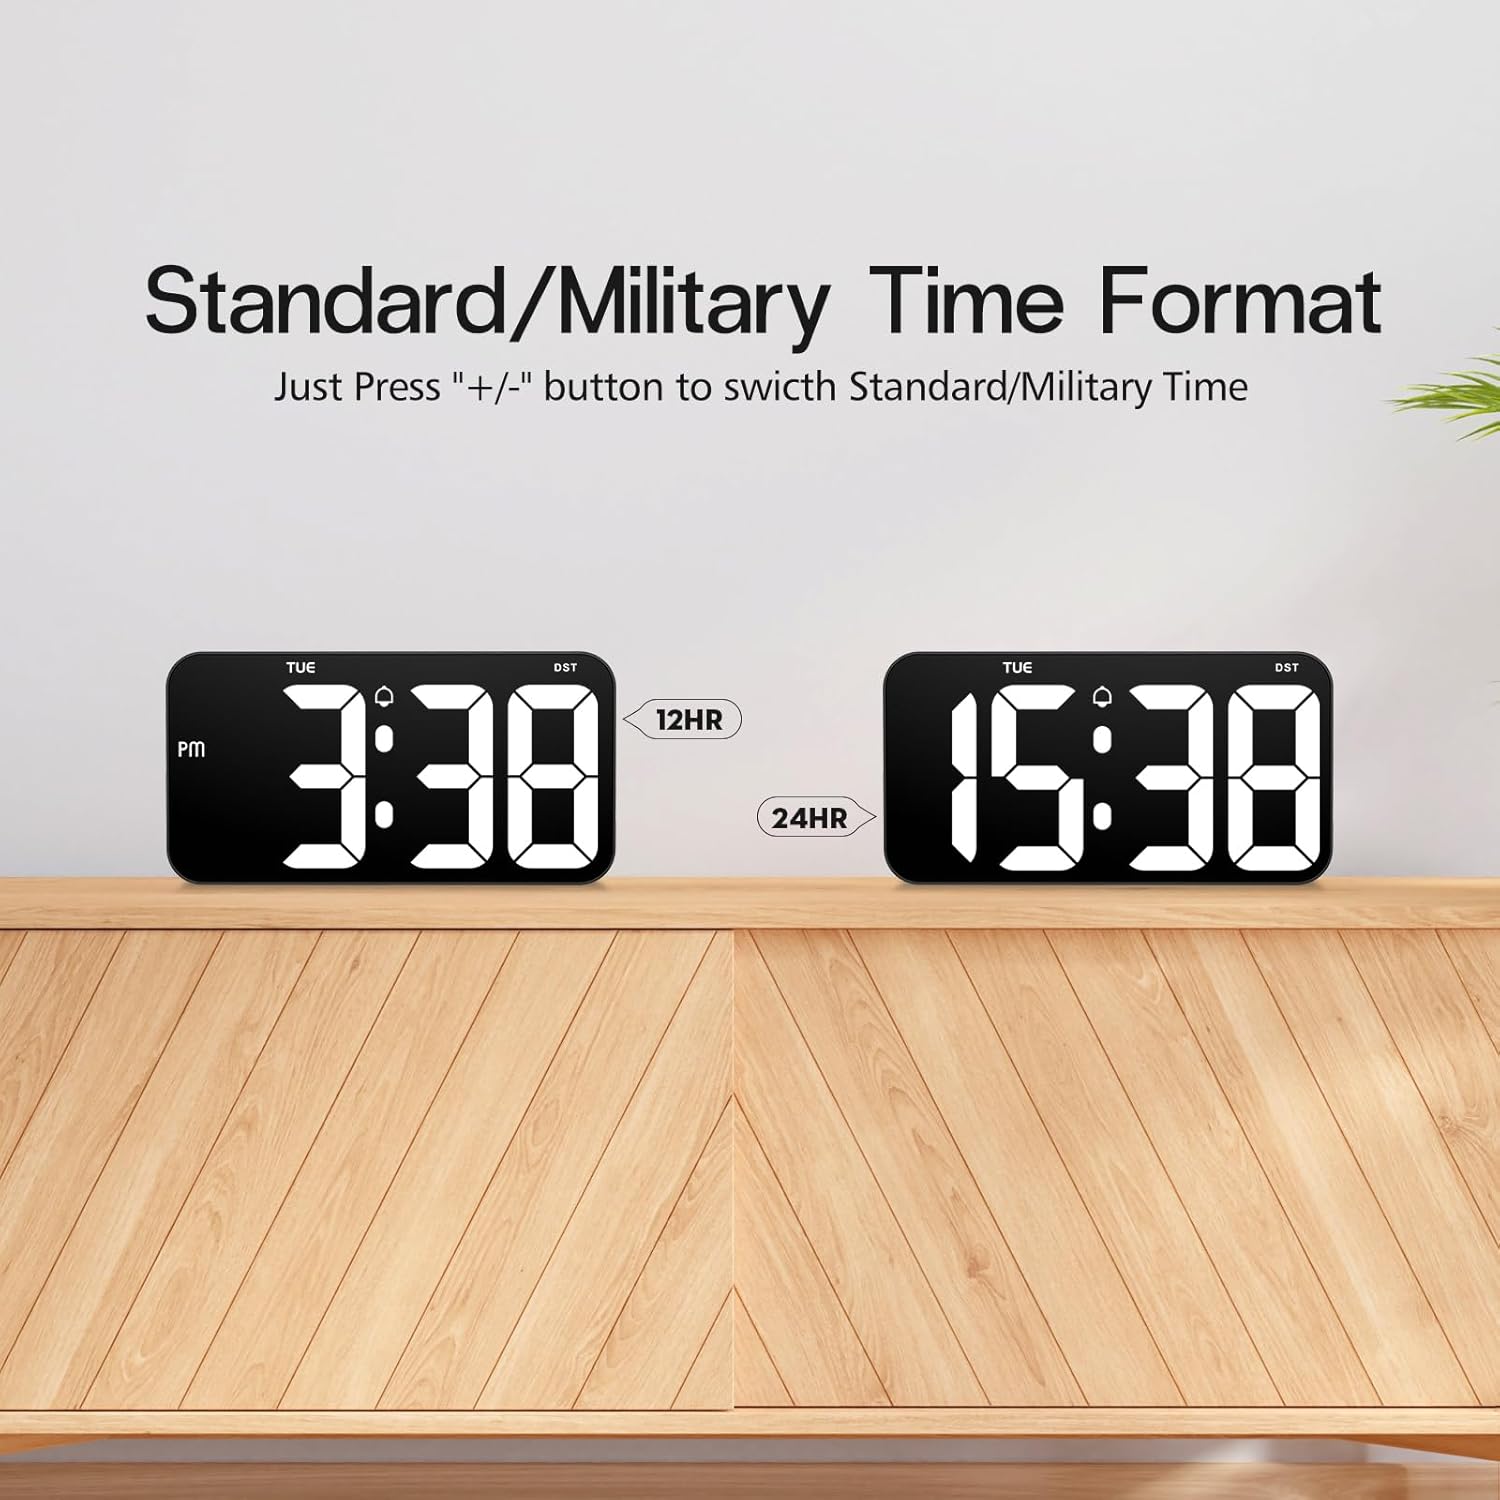
Comparison of the 12-hour (Standard) and 24-hour (Military) time formats.
To switch between Standard (12-hour with AM/PM indicator) and Military (24-hour) time formats, simply press the + or - button when the clock is displaying the time normally (not in setting mode).
4.5 Daylight Saving Time (DST) Function

Illustration of the Daylight Saving Time (DST) function.
The clock supports a Daylight Saving Time (DST) function. Typically, a dedicated DST button or a combination of buttons is used to activate or deactivate this feature, which adjusts the time by one hour forward or backward. Consult the specific button labels on your clock for this function.
4.6 Power Failure Memory

Illustration demonstrating the power failure memory feature.
Thanks to the built-in CR2302 coin cell battery, the Zgrmbo F500 clock retains all its settings (time, date, alarm, etc.) even during a power outage or when unplugged. You will not need to reset the clock once power is restored.
4.7 Display Options
- Flashing Center Dots: Long press the + button to turn on or off the flashing colon (:) between the hour and minute digits.
- Alternating Time/Date Display: Long press the - button to enable or disable the alternating display of time and date. When enabled, the clock will switch between showing the current time and the current date.
5. Installation
Detailed view of the back of the Zgrmbo F500 Digital Clock, highlighting mounting and stand features.
5.1 Wall Mounting
The clock features a double wall-hung hole design for secure mounting.
- Determine the desired location on your wall.
- Use the provided ruler to mark the positions for the two wall nails, ensuring they are level and spaced correctly to align with the hanging holes on the back of the clock.
- Carefully insert the two wall nails into the marked positions.
- Align the clock's hanging holes with the nails and gently slide the clock down to secure it on the wall.
- Utilize the hidden cable winder support on the back of the clock to manage any excess power cable, ensuring a neat appearance.
5.2 Desk Placement
For desk or tabletop use, the clock is equipped with two hidden, stable standing brackets.
- Locate the two hidden feet on the back of the clock.
- Gently pull out and unfold these feet until they lock into position, providing a stable angle for the clock to stand on a flat surface.
- Place the clock on your desk, nightstand, or TV counter.
- The hidden cable winder can also be used to keep the power cable tidy when placed on a surface.
6. Maintenance
- Cleaning: To clean the clock, gently wipe the display and casing with a soft, dry, or slightly damp cloth. Avoid using abrasive cleaners, solvents, or chemical sprays, as these may damage the surface.
- Battery Replacement: If the clock fails to retain settings during a power outage, the CR2302 memory backup battery may need replacement. Follow the instructions in Section 3.2 to replace the battery.
- Storage: If storing the clock for an extended period, disconnect it from power and consider removing the CR2302 battery to prevent potential leakage. Store in a cool, dry place.
7. Troubleshooting
| Problem | Possible Cause | Solution |
|---|---|---|
| Clock display is off or flickering. | No power, loose connection, faulty cable/adapter. | Ensure USB cable is securely connected. Try a different USB port or power adapter. |
| Clock does not retain settings after power loss. | CR2302 memory battery is dead or not installed correctly. | Replace the CR2302 battery. Ensure it is inserted with correct polarity. |
| Alarm does not sound. | Alarm is not activated, alarm volume is too low (if adjustable), incorrect alarm time/mode. | Ensure the alarm icon is displayed. Re-check alarm time and operating mode settings. |
| Display is too bright or too dim. | Brightness setting is incorrect, auto-dimming mode is active. | Press the LIGHT button to adjust brightness. Long press LIGHT to toggle auto-dimming mode. |
| Time is inaccurate. | Time was set incorrectly. | Re-set the time following instructions in Section 4.1. |
8. Specifications
| Feature | Detail |
|---|---|
| Brand | Zgrmbo |
| Model Number | F500 |
| Color | Black/White |
| Dimensions (L x W x H) | 26.04 x 3.81 x 13.46 cm (10.25 x 1.5 x 5.3 inches) |
| Weight | 426 grams (0.94 lbs) |
| Material | Acrylonitrile Butadiene Styrene (ABS) |
| Display Type | Digital LED |
| Digit Size | 4 inches (10.2 cm) |
| Power Source | USB Cable (Electric) |
| Special Features | Large Display, Auto-Dimming, Custom Brightness, Alarm, Time Memory, 12/24H Format, DST Function, Wall Mountable, Desk Stand |
9. Warranty and Support
Zgrmbo provides an 18-month warranty for the F500 Digital Wall Clock, covering manufacturing defects and malfunctions under normal use. Additionally, a 45-day return policy is offered for your peace of mind.
For any questions, technical assistance, warranty claims, or support, please do not hesitate to contact Zgrmbo customer service through the Amazon platform where you purchased the product. Please provide your order number and a detailed description of the issue to facilitate a quick resolution.


