
RovyVon A26
Contents
RovyVon A26 EDC Flashlight User Manual
Model: A26
Introduction
This manual provides detailed instructions for the safe and effective use of your RovyVon A26 EDC Flashlight. Please read this manual thoroughly before operating the device and retain it for future reference.
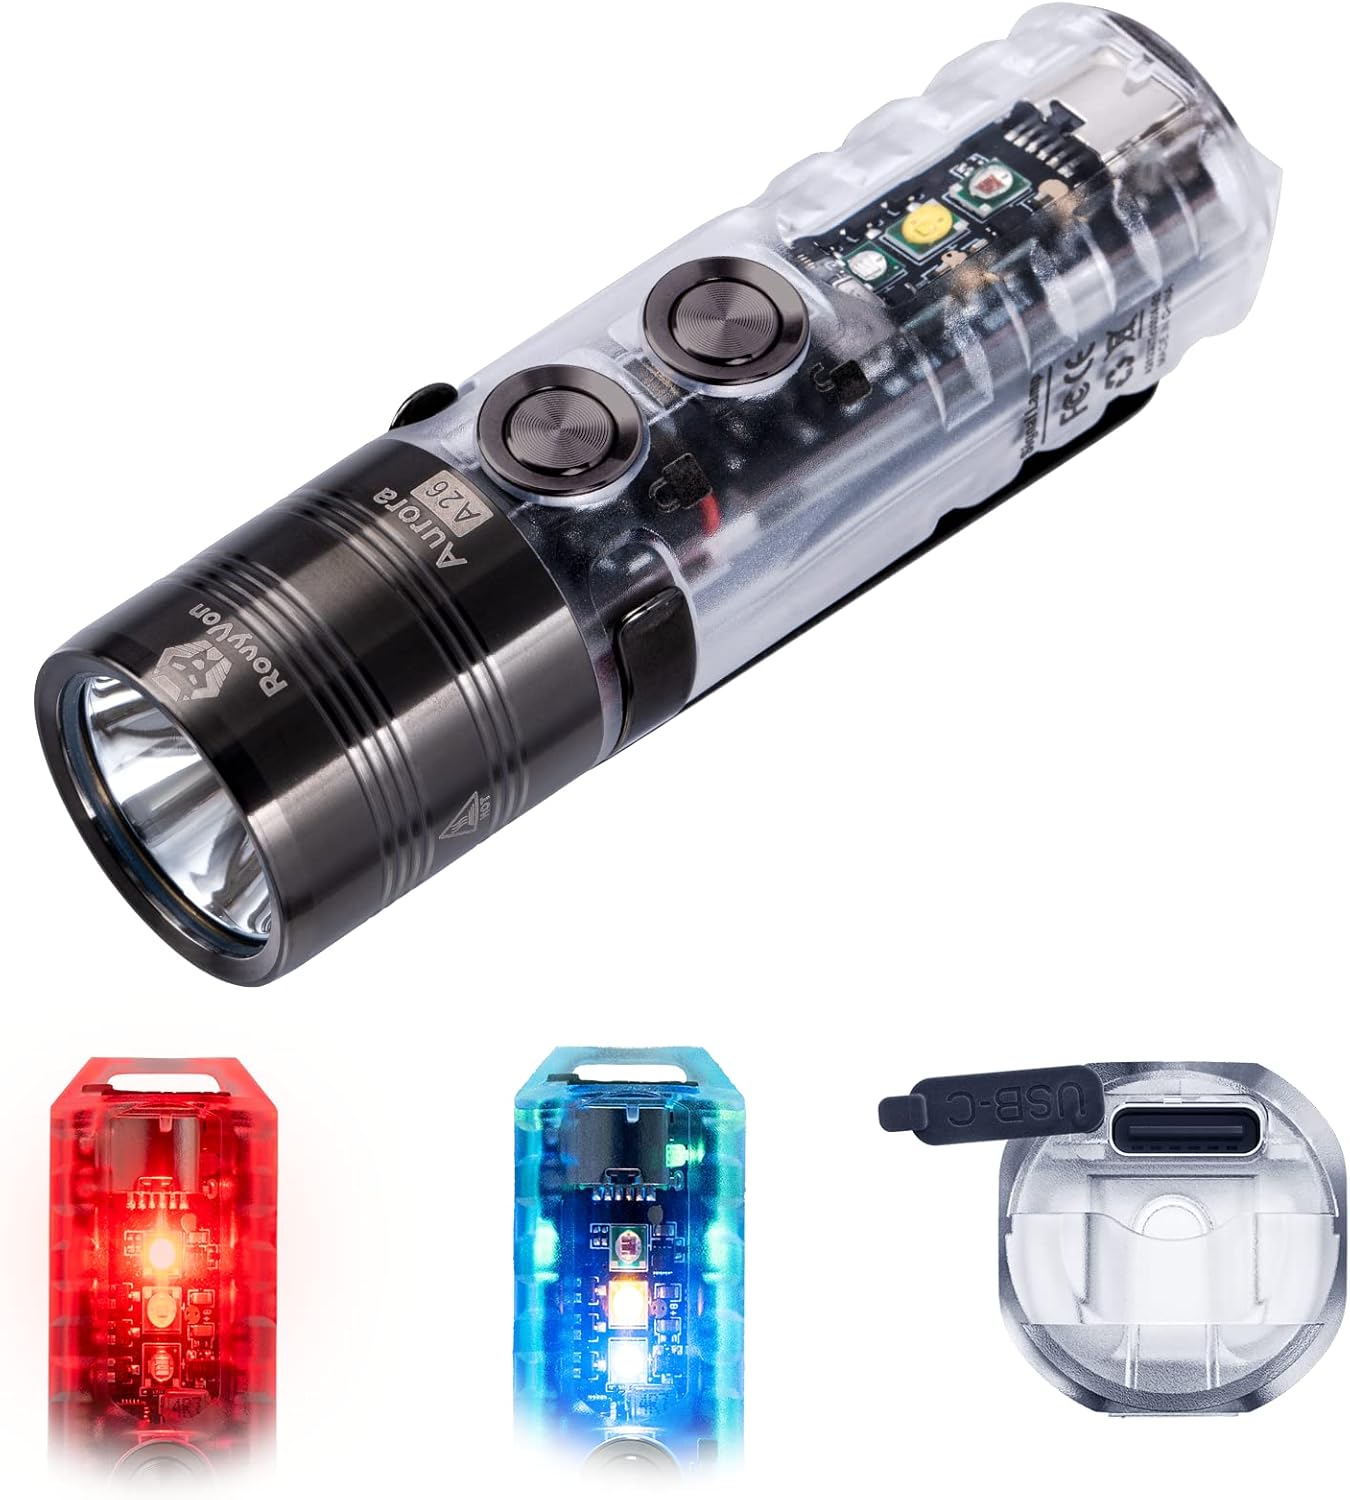
Image: The RovyVon A26 EDC Flashlight, showcasing its main body, front light, and examples of its red and blue sidelights, along with the USB-C charging port.
Package Contents
- RovyVon A26 EDC Flashlight
- USB-A to USB-C Charging Cable
- Magnetic Pocket Clip
- Keychain
- User Manual (this document)
Setup and Charging
Initial Charge
The RovyVon A26 features a built-in 850mAh Lithium Polymer battery. For optimal performance, fully charge the flashlight before first use.
- Locate the USB-C charging port on the flashlight.
- Connect the provided USB-A to USB-C cable to the flashlight and a compatible USB power source (e.g., computer, wall adapter).
- The flashlight will indicate charging status:
- Breathing Blue: Charging in progress.
- Solid Green: Fully charged.
- A full charge typically takes approximately one hour.
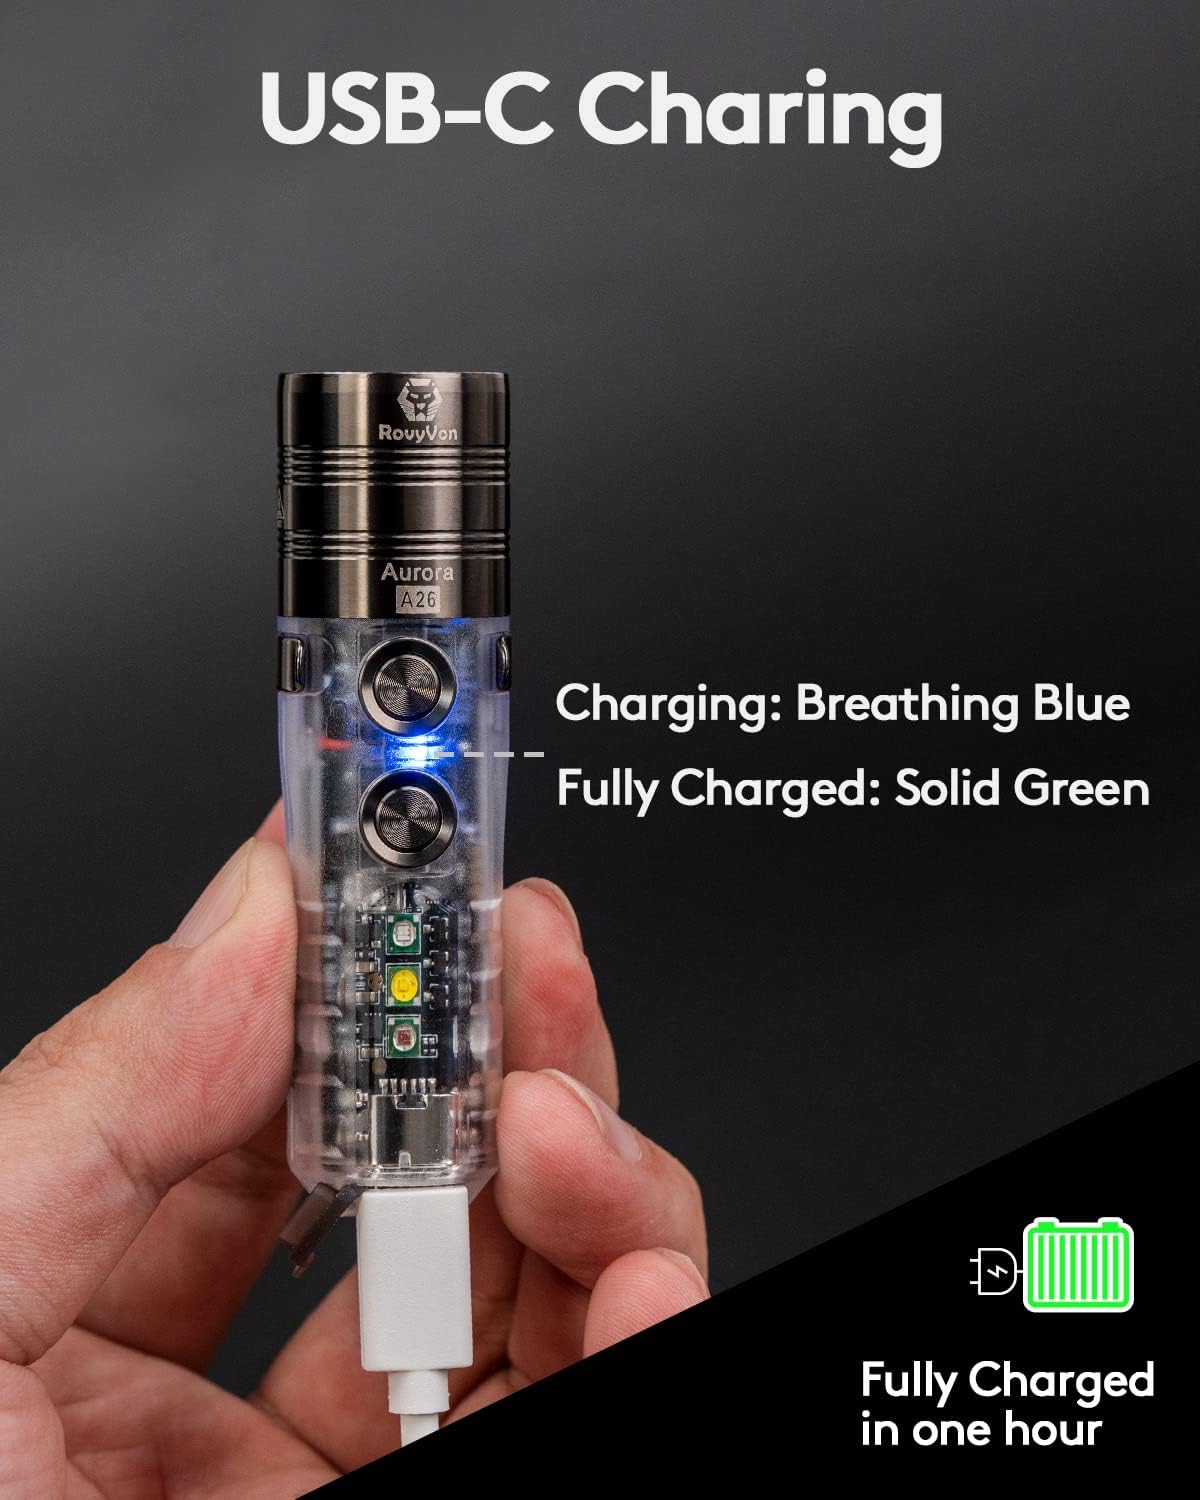
Image: The RovyVon A26 flashlight connected via USB-C cable, illustrating the breathing blue light during charging. The image also indicates that the device is fully charged in one hour.

Image: A visual guide to the USB-C charging indicators on the RovyVon A26, showing blue for charging, green for fully charged, and red for low battery.
Operation
Controls: Dual Switch System
The A26 flashlight features two independent metal switches for intuitive control of the main light and sidelights.

Image: An illustration detailing the functions of Button 1 (Lock, Moonlight, Constant On, Strobe-SOS) and Button 2 (Unlock, Momentary On, Side LEDs) on the RovyVon A26 flashlight.
Main Light Functions (Button 1)
- Lock: Long press Button 1 for 5 seconds. The front emitter will blink twice to confirm. This prevents accidental activation.
- Moonlight Mode (0.5 lumens): From off, single click Button 1.
- Constant On (Low, Med, High, Turbo): From off, double click Button 1 to activate the last used mode. Single click to cycle through modes (Low → Med → High → Turbo).
- Strobe/SOS: From any constant on mode, triple click Button 1.
- Turn Off: From any constant on mode, long press Button 1.

Image: A visual representation of the RovyVon A26's main light modes and their respective lumen outputs, demonstrated by a person illuminating an outdoor area.
Sidelight Functions (Button 2)
The A26 is equipped with three versatile sidelights: Red, 4000K Warm White, and 365nm UV.
- Unlock: Long press Button 2 for 3 seconds. The front emitter will blink three times to confirm.
- Momentary On: From off, press and hold Button 2 for temporary activation of the sidelights. Release to turn off.
- Activate Sidelights: From off, double click Button 2 to activate the last used sidelight mode. Single click to cycle through modes (Red → Warm White → UV).
- Red Light Beacon/Flash: From Red light mode, double click Button 2.
- Turn Off: From any sidelight mode, long press Button 2.

Image: An illustration of the RovyVon A26's sidelight capabilities, including the Red LED for signaling, Warm White LED for reading, and 365nm UV LED for banknote verification.

Image: Detailed views of the 365nm UV emitter for checking traces, the Red emitter for signaling or low light, and the Warm White emitter for reading.
Lockout Feature
To prevent accidental activation and conserve battery, the A26 includes a lockout feature:
- Lock: Long press Button 1 for 5 seconds. The front emitter will blink twice.
- Unlock: Long press Button 2 for 3 seconds. The front emitter will blink three times.

Image: A visual guide to activating and deactivating the lockout feature using Button 1 and Button 2, respectively.
Magnetic Pocket Clip
The included magnetic pocket clip offers versatile attachment options:
- Attach the flashlight to metal surfaces for hands-free operation.
- Clip it to your pocket, belt, or hat brim.
- The clip is reversible for flexible carrying positions.

Image: The RovyVon A26 flashlight demonstrating its magnetic attachment capability, adhering to a metal surface and providing illumination.

Image: A depiction of the RovyVon A26's compact size and the functionality of its magnetic two-way pocket clip for hands-free use.
Maintenance
- Cleaning: Wipe the flashlight with a soft, damp cloth. Do not use abrasive cleaners or solvents.
- Storage: Store the flashlight in a cool, dry place away from direct sunlight and extreme temperatures.
- Battery Care: For long-term storage, charge the battery to approximately 50% every 3-6 months to maintain battery health.
- Water Resistance: The A26 is water-resistant. Avoid submerging it in water for extended periods. Ensure the USB-C port cover is securely closed to maintain water resistance.
Troubleshooting
- Flashlight not turning on:
- Ensure the battery is charged.
- Check if the lockout feature is activated (unlock using Button 2).
- Charging issues:
- Verify the USB-C cable is properly connected to both the flashlight and the power source.
- Try a different USB-C cable or power adapter.
- Reduced brightness or runtime:
- The battery may be low; recharge the flashlight.
- In Turbo mode, the flashlight will step down to 300 lumens after 90 seconds to prevent overheating and protect the battery.
Specifications
| Feature | Detail |
|---|---|
| Model | A26 |
| Light Source Type | LED (6500K Cool White main emitter) |
| Main Light Output | Moonlight (0.5lm), Low (10lm), Med (100lm), High (300lm), Turbo (600lm) |
| Max Beam Distance | 180 meters (592 feet) |
| Sidelights | Red, 4000K Warm White, 365nm UV |
| Power Source | Battery Powered |
| Battery Type | 850mAh Lithium Polymer (included, non-replaceable by user) |
| Charging Port | USB-C |
| Charging Time | Approximately 1 hour |
| Material | Polyimide (body), PVD treated head/clip/buttons |
| Dimensions (L x D) | 2.99" x 0.87" (76mm x 22mm) |
| Weight | 0.634 ounces (18 grams) |
| Water Resistance | Water Resistant (specific IP rating not provided, avoid submersion) |
| Special Features | Rechargeable, Magnetic Pocket Clip, Dual Switch, Lockout Function |

Image: A comprehensive table outlining the performance specifications for the RovyVon A26, including output levels, runtimes, and beam distances for both main and sidelights.

Image: A bar chart illustrating the improved efficiency and runtime of the RovyVon A26's 850mAh battery across various brightness modes, from Moonlight to Turbo.
Warranty and Support
For warranty information, technical support, or service inquiries, please contact RovyVon customer service through their official website or the retailer where the product was purchased.
Please retain your proof of purchase for warranty claims.
Documents and downloads
Ask a question about this manual
Ask about setup, troubleshooting, compatibility, parts, safety, or missing instructions. Manuals+ will review the question and use this page’s manual context to help answer it.