
1. Introduction
The Gardena Micro-Drip-Irrigation Terrace Set is designed for water-saving drip irrigation of up to 30 potted plants on terraces or plants in plant troughs and tubs. This ready-to-use set provides everything necessary for efficient and targeted watering, accommodating plants with varying water requirements.
The system features patented Quick & Easy connection technology for 13 mm components and unique Easy & Flexible connection technology for 4.6 mm components, allowing for simple assembly, flexible rearrangement, and sustainable reuse without damage.
2. Safety Information
Always read and understand all instructions before installing and operating the Micro-Drip-Irrigation system. Keep this manual for future reference. Ensure all connections are secure to prevent leaks and water wastage. Do not use the system with water temperatures exceeding 40°C (104°F) or with corrosive liquids.
3. Package Contents
Verify that all components listed below are present in your package:
- 1 x Master Unit 1000 (Pressure Reducer and Filter)
- 15 m (49.2 ft) x 13 mm (1/2") Supply Pipe
- 20 m (65.6 ft) x 4.6 mm (3/16") Distribution Pipe
- 10 x Reducing T-Joints (for connecting 13mm to 4.6mm)
- 3 x Shut-off Valves
- 5 x T-Joints (for 4.6mm pipe)
- 2 x End Caps (for 13mm pipe)
- 20 x Adjustable Endline Drip Heads (0-15 l/h)
- 10 x Inline Drip Heads (2 l/h)
- 5 x End Plugs (for 4.6mm pipe)
- 20 x Pipe Holders (stakes)
- 5 x Pipe Clips
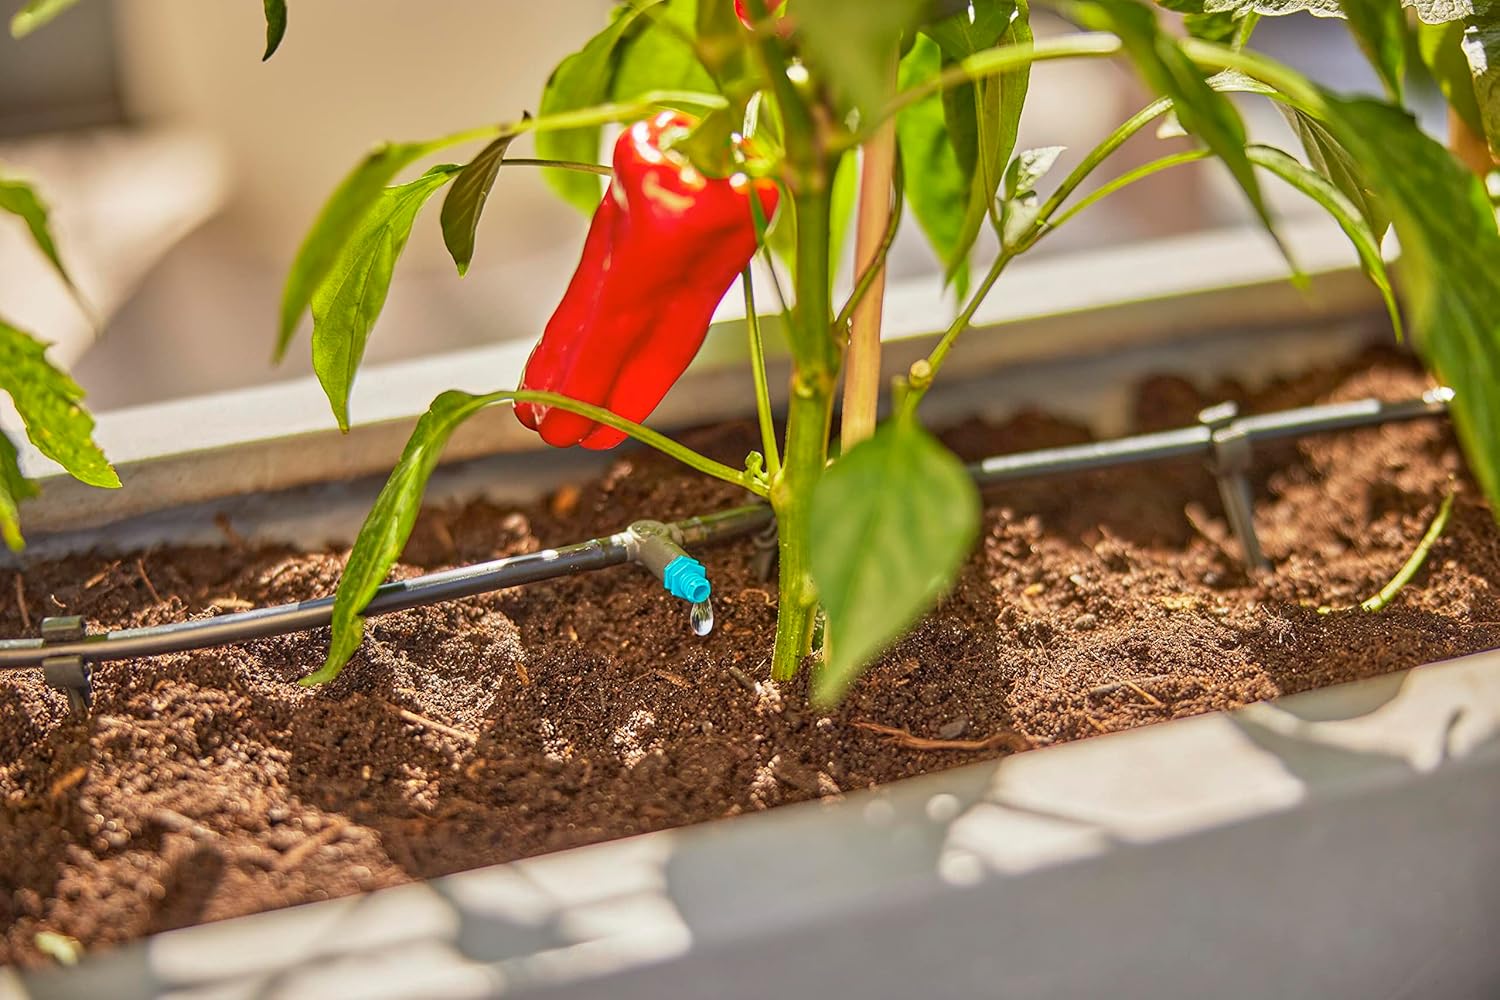

4. Setup Instructions
Follow these steps to set up your Gardena Micro-Drip-Irrigation Terrace Set:
- Connect the Master Unit: Attach the Master Unit 1000 to your water tap. The Master Unit reduces water pressure to approximately 1.5 bar and filters the water, ensuring optimal system performance.
- Lay the Supply Pipe (13 mm): Connect the 13 mm (1/2") supply pipe to the Master Unit. Lay this pipe along your terrace or through plant troughs to the areas where you want to irrigate. Use pipe clips and holders to secure the pipe as needed.
- Install Distribution Pipes (4.6 mm): Use the reducing T-joints to connect the 4.6 mm (3/16") distribution pipe to the 13 mm supply pipe. Route the thinner distribution pipes to individual potted plants or specific sections of plant troughs. The Quick & Easy connection technology allows for flexible and secure connections.
- Place Drip Heads: Insert the Endline Drip Heads or Inline Drip Heads into the 4.6 mm distribution pipes near each plant. Use the pipe holders to secure the drip heads in place, ensuring they are positioned to deliver water directly to the plant's root area.
- Install Shut-off Valves: Integrate shut-off valves into the 4.6 mm lines where you need to control water flow to specific plants or sections.
- Cap the Ends: Use end plugs for the 4.6 mm pipes and end caps for the 13 mm pipes to seal the system and maintain pressure.


5. Operating Instructions
Once installed, operating your Micro-Drip system is straightforward:
- Water Flow: Turn on the water tap. The Master Unit will regulate the pressure and distribute water evenly through the system.
- Adjustable Drip Heads: The adjustable Endline Drip Heads allow you to set the water output between 0 and 15 litres per hour. Rotate the cap on the drip head to increase or decrease the flow rate according to the specific needs of each plant.
- Inline Drip Heads: Inline Drip Heads provide a constant water output of 2 litres per hour, suitable for plants with consistent water requirements.
- Monitoring: Regularly observe your plants to ensure they are receiving adequate water. Adjust drip head settings as plant needs change due to growth or weather conditions.


6. Maintenance
Regular maintenance ensures the longevity and efficiency of your Micro-Drip system:
- Filter Cleaning: Periodically check and clean the filter within the Master Unit to prevent blockages and maintain optimal water flow.
- Drip Head Inspection: Inspect drip heads for any blockages or mineral deposits. Clean them gently if necessary.
- Leak Checks: Regularly check all connections and pipes for leaks. Tighten connections or replace damaged components as needed.
- Winterization: Before the first frost, completely drain the system to prevent freezing and damage to pipes and components. Disconnect the Master Unit and store all components in a frost-free environment.
7. Troubleshooting
| Problem | Possible Cause | Solution |
|---|---|---|
| Uneven water distribution or low flow from drip heads | Clogged filter in Master Unit; Blocked drip heads; Insufficient water pressure; Too many drip heads on one line. | Clean the Master Unit filter. Inspect and clean drip heads. Ensure adequate water pressure from the tap. Consider splitting the system into multiple lines or reducing the number of drip heads per line. |
| Leaks at connections | Connections not fully seated; Damaged O-rings or seals; Excessive water pressure. | Ensure all pipes are fully inserted into connectors and locked (if applicable). Check O-rings and seals for damage and replace if necessary. The Master Unit regulates pressure, but ensure your tap pressure is not excessively high. |
| Water not reaching all plants | Pipe blockage; System too long for pressure; Incorrect layout. | Check pipes for kinks or blockages. Ensure the total length of 4.6mm distribution pipes does not exceed recommended limits (typically around 10-15 meters per line for optimal performance). Review your system layout for efficiency. |
8. Specifications
| Feature | Detail |
|---|---|
| Brand | Gardena |
| Model Name | Micro-Drip-Irrigation Terrace Set (30 plants) |
| Model Number | 13400-20 |
| Material | Plastic |
| Weight | 1.3 Kilograms |
| Hose Length (Supply) | 15 Meters (13mm) |
| Hose Length (Distribution) | 20 Meters (4.6mm) |
| Maximum Pressure | 1.5 Bars (regulated by Master Unit) |
| Number of Drip Heads | 20 Adjustable Endline, 10 Inline |
| Special Feature | Adjustable water flow |
| Country of Origin | Germany |
9. Warranty and Support
For warranty information, technical support, or to purchase replacement parts, please refer to the official Gardena website or contact Gardena customer service directly. Keep your proof of purchase for warranty claims.