1. Introduction
Thank you for choosing the Haofy K1688 Photovoltaic Power Controller. This device is designed to manage the power flow from your solar panels to your battery and load, ensuring efficient and safe operation of your solar energy system. It features an industrial-grade master control chip, dual USB outputs, and multiple protection functions to safeguard your system.
2. Safety Information
- Ensure all connections are correct before powering on the controller. Incorrect wiring, especially reverse polarity, can damage the device and connected components.
- Do not attempt to disassemble or repair the controller yourself. Refer to qualified personnel for service.
- Install the controller in a well-ventilated area, away from direct sunlight, high temperatures, and moisture.
- Keep children away from the solar power system components.
- Always disconnect the solar panel and battery power before performing any wiring or maintenance.
3. Product Overview
The Haofy K1688 Solar Controller is equipped with an LCD display for monitoring system status and dual USB outputs for charging external devices. It supports 12V and 24V battery systems with automatic adaptation.
Key Features:
- LCD Display: Shows charging/discharging current, accumulated electricity generated and discharged, temperature, optical control, and delay control settings. Features power-off memory.
- Dual USB Output: Two USB ports provide up to 5V 2.5A (maximum) for charging mobile devices.
- Comprehensive Protection: Built-in safeguards against over-current, short-circuit, open-circuit, and reverse connection. These are self-recovery types, preventing damage to the controller.
- Industrial Grade Control Chip: Ensures stable performance and features an anti-backflow circuit with ultra-low heat generation.
- Automatic System Voltage Identification: Automatically detects 12V or 24V battery systems.
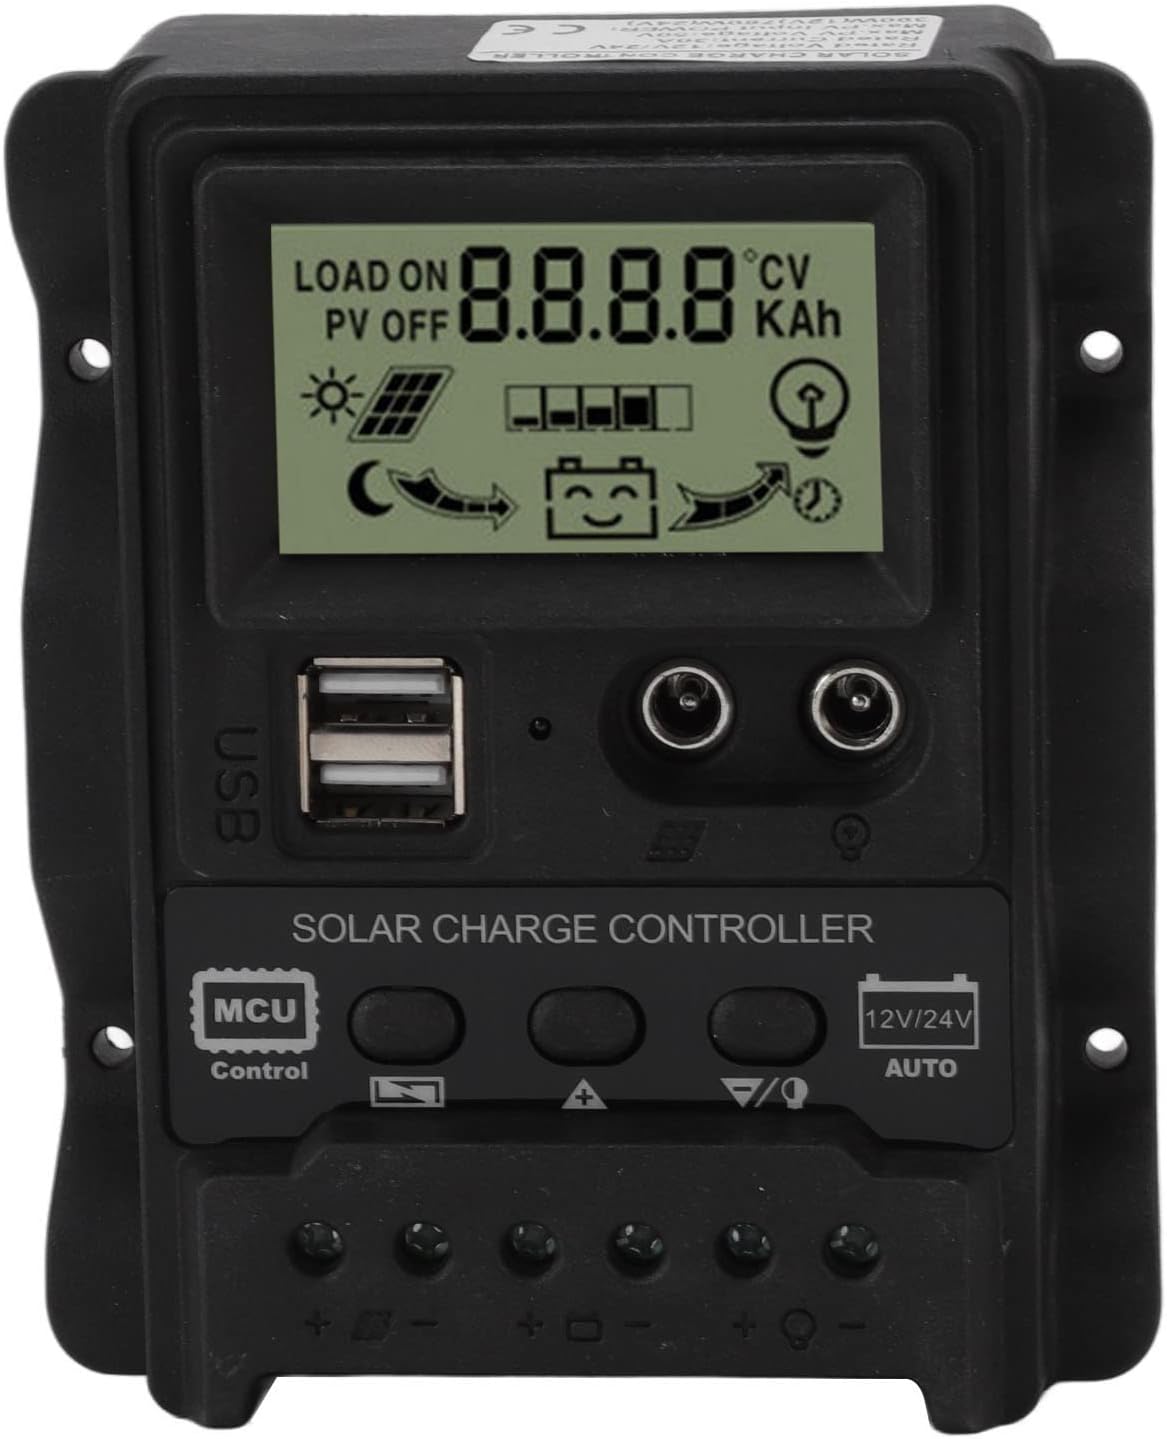
Figure 1: Front view of the Haofy K1688 Solar Charge Controller, showing the LCD display, control buttons, USB ports, and wiring terminals.
4. Specifications
| Parameter | Value |
|---|---|
| Model | K1688 |
| Material | ABS |
| System Voltage | 12V / 24V Automatic Adaptation |
| Rated Discharge Current | 10A (Note: Product title indicates 30A, please verify specific model variant if applicable) |
| Maximum Photovoltaic Voltage | 23V (for 12V battery); 46V (for 24V battery) |
| Lifting Voltage | 14.4V (12V); 28.8V (24V) |
| Charging Voltage (Default) | 13.7V (12V); 27.4V (24V) |
| Discharge Cut-off Voltage (Default) | 10.7V (12V); 21.4V (24V) |
| Discharge Recovery Voltage (Default) | 12.6V (12V); 25.2V (24V) |
| Charging Recovery Voltage | 13V (12V); 26V (24V) |
| Light Control Lamp On Threshold | 8V (PV panel, 12V); 16V (PV panel, 24V) |
| Light Control Switch Off Threshold | 8V (PV panel, 12V); 16V (PV panel, 24V) |
| USB Output | 2-way USB, 5V 2.5A (Max) |
| Standby Current | <10mA |
| Working Temperature | -35°C to +60°C |
| Maximum Photovoltaic Input Power | 390W (12V); 780W (24V) |
| Dimensions | 12.5 x 10 x 3 cm (4.9 x 3.9 x 1.2 inches) |
| Item Weight | 202g (7.1 ounces) |
| Display Type | LCD |

Figure 2: Physical dimensions of the Haofy K1688 Solar Charge Controller.
5. Setup and Installation
Follow these steps for proper installation of your solar charge controller. Ensure all connections are secure and correct to prevent damage.
- Connect the Battery: Connect the positive (+) and negative (-) poles of your battery to the corresponding battery terminals on the controller. The controller will automatically detect the battery voltage (12V or 24V).
- Connect the Load: Connect the positive (+) and negative (-) poles of your DC load to the corresponding load terminals on the controller. Caution: Ensure correct polarity to avoid damaging the load or controller.
- Connect the Solar Panel: Connect the positive (+) and negative (-) poles of your solar panel(s) to the corresponding solar panel terminals on the controller.
Important: Always connect the battery first, then the solar panel, and finally the load. When disconnecting, reverse the order: disconnect the load, then the solar panel, and finally the battery.

Figure 3: System connection diagram for the Haofy K1688 Solar Charge Controller.

Figure 4: Detailed view of the wiring terminals for solar panel, battery, and load connections.
6. Operating Instructions
The LCD display provides real-time information about your solar system. Use the control buttons to navigate through different display modes and adjust settings.
LCD Display Modes:
Press the 'Control' button (or similar navigation button) to cycle through the following display screens:
- Battery Voltage (Main Interface): Displays the current battery voltage.
- Solar Panel Charge Current: Shows the current being supplied by the solar panels to the battery.
- Load Discharge Current: Indicates the current being drawn by the connected DC load.
- High Voltage Disconnection (HVD): Displays the voltage threshold at which charging will stop to prevent overcharging.
- Accumulated Discharging Power (Ah): Shows the total ampere-hours discharged from the battery.
- Accumulated Charging Power (Ah): Shows the total ampere-hours charged into the battery.
- Low Voltage Reconnection (LVR): Displays the voltage at which the load will be reconnected after a low voltage disconnection.
- Low Voltage Disconnection (LVD): Displays the voltage threshold at which the load will be disconnected to protect the battery from over-discharge.
- Load Working Mode: Indicates the operational mode of the load (e.g., always on, light control, timed).

Figure 5: Overview of LCD display modes and settings.
USB Charging:
The controller features two USB ports (5V 2.5A max) for charging compatible devices. Simply connect your device's USB cable to one of the ports.

Figure 6: Close-up of the LCD screen and dual USB ports.
7. Maintenance
To ensure optimal performance and longevity of your Haofy K1688 Solar Controller, follow these maintenance guidelines:
- Regular Inspection: Periodically check all wiring connections for tightness and corrosion. Loose connections can cause overheating and damage.
- Cleanliness: Keep the controller clean and free from dust and debris. Use a dry, soft cloth for cleaning. Do not use liquids or abrasive cleaners.
- Ventilation: Ensure the installation area remains well-ventilated to prevent overheating of the controller.
- Environmental Conditions: Avoid exposing the controller to extreme temperatures, direct water, or high humidity.
8. Troubleshooting
If you encounter issues with your solar charge controller, refer to the following common problems and solutions:
| Problem | Possible Cause | Solution |
|---|---|---|
| Controller not powering on / LCD blank | No battery connected or reverse polarity; Battery voltage too low. | Ensure battery is connected correctly with proper polarity. Check battery voltage; if too low, charge it externally. |
| Battery not charging | Solar panel not connected or reverse polarity; Insufficient sunlight; Damaged solar panel or wiring. | Check solar panel connections and polarity. Ensure adequate sunlight. Inspect solar panel and wiring for damage. |
| Load not working | Load not connected or reverse polarity; Battery voltage too low (LVD activated); Overload on load terminals. | Check load connections and polarity. Charge battery. Reduce load or check for short circuits in the load. |
| USB ports not charging | Battery voltage too low; Device not compatible or cable faulty. | Ensure battery is sufficiently charged. Try a different USB cable or device. |
9. Warranty and Support
For warranty information or technical support, please refer to the documentation provided with your purchase or contact Haofy customer service through the retailer where the product was purchased.