
Introduction
This user manual provides comprehensive instructions for the assembly, operation, and maintenance of your RALENO Photography Lighting Kit. Designed for beginners, amateur photographers, and professionals, this kit is suitable for product photography, portrait photography, video shooting, and various background needs. Please read this manual thoroughly before setting up and using the equipment to ensure safe and optimal performance.
Package Contents
Please verify that all items listed below are included in your package:
- 2 x 50W LED Bulbs (for softbox)
- 2 x 45W LED Bulbs (for soft umbrellas)
- 1 x 8.5 x 10 ft Background Support System
- 3 x 6 x 9 ft Backdrop Curtains (Black, White, Green)
- 2 x 20 x 27.6 inch Softboxes
- 2 x 33 inch Soft Umbrellas
- 4 x 78 inch Light Stands
- 2 x Lamp Holders
- 3 x Spring Clips
- 1 x 23 inch 2-in-1 Reflector
- 1 x Nylon Carrying Bag
- 1 x Instruction Manual (this document)
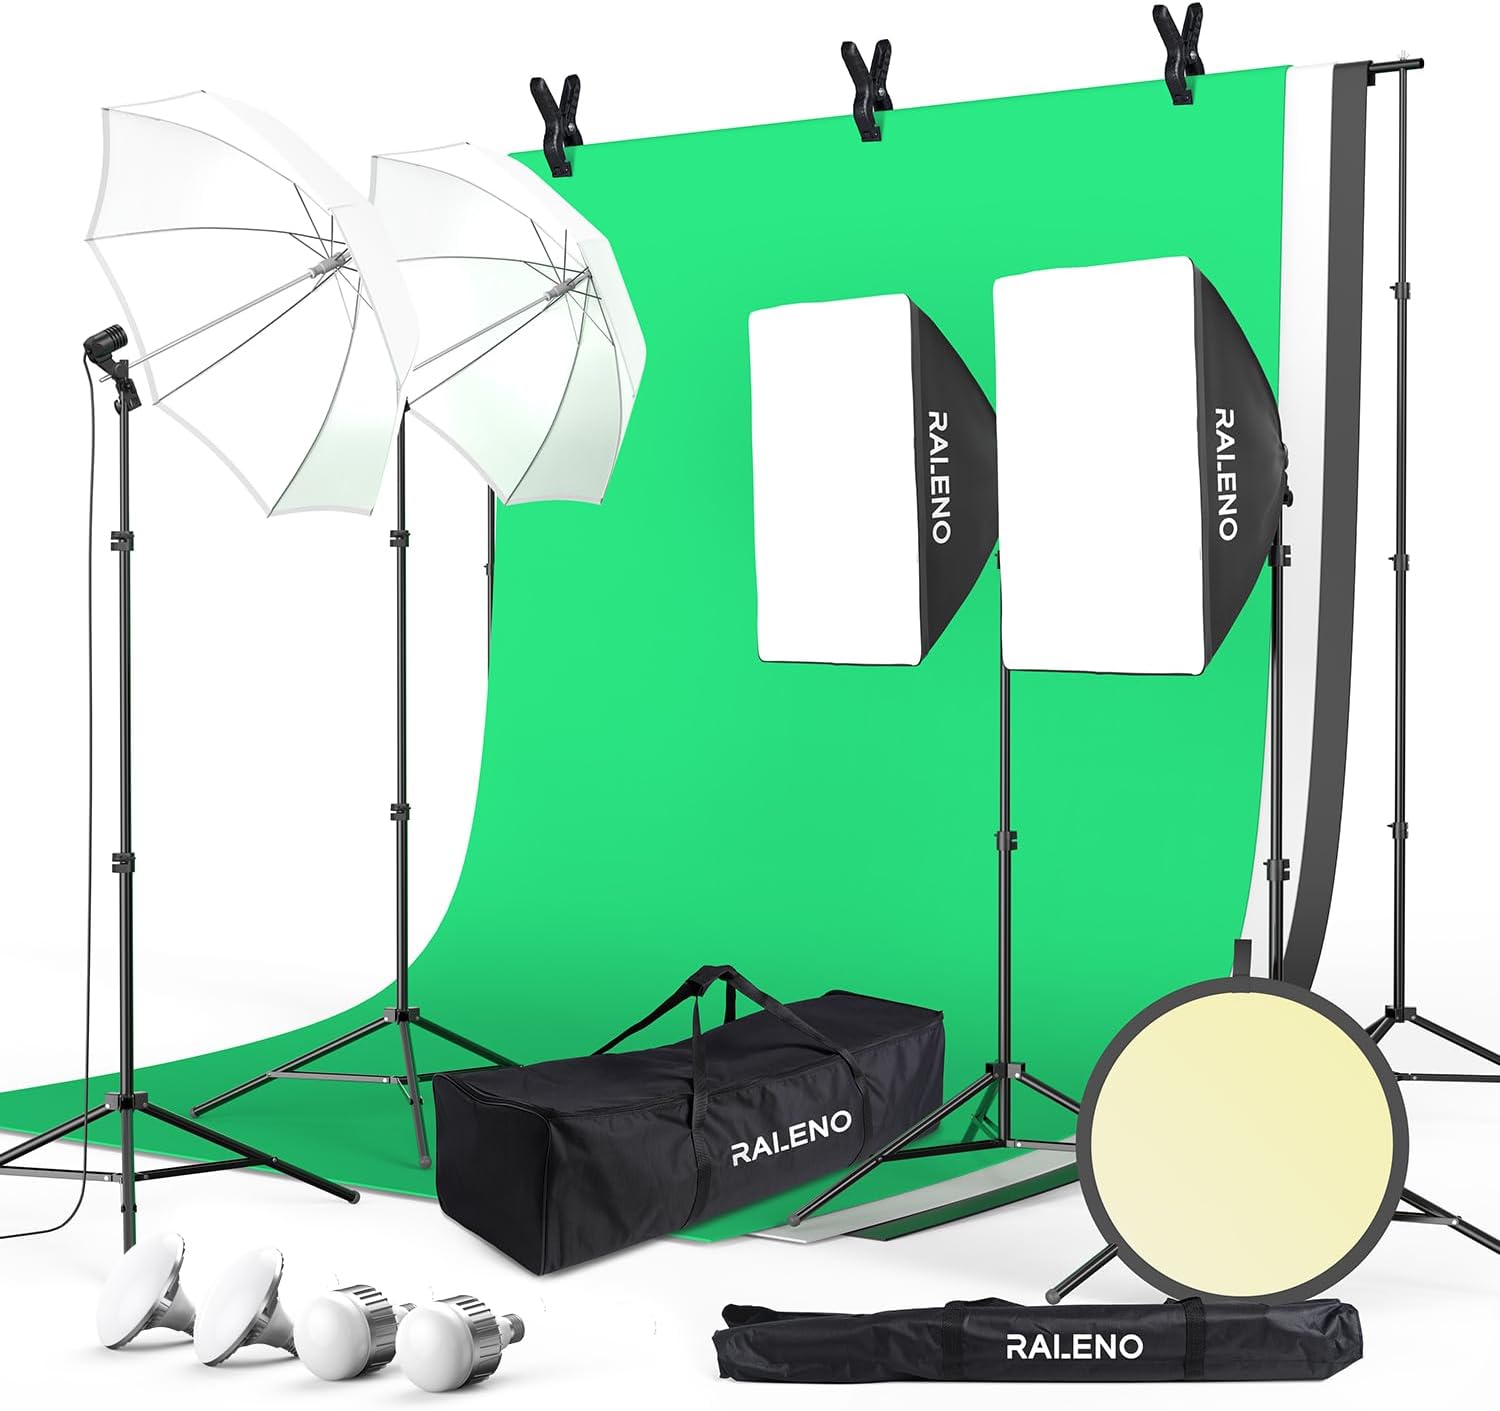
Figure 1: Overview of all components included in the RALENO Photography Lighting Kit.
Setup Instructions
1. Assembling the Background Support System
- Extend the two retractable tripods to your desired height (adjustable from 4.3 feet to 8.5 feet). Ensure they are stable on a flat surface.
- Assemble the four segment crossbars by screwing them together to achieve the desired width (adjustable from 5 feet to 10 feet).
- Insert the assembled crossbar into the top mounts of the two tripods.
- Select one of the 1.8 x 2.8 m backdrop cloths (black, white, or green).
- Drape the backdrop cloth over the crossbar. Use the provided spring clamps to secure the backdrop to the crossbar, ensuring it hangs smoothly.

Figure 2: Step-by-step assembly of the background support system.

Figure 3: Illustration highlighting the quality and thickness of the included backdrop fabrics.
2. Assembling the Softbox Lighting
- Take two of the light stands. Adjust their height using the quick-release buttons (adjustable from 26.7 inches to 78.7 inches).
- Attach a lamp holder to the top of each light stand.
- Screw a 50W LED bulb into each lamp holder.
- Assemble the 50 x 70 cm softboxes according to their individual instructions (typically involves inserting rods into corners and attaching the diffuser).
- Mount the assembled softboxes onto the lamp holders. The lamp socket allows for 210-degree rotation to adjust the light angle.

Figure 4: Softbox setup demonstrating the 210-degree adjustable angle for versatile lighting.
3. Assembling the Umbrella Lighting
- Take the remaining two light stands and adjust their height.
- Attach a lamp holder to the top of each light stand.
- Screw a 45W LED bulb into each lamp holder.
- Insert the shaft of the 84 cm soft umbrellas into the designated hole on the lamp holder.
- Adjust the angle of the umbrellas as needed using the lamp socket's 210-degree rotation feature.

Figure 5: Umbrella setup demonstrating the 210-degree adjustable angle for versatile lighting.
Operating Instructions
1. Powering On and Off
- Ensure all bulbs are securely screwed into their respective lamp holders.
- Plug the power cords of the lamp holders into a standard electrical outlet.
- The LED bulbs will illuminate immediately. There are no separate power switches on the bulbs themselves. To turn off the lights, unplug them from the power source.

Figure 6: Details of the LED bulbs, emphasizing their performance characteristics.
2. Adjusting Lighting
- Softboxes: Position the softboxes to direct light onto your subject. The 210-degree rotatable lamp socket allows for precise angle adjustments. Softboxes provide diffused, even lighting ideal for portraits and product photography.
- Umbrellas: Use the umbrellas to bounce or diffuse light, creating a softer, broader light spread. Their 210-degree adjustable angle offers flexibility in lighting setup.
- Reflector: The included 2-in-1 reflector can be used to bounce light back onto your subject, fill shadows, or add catchlights. Experiment with the gold and silver sides for different effects.
3. Utilizing Backdrops
- Green Screen: Ideal for chroma keying (removing the background in post-production) for video production or creative photography.
- White Backdrop: Provides a clean, neutral background suitable for high-key photography, product shots, or bright portraits.
- Black Backdrop: Creates a dramatic, low-key background, perfect for emphasizing contours, shadows, or for dark and moody aesthetics.


Figure 7: Examples of green, black, and white backdrops in use for various photographic styles.
Maintenance
- Cleaning:
- Backdrops: The fabric backdrops can be gently spot cleaned with a damp cloth and mild detergent if necessary. For wrinkles, a low-heat iron or steamer can be used.
- Light Stands & Hardware: Wipe down metal and plastic components with a dry or slightly damp cloth to remove dust and grime. Avoid abrasive cleaners.
- Softboxes & Umbrellas: These can be wiped clean with a soft, dry cloth. If heavily soiled, consult specific cleaning instructions for photographic light modifiers.
- Storage: When not in use, disassemble the kit and store all components in the provided nylon carrying bag. This protects the equipment from dust and damage and makes transport easier.
- Bulb Replacement: If an LED bulb fails, replace it with a compatible E27 base LED bulb of similar wattage (50W for softboxes, 45W for umbrellas) to maintain consistent lighting.
Troubleshooting
| Problem | Possible Cause | Solution |
|---|---|---|
| Lights do not turn on. | Bulb not screwed in properly, power outlet issue, faulty bulb. | Ensure bulbs are tightly screwed. Test the outlet with another device. Try a different bulb. |
| Backdrop is wrinkled. | Improper folding/storage, fabric naturally wrinkles. | Steam the backdrop or iron on a low setting. Ensure it is stretched taut when clipped to the stand. |
| Light stands are unstable. | Legs not fully extended, uneven surface, weight imbalance. | Ensure all tripod legs are fully extended and locked. Place on a flat, stable surface. Distribute weight evenly. |
| Softbox/Umbrella difficult to assemble. | Incorrect rod insertion, stiff material. | Refer to the specific assembly diagrams. Apply gentle, even pressure. Material may soften slightly with use. |
Specifications
| Feature | Detail |
|---|---|
| Model Number | LX-PS55-US |
| Product Dimensions | 35.83 x 10.63 x 8.66 inches (packaged) |
| Item Weight | 30.9 pounds |
| Light Stand Height | 26.7 inches to 78.7 inches (adjustable) |
| Backdrop Stand Height | 4.3 feet to 8.5 feet (adjustable) |
| Backdrop Stand Width | 5 feet to 10 feet (adjustable) |
| LED Bulbs (Softbox) | 2 x 50W, 5500K, 97CRI |
| LED Bulbs (Umbrella) | 2 x 45W, 5500K, 97CRI |
| Softbox Size | 50 x 70 cm (approx. 20 x 27.6 inches) |
| Soft Umbrella Size | 84 cm (approx. 33 inches) |
| Backdrop Cloth Size | 1.8 x 2.8 m (approx. 6 x 9 ft) |
| Material | Aluminum (stands), PC (lampshade) |
| Country of Origin | China |
Warranty and Support
RALENO is committed to providing high-quality products and excellent customer service. If you encounter any issues with your photography lighting kit, please do not hesitate to contact our support team.
- User Manual (PDF): For a downloadable version of this manual, please refer to the official product page or click here.
- Customer Service: Our professional and responsible after-sales personnel are available to assist you with any problems or questions. Please visit the RaLeno Store on Amazon for contact information and further support.
- Warranty Information: Specific warranty details may vary. Please retain your purchase receipt for any warranty claims.