
Kazeila HTC-355
Kazeila Water Timer User Manual
Model: HTC-355
Introduction
The Kazeila Automatic Sprinkler Timer, Model HTC-355, is designed to automate your garden watering system, providing convenience and efficiency. This device features a sensitive rain sensor, three customizable irrigation programs, and both automatic and manual watering modes. It is built for outdoor use with IPX55 waterproof rating, ensuring durability and reliable performance in various weather conditions.
This manual provides detailed instructions for the proper installation, operation, maintenance, and troubleshooting of your Kazeila Water Timer.

Figure 1: Kazeila Water Timer HTC-355, displaying its LCD screen and control buttons.
Product Features
- Newly Upgraded Rain Sensor: Automatically shuts off watering when rain is detected and resumes when dry.
- 3 Customizable Irrigation Modes (P1/P2/P3): Allows for setting different start times, frequencies, and durations for various watering needs.
- Flexible Manual Watering Mode: Enables immediate watering without interrupting programmed schedules.
- IPX55 Waterproof Rating: Designed for outdoor use with robust, impact-resistant materials and a waterproof battery case.
- User-Friendly LCD Screen: Displays current time, battery level, active program (P1/P2/P3), next start time, watering duration, frequency, and child lock status.
- Child Lock Function: Prevents accidental program changes.
Setup and Installation
- Battery Installation:
Unscrew the battery compartment cover on the back of the timer. Insert two AA alkaline batteries (not included), ensuring correct polarity (+/-). Replace the cover securely to maintain the waterproof seal.
- Connecting to Faucet:
Thread the timer onto a standard outdoor faucet. Ensure the connection is hand-tight to prevent leaks. Do not overtighten.
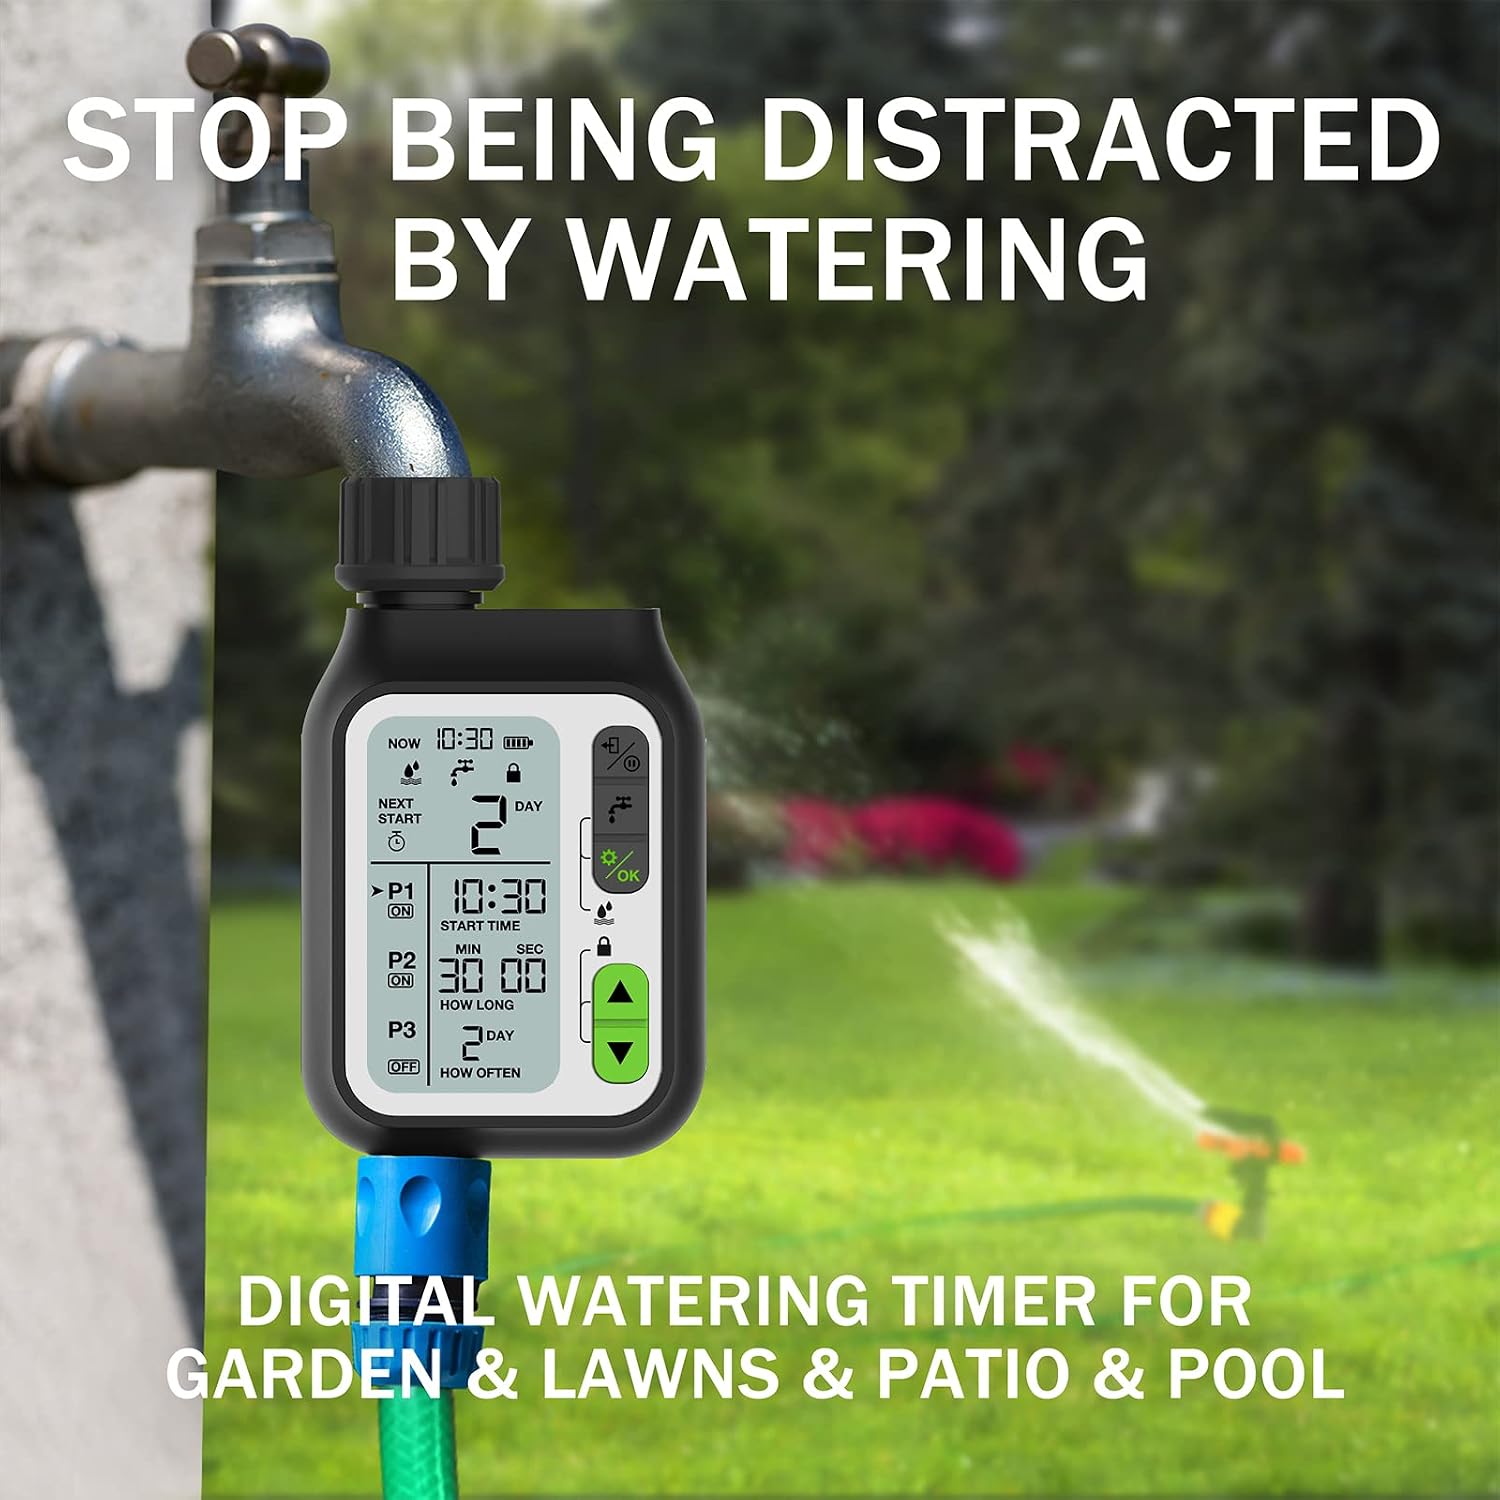
Figure 2: The water timer securely attached to a garden faucet, ready for operation.
- Connecting to Hose/Irrigation System:
Attach your garden hose or irrigation system connector to the bottom outlet of the timer. Ensure a tight, leak-free connection.
- Initial Time Setting:
Upon battery installation, the LCD screen will activate. Use the control buttons to set the current time. Refer to the 'Operating Instructions' section for detailed button functions.
Operating Instructions
Understanding the Display and Buttons
The large LCD screen provides all necessary information. The control panel includes buttons for navigation and setting adjustments.
- LCD Display: Shows current time, battery level, active program (P1/P2/P3), next start time, watering duration, frequency, and child lock status.
- Buttons: Typically include 'MODE', 'OK', 'UP', 'DOWN', and a manual watering button. Consult the specific button icons on your device for exact functions.
Programming Irrigation Schedules (P1, P2, P3)
The timer allows for three independent watering programs. Each program can be set with a unique start time, duration, and frequency.
- Select Program: Use the 'MODE' button to cycle through P1, P2, P3 settings.
- Set Start Time: Use 'UP'/'DOWN' buttons to adjust the desired start time for the selected program. Press 'OK' to confirm.
- Set Watering Duration: Adjust the length of watering from 1 second to 99 minutes and 59 seconds. Press 'OK' to confirm.
- Set Watering Frequency: Choose how often the program runs (e.g., every day, every 2 days, specific days of the week). Press 'OK' to confirm.

Figure 3: Example of setting up three distinct watering schedules for different areas.
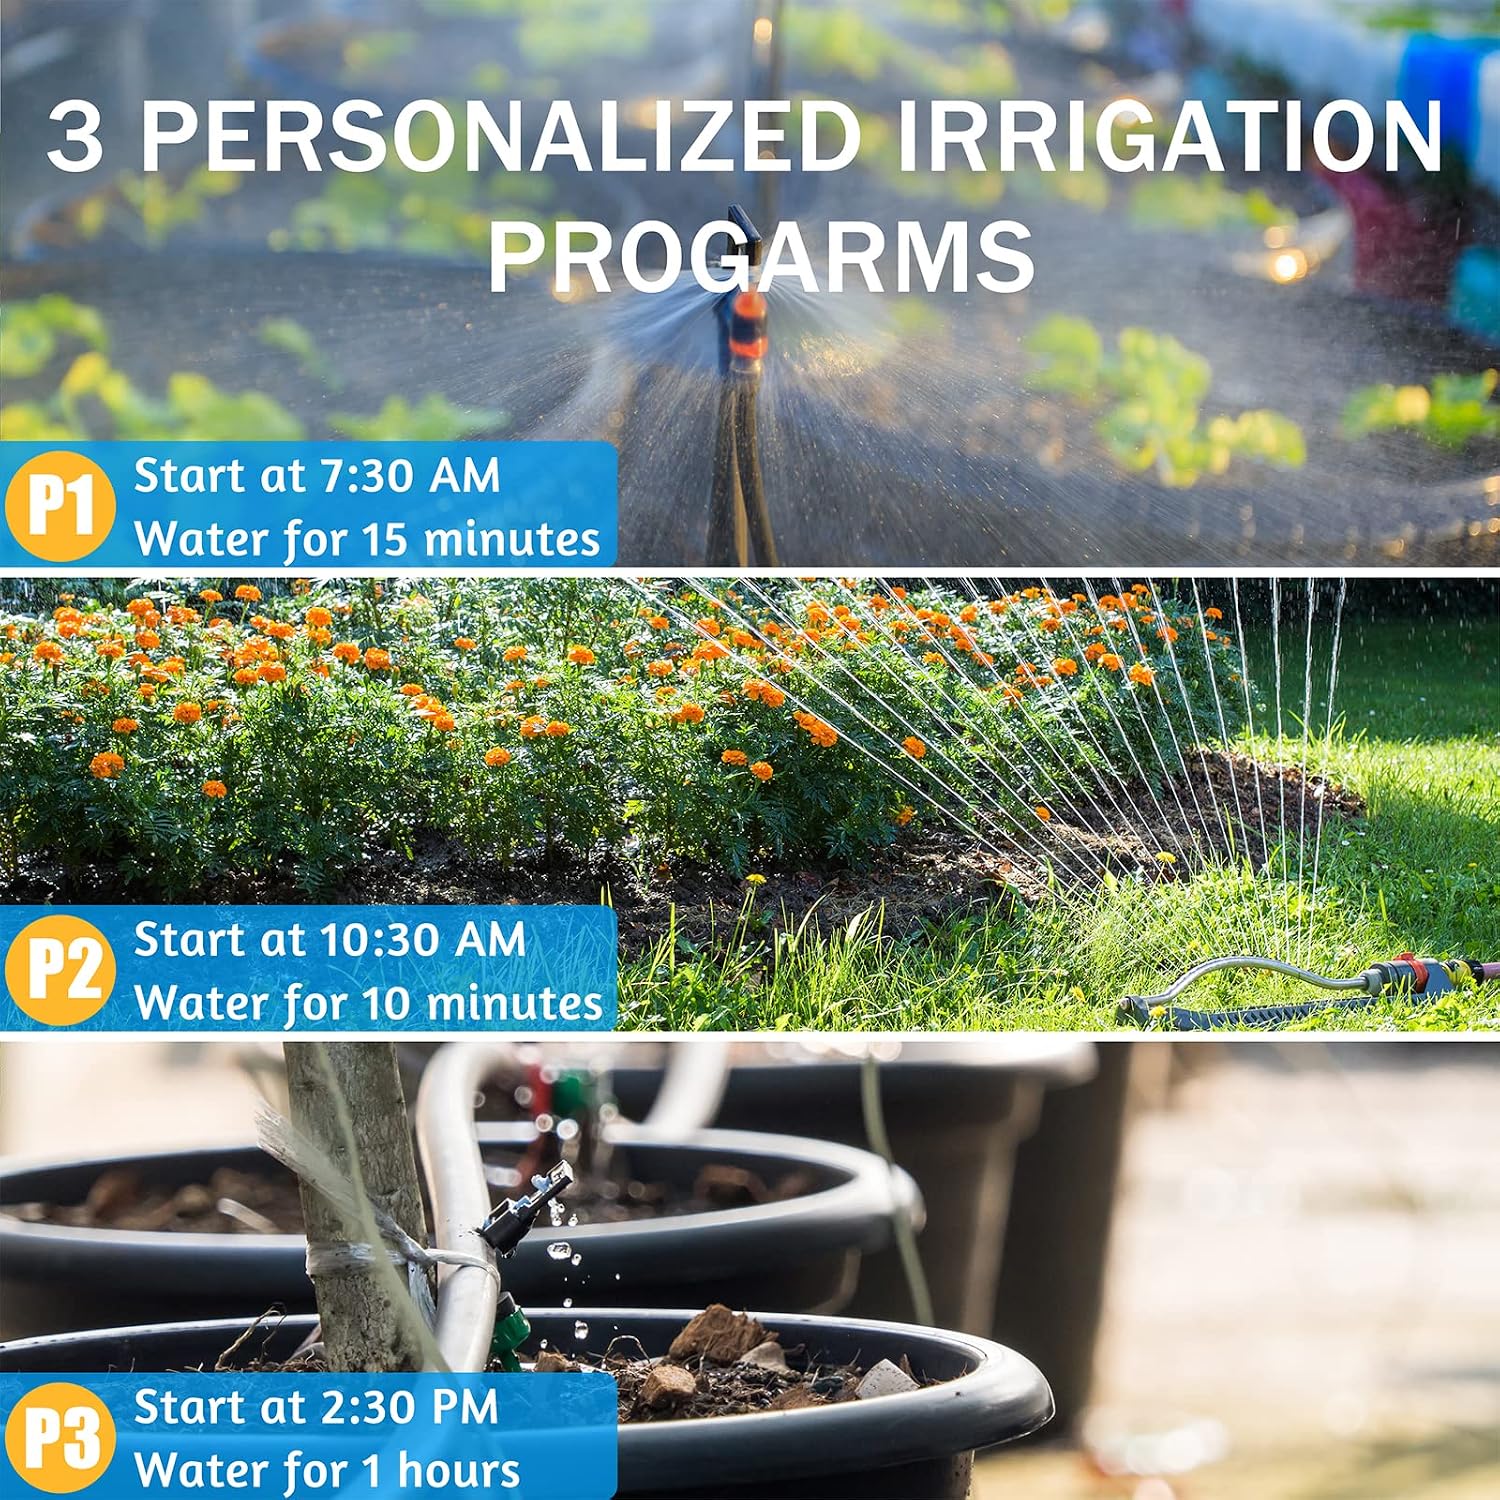
Figure 4: The timer's display indicating options for setting watering duration and frequency.
Manual Watering Mode
To water immediately without affecting your programmed schedules, activate the manual mode. This is useful for spot watering or when extra hydration is needed.
- Press the 'Manual' button (often indicated by a water droplet icon).
- Use 'UP'/'DOWN' to set the desired manual watering duration.
- Press 'OK' to start manual watering. The timer will automatically revert to programmed schedules after the manual cycle completes.
Rain Sensor Function
The integrated rain sensor detects rainfall and automatically pauses scheduled watering to prevent overwatering and conserve water. Once the sensor dries, the timer will resume its programmed schedule.

Figure 5: The water timer demonstrating its rain sensor capability, pausing watering during rainfall.
Child Lock Function
To prevent accidental changes to your settings, activate the child lock. Refer to your device's specific instructions for engaging and disengaging the child lock, typically by holding down a combination of buttons for a few seconds.
Maintenance
- Battery Replacement: Replace batteries when the low battery indicator appears on the LCD screen. Always use fresh alkaline batteries.
- Cleaning: Periodically wipe the exterior of the timer with a damp cloth. Do not use abrasive cleaners or submerge the unit in water.
- Connection Check: Regularly inspect all connections for leaks. Ensure washers are properly seated and connections are hand-tight.
- Winterization: Before the first frost, disconnect the timer from the faucet and hose. Remove batteries. Store the timer indoors in a dry, protected area to prevent damage from freezing temperatures.
Troubleshooting
| Problem | Possible Cause | Solution |
|---|---|---|
| Timer not watering / No water flow. | Low or dead batteries; Faucet turned off; Program not set correctly; Rain sensor activated. | Replace batteries; Ensure faucet is fully open; Verify program settings; Check if rain sensor is wet. |
| Water leaks from connections. | Loose connections; Missing or damaged washer; Cracked housing. | Tighten connections by hand; Check and replace washers if necessary; If housing is cracked, unit may need replacement. |
| LCD screen unreadable / condensation. | Moisture ingress; Extreme temperature changes. | Ensure battery compartment is sealed properly. If condensation persists, allow unit to dry in a warm, dry place. If problem continues, contact support. |
| Programs not running as scheduled. | Incorrect time setting; Child lock engaged; Overlapping programs. | Verify current time and program start times; Disengage child lock; Adjust programs to avoid conflicts. |
Specifications
| Feature | Detail |
|---|---|
| Model | HTC-355 |
| Brand | Kazeila |
| Material | Plastic |
| Product Dimensions | 5.59 x 8.64 x 16 cm (2.2 x 3.4 x 6.3 inches) |
| Item Weight | 388 g (13.7 ounces) |
| Waterproof Rating | IPX55 |
| Number of Settings | 3 (P1, P2, P3) |
| Watering Duration Range | 1 second to 99 minutes 59 seconds |
Warranty and Support
Kazeila stands behind the quality of its products. For any questions, technical assistance, or warranty inquiries, please contact Kazeila customer support. Please have your model number (HTC-355) and purchase information ready when contacting support.
You can find more information and contact details by visiting the official Kazeila store:
Ask a question about this manual
Ask about setup, troubleshooting, compatibility, parts, safety, or missing instructions. Manuals+ will review the question and use this page’s manual context to help answer it.