1. Introduction
Thank you for choosing the JAKEMY JM-E21A Electric Precision Screwdriver Kit. This kit is designed for precise repair and maintenance of various electronic devices and small appliances. It features a cordless, rechargeable design with adjustable torque, LED illumination, and both electric and manual operating modes. Please read this manual thoroughly before use to ensure proper operation and longevity of your tool.
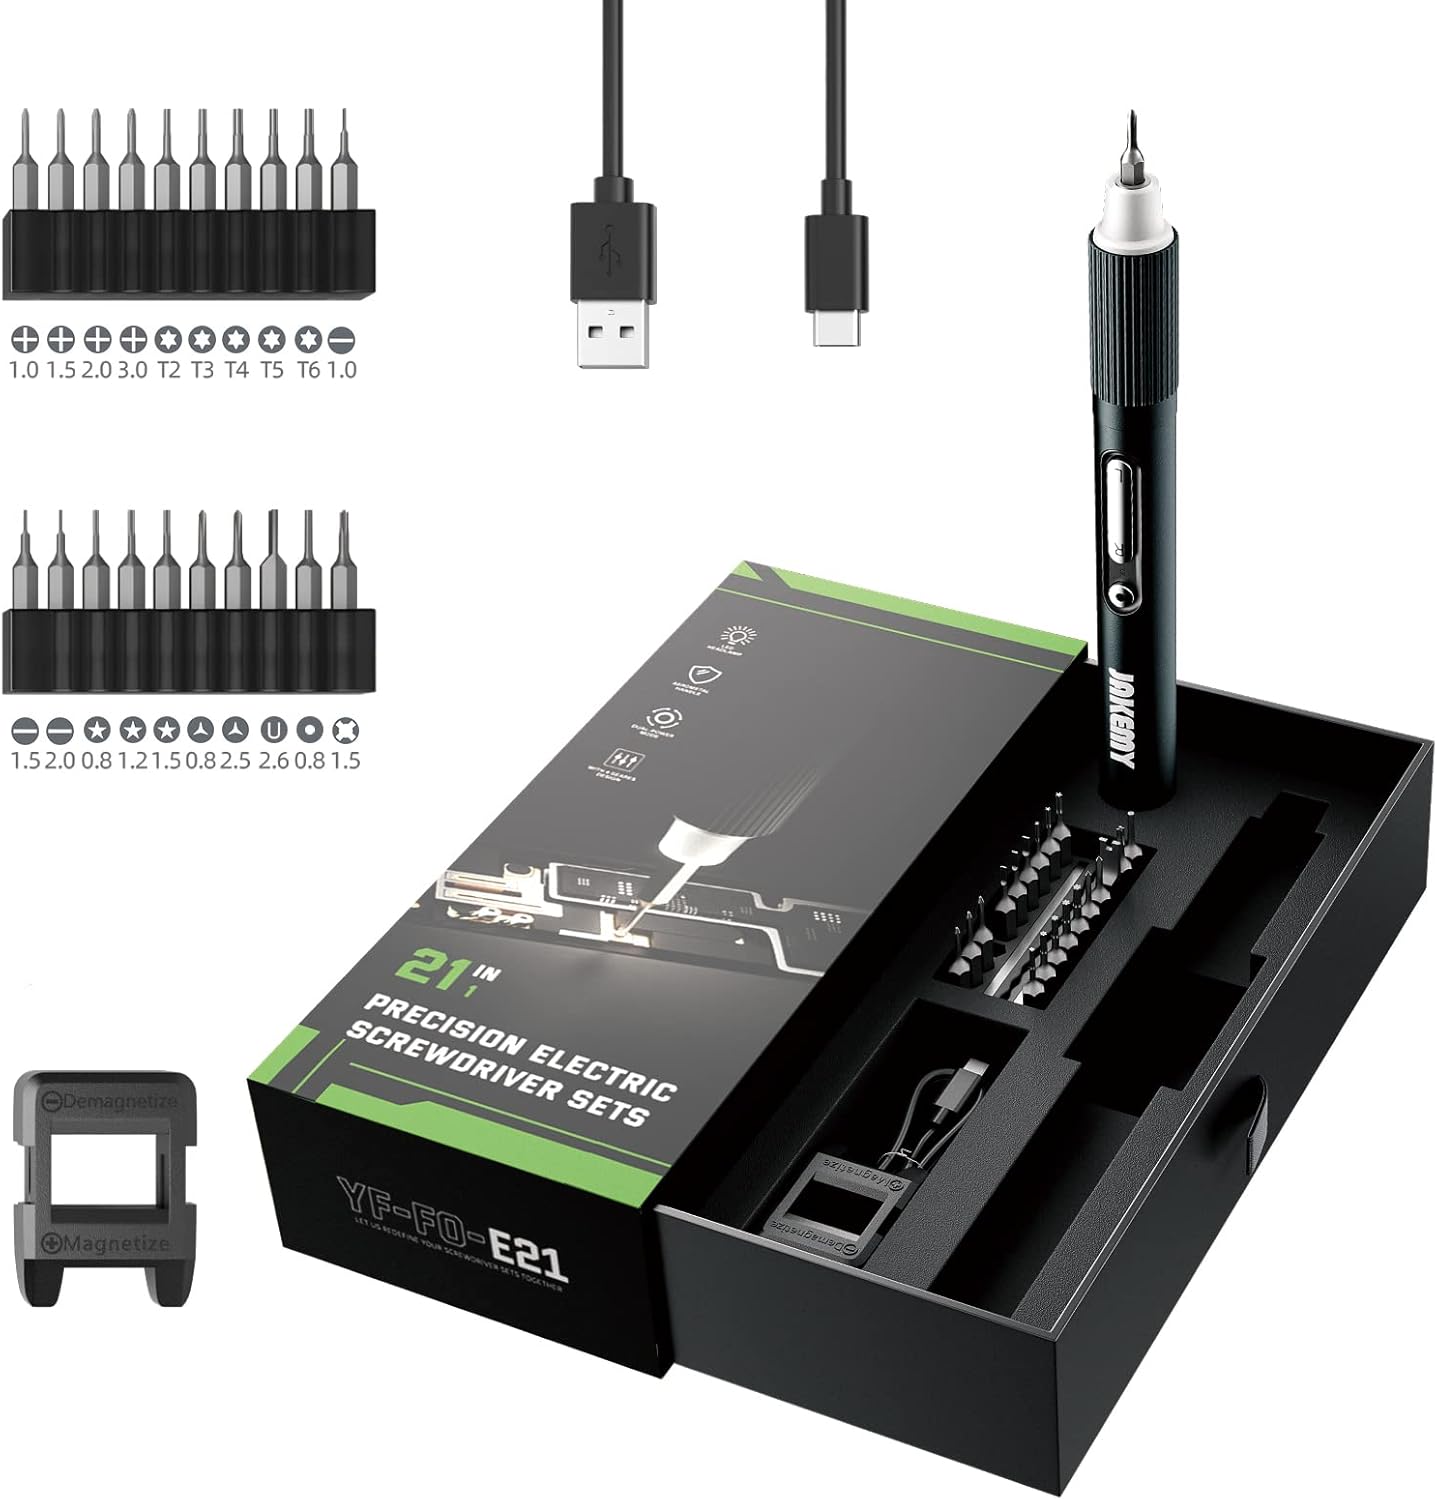
Image 1.1: Overview of the JAKEMY JM-E21A Electric Precision Screwdriver Kit, including the electric screwdriver, various precision bits, USB charging cable, and magnetizer, all neatly arranged in its portable case.
2. Package Contents
The JAKEMY JM-E21A kit includes the following components:
- 1 x Upgraded Mini Electric Screwdriver
- 20 x CRV Magnetic Precision Screwdriver Bits (Phillips, Flathead, Tri-Wing, U-Type, Ejection Pin, Standoff, Torx, Star)
- 1 x Magnetizer/Demagnetizer
- 1 x USB Charging Cable
- 1 x Portable Packing Box
3. Setup and Charging
3.1 Initial Charging
Before first use, fully charge the electric screwdriver. The device is powered by a Lithium-Ion battery.
- Locate the USB Type-C charging port on the screwdriver handle.
- Connect the provided USB charging cable to the screwdriver and a compatible USB power source (e.g., computer, wall adapter).
- The LED indicator will show charging status. A full charge typically takes approximately 1.5 hours.

Image 3.1: The electric screwdriver connected to a USB power source for charging. The image also highlights the working time (120 minutes continuous), standby time (30 days), charging time (1.5 hours), and battery capacity (320 mAh).
3.2 Installing Screwdriver Bits
The screwdriver uses magnetic precision bits for easy installation and secure hold.
- Select the appropriate bit for your task from the kit.
- Insert the bit firmly into the magnetic chuck at the tip of the screwdriver.
- To remove, simply pull the bit out.
3.3 Using the Magnetizer/Demagnetizer
The included tool can magnetize bits for better screw retention or demagnetize them to prevent interference with sensitive electronics.
- To Magnetize: Slide the bit through the opening marked 'Magnetize'.
- To Demagnetize: Slide the bit through the opening marked 'Demagnetize'.

Image 3.2: The magnetizer/demagnetizer tool is shown alongside the electric screwdriver and its various bits, illustrating its function for enhancing or removing magnetic properties from the screwdriver tips.
4. Operating Instructions
4.1 Powering On/Off and LED Light
The screwdriver features an independent switch for control.
- Press the LED light button to activate the 4 shadowless LED lamps, providing illumination for dark work areas.
- The screwdriver is activated by pressing the rotation buttons.

Image 4.1: Detailed view of the screwdriver's features, including the Type-C USB charging port, 4 LED shadowless lamps, non-slip handle, rhombus gear adjustment cap, independent rotation buttons, and magnetic bit holder.
4.2 Dual Operating Modes: Electric and Manual
The JM-E21A offers both electric and manual modes, allowing flexibility for various tasks.
- Electric Mode (E-mode): Press the 'R' button for clockwise rotation (tightening) or 'L' button for counter-clockwise rotation (loosening). This mode is ideal for delicate tasks.
- Manual Mode (M-mode): For screws that are too tight or require higher torque, the screwdriver can be used manually. Simply twist the handle as you would with a traditional screwdriver. The maximum manual torque is 2 Nm.
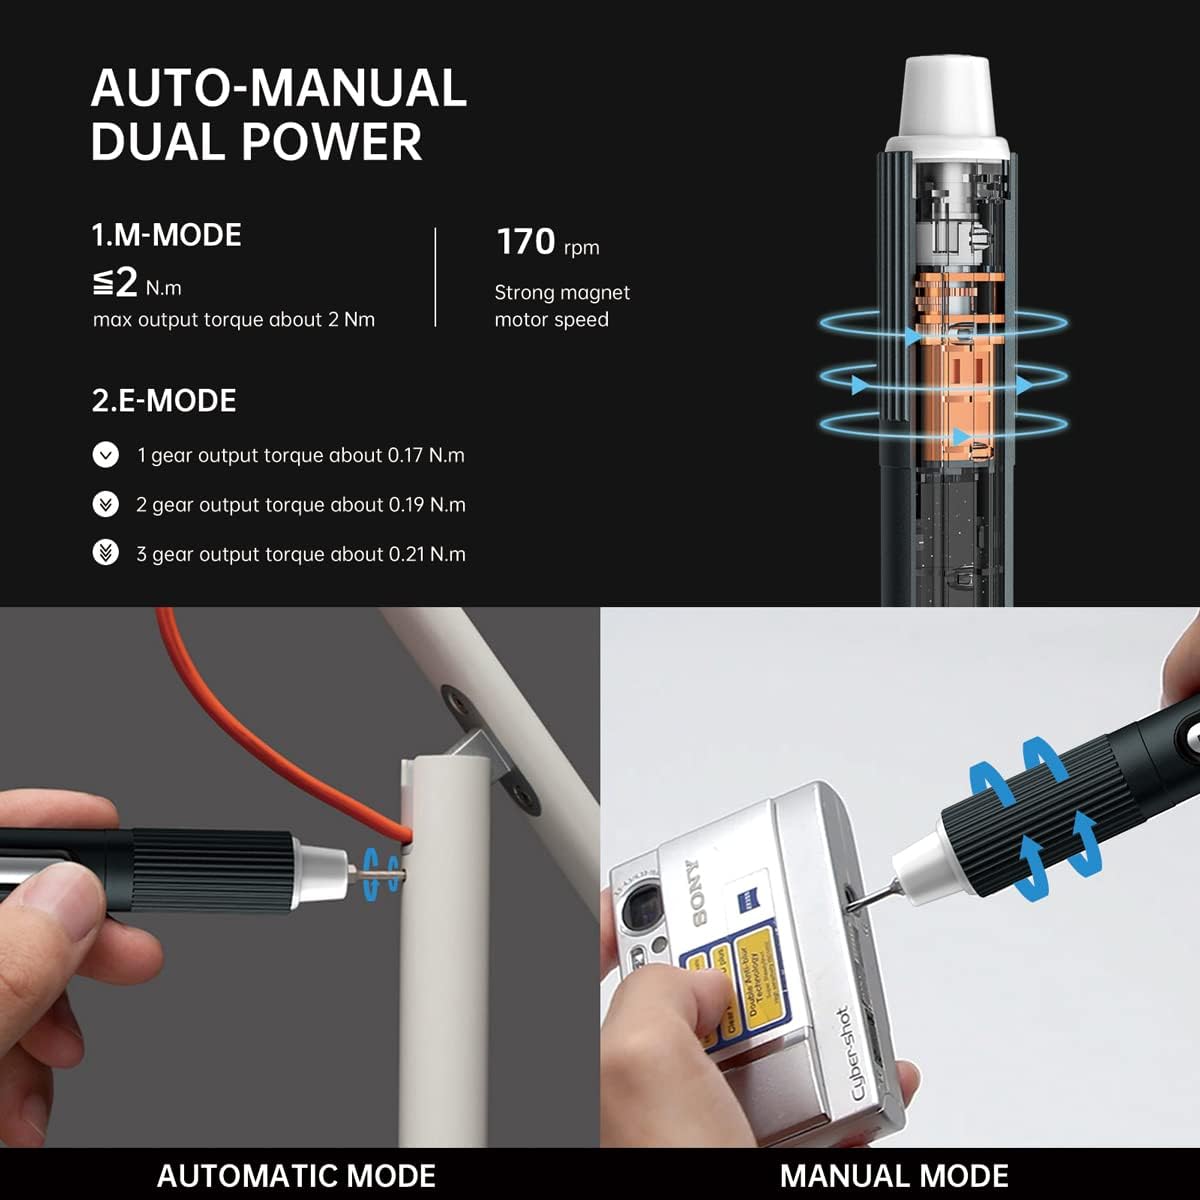
Image 4.2: This image explains the dual operating modes: Automatic (Electric) mode with 170 rpm motor speed and adjustable torque, and Manual mode for higher torque applications (up to 2 Nm).
4.3 Adjusting Torque (Electric Mode)
The electric mode features 3 adjustable torque gears for different applications.
- Rotate the rhombus gear adjustment cap at the top of the screwdriver to select the desired torque setting.
- Gear 1: Approximately 0.17 Nm
- Gear 2: Approximately 0.19 Nm
- Gear 3: Approximately 0.21 Nm
Start with the lowest torque setting and increase if necessary to avoid overtightening or damaging delicate components.
4.4 Recommended Uses
This precision screwdriver kit is suitable for a wide range of small electronics and devices, including but not limited to:
- Laptops and Desktop Computers
- Mobile Phones and Tablets
- Cameras and Drones
- Gaming Consoles (e.g., PS5)
- Eyeglasses and Watches
- Small Toys and RC Cars

Image 4.3: The screwdriver is depicted in various application scenarios, demonstrating its utility for tasks such as repairing a laptop fan, adjusting a watch, working on a circuit board, and fastening a small bracket.
5. Maintenance
Proper maintenance ensures the longevity and optimal performance of your JAKEMY JM-E21A screwdriver kit.
- Cleaning: Wipe the screwdriver handle and bits with a soft, dry cloth after each use to remove dust and debris. Do not use harsh chemicals or abrasive cleaners.
- Storage: Store the screwdriver and all bits in the provided portable packing box when not in use. This protects the components from damage and keeps them organized. Store in a cool, dry place away from direct sunlight and moisture.
- Battery Care: To maintain battery health, avoid completely draining the battery frequently. Recharge the screwdriver when the power is low. If storing for an extended period, charge the battery to approximately 50% every few months.
6. Troubleshooting
If you encounter issues with your JAKEMY JM-E21A, refer to the following common troubleshooting steps:
- Screwdriver not turning on or operating:
- Ensure the battery is sufficiently charged. Connect to the USB charging cable and allow it to charge for at least 30 minutes.
- Verify that the rotation buttons are being pressed correctly.
- Bit slipping or not engaging screw:
- Ensure the correct bit size and type is selected for the screw.
- Confirm the bit is fully inserted into the magnetic chuck.
- If the bit is worn, replace it with a new one.
- Use the magnetizer to enhance the magnetic hold of the bit if needed.
- Screwdriver feels weak or lacks power:
- Recharge the battery fully.
- Ensure you are using the appropriate torque setting for the task. For very tight screws, switch to manual mode.
- LED lights not working:
- Press the dedicated LED light button to activate them.
- If the battery is extremely low, the LED lights may not function. Charge the screwdriver.
If problems persist after following these steps, please contact customer support.
7. Specifications
| Brand | JAKEMY |
| Model Name | 3 Torque Electric Screwdriver Set E21A (JM-E21A) |
| Number of Items | 23 (1 screwdriver, 20 bits, 1 magnetizer, 1 USB cable) |
| Head Style | Phillips, Flathead, Tri-Wing, U-Type, Ejection Pin, Standoff, Torx, Star |
| Material | Aluminum Screwdriver Handle |
| Electric Torque Gears | Gear 1: ~0.17 Nm, Gear 2: ~0.19 Nm, Gear 3: ~0.21 Nm |
| Manual Torque | Max 2 Nm |
| Motor Speed | 170 rpm |
| Battery Type | Lithium Ion (included) |
| Charging Time | Approx. 1.5 hours |
| Working Time | Approx. 120 minutes (continuous at full power) |
| Standby Time | Approx. 30 days (in 0 gear mode) |
| Illumination | 4 LED Shadowless Lamps |
| Product Dimensions | 8.07 x 3.54 x 1.77 inches |
| Item Weight | 10.6 ounces |
8. Warranty and Support
8.1 Warranty Information
The JAKEMY JM-E21A Electric Precision Screwdriver Kit is guaranteed for 365 days from the date of purchase against quality issues related to the electronics.
8.2 Customer Support
For any product-related questions or concerns, JAKEMY is committed to providing efficient service. Please contact our customer support team for assistance. We aim to address product problems within 24 hours.
For support, please refer to the contact information provided with your purchase or visit the official JAKEMY website.


