1. Introduction
This manual provides detailed instructions for the installation, operation, and maintenance of your Gikysuiz 5200mAh Replacement Battery, designed for Eufy Robovac L70 Hybrid Series Robot Vacuums. Please read this manual thoroughly before proceeding with installation to ensure proper function and safety.

Image 1.1: Gikysuiz 5200mAh Replacement Battery with included screwdriver.
2. Compatibility
This replacement battery is fully compatible with the following Eufy RoboVac models:
- Eufy T2190 Robovac L70 Hybrid robot vacuum
- Eufy T2190G21 Robovac L70 Hybrid robot vacuum
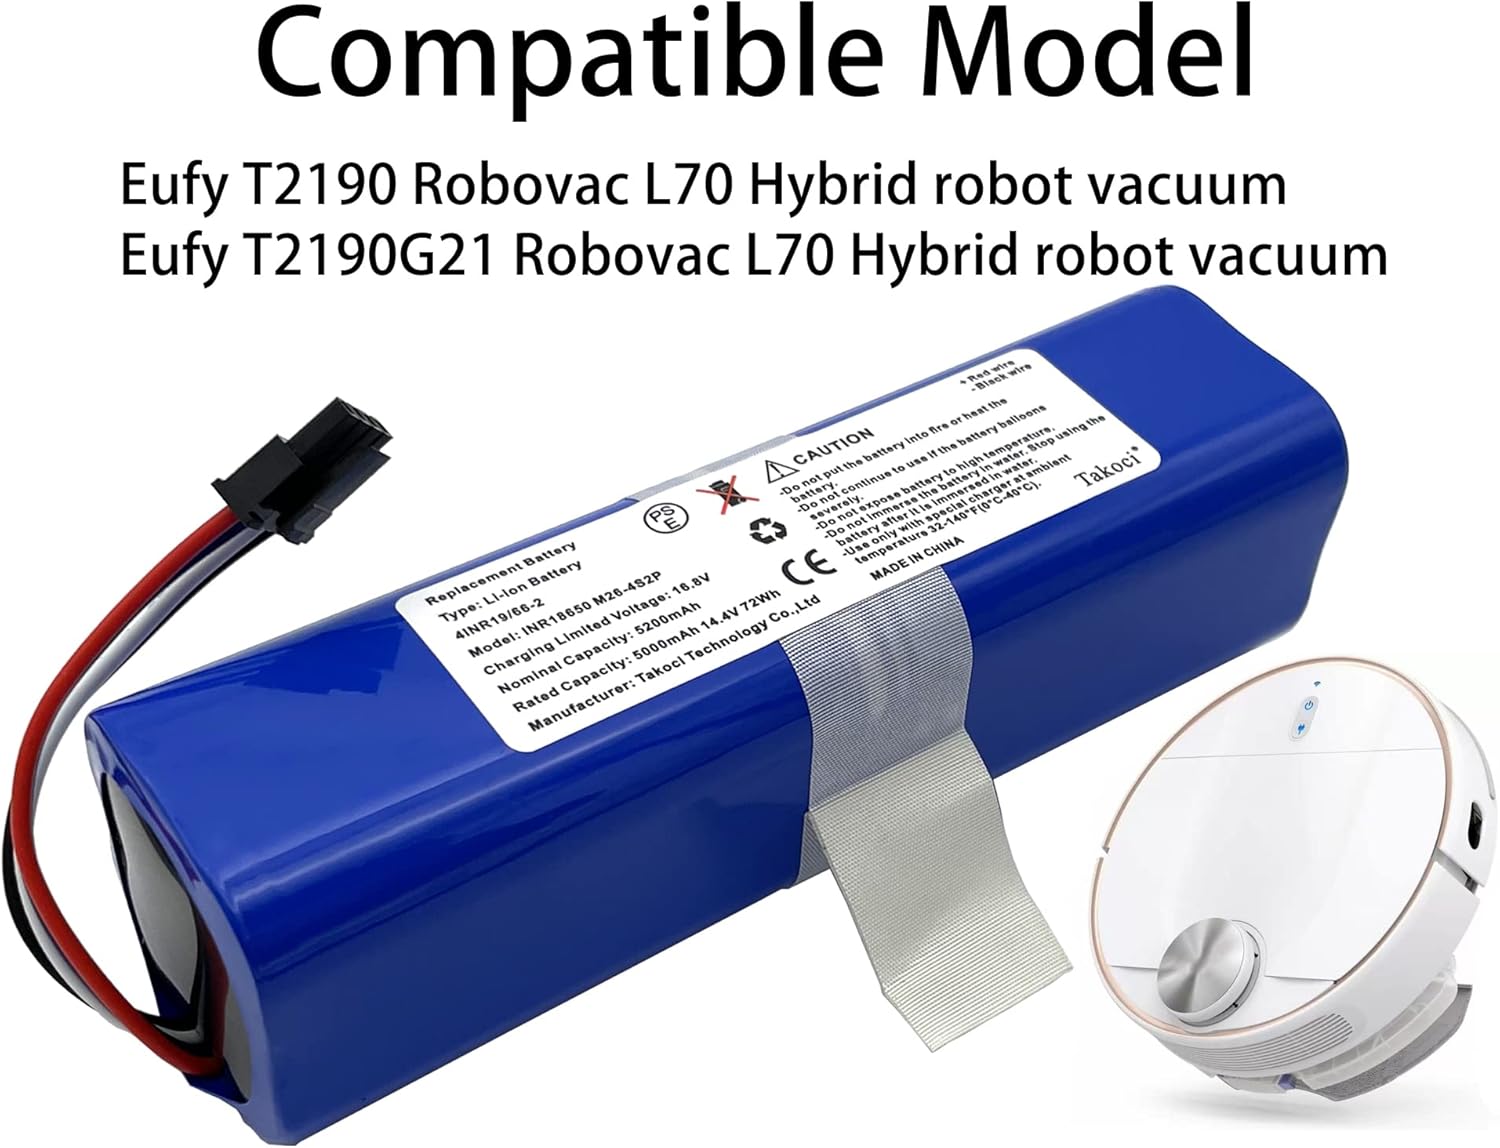
Image 2.1: The replacement battery shown with a compatible Eufy Robovac L70 Hybrid.
3. Key Features
- High Capacity: 5200mAh capacity ensures extended runtime for your robot vacuum.
- Easy Installation: Designed for quick and straightforward replacement.
- Superior Quality: Manufactured with high-quality components, offering no memory effect.
- Advanced Protection: Includes multiple safety features such as over-temperature protection, over-charging protection, over-load protection, short-circuit protection, and safeguard protection.
- Durability: Engineered for heat and cold resistance, ensuring stable output in various environments.

Image 3.1: Visual representation of the battery's multiple protection features.
4. Safety Information
WARNING: Failure to follow these safety instructions could result in fire, electric shock, or other injury or damage.
- Do not put the battery into fire or heat the battery.
- Do not continue to use if the battery balloons severely.
- Do not expose battery to high temperature.
- Do not immerse the battery in water. Stop using the battery after it is immersed in water.
- Use only with special charger at ambient temperature 32-104°F (0-40°C).
- Do not disassemble, impact, squeeze, or place in high-temperature environments.
5. Installation Guide
Follow these steps carefully to replace the battery in your Eufy Robovac L70 Hybrid robot vacuum. It is recommended to watch the accompanying video for a visual guide.
5.1. Preparation
- Ensure the robot vacuum is powered off and disconnected from its charging base.
- Flip the robot vacuum upside down to access the bottom panel.

Image 5.1: Underside of the robot vacuum, ready for battery replacement.
5.2. Removing the Old Battery
- Using a Phillips screwdriver, remove the five screws securing the bottom cover. (Refer to video for screw locations).
- Remove the rolling brush by lifting its cover and pulling it out.
- Unscrew and remove the side brush.
- Carefully lift and remove the entire bottom cover.
- Locate the old battery. It will be secured with a white insulating tape. Gently pull the battery out.
- Disconnect the battery connector from the robot vacuum's circuit board. This connector is typically white and has multiple wires (red, black, white, grey).

Image 5.2: Detail of the battery connector.
5.3. Installing the New Battery
- Connect the new Gikysuiz replacement battery's connector to the corresponding port on the robot vacuum's circuit board. Ensure it clicks securely into place.
- Carefully place the new battery into its compartment, ensuring the printed side is facing down.
- Re-wrap the connector with the insulating tape if it was present on the original battery.
- Reattach the bottom cover, ensuring all tabs align correctly.
- Secure the bottom cover by re-inserting and tightening the five Phillips screws.
- Reinstall the rolling brush and its cover.
- Reinstall the side brush and tighten its screw.
- Flip the robot vacuum back to its upright position.
5.4. Installation Video Guide
For a comprehensive visual walkthrough of the battery installation process, please refer to the official video below:
Video 5.1: Official tutorial for installing the battery in Eufy Robovac L70 Hybrid.
6. Operating and Charging
After successful installation, place your robot vacuum back on its charging base. Allow the battery to fully charge before its first use. The robot vacuum's indicator lights will typically show charging status. A full charge ensures optimal performance and runtime.

Image 6.1: The robot vacuum in operation, demonstrating its cleaning path.
7. Maintenance
- Regular Charging: For optimal battery life, ensure the robot vacuum is regularly charged. Avoid completely draining the battery frequently.
- Storage: If storing the robot vacuum for an extended period, ensure the battery is partially charged (around 50%) and store it in a cool, dry place. Recharge every 3-6 months to prevent deep discharge.
- Cleaning: Keep the battery contacts on both the battery and the vacuum clean to ensure efficient charging.
- Temperature: Operate and charge the battery within the recommended ambient temperature range of 32-104°F (0-40°C).

Image 7.1: The battery's design emphasizes its upgraded high capacity for longer service.
8. Troubleshooting
| Problem | Possible Cause | Solution |
|---|---|---|
| Robot vacuum not powering on after battery replacement. | Battery connector not properly seated. | Ensure the battery connector is firmly plugged in. Re-open the cover and check the connection. |
| Reduced runtime after new battery installation. | Battery not fully charged. | Place the robot vacuum on its charging base and allow it to charge completely (several hours). |
| Robot vacuum not charging. | Dirty charging contacts or faulty charging base. | Clean the charging contacts on both the robot vacuum and the charging base. Test with another charging base if available. |
| Battery appears swollen or damaged. | Internal battery issue. | Immediately discontinue use and safely dispose of the battery according to local regulations. Do NOT attempt to charge or use a swollen battery. |
9. Specifications
- Brand: Gikysuiz
- Model Number: Eufy INR18650M26-4S2P
- Battery Cell Composition: Lithium Ion
- Battery Capacity: 5200 Milliamp Hours (mAh)
- Rated Voltage: 14.4V
- Item Weight: 14.4 ounces
- Package Dimensions: 6.73 x 2.17 x 1.73 inches
- Recommended Uses: Vacuum Cleaner
10. Warranty and Support
For warranty information or technical support, please contact Gikysuiz customer service directly. Refer to the product packaging or the seller's information for contact details.
Please ensure both the model and battery part number are matched with your device. If you are not sure, please send an email to the manufacturer with your battery details or pictures for professional suggestions.