
1. Introduction
This manual provides detailed instructions for the K&F CONCEPT 4K WiFi Invisible Infrared Trail Camera, model E10xs (KF35.131). This camera is designed for wildlife observation, security monitoring, and other outdoor recording needs. It features 4K Ultra HD video recording, 32MP image capture, invisible infrared night vision, and convenient WiFi/Bluetooth connectivity for smartphone control.
Please read this manual thoroughly before using the camera to ensure proper operation and to maximize its performance.
2. Setup
2.1 Package Contents
Verify that all items are present in your package:
- K&F CONCEPT 4K WiFi Invisible Infrared Trail Camera (E10xs)
- 8x AA 1.5V Alkaline Batteries
- 64GB Micro SD Card (U3)
- Mounting Strap
- Adjustable Mounting Bracket
- USB Cable
- User Manual
2.2 Battery Installation
The camera requires 8 AA 1.5V alkaline batteries for operation. Ensure correct polarity when inserting batteries.
- Open the camera's battery compartment latch.
- Insert 8 AA batteries, matching the positive (+) and negative (-) terminals as indicated inside the compartment.
- Close the battery compartment securely to maintain the IP66 waterproof rating.
Note: For optimal performance and battery life, use high-quality 1.5V alkaline batteries. Rechargeable batteries (typically 1.2V) may not provide sufficient power for consistent operation.
2.3 Micro SD Card Insertion
A 64GB Micro SD U3 card is included. The camera supports Micro SD cards up to 512GB.
- Locate the Micro SD card slot on the side or bottom of the camera.
- Insert the Micro SD card with the gold contacts facing the correct direction until it clicks into place.
- To remove, push the card in gently until it springs out.
Important: Format the Micro SD card in the camera's settings menu before first use and periodically thereafter to ensure stable performance.
2.4 Mounting the Camera
The camera comes with a mounting strap and an adjustable bracket for flexible installation.
- Using the Mounting Strap: Thread the strap through the slots on the back of the camera and secure it around a tree or pole. The camera's serrated back helps provide a stable grip.
- Using the Adjustable Bracket: Attach the bracket to a surface using screws (not included), then mount the camera onto the bracket. This allows for a 45° tilt adjustment.
Ensure the camera is positioned to capture the desired area, keeping in mind the 120° detection angle and 20-meter detection distance.
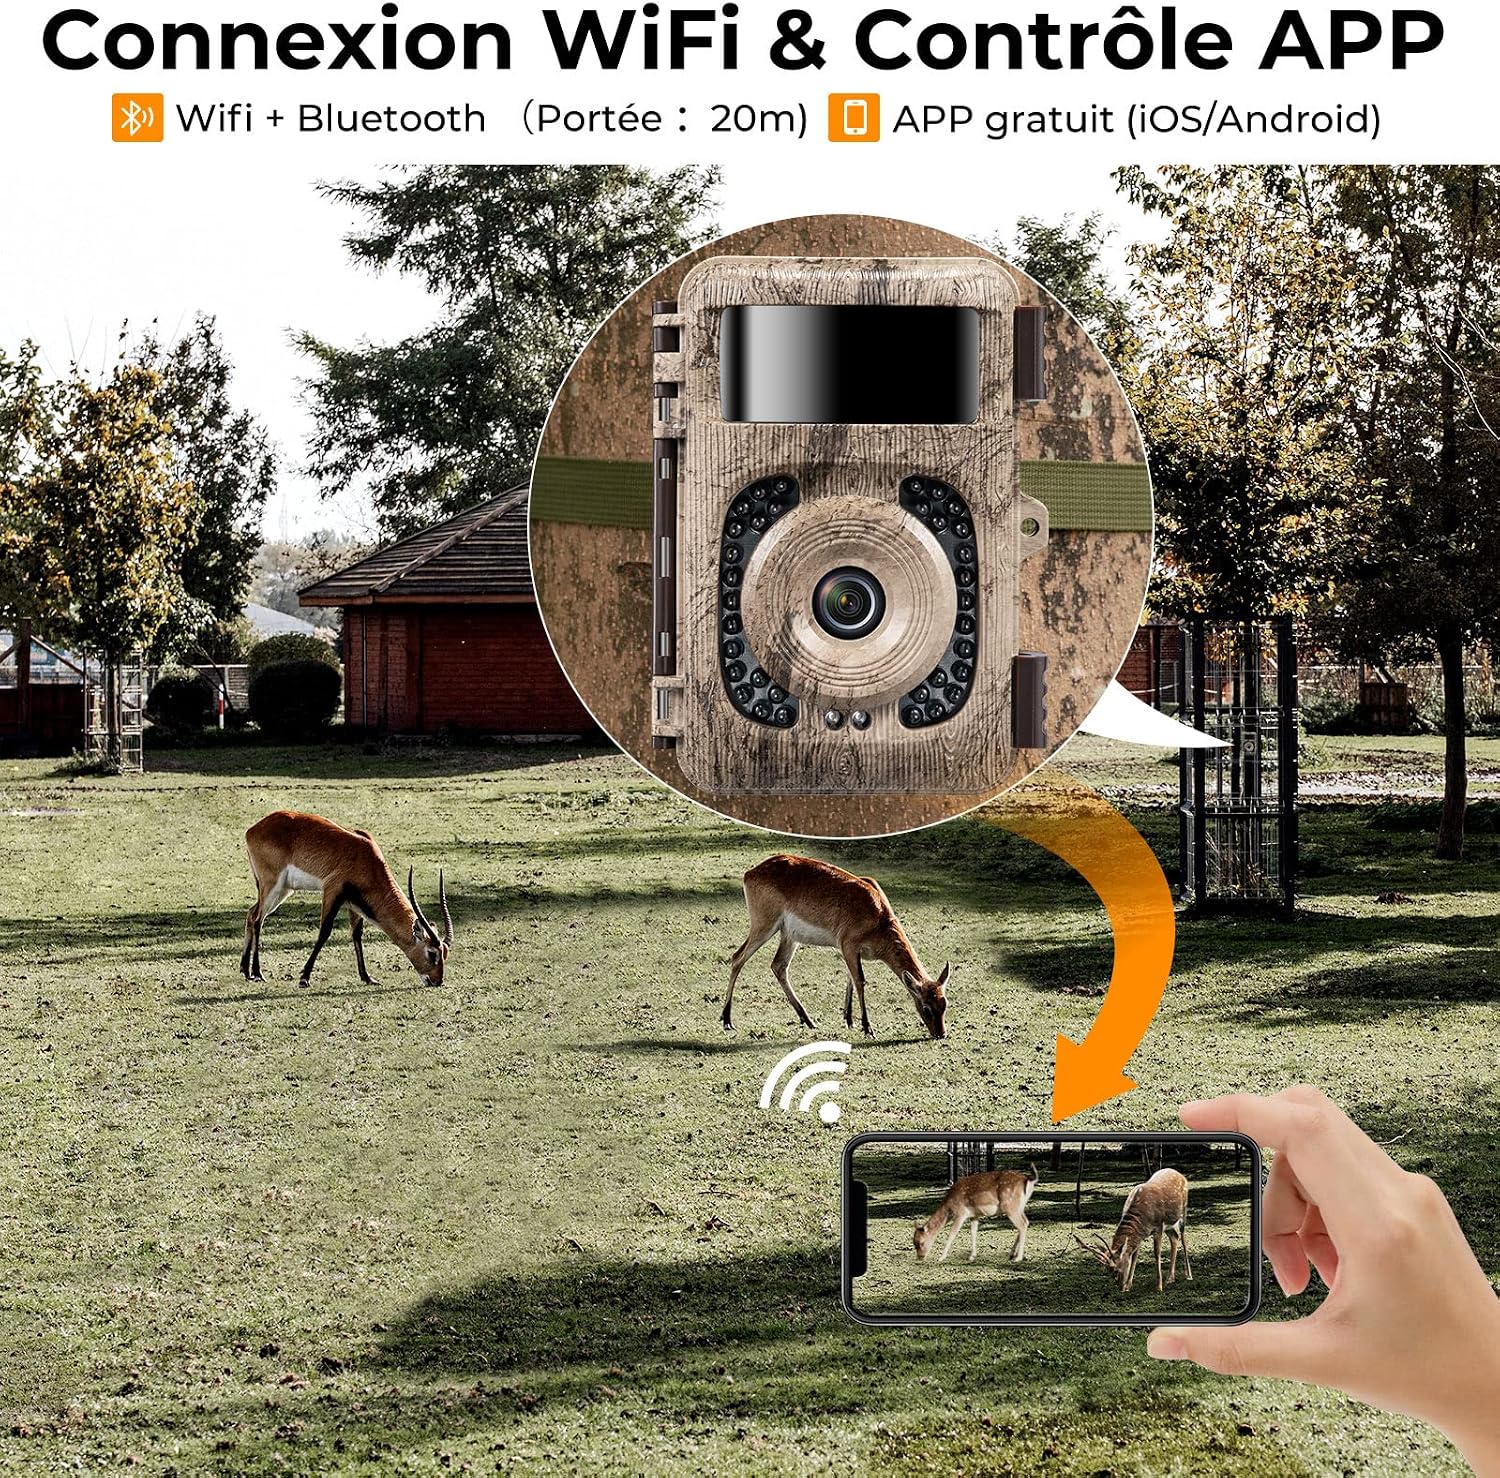
Image: The K&F CONCEPT Trail Camera shown mounted on a tree using the provided strap.

Image: Illustration of the adjustable mounting bracket, allowing for precise camera positioning.
2.5 Initial Power On and Settings
- Slide the power switch to the "TEST" position. The internal screen will turn on.
- Use the navigation buttons to access the menu.
- Navigate to "Language" and select "English".
- Set the date, time, and other basic parameters as needed.
- Format the inserted Micro SD card via the menu option.
3. Operating Instructions
3.1 Power Modes
- OFF: Camera is powered off.
- TEST: Allows access to the camera's menu, settings, and manual photo/video capture. The screen is active in this mode.
- ON: The camera enters monitoring mode. The screen turns off, and the camera will record photos or videos automatically when motion is detected.
3.2 WiFi and App Control
The camera features integrated low-power WiFi and Bluetooth technology for smartphone connectivity via the "TrailCamer Wifi" app.
- Download the "TrailCamer Wifi" app from your smartphone's app store.
- Ensure Bluetooth and GPS are enabled on your smartphone.
- Switch the camera to "ON" mode.
- Open the "TrailCamer Wifi" app on your smartphone. The app will use Bluetooth to activate the camera's WiFi.
- Connect your smartphone to the camera's WiFi network (SSID and password will be displayed in the app or on the camera screen during connection).
- Once connected, you can view recorded content, preview in real-time, download media, and adjust camera settings directly from the app without physically accessing the camera.
Note: WiFi connection range is approximately 10 meters. Connectivity may vary based on environmental factors and smartphone model.

Image: Visual guide on connecting the camera to a smartphone using the WiFi feature.
3.3 Motion Detection and Trigger Speed
The camera is equipped with a high-sensitivity PIR sensor.
- Detection Angle: Up to 120°.
- Detection Distance: Up to 65 feet (20 meters).
- Trigger Speed: 0.2 seconds upon motion detection.
- PIR Sensitivity: Adjustable (Low, Medium, High) in the settings to prevent false triggers from environmental factors like moving branches.
3.4 Image and Video Capture
The camera captures high-quality images and videos with sound.
- Image Resolution: Up to 32 Megapixels (MP).
- Video Resolution: Up to 4K Ultra HD.
- File Formats: Images are saved as JPG, videos as AVI (H.264 codec).
- Audio Recording: Videos include sound.
- Burst Mode: Capture multiple photos in a series (up to 10).
- Video Length: Adjustable from 3 seconds to 10 minutes.
- Time Lapse Mode: Available for extended monitoring.

Image: Detail of the camera's lens and invisible infrared LEDs for night vision.
3.5 Night Vision
The camera provides clear night vision without disturbing wildlife.
- IR LEDs: 34 non-luminous 940nm infrared lamps. These LEDs are invisible to the human eye and animals.
- Night Vision Range: Up to 20 meters.
- Automatic Mode: The camera automatically switches to image noise reduction mode at night and uses adaptive lighting technology to prevent overexposure, ensuring clear black and white night images/videos.

Image: An example demonstrating the clarity of advanced 940nm infrared night vision.
3.6 External Power Supply
For extended operation, the camera can be powered by an external 6V 2A power supply (not included). The external power port is a 3.5mm outer diameter, 1.35mm inner diameter jack.
4. Maintenance
4.1 Battery Replacement
When the battery indicator shows low power, replace all 8 AA batteries with new 1.5V alkaline batteries. Do not mix old and new batteries or different battery types.
4.2 Micro SD Card Management
- Formatting: Regularly format the Micro SD card through the camera's menu to maintain optimal performance and prevent data corruption.
- Capacity: The camera supports Micro SD cards up to 512GB. Ensure the card is U3 rated for 4K video recording.
- Data Transfer: Connect the camera to a computer using the provided USB cable or remove the Micro SD card and insert it into a card reader to transfer files.
4.3 Cleaning
- Lens: Use a soft, lint-free cloth specifically designed for optics to clean the camera lens. Avoid abrasive materials.
- Housing: Wipe the camera body with a damp cloth. Do not use strong detergents or solvents.
- Waterproof Seal: Periodically check the rubber seal around the battery compartment and camera housing for dirt or damage to ensure its IP66 waterproof integrity.
5. Troubleshooting
| Problem | Possible Cause | Solution |
|---|---|---|
| Camera does not power on. |
|
|
| Micro SD card not recognized. |
|
|
| Poor WiFi connectivity or app issues. |
|
|
| Camera not triggering or missing events. |
|
|
| Poor image/video quality at night. |
|
|
6. Specifications
| Feature | Detail |
|---|---|
| Model Name | E10xs (KF35.131) |
| Brand | K&F CONCEPT |
| Image Resolution | Up to 32MP |
| Video Resolution | 4K Ultra HD (3840x2160 @ 10fps, 2304x1296 @ 30fps, etc.) |
| Video Format | AVI (H.264) |
| Image Format | JPG |
| Detection Angle | 120 Degrees |
| Detection Distance | Up to 20 meters (65 feet) |
| Trigger Speed | 0.2 seconds |
| Night Vision | 34x 940nm Invisible IR LEDs, up to 20 meters |
| Connectivity | WiFi, Bluetooth (for app control) |
| Compatible Devices | Smartphone (iOS/Android via "TrailCamer Wifi" app) |
| Storage | Micro SD card (up to 512GB, U3 recommended) |
| Power Source | 8x AA 1.5V Alkaline Batteries or 6V 2A External DC (3.5x1.35mm) |
| Waterproof Rating | IP66 |
| Operating Temperature | -20°C to 60°C |
| Dimensions | 17.9 x 15.6 x 9.7 cm (approx.) |
| Optical Sensor Technology | CMOS |
| Focus Type | Auto Focus |
7. Warranty and Support
The manufacturer's warranty information is not explicitly defined in the product details. For specific warranty terms and conditions, please refer to the documentation included with your purchase or contact K&F CONCEPT customer support directly.
7.1 Customer Support
If you encounter any issues or have questions regarding your K&F CONCEPT Trail Camera, please visit the official K&F CONCEPT website or contact their customer service department for assistance. You can often find support contact information on the product packaging or the brand's official online store.
For additional resources, you may also refer to the official K&F CONCEPT store on Amazon: K&F CONCEPT Amazon Store