
1. Introduction
This user manual provides detailed instructions for the BAOFENG Walkie Talkie Wireless Headset, designed for hands-free communication with compatible two-way radios. Please read this manual thoroughly before using the product to ensure proper operation and to maximize its performance and lifespan.

Figure 1.1: BAOFENG Wireless Headset components including the PTT button, wireless dongle, and earpiece.
2. Package Contents
Verify that all items listed below are present in your package:
- 1 x Wireless Earpiece V5.0
- 1 x Wireless Dongle HB-6A (K1 Plug)
- 1 x Wireless PTT HB-6B
- 1 x USB Charging Cable
- 1 x Elastic Band (for PTT)

Figure 2.1: Standard package contents of the BAOFENG Wireless Headset.
3. Product Features
- Wireless Connectivity: Utilizes Bluetooth 5.0 for stable and efficient communication.
- Hands-Free Operation: Allows for communication without holding the radio.
- Noise-Cancelling Microphone: Enhances audio clarity in noisy environments.
- K1 Plug Compatibility: Specifically designed for K1 plug handheld Baofeng walkie talkies and other compatible models.
- Long Battery Life: Up to 8 hours of work time and 100 hours of standby time.
- Versatile PTT: The wireless PTT button can be worn on a finger or attached to a handlebar for convenient access.

Figure 3.1: The wireless PTT button can be conveniently fixed on a finger.

Figure 3.2: The PTT button can also be attached to a bicycle handlebar for easy access during activities.
4. Compatibility
This headset is designed for K1 plug two-way radios. Please ensure your radio has a K1 connector before purchase. The Bluetooth protocol is specific and may not be compatible with radios from other brands like ICOM, Kenwood, AnyTone, or Motorola, even if they use a similar physical connector.

Figure 4.1: Compatibility warning for different radio brands.
Compatible Baofeng Radio Models:
- UV5R, UV-82, UV-S9Plus, BF-H5/H6/H7, AR-152, UV-B5, UV-B6, UV-8, UV8D, UV5RA, UV5RB, UV5RC, UV5RD, UV5RE, UV5REPlus, UV5RO, UV5RA+, BF-480, BF-888S, BF-77S7, BF-666S, BF-388A, BF-F8+, BF-A52
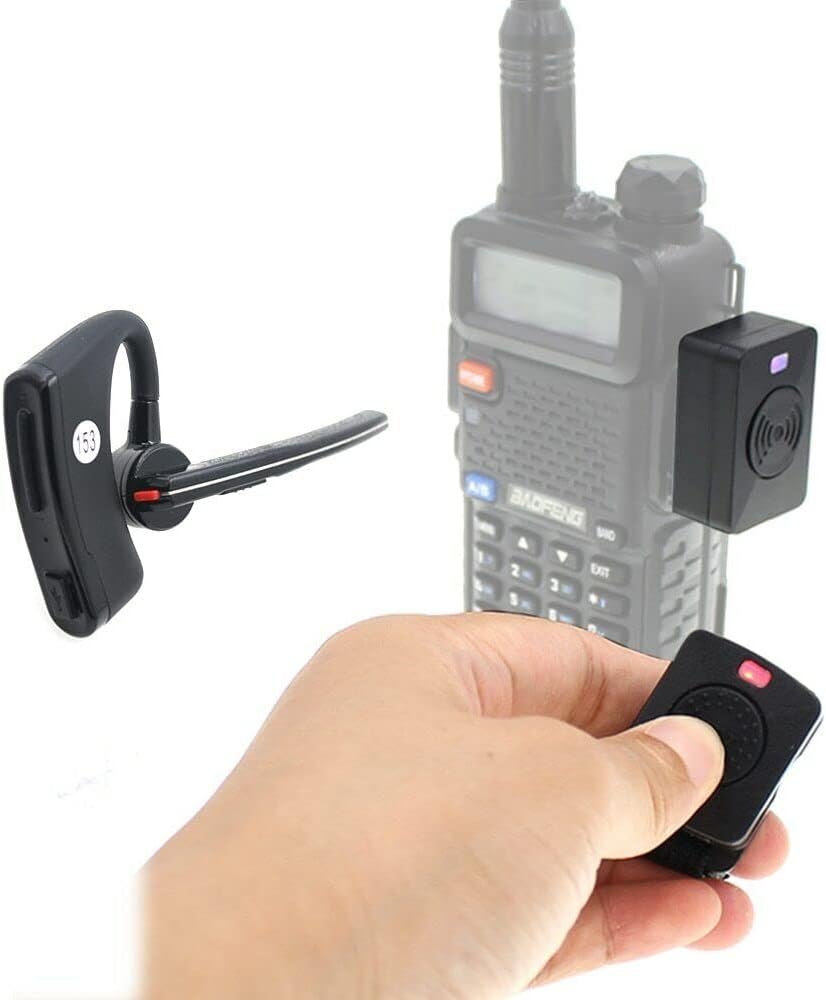
Figure 4.2: K1 connector compatibility with Baofeng and Kenwood TK series radios.
Other Compatible K1 Connector Radios:
- Anysecu Radio: AC-U2, S198, DM-UV450, UV-K5, UV-F9plus
- WLN Radio: KD-C1, KD-C1plus
- PUXING Radio: PX-666, PX-777, PX-777PLUS, PX-888, PX-999
- WOUXUN Radio: KG-659, KG-659Plus, KG-669, KG-669PLUS, KG-679, KG-679Plus, KG-689, KG-689PLUS, KG-699E, KG-UVD1, KG-UVD1P

Figure 4.3: K1 connector compatibility with various other radio brands.
5. Setup and Installation
5.1 Charging the Components
Before first use, fully charge the wireless earpiece, wireless dongle, and wireless PTT button. Use the provided USB charging cable. The charging time is approximately 1-2.5 hours.
5.2 Connecting the Wireless Dongle to Your Radio
Insert the K1 plug of the wireless dongle (HB-6A) into the K1 port of your compatible walkie talkie. Ensure it is securely seated.

Figure 5.1: Wireless Dongle HB-6A with K1 plug.
5.3 Pairing the Components
- Power On Earpiece: Long press the power button on the wireless earpiece for 3-8 seconds until the indicator light flashes, indicating it's in pairing mode.
- Power On Dongle: Turn on the wireless dongle. It will automatically attempt to pair with the earpiece.
- Power On PTT: Turn on the wireless PTT button. It will also automatically attempt to pair.
- Confirmation: Once successfully paired, the indicator lights on all three components will show a steady blue light or a slow flash, depending on the device status.
The three parts (earpiece, dongle, and PTT) and the radio should be within 5-10 meters for optimal connection.

Figure 5.2: Complete setup with earpiece, dongle, and PTT.
6. Operating Instructions
6.1 Basic Operation
- Power On/Off: Long press the power button on the earpiece to turn it on or off.
- Volume Control: Use the volume up/down buttons on the earpiece to adjust listening volume.
- Push-to-Talk (PTT): Press and hold the PTT button on the wireless PTT unit to transmit. Release to listen.
6.2 Wearing the Earpiece
The earpiece is designed for comfortable, all-day wear. Adjust it to fit securely in your ear. The rounded tip ensures a snug fit.
7. Maintenance
- Cleaning: Wipe the earpiece and other components with a soft, dry cloth. Do not use harsh chemicals or abrasive cleaners.
- Storage: Store the headset in a cool, dry place away from direct sunlight and extreme temperatures.
- Battery Care: To prolong battery life, avoid fully discharging the batteries frequently. Charge them regularly, even if not in use for extended periods.
- Water Resistance: This product is not water resistant. Avoid exposure to water or excessive moisture.
8. Troubleshooting
| Problem | Possible Cause | Solution |
|---|---|---|
| No audio from earpiece | Earpiece not powered on; Not paired; Low battery; Out of range | Ensure earpiece is on; Re-pair all components; Charge battery; Move closer to radio/dongle |
| Cannot transmit (PTT not working) | PTT not powered on; Not paired; Low battery | Ensure PTT is on; Re-pair all components; Charge battery |
| Poor audio quality / Choppy audio | Interference; Out of range; Low battery | Move away from sources of interference; Move closer to radio/dongle; Charge battery |
| Device disconnects frequently | Out of range; Interference; Low battery | Ensure devices are within 10 meters; Minimize interference; Charge battery |
9. Specifications
| Feature | Specification |
|---|---|
| Model Name | BAOFENG Walkie Talkie Wireless Headset |
| Connectivity Technology | Wireless (Bluetooth 5.0) |
| Headphones Jack | 2.5mm+3.5mm (K1 Plug) |
| Charging Time | 1-2.5 Hours |
| Work Time | 5-8 Hours |
| Standby Time | <100 Hours |
| Talk Range | ≤10 Meters (Bluetooth) |
| Noise Control | Active Noise Cancellation |
| Material | Plastic |
| Item Weight | 0.635 ounces |
| Manufacturer | BAOFENG |
10. Warranty and Support
10.1 Warranty Information
BAOFENG products typically come with a standard manufacturer's warranty covering defects in materials and workmanship. Please refer to the warranty card included with your product or contact BAOFENG customer support for specific warranty terms and conditions.
10.2 Customer Support
For technical assistance, troubleshooting, or warranty claims, please contact BAOFENG customer support through their official website or the contact information provided in your product packaging. When contacting support, please have your product model number (RM) and purchase details ready.