
SKY TOPPOWER PS305H
Contents
SKY TOPPOWER PS305H 30V 5A Adjustable Regulated DC Power Supply User Manual
Model: PS305H
1. Introduction
The SKY TOPPOWER PS305H is a high-precision, adjustable, regulated DC bench power supply designed for a wide range of applications including laboratory testing, electronic maintenance, product development, and educational purposes. This device features a 4-digit LED display for accurate voltage and current readings, and offers both Constant Voltage (CV) and Constant Current (CC) operating modes with automatic conversion. Its compact design and robust safety features ensure reliable and safe operation.

Image 1.1: The SKY TOPPOWER PS305H DC Power Supply shown in different application environments, highlighting its versatility in teaching, engineering, laboratory work, electronic maintenance, and battery charging.
2. Important Safety Instructions
To ensure safe operation and prolong the lifespan of your SKY TOPPOWER PS305H power supply, please adhere to the following safety guidelines:
- Grounding: Always connect the power supply to a grounded electrical outlet. The ground terminal on the front panel provides an additional safety measure.
- Ventilation: Ensure adequate ventilation around the unit. Do not block the cooling fan or vents. Overheating can damage the device.
- Power Cord: Use only the provided power cord. Inspect the cord for damage before each use.
- Environment: Operate the power supply in a dry environment, away from moisture, flammable materials, and direct sunlight.
- Voltage/Current Limits: Do not exceed the specified voltage and current limits of the device or the connected load.
- Anti-Reverse Connection Protection: The unit features anti-reverse connection protection to prevent damage from incorrect polarity. However, always double-check connections before applying power.
- Maintenance: Refer all servicing to qualified personnel. Do not attempt to open or repair the unit yourself.

Image 2.1: A diagram demonstrating the internal anti-reverse connection protection circuit, which safeguards the power supply and connected load from damage due to incorrect polarity.
3. Package Contents
Upon unpacking, please verify that all items listed below are present and in good condition:
- 1 x SKY TOPPOWER PS305H DC Bench Power Supply
- 1 x Power Cord (US standard)
- 1 set x Alligator Clip Test Leads (Red and Black)
- 1 x User Manual

Image 3.1: The product packaging contents, including the PS305H power supply, power cord, alligator clip test leads, and user manual.
4. Product Overview
The SKY TOPPOWER PS305H features a clear front panel with intuitive controls and a bright 4-digit LED display for precise monitoring of output voltage and current. The rear panel includes the power input, fuse box, and a smart cooling fan.
4.1 Front Panel Controls and Indicators

Image 4.1: Detailed view of the front panel, labeling each control and indicator for the SKY TOPPOWER PS305H.
- Voltage Output Display: Shows the current output voltage in Volts (V).
- Current Output Display: Shows the current output current in Amperes (A).
- Voltage Coarse Knob: Adjusts the output voltage in larger increments.
- Voltage Fine Knob: Adjusts the output voltage in smaller, precise increments.
- Current Coarse Knob: Adjusts the current limit in larger increments.
- Current Fine Knob: Adjusts the current limit in smaller, precise increments.
- Constant Voltage (CV) Indicator: LED illuminates when the power supply is operating in Constant Voltage mode.
- Constant Current (CC) Indicator: LED illuminates when the power supply is operating in Constant Current mode.
- Power Switch: Turns the unit ON or OFF.
- Output Positive (+): Red terminal for positive output connection.
- Output Negative (-): Black terminal for negative output connection.
- Ground Terminal (GND): Yellow terminal for chassis ground connection, enhancing safety.
4.2 Rear Panel Features

Image 4.2: The rear panel of the power supply, highlighting the smart cooling fan and the AC power input with integrated fuse box.
- AC Power Input: Standard IEC C14 inlet for connecting the power cord.
- Fuse Box: Integrated with the AC power input, providing overcurrent protection.
- Smart Cooling Fan: Activates automatically when the internal temperature rises to maintain optimal operating conditions and prolong product life.
4.3 Display Accuracy

Image 4.3: A visual comparison demonstrating the high precision of the 4-digit display for both voltage and current, matching readings from an external multimeter.
The 4-digit LED display provides high accuracy, capable of showing voltage to 0.01V (10mV) and current to 0.001A (1mA), ensuring precise control and monitoring of your power output.
5. Setup
Follow these steps to set up your SKY TOPPOWER PS305H DC power supply:
- Placement: Place the power supply on a stable, level surface with adequate space for ventilation, especially around the rear cooling fan.
- Power Connection: Connect the provided power cord to the AC power input on the rear panel of the power supply and then to a grounded electrical outlet.
- Grounding (Optional but Recommended): For enhanced safety, connect the front panel GND terminal to an external ground point using a suitable wire.
- Initial Check: Ensure the power switch is in the OFF position before connecting any load.
6. Operating Instructions
The SKY TOPPOWER PS305H operates in two primary modes: Constant Voltage (CV) and Constant Current (CC), with automatic switching between them based on the load conditions.
6.1 Setting Voltage and Current Limits
- Power On: Turn on the power supply using the front panel switch. The display will illuminate.
- Pre-set Voltage (No Load): Before connecting your load, adjust the Voltage Coarse and Voltage Fine knobs to set the desired output voltage.
- Pre-set Current Limit (Short Circuit Method - Recommended):
- With the power supply ON and no load connected, turn the Voltage Fine knob fully counter-clockwise to set the voltage to minimum.
- Connect the positive (+) and negative (-) output terminals with a short circuit (e.g., using a test lead). The CC indicator should light up.
- Adjust the Current Coarse and Current Fine knobs to set the desired maximum current limit.
- Remove the short circuit. The CC indicator will turn off, and the CV indicator may light up. The power supply is now ready to connect to your load with the set voltage and current limits.
- Connect Load: Connect your device or circuit to the output terminals using the provided alligator clip leads or other suitable connectors. Ensure correct polarity.
- Operation: The power supply will automatically operate in CV mode if the load current is below the set current limit, maintaining the set voltage. If the load current reaches or exceeds the set limit, the unit will switch to CC mode, maintaining the set current and allowing the voltage to drop as needed to protect the load and the power supply.
6.2 Battery Charging
The PS305H can be used for charging various types of batteries. Follow these steps for safe and effective battery charging:
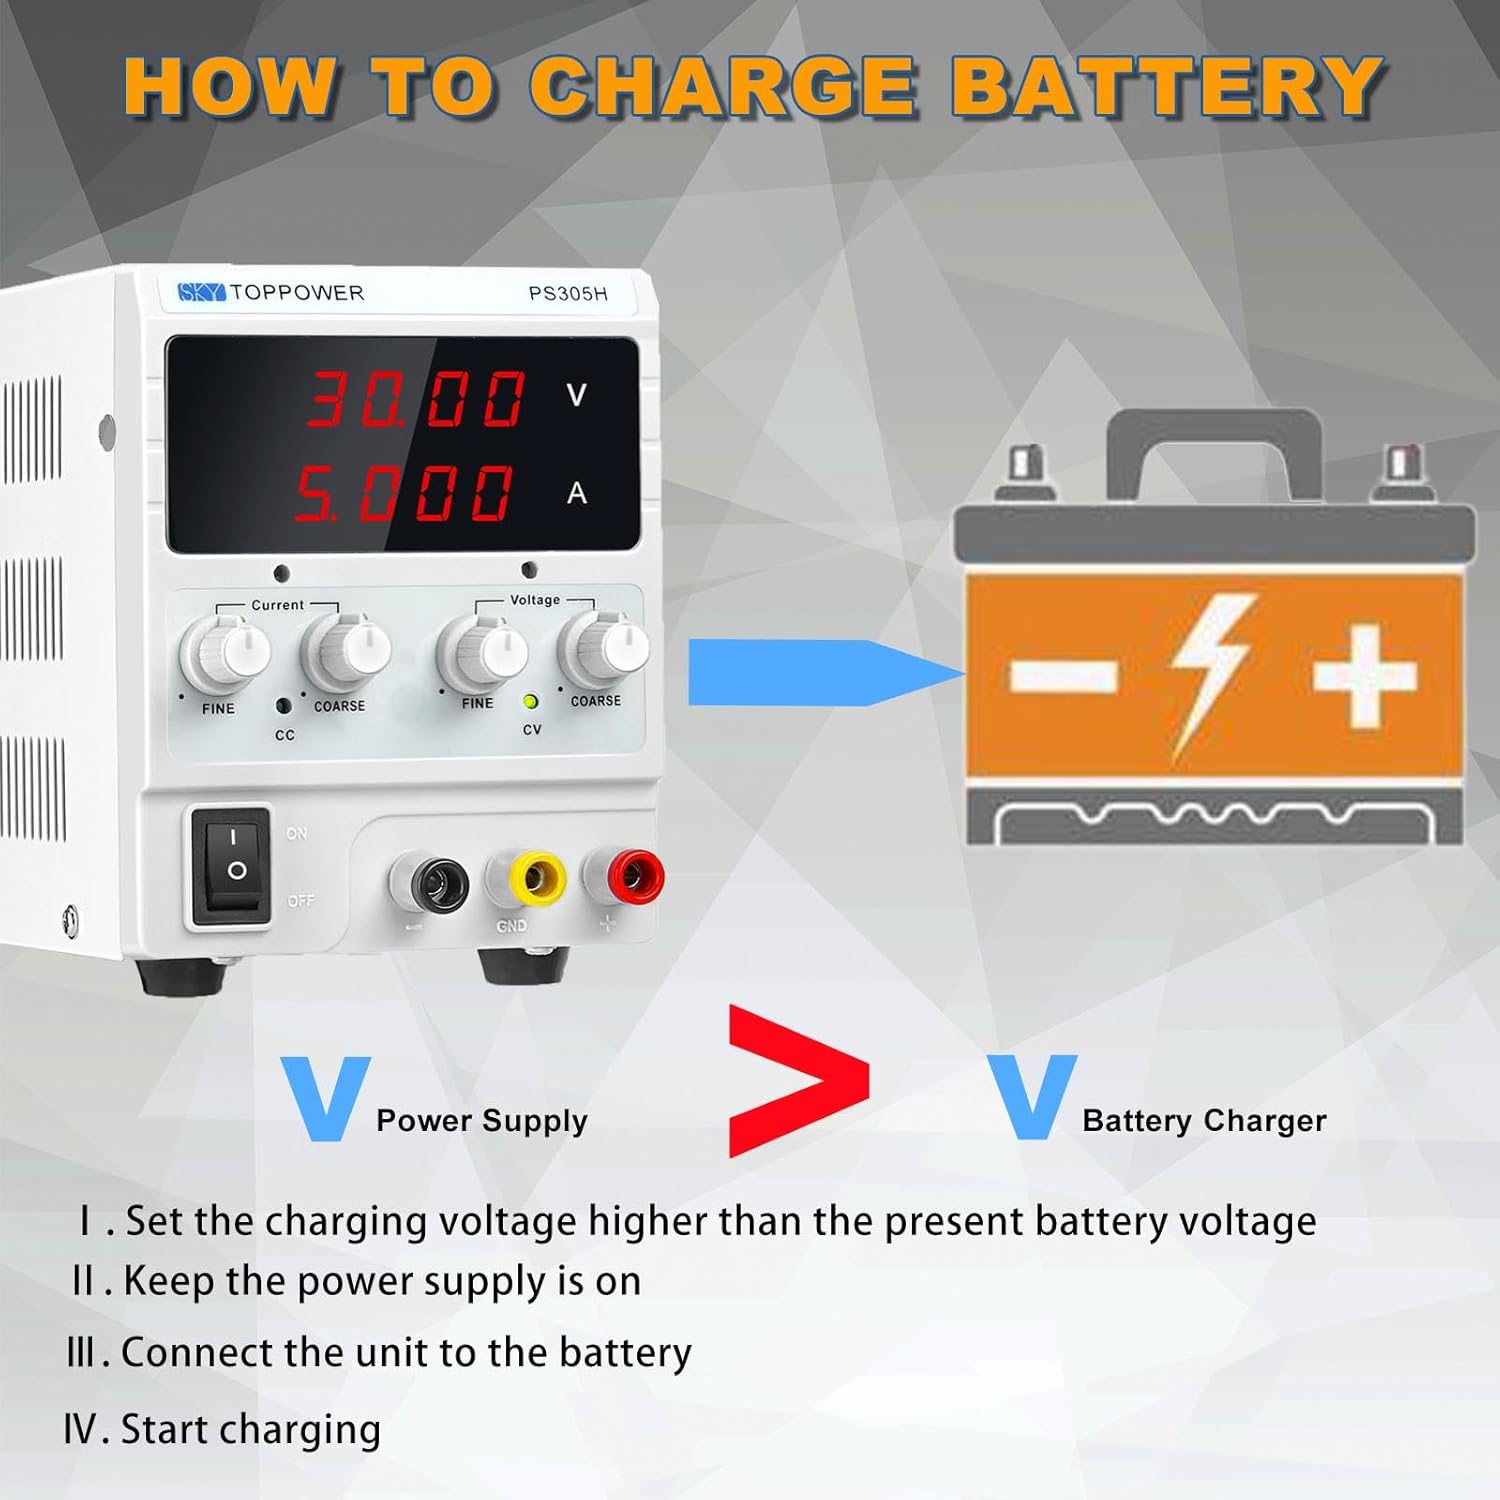
Image 6.1: Visual guide for connecting the power supply to a battery for charging, emphasizing the voltage setting.
- Set Charging Voltage: Set the charging voltage slightly higher than the nominal voltage of the battery. Consult the battery manufacturer's specifications for recommended charging voltage.
- Set Current Limit: Set the current limit to a safe charging rate for your battery (e.g., 0.1C to 0.2C for lead-acid batteries, where C is the battery's capacity in Ah).
- Ensure Power Supply is ON: Turn on the power supply.
- Connect to Battery: Connect the positive (+) output of the power supply to the positive terminal of the battery, and the negative (-) output to the negative terminal of the battery. Double-check polarity.
- Start Charging: The battery will begin charging. The power supply will initially operate in CC mode, then switch to CV mode as the battery charges and the current draw decreases. Monitor the charging process.
7. Maintenance
Proper maintenance ensures the longevity and optimal performance of your power supply.
- Cleaning: Disconnect the power supply from the mains before cleaning. Use a soft, dry cloth to wipe the exterior. Do not use abrasive cleaners or solvents.
- Ventilation: Regularly check that the ventilation openings and the cooling fan are free from dust and obstructions. A build-in cooling fan helps maintain stable operation.
- Storage: When not in use for extended periods, store the power supply in a cool, dry place, away from direct sunlight and extreme temperatures.
- Fuse Replacement: If the power supply fails to turn on, check the fuse located in the fuse box on the rear panel. Replace it with a fuse of the same type and rating (e.g., 250V/5A).
8. Troubleshooting
If you encounter issues with your SKY TOPPOWER PS305H, refer to the following common problems and solutions:
| Problem | Possible Cause | Solution |
|---|---|---|
| No power/Display off | Power cord disconnected, power switch off, blown fuse. | Check power cord connection, ensure switch is ON, replace fuse if blown. |
| No voltage output | Voltage knobs set to minimum, CC mode active (current limit reached). | Adjust voltage knobs, check if CC LED is on (reduce load or increase current limit). |
| No current output | Load not connected, load resistance too high, current limit set too low. | Ensure load is connected, check load resistance, increase current limit. |
| Unit overheats | Blocked ventilation, excessive load. | Ensure clear airflow around vents and fan, reduce load if continuously operating at maximum capacity. |
If the problem persists after attempting these solutions, please contact SKY TOPPOWER technical support.
9. Specifications
Technical specifications for the SKY TOPPOWER PS305H DC Power Supply:
| Feature | Specification |
|---|---|
| Model | PS305H |
| Input Voltage | AC 110V ±10%, 60Hz |
| Output Voltage | 0-30V (Adjustable) |
| Output Current | 0-5A (Adjustable) |
| Display Type | 4-Digit LED Display |
| Voltage Display Accuracy | ±0.01V (10mV) |
| Current Display Accuracy | ±0.001A (1mA) |
| Operating Modes | Constant Voltage (CV), Constant Current (CC) |
| Protection Features | Leakage protection, Thermal protection, Voltage overload, Limit current, Short-circuit protection, Anti-reverse connection protection |
| Cooling | Smart Cooling Fan |
| Dimensions (L x W x H) | 8.70 x 5.43 x 4.09 inches (approx.) |
| Weight | Approximately 3.49 pounds (1.58 kg) |

Image 9.1: The physical dimensions of the PS305H power supply, indicating its compact size and weight.
10. Warranty and Support
SKY TOPPOWER is committed to providing high-quality products and customer satisfaction. Your PS305H power supply comes with a standard warranty. For specific warranty terms and conditions, please refer to the documentation included with your purchase or contact customer support.
For technical assistance, troubleshooting, or any questions regarding your power supply, our technical team with over 20 years of experience is available to provide professional support. Please feel free to contact us through the seller's contact information on the purchase platform.
Ask a question about this manual
Ask about setup, troubleshooting, compatibility, parts, safety, or missing instructions. Manuals+ will review the question and use this page’s manual context to help answer it.