Product Overview
The Nitecore MH10S is an ultra-compact, high-performance USB-C rechargeable flashlight designed for various applications including emergency, self-defense, and outdoor activities. It features a Luminus SST-40-W LED, delivering a maximum output of 1800 lumens and a beam distance of up to 294 meters. The MH10S offers 5 brightness levels and 3 special modes, ensuring versatility for different lighting needs.
Equipped with an optical system combining crystal coating and "Precis Digital Optics Technology" (PDOT), this flashlight ensures optimal beam intensity. Its robust aluminum construction and IP68 rating make it durable and suitable for all-weather use, being 2 meters submersible and 1 meter impact resistant.

Figure 1: Nitecore MH10S Flashlight and Included Accessories.
Specifications
| Max Output | 1800 Lumens |
| Max Beam Distance | 294 meters |
| Max Beam Intensity | 21600 cd |
| Max Runtime | 1500 hours (62.5 days on Ultralow) |
| LED Type | Luminus SST-40-W LED |
| Battery Compatibility | 1 x 21700 (recommended), 1 x 18650, 2 x CR123 / RCR123 |
| Special Modes | Location Beacon, SOS, Strobe |
| Beam Color | White light |
| Length | 131.3 mm (5.17 inches) |
| Head Size | 25.4 mm (1.00 inch) |
| Weight | 69.7 g (2.46 oz) |
| Water Resistance | IP68 (2m submersible) |
| Impact Resistance | 1 meter |
| Charging Port | USB-C |
What's in the Box
- Nitecore MH10S Flashlight
- Nitecore 21700 Li-ion Battery (NL2150R 5000mAh)
- USB-C Charging Cable
- NTH10 Tactical Holster
- Detachable Pocket Clip
- Lanyard
- Spare O-ring
- 18650/CR123 Battery Magazine (for compatibility with smaller batteries)
Setup
Battery Installation
- Unscrew the tail cap of the flashlight.
- Insert the included 21700 Li-ion battery with the positive (+) terminal facing towards the head of the flashlight. If using an 18650 or CR123 battery, place it inside the provided battery magazine first, then insert the magazine into the flashlight.
- Screw the tail cap back on tightly to ensure proper contact and water resistance.

Figure 2: Battery Compatibility and Installation.
Initial Charging
Before first use, it is recommended to fully charge the battery. The MH10S features a built-in USB-C charging port.
- Locate the USB-C charging port cover near the head of the flashlight.
- Lift the rubber cover to expose the USB-C port.
- Connect one end of the provided USB-C charging cable to the flashlight's port and the other end to a USB power source (e.g., wall adapter, computer, power bank).
- The power indicator light on the side switch will blink slowly during charging and become steady when charging is complete.
- Once charging is complete, securely close the rubber cover to maintain water and dust resistance.
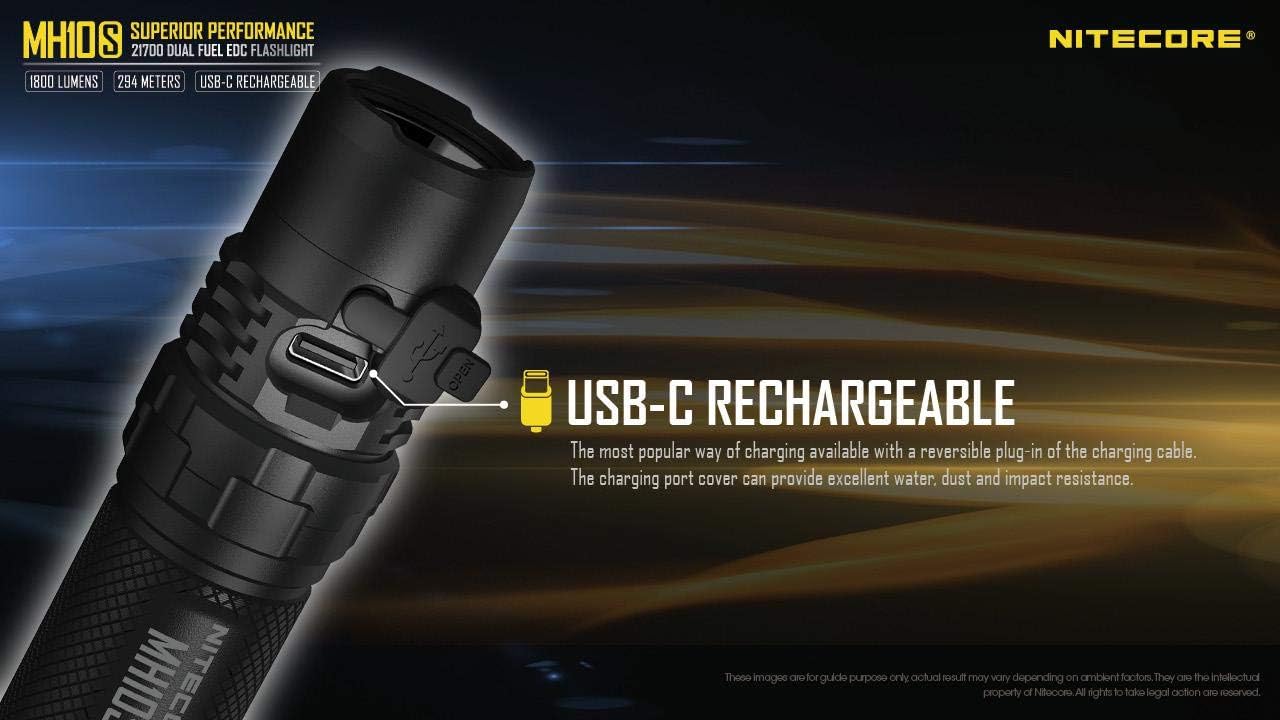
Figure 3: USB-C Charging Port.
Operating Instructions
The MH10S is operated via a single side switch, providing intuitive control over all functions.

Figure 4: User-Friendly Metal Side Switch.
Turning On/Off
- Turn On: When the light is off, press and hold the side switch for 1 second to turn on the flashlight in ULTRALOW mode.
- Turn Off: When the light is on, press and hold the side switch for 1 second to turn off the flashlight.
Brightness Levels
When the light is on, short press the side switch to cycle through the brightness levels: ULTRALOW → LOW → MID → HIGH → TURBO.
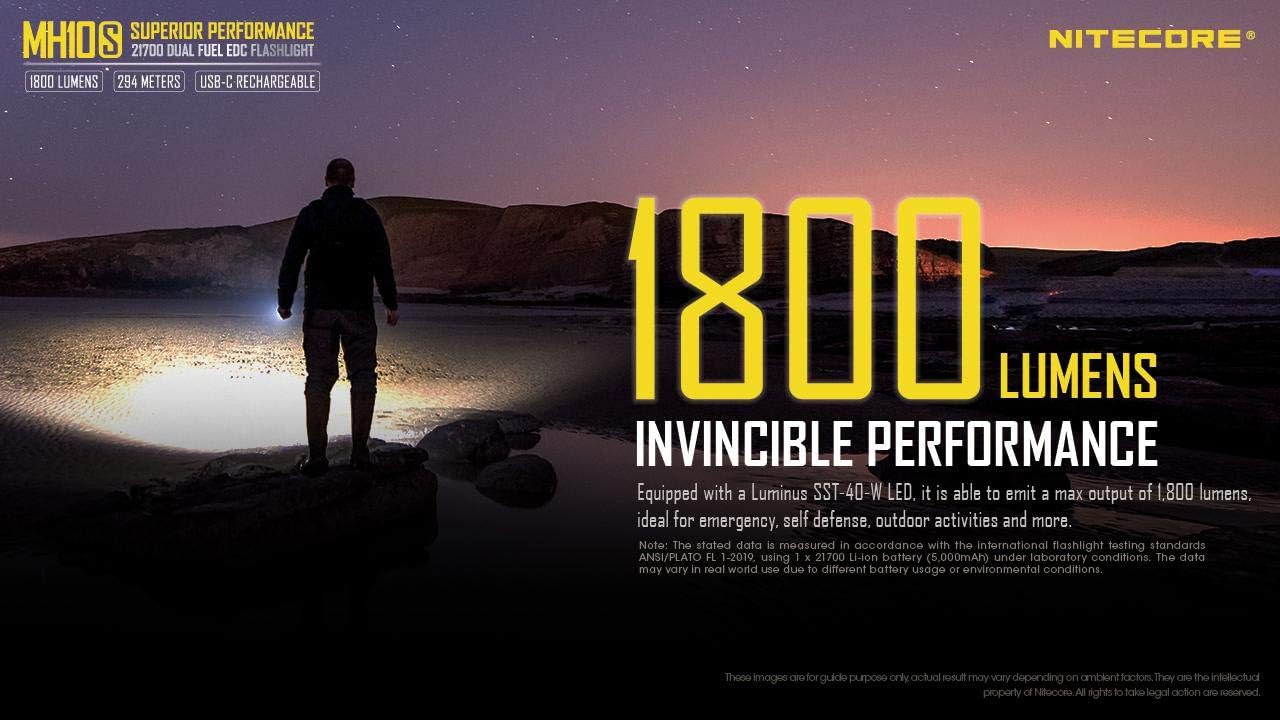
Figure 5: 1800 Lumens Invincible Performance.

Figure 6: Optimized Grand Throw of 294 Meters.
Special Modes (Strobe/SOS/Location Beacon)
- Access Strobe: When the light is off, triple press the side switch to access Strobe mode. When the light is on, triple press the side switch to access Strobe mode.
- Cycle Special Modes: While in Strobe mode, short press the side switch to cycle through SOS → Location Beacon → Strobe.
- Exit Special Modes: Press and hold the side switch for 1 second to turn off the flashlight and exit special modes.
Power Indication
The power indicator integrated into the side switch displays the battery voltage when the tail cap is tightened or when the flashlight is connected to a power source for charging.
- Three blinks: Battery voltage above 50%.
- Two blinks: Battery voltage below 50%.
- One blink: Battery voltage below 10%.
Note: The power indicator light can be difficult to see in certain lighting conditions. Shielding the switch with your hand may help in dimly lit environments.
Maintenance
- Cleaning: Regularly clean the threads and O-rings with a clean cloth. Apply a thin layer of silicone lubricant to the threads periodically to maintain water resistance.
- Battery Care:
- Store the flashlight with the battery removed if it will not be used for an extended period to prevent battery drain or leakage.
- Recharge the battery regularly, especially if it has been stored for a long time, to maintain its lifespan.
- Avoid over-discharging or over-charging the battery.
- Water Resistance: Ensure the USB-C port cover is securely closed when not charging to maintain the IP68 water resistance rating.
Troubleshooting
- Flashlight not turning on:
- Check if the battery is inserted correctly with the positive (+) terminal facing the head.
- Ensure the tail cap is tightened securely.
- Charge the battery fully. The battery might be depleted.
- Light output is dim or flickering:
- The battery may be low. Recharge the battery.
- Clean the battery contacts and flashlight threads.
- Side switch difficult to locate or see indicator light:
- The side switch is designed to be flush with the body for a compact profile. In dark conditions, tactile feel is important.
- The power indicator light can be subtle. Try shielding the switch with your hand to better observe the indicator in dimly lit environments.
- Charging issues:
- Ensure the USB-C cable is properly connected to both the flashlight and the power source.
- Try a different USB-C cable or power adapter.
Warranty and Support
Nitecore products are known for their quality and durability. For specific warranty information, please refer to the warranty card included with your product or visit the official Nitecore website. If you encounter any issues not covered in this manual, please contact Nitecore customer support or your authorized dealer for assistance.
For further information and product updates, you may visit the Nitecore Store on Amazon.


