1. Important Safety Information
Please read all instructions carefully before using the appliance and retain them for future reference. Failure to follow these safety instructions may result in electric shock, fire, or serious injury.
- Electrical Safety: Ensure the voltage indicated on the appliance matches your local mains voltage before connecting. Do not immerse the cord, plug, or appliance in water or other liquid.
- Placement: Always place the appliance on a stable, heat-resistant surface, away from walls or other appliances to allow for proper ventilation. Do not place near flammable materials.
- Hot Surfaces: The appliance surfaces become hot during use. Use oven mitts when handling hot components. Do not touch hot surfaces directly.
- Supervision: This appliance is not intended for use by persons (including children) with reduced physical, sensory or mental capabilities, or lack of experience and knowledge, unless they have been given supervision or instruction concerning use of the appliance by a person responsible for their safety.
- Maintenance: Unplug the appliance from the outlet when not in use and before cleaning. Allow it to cool down completely before cleaning or storing.
- Damage: Do not operate any appliance with a damaged cord or plug, or after the appliance malfunctions or has been damaged in any manner.
2. Product Overview
The Generic Digital Electric Deep Fryer (Model 8803) is an industrial-grade air fryer designed for efficient and healthy cooking. It utilizes rapid air circulation technology to cook food with little to no oil, offering a healthier alternative to traditional deep frying.
Key Features:
- Highly useful and effective for various cooking tasks.
- Comes in good packaging, ensuring product integrity upon delivery.
- Easy to maintain and clean for prolonged use.
- Digital touch control panel for precise temperature and time settings.
- Temperature control feature for versatile cooking.
Components:

Figure 2.1: Front view of the air fryer, showing the digital display and touch control panel with various function icons.
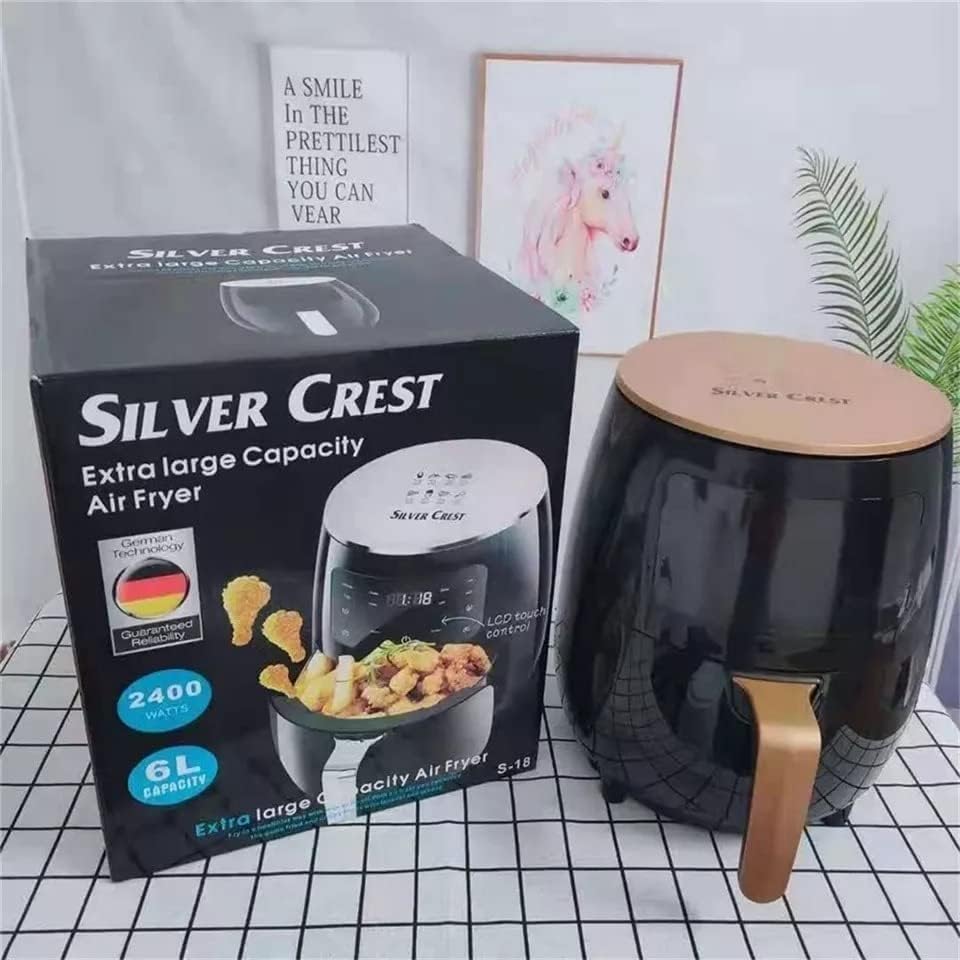
Figure 2.2: The air fryer alongside its retail packaging, highlighting the 'Silver Crest' branding and 'Extra Large Capacity' claim.

Figure 2.3: Bottom view of the air fryer, displaying recommended cooking times and temperatures for common food items like cupcakes, shrimp, fish, steak, chicken wings, and fries.
3. Setup
Follow these steps to set up your new air fryer:
- Unpack: Carefully remove the air fryer and all its accessories from the packaging. Retain packaging for future storage or transport.
- Inspect: Check the appliance for any signs of damage. Do not use if damaged.
- Clean: Before first use, wipe the exterior of the appliance with a damp cloth. Wash the frying basket and pan with hot water, dish soap, and a non-abrasive sponge. Rinse thoroughly and dry all parts.
- Placement: Place the air fryer on a stable, level, and heat-resistant surface. Ensure there is at least 10 cm (4 inches) of free space on the back and sides, and above the appliance, to allow for proper air circulation.
- Power Connection: Plug the power cord into a grounded wall outlet.
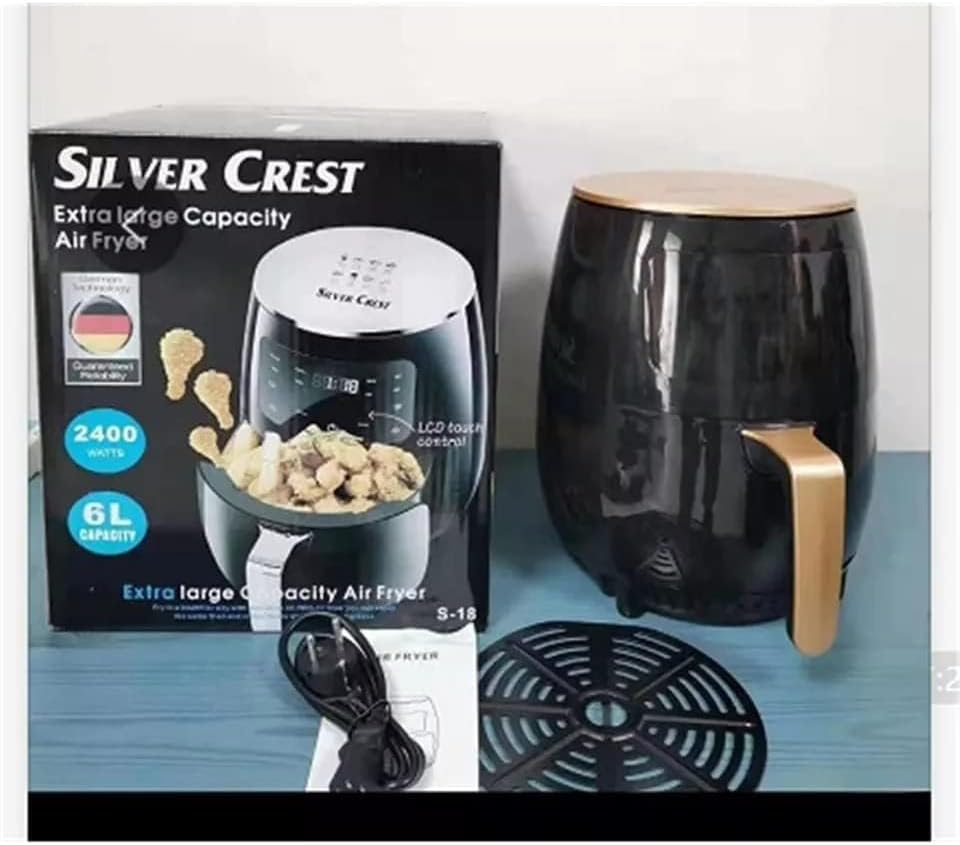
Figure 3.1: Unpacked air fryer components, including the main unit, removable frying basket, and power cord, ready for initial setup.
4. Operating Instructions
Basic Operation:
- Prepare Food: Place the food you wish to cook into the frying basket. Do not overfill the basket.
- Insert Basket: Slide the frying basket back into the air fryer until it clicks into place.
- Power On: Press the power button on the control panel to turn on the appliance.
- Set Temperature and Time: Use the temperature and time control buttons to set your desired cooking parameters. Refer to recipes or the cooking guide on the appliance's base for recommendations.
- Start Cooking: Press the start button to begin the cooking process. The air fryer will automatically shut off when the timer reaches zero.
- Shake Basket (Optional): For even cooking, especially for items like fries or chicken nuggets, pull out the basket halfway through the cooking time and shake it gently. Then, slide it back in.
- Remove Food: Once cooking is complete, carefully pull out the basket. Use tongs to remove the cooked food.
Pre-set Functions:
The control panel features several pre-set functions for common dishes, indicated by icons. These typically include:
- Chicken: Optimized settings for chicken pieces.
- Fries: Ideal for crispy French fries.
- Cake: Suitable for baking small cakes or pastries.
- Keep Warm: Maintains food temperature after cooking.
- Preheat: Heats the air fryer to the desired temperature before adding food.
- Reservation/Delay Start: Allows you to set a delayed start time for cooking.

Figure 4.1: An example of the versatility of the air fryer, capable of preparing a variety of dishes including shrimp, pizza, steak, fried chicken, fries, and sweet potatoes.
5. Maintenance and Cleaning
Regular cleaning ensures optimal performance and extends the lifespan of your air fryer.
- Unplug and Cool: Always unplug the air fryer from the power outlet and allow it to cool down completely before cleaning.
- Clean Basket and Pan: The frying basket and pan are non-stick. Wash them with hot water, dish soap, and a non-abrasive sponge. For stubborn residue, soak them in hot water for about 10 minutes. They may also be dishwasher safe (check product specifications for confirmation).
- Clean Interior: Wipe the interior of the appliance with a damp cloth and mild detergent. Do not use abrasive cleaners or steel wool.
- Clean Exterior: Wipe the exterior of the air fryer with a damp cloth.
- Storage: Ensure all parts are completely dry before storing the appliance in a cool, dry place.
6. Troubleshooting
If you encounter issues with your air fryer, refer to the following common problems and solutions:
| Problem | Possible Cause | Solution |
|---|---|---|
| Air fryer does not turn on. | Appliance not plugged in. Power outlet not working. | Ensure the power cord is securely plugged into a working outlet. Test the outlet with another appliance. |
| Food is not cooked evenly. | Basket is overloaded. Food not shaken during cooking. | Do not overload the basket. Shake the basket halfway through cooking for even results. |
| White smoke coming from the appliance. | Grease residue from previous use. | Clean the basket and pan thoroughly after each use to remove grease buildup. |
| Food is not crispy. | Too much moisture in food. Not enough oil (if desired). Temperature too low. | Pat food dry before cooking. Lightly brush or spray food with oil. Increase temperature if necessary. |
7. Specifications
| Attribute | Detail |
|---|---|
| Brand | Generic |
| Model Number | 8803 |
| Manufacturer | Generic |
| Item Weight | 4 Kilograms |
| Product Dimensions (L x W x H) | 22 x 25 x 30 cm |
| Color | Black |
| Material | Aluminum |
| Voltage | 240 Volts |
| Wattage | 1800 Watts |
| Capacity | 8 Liters |
| Special Features | Temperature Control |
8. Warranty and Support
This product is covered by a standard manufacturer's warranty against defects in materials and workmanship. The specific duration and terms of the warranty may vary based on your region and point of purchase.
For warranty claims, technical support, or any product-related inquiries, please contact the seller or the authorized service center where you purchased the appliance. Please retain your proof of purchase for warranty validation.
Additional protection plans, such as extended warranties, may be available from third-party providers. For example, a 2-Year Extended Warranty by Salama Care may be offered.


