
Whirlpool FFWDD107436BSVIT
Whirlpool Washer-Dryer User Manual
Model: FFWDD107436BSVIT
1. Important Safety Information
Please read these instructions carefully before using the appliance and retain them for future reference. This manual provides important safety warnings, installation, operation, and maintenance instructions.
General Safety
- This appliance can be used by children aged from 8 years and above and persons with reduced physical, sensory or mental capabilities or lack of experience and knowledge if they have been given supervision or instruction concerning use of the appliance in a safe way and understand the hazards involved.
- Children should be supervised to ensure that they do not play with the appliance.
- Cleaning and user maintenance shall not be made by children without supervision.
- Do not install the appliance in a very damp place or where water may splash.
- Ensure the appliance is disconnected from the power supply before any maintenance or cleaning.
Electrical Connection
- The appliance must be earthed in accordance with local regulations.
- Do not use extension cords or multiple adapters.
- The power cord must not be bent or compressed.
Water Connection
- Use new hose sets supplied with the appliance. Old hose sets should not be reused.
- Ensure all connections are tight to prevent leaks.
2. Product Overview
The Whirlpool FFWDD107436BSVIT is a versatile washer-dryer designed for efficient laundry care. It combines washing and drying functions in a single unit, saving space and simplifying your laundry routine.

Figure 2.1: Angled front view of the Whirlpool Washer-Dryer.
Key Features
- FFWDD 107426 BSV IT Washer-Dryer 10 kg Class D 1400 rpm
- Product type: Washer / Dryer
- Brand: Whirlpool
- Color: white
- High-speed spinning capability
Main Components
- Control Panel: Located on the front, used for program selection and settings.
- Detergent Dispenser: Compartments for pre-wash, main wash detergent, and fabric softener.
- Drum: Stainless steel interior where laundry is washed and dried.
- Door: Front-loading door with a secure locking mechanism.
- Pump Filter: Accessible at the bottom front, requires periodic cleaning.

Figure 2.2: Front view of the appliance, showing the control panel and door.

Figure 2.3: The appliance with its front door open, revealing the drum interior.
3. Setup and Installation
Proper installation is crucial for the safe and efficient operation of your washer-dryer.
3.1 Unpacking
- Remove all packaging materials.
- Remove the transport bolts located at the rear of the appliance. Keep them for future transport.
- Insert the plastic caps provided into the holes left by the transport bolts.
3.2 Location Requirements
- Place the appliance on a flat, stable surface.
- Ensure adequate ventilation around the appliance.
- Avoid installing in areas exposed to direct sunlight or extreme temperatures.
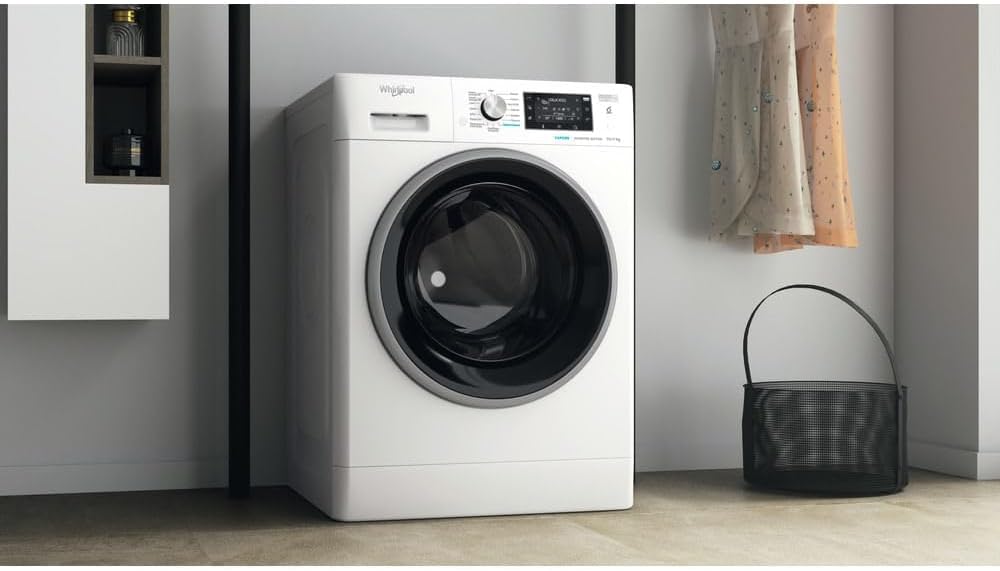
Figure 3.1: The washer-dryer positioned in a typical laundry room environment.
3.3 Water Connection
- Connect the cold water inlet hose to a cold water tap with a 3/4" thread.
- Ensure the hose is securely tightened to prevent leaks.
- Position the drain hose into a standpipe or over the edge of a sink, ensuring it is not kinked.
3.4 Electrical Connection
- Plug the appliance into a grounded electrical outlet.
- Ensure the voltage and frequency match the specifications on the appliance's rating plate.
3.5 Levelling the Appliance
- Use a spirit level to check if the appliance is perfectly level.
- Adjust the adjustable feet at the bottom of the appliance until it is stable and level.
4. Operating Instructions
This section guides you through the daily operation of your Whirlpool washer-dryer.
4.1 Control Panel Overview
The control panel consists of a program selector knob, function buttons, and a digital display.
Figure 4.1: The control panel of the washer-dryer.
4.2 Loading Laundry and Adding Detergent
- Open the appliance door and load laundry, ensuring not to overload the drum.
- Pull out the detergent dispenser drawer.
- Add appropriate amounts of detergent to the main wash compartment and fabric softener to its designated compartment.
- Close the detergent dispenser drawer gently.
4.3 Selecting a Program
Turn the program selector knob to choose the desired washing or washing and drying program. The display will show the default settings for the selected program.
Common Washing Programs:
- Cottons: For normally soiled cotton garments.
- Synthetics: For synthetic or mixed fabrics.
- Delicates: For delicate garments requiring gentle care.
- Spin: For draining water and spinning laundry.
Drying Programs:
- Wash & Dry: Combines a wash cycle with a subsequent drying cycle.
- Drying Only: For drying already washed items.
4.4 Adjusting Options
After selecting a program, you can modify certain options using the function buttons:
- Temperature: Adjust the wash temperature.
- Spin Speed: Change the spin speed or select no spin.
- Extra Rinse: Add an additional rinse cycle.
- Delay Start: Postpone the start of the program.
4.5 Starting and Ending a Cycle
- Press the 'Start/Pause' button to begin the selected program.
- To pause a running program, press 'Start/Pause' again.
- To cancel a program, turn the program selector knob to 'Off' or press and hold the 'Start/Pause' button for a few seconds.
- At the end of the cycle, the appliance will signal completion. Wait for the door lock indicator to turn off before opening the door.
5. Maintenance and Care
Regular maintenance ensures the longevity and optimal performance of your appliance.
5.1 Cleaning the Exterior
- Wipe the exterior surfaces with a soft, damp cloth.
- Do not use abrasive cleaners or solvents.
5.2 Cleaning the Detergent Dispenser
- Remove the dispenser drawer and rinse it under running water.
- Clean any residue from the compartments and the housing.
5.3 Cleaning the Door Seal
- Regularly wipe the rubber door seal to remove lint, dirt, and detergent residue.
- Ensure no foreign objects are trapped in the seal.
5.4 Cleaning the Pump Filter
- Open the cover at the bottom front of the appliance.
- Place a shallow container to collect any residual water.
- Slowly unscrew the filter, allow water to drain, and remove any debris.
- Clean the filter thoroughly and screw it back in securely.
5.5 Descaling
- Periodically run a descaling cycle using a suitable descaling product, especially in hard water areas.
- Follow the instructions on the descaling product packaging.
6. Troubleshooting
Before contacting customer service, please refer to the following table for common issues and their solutions.
| Problem | Possible Cause | Solution |
|---|---|---|
| Appliance does not start | No power supply; Door not closed properly; Program not selected. | Check power plug and fuse; Ensure door is firmly closed; Select a program and press Start. |
| No water entering appliance | Water tap closed; Water inlet hose kinked; Water inlet filter blocked. | Open water tap; Straighten hose; Clean inlet filter. |
| Water not draining | Drain hose kinked or blocked; Pump filter blocked. | Straighten or clear drain hose; Clean pump filter. |
| Excessive vibration during spin | Transport bolts not removed; Appliance not level; Uneven load. | Remove transport bolts; Adjust feet to level appliance; Redistribute laundry in drum. |
| Drying results unsatisfactory | Overloaded; Incorrect program selected. | Reduce load size; Select appropriate drying program for fabric type. |
7. Technical Specifications
Detailed specifications for the Whirlpool FFWDD107436BSVIT Washer-Dryer.
| Specification | Value |
|---|---|
| Manufacturer | Whirlpool |
| Item Model Number | FFWDD107436BSVIT |
| Product Dimensions (L x W x H) | 61 x 60 x 85 cm |
| Washing Capacity | 10 Kilograms |
| Drying Capacity | 7 Kilograms |
| Color | White |
| Drum Material | Stainless Steel |
| Maximum Spin Speed | 1400 rpm |
| Energy Efficiency Class (Washing) | A |
| Energy Efficiency Class (Wash & Dry) | D |
| Spin Efficiency Class | B |
| Water Consumption (Washing) | 52 L |
| Control Type | Push-button |
| Voltage | 230 Volts |
| Access Location | Front load |
| Number of Washing Cycles | 4 |
| Number of Drying Cycles | 2 |
| Special Feature | High-speed spinning |
| Spare Parts Availability | Information unavailable on spare parts |
8. Warranty and Customer Support
For information regarding the warranty period and terms for your Whirlpool appliance, please refer to the warranty card included with your purchase or visit the official Whirlpool website for your region.
If you encounter any issues that cannot be resolved using the troubleshooting guide, or require technical assistance, please contact Whirlpool Customer Service. Have your appliance model number (FFWDD107436BSVIT) and serial number ready when you call.
You can typically find contact information for customer support on the Whirlpool website or in the documentation provided with your appliance.
Related documentsFFWDD107436BSVIT


Ask a question about this manual
Ask about setup, troubleshooting, compatibility, parts, safety, or missing instructions. Manuals+ will review the question and use this page’s manual context to help answer it.