Introduction
Thank you for purchasing the VONROC EH519AC Electric Ceramic Fan Heater. This manual provides essential information for the safe and efficient operation, maintenance, and troubleshooting of your device. Please read these instructions carefully before use and retain them for future reference.
Safety Instructions
Always observe the following safety precautions to reduce the risk of fire, electric shock, or injury:
- Ensure the power supply matches the specifications on the rating label.
- Do not cover the heater to prevent overheating.
- Keep flammable materials at least 1 meter away from the heater.
- Do not use in bathrooms, laundry areas, or similar wet locations.
- Unplug the heater when not in use or before cleaning.
- Supervise children and pets when the heater is in operation.
- Do not operate with a damaged cord or plug.
- This appliance is for indoor use only.
- Do not insert objects into any openings.
Product Components
The VONROC EH519AC Electric Ceramic Fan Heater package includes the following items:
- Main Heater Unit
- Remote Control
- User Manual

Image 1: Front view of the VONROC EH519AC Ceramic Fan Heater, showcasing its sleek black design, digital display, and control buttons.

Image 2: The VONROC EH519AC Ceramic Fan Heater displayed next to its compact remote control, highlighting both methods of operation.
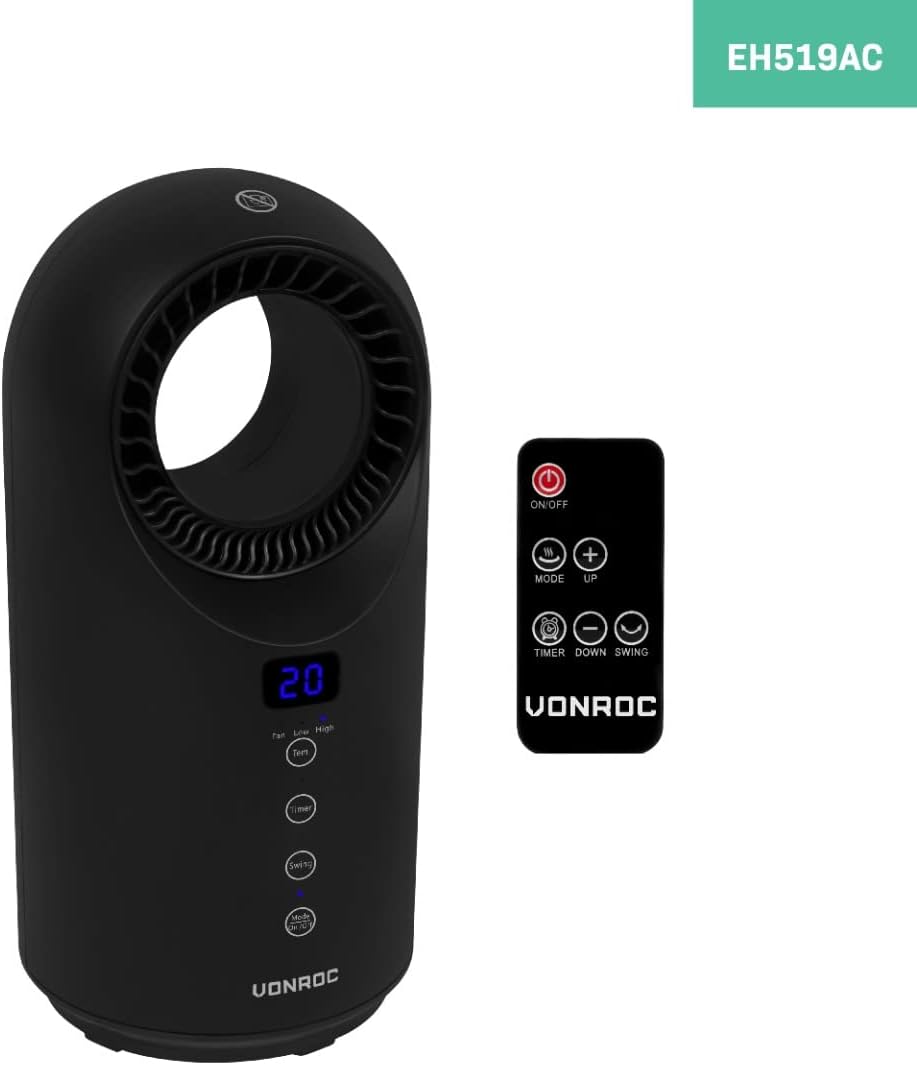
Image 3: A visual representation of the VONROC EH519AC Ceramic Fan Heater with its approximate dimensions: 37 cm in height and 18.5 cm in diameter.
Setup
- Unpacking: Carefully remove the heater and all accessories from the packaging. Retain packaging for storage or future transport.
- Placement: Place the heater on a firm, level, and stable surface. Ensure there is at least 1 meter (3 feet) of clear space around the heater to allow for proper airflow and to prevent fire hazards. Do not place it directly under a power outlet.
- Power Connection: Plug the power cord into a suitable 220-240V AC, 50Hz grounded power outlet. Ensure the outlet is capable of handling the heater's maximum power requirements (1500W).
- Remote Control Battery: Open the battery compartment on the remote control and insert 2x AAA batteries (not included), ensuring correct polarity.
Operating Instructions
Control Panel and Remote Control
The heater can be operated using the touch control panel on the unit or the provided remote control. The functions are identical.
Image 4: Detailed view of the heater's control panel buttons and the remote control layout, indicating power, mode, timer, and swing functions.
Functions:
- Power On/Off: Press the ON/OFF button to turn the heater on or off. When on, the digital display will show the current room temperature.
- Mode/Heat Settings: Press the MODE button to cycle through the available heat settings:
- Fan Only: Circulates air without heat.
- Low Heat (1000W): Provides moderate heat output.
- High Heat (1500W): Provides maximum heat output.
- Thermostat (Temperature Setting):
- Press the TEMP button (or + / - on remote) to adjust the desired temperature between 15°C and 40°C.
- The heater will automatically turn on or off to maintain the set temperature.
- Timer Function:
- Press the TIMER button to set the operating time from 1 to 12 hours.
- Each press increases the timer by 1 hour. The display will show the set time.
- The heater will automatically turn off once the set time expires.
- Swing Function: Press the SWING button to activate or deactivate the oscillation feature, which distributes heat more evenly across the room.

Image 5: The heater rotating on its base, illustrating the swing function for wider heat distribution within a room.
Maintenance
Regular maintenance ensures optimal performance and extends the lifespan of your heater.
- Cleaning:
- Always unplug the heater and allow it to cool completely before cleaning.
- Wipe the exterior with a soft, damp cloth. Do not use abrasive cleaners, solvents, or harsh chemicals.
- Use a vacuum cleaner with a brush attachment to gently remove dust from the air intake and outlet grilles.
- Do not immerse the heater in water or any other liquid.
- Storage: If storing the heater for an extended period, clean it thoroughly and place it back in its original packaging. Store in a cool, dry place, away from direct sunlight and moisture.
Troubleshooting
| Problem | Possible Cause | Solution |
|---|---|---|
| Heater does not turn on. | No power supply; Power switch off; Overheat protection activated; Tip-over switch activated. | Check power cord connection and wall outlet; Ensure power switch is ON; Allow heater to cool down and reset; Place heater on a flat, stable surface. |
| No heat output. | Fan mode selected; Temperature setting too low. | Select a heat mode (Low or High); Increase the desired temperature setting. |
| Heater makes unusual noise. | Dust or debris in fan; Loose internal component. | Unplug and clean fan grilles; If noise persists, contact customer support. |
| Remote control not working. | Dead batteries; Obstruction between remote and heater. | Replace batteries; Ensure clear line of sight to the heater's sensor. |
If the problem persists after attempting these solutions, please contact VONROC customer support.
Specifications
| Model Number | EH519AC |
| Power Supply | 220-240V AC, 50Hz |
| Heat Output | 1000W / 1500W |
| Heat Settings | Fan Only, Low (1000W), High (1500W) |
| Thermostat Range | 15°C - 40°C |
| Timer | 1-12 hours |
| Product Dimensions (H x D) | 41 cm x 18.5 cm (approx.) |
| Product Weight | 2.1 kg |
| Features | Ceramic PTC Element, Digital Display, Remote Control, Overheating Protection, Fall-over Protection, Swing Function |
Warranty and Support
VONROC products are manufactured to high quality standards. This product comes with a standard manufacturer's warranty. For detailed warranty terms and conditions, please refer to the warranty card included with your product or visit the official VONROC website.
For technical support, spare parts, or any questions regarding your VONROC EH519AC heater, please contact VONROC customer service. Contact information can typically be found on the VONROC website or on your purchase documentation.
Online Support: www.vonroc.com/support


