
Introduction
This manual provides detailed instructions for the setup, operation, and maintenance of your Soobest Digital Wall Clock, Model SO801L. Please read this manual thoroughly before using the product to ensure proper function and longevity. This clock features a large LED display, remote control, countdown timer, and adjustable brightness levels, designed for various indoor environments.

Image: Soobest Digital Wall Clock with its remote control, displaying the time 12:30 and seconds 08.
Package Contents
Verify that all items listed below are included in your package:
- Soobest Digital Wall Clock (Model SO801L)
- Remote Control
- Power Adapter
- Measuring Ruler
- Mounting Nails (2 pcs)
- Instruction Manual

Image: A visual representation of the clock and all included accessories: remote, power adapter, measuring ruler, nails, and manual.
Product Overview
The Soobest Digital Wall Clock SO801L is designed for clear visibility and versatile functionality. Key features include:
- Large LED Display: 10.2-inch display with bold, 3-inch digits for easy readability.
- Seconds Display: Provides precise time tracking.
- Remote Control: Convenient adjustment of settings from a distance.
- Countdown/Count-up Timer: Ideal for gym workouts, cooking, and other timed activities.
- 5-Level Dimmer: Adjustable brightness to suit various lighting conditions and preferences.
- Automatic Daylight Saving Time (DST): Automatically adjusts for DST changes.
- Wall Mount Design: Saves space and provides optimal viewing angles.
- AC Powered with Battery Backup: Ensures time and settings are retained during power outages (2 AAA batteries not included for backup).

Image: An overview of the clock's main features, including time, date, seconds, timer, dimmer, 12/24 hour format, remote control, and battery backup.
Setup Instructions
- Power Connection:
- Insert 2 AAA batteries (not included) into the battery compartment on the back of the clock. These batteries provide backup for time and settings during a power outage, but do not power the display.
- Connect the provided power adapter to the DC input port on the back of the clock.
- Plug the power adapter into a standard electrical outlet. The clock display will illuminate.
- Wall Mounting:
- Use the included measuring ruler to mark the desired mounting points on your wall.
- Drill holes at the marked points and insert the provided mounting nails or appropriate wall anchors.
- Carefully hang the clock onto the installed nails/anchors. Ensure it is securely fastened.
- Initial Time Setting:
- Once powered on, use the remote control to set the current time. Refer to the 'Operating Instructions' section for detailed steps on setting time and other functions.
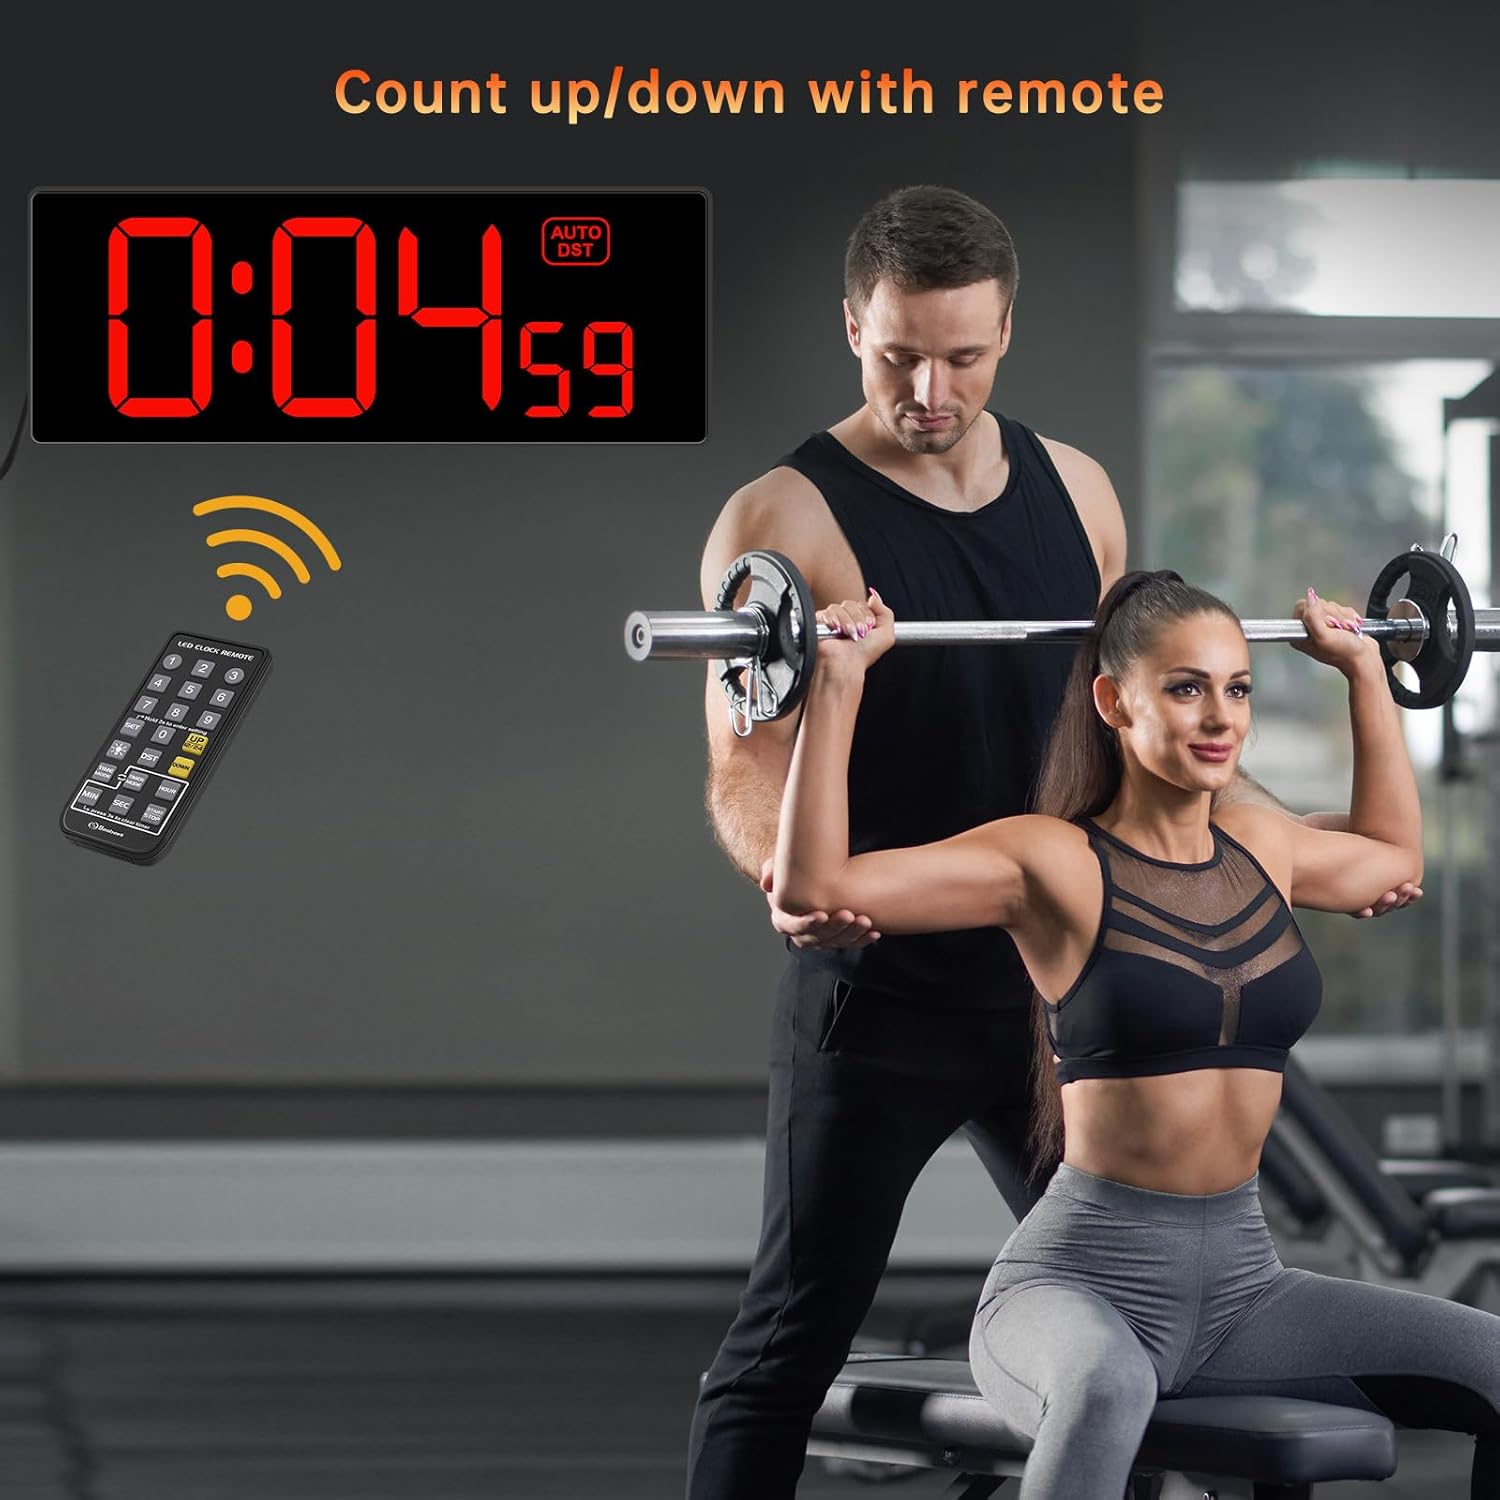
Image: A visual guide showing the two main setup steps: plugging in the power adapter and using the remote control for initial settings.
Operating Instructions
1. Setting Time and Date
- Press the 'SET' button on the remote control. The hour digits will flash.
- Use the number buttons (0-9) on the remote to enter the current hour.
- Press 'SET' again. The minute digits will flash. Enter the current minutes.
- Continue pressing 'SET' to cycle through setting the year, month, and day, entering the correct values each time.
- Press 'SET' one last time to confirm all settings.
2. 12/24 Hour Format Switch
Press the '12/24HR' button on the remote control to toggle between 12-hour (with AM/PM indicator) and 24-hour (military time) formats.
3. Daylight Saving Time (DST)
Press the 'DST' button on the remote control to activate or deactivate the automatic Daylight Saving Time function. When activated, the clock will automatically adjust for spring forward/fall back.

Image: Illustration of the clock's automatic DST feature, showing how it adjusts for spring forward (+1h) and fall back (-1h).
4. Dimmer Function
The clock features 5 levels of brightness. Press the 'DIMMER' button on the remote control repeatedly to cycle through the brightness levels (Level 1 is the dimmest, Level 5 is the brightest) until you find your preferred setting.

Image: A visual representation of the 5 dimmer levels, from dimmest to brightest, controlled by the remote.
5. Countdown/Count-up Timer
- Setting Countdown: Press the 'TIMER' button on the remote. The display will show '00:00'. Use the number buttons to enter the desired countdown time (e.g., '0500' for 5 minutes). Press 'START/STOP' to begin the countdown.
- Count-up: To start a count-up timer, ensure the timer is reset to '00:00' (press 'RESET' if needed), then press 'START/STOP'.
- Pause/Resume: During countdown or count-up, press 'START/STOP' to pause, and press again to resume.
- Reset: Press the 'RESET' button to clear the timer.
- Alarm: When the countdown finishes, the clock will emit a 60-second beep sound.

Image: A person in a gym setting, with the clock displaying a countdown timer (0:04:59), illustrating its use for workouts.
Maintenance
- Cleaning: Wipe the clock display and body with a soft, dry cloth. Avoid using abrasive cleaners or solvents.
- Battery Replacement: If the clock loses time or settings after a power outage, replace the 2 AAA backup batteries in the compartment on the back of the clock.
- Power Cord: Ensure the power cord is not bent, pinched, or damaged.
Troubleshooting
| Problem | Possible Cause | Solution |
|---|---|---|
| Clock display is off. | No power supply. | Ensure the power adapter is securely plugged into the clock and a working electrical outlet. Check if the outlet has power. |
| Clock loses time or settings after power outage. | Backup batteries are dead or missing. | Replace the 2 AAA backup batteries in the battery compartment. Ensure they are inserted with correct polarity. |
| Remote control is not working. | Remote battery is dead or line of sight is blocked. | Replace the battery in the remote control. Ensure there are no obstructions between the remote and the clock's sensor. |
| Time is inaccurate (e.g., seconds jump). | Internal clock synchronization issue. | Unplug the clock from power for a few minutes, then plug it back in and reset the time. If the issue persists, contact customer support. |
| Display is too bright/dim. | Dimmer setting is not adjusted. | Use the 'DIMMER' button on the remote control to adjust the brightness to one of the 5 available levels. |
Specifications
| Feature | Detail |
|---|---|
| Brand | Soobest |
| Model Number | SO801L |
| Color | Red |
| Display Type | Digital LED |
| Product Dimensions | 4.2"W x 10.7"H |
| Power Source | Corded Electric |
| Battery Backup | 2 AAA batteries (not included) for time/settings retention |
| Special Features | Corded, Daylight Saving, Large Display, Silent Clock, Timer, Remote Control, 5-Level Dimmer |
| Mounting Type | Wall Mount |
| Material | Plastic |
| Item Weight | 16 ounces (1 pound) |
Warranty and Support
Warranty: This Soobest Digital Wall Clock comes with a 1-year warranty from the date of purchase, covering manufacturing defects. Please retain your proof of purchase for warranty claims.
Customer Support: For any questions, technical assistance, or warranty inquiries, please contact Soobest customer support:
- Email: 202-0014@outlook.com
When contacting support, please provide your product model number (SO801L) and a detailed description of the issue.