1. Introduction
The TOPXCDZ SP801E is a versatile WiFi Art-Net LED controller designed for managing WS2812B, WS2811, and similar one-wire RZ code LED driver ICs. It enables wireless control of LED matrix panels and light strips via iOS and Android applications, supporting both AP (Access Point) and STA (Station) modes for flexible network integration. This manual provides detailed instructions for setup, operation, and maintenance.
2. Features
- APP controlled via WiFi, compatible with multiple Art-Net computer software.
- BluFi configuration using dual mode chip (WIFI & BT).
- Supports AP mode and STA mode for network connectivity.
- Two layout setting methods: regular rectangle layout setting and importing DXF files.
- Supports two layers overlay, with built-in multiple types of effect layers (text, music effect, etc.).
- Effect layers support a variety of custom parameters: direction, width, color, length, shape.
- Real-time preview function, with support for recording the current scene to the controller storage.
- Allows changing device name, reordering RGB sequence, and OTA updates.
- Package includes: 1PCS SP801E Wifi Art-Net Magic LED Controller.
3. Specifications

Image: SP801E Controller with printed specifications.
| Working Temperature | -20℃ ~ 60℃ |
| Working Voltage | DC5V ~ 24V |
| Working Current | 25mA ~ 130mA |
| Flash Capacity | 128M |
| Output Signal | 4-port TTL signals |
| Maximum Pixel Number | 1024 / port |
| LED Driver IC | Normal one-wire RZ code LED driver IC |
| Dimensions | 80mm * 41mm * 20mm (approximate) |
| Item Weight | 2.08 ounces |
4. Setup
4.1 Wire Connection
Proper wiring is crucial for the controller's functionality. Connect the power supply and LED strips to the controller as shown in the diagram below. Ensure correct voltage (DC5V-24V) and polarity (VCC, GND) for both the controller and the LED strips.
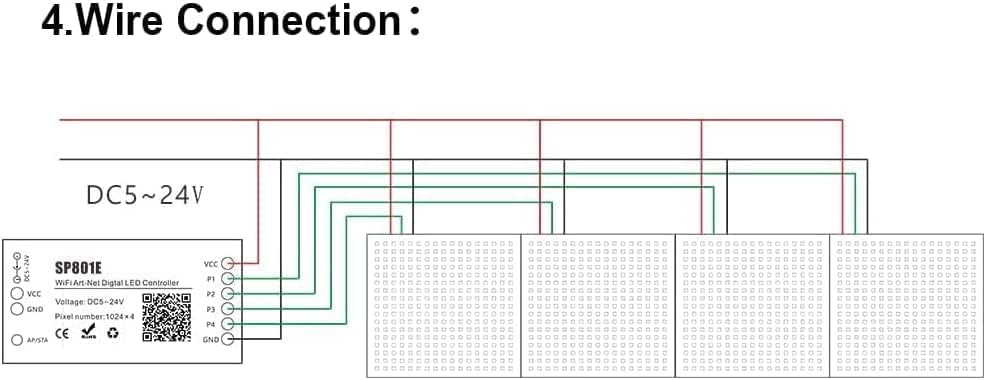
Image: Diagram illustrating the wire connections for the SP801E controller to LED strips and power supply.
The controller features VCC and GND terminals for power input, and P1, P2, P3, P4, and GND terminals for connecting up to four LED strip outputs. Connect the VCC and GND from your DC power supply to the controller's VCC and GND inputs. Then, connect the data lines (P1-P4) and corresponding GND lines from the controller to your LED strips.
4.2 App Installation
The SP801E controller is managed via the "BanlanX" application, available for both iOS and Android devices.
- iOS Devices: Requires iOS version 10.0 or later. Search for "BanlanX" on the App Store.
- Android Devices: Requires Android OS version 4.4 or later. Search for "BanlanX" on Google Play.
Alternatively, you can scan the QR code provided in the product documentation or on the controller itself to download and install the app. For additional resources, visit the official download page: https://download.ledhue.com/page/scenex/
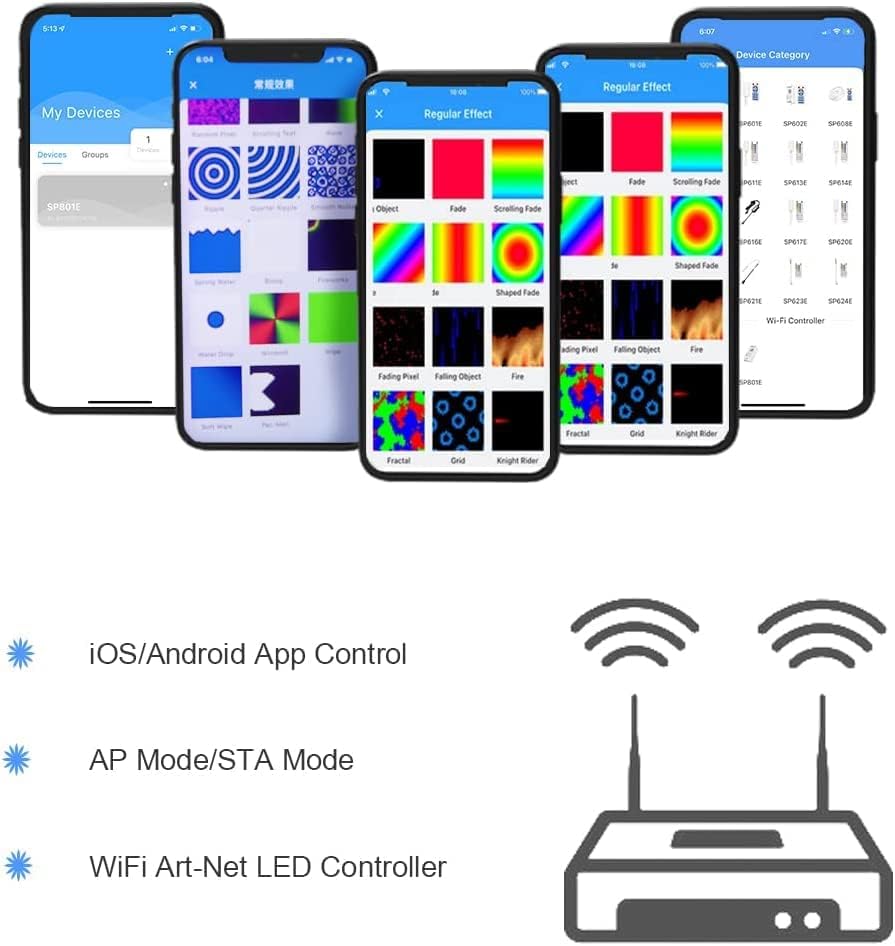
Image: Screenshots of the BanlanX application interface, showing device list and effect selection.
4.3 Controller Modes and Indicators
The SP801E controller supports two primary working modes: AP (Access Point) and STA (Station) mode. It also features a button and an LED indicator for mode management.
- Button Functions:
- Click: Switches between AP and STA modes.
- Press and Hold: Enters BluFi network configuration mode.
- LED Indicator Functions:
- Blue Static: Indicates AP (Access Point) mode.
- Green Static: Indicates STA (Station) mode.
- Green Flashing: Indicates BluFi configuration mode.
4.4 Network Configuration
AP (Access Point) Working Mode:
- Ensure the controller's LED is blue (AP mode). If not, click the button to switch modes.
- Go to your phone's Wi-Fi settings.
- Connect to the Wi-Fi network named like "SP801E_XXX". The default password is 12345678.
- Open the BanlanX App. Click the "+" button to configure the new SP801E controller. The controller should then appear in the device list.
STA (Station) Working Mode:
In STA mode, the controller and your phone are connected to the same local Wi-Fi network, allowing you to control the device within that network. There are two methods to configure the controller into your local Wi-Fi network:
- Using BluFi Configuration: Press and hold the controller's button until the LED flashes green to enter BluFi configuration mode. Follow the instructions in the BanlanX app to connect the controller to your home Wi-Fi network.
- Via AP Mode (Initial Setup): First connect to the controller in AP mode as described above. Within the BanlanX app, navigate to the controller settings and select your desired local Wi-Fi network, entering its password. The controller will then attempt to connect to this network and switch to STA mode (green static LED).
5. Operating Instructions
Once the controller is connected to your network and recognized by the BanlanX app, you can begin controlling your LED lights.
- Device List: The app will display a list of connected SP801E controllers. Select the desired controller to manage.
- Effect Layers: Explore the various built-in effect layers, including text, music effects, and more.
- Custom Parameters: Adjust parameters such as direction, width, color, length, and shape for each effect layer to create custom lighting displays.
- Layout Settings: Configure the layout of your LED matrix or strip using either the regular rectangle layout setting or by importing DXF files for complex designs.
- Real-time Preview: Utilize the real-time preview feature to see how effects will look before applying them.
- Scene Recording: Record your favorite scenes and save them to the controller's storage for quick recall.
- Device Management: Within the app, you can change the device name, reorder the RGB sequence for your specific LED type, and perform OTA (Over-The-Air) firmware updates.
6. Maintenance
To ensure the longevity and optimal performance of your SP801E controller, follow these maintenance guidelines:
- Cleaning: Gently wipe the controller with a dry, soft cloth. Avoid using liquid cleaners or solvents, as they may damage the device.
- Environment: Operate the controller within its specified working temperature range (-20℃ to 60℃). Avoid exposure to extreme temperatures, high humidity, or direct sunlight.
- Power Supply: Always use a stable DC5V-24V power supply that meets the controller's requirements. Incorrect voltage can cause damage.
- Firmware Updates: Regularly check for and apply OTA firmware updates through the BanlanX app to benefit from new features and bug fixes.
7. Troubleshooting
If you encounter issues with your SP801E controller, refer to the following common troubleshooting steps:
- Controller Not Powering On:
- Check the power supply connection and ensure it is providing the correct DC5V-24V voltage.
- Verify that the power adapter is functional.
- Cannot Connect to Controller Wi-Fi (AP Mode):
- Ensure the controller's LED is blue, indicating AP mode. If not, click the button to switch.
- Double-check the Wi-Fi password (default is 12345678).
- Try restarting both the controller and your phone.
- Controller Not Appearing in BanlanX App (STA Mode):
- Confirm that both your phone and the controller are connected to the same local Wi-Fi network. The controller's LED should be green static.
- Ensure your Wi-Fi router is functioning correctly and providing internet access.
- Restart the app, controller, and router.
- LEDs Not Responding or Displaying Incorrect Colors:
- Verify the wire connections between the controller and the LED strips, paying attention to data and ground lines.
- Check the LED driver IC type selected in the BanlanX app matches your LED strips (e.g., WS2812B, WS2811).
- Ensure the RGB order is correctly configured in the app settings for your specific LED strips.
- Confirm the pixel count per port is set correctly in the app, not exceeding 1024 pixels per port.
- App Freezing or Crashing:
- Ensure your BanlanX app is updated to the latest version.
- Clear the app's cache or reinstall it.
- Check your phone's operating system for available updates.
8. Warranty and Support
For warranty information and technical support, please refer to the documentation provided with your purchase or contact TOPXCDZ customer service directly. Keep your purchase receipt as proof of purchase for any warranty claims.

