Product Overview
This 60A MPPT Solar Charge Controller is designed for 12V/24V solar panel battery systems. It features dual USB ports, an LCD display, and timer settings for ON/OFF hours. It provides intelligent regulation for efficient solar charging and battery protection, making it suitable for various applications including home, industrial, and commercial use.
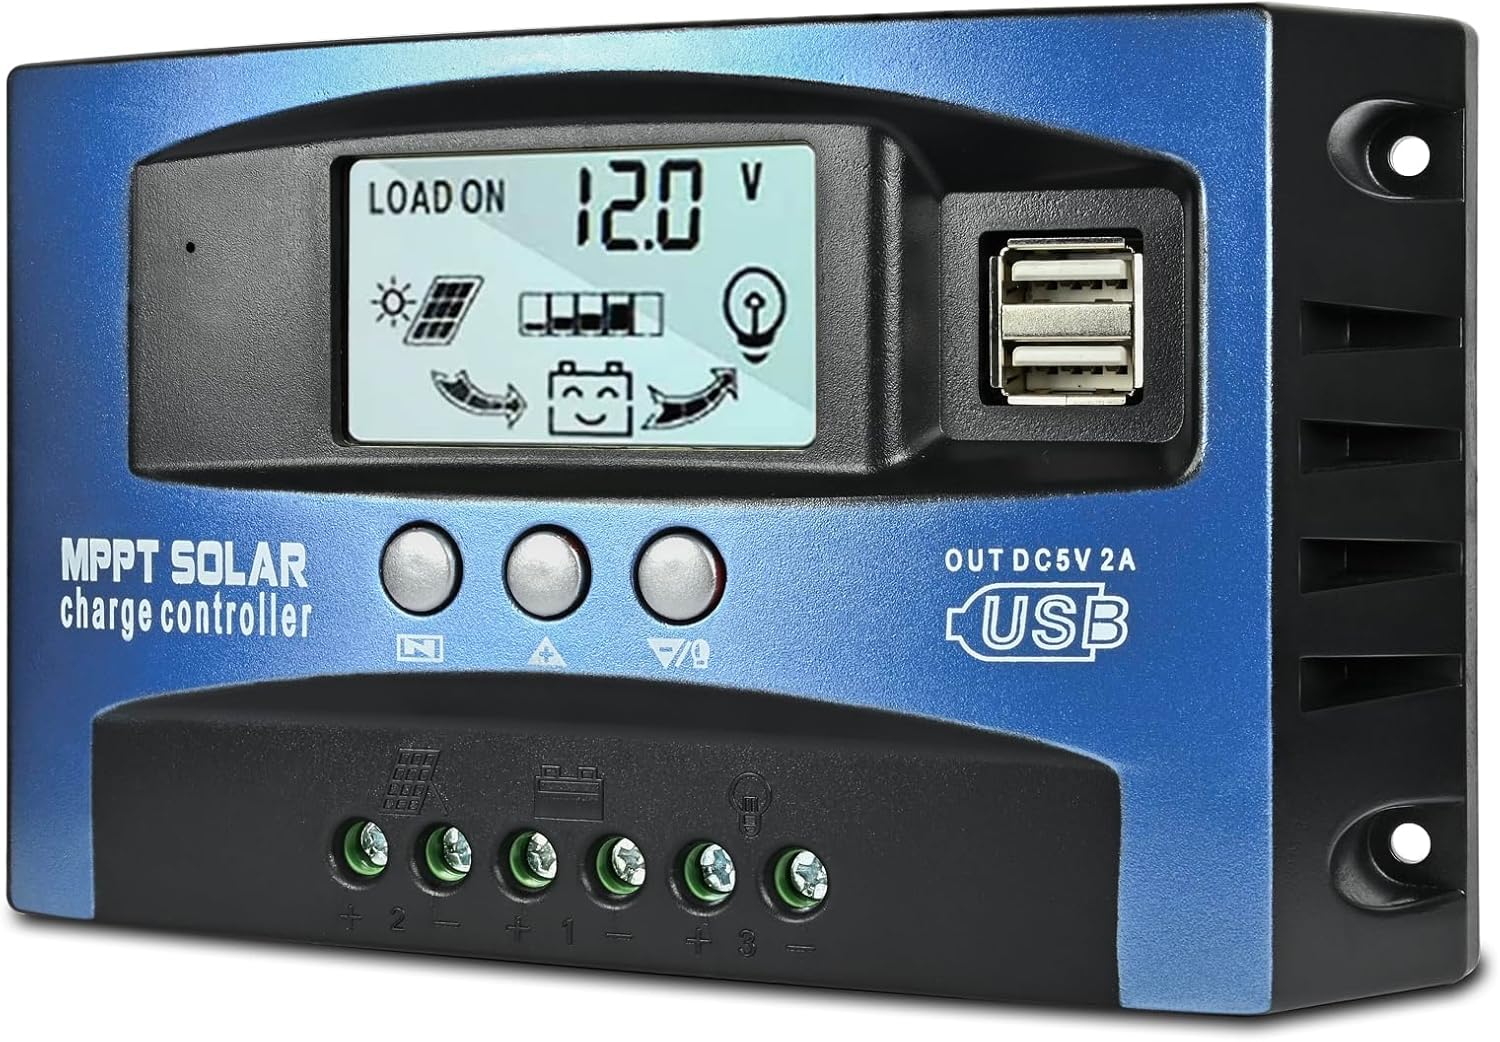
Image: Front view of the Depvko 60A MPPT Solar Charge Controller, showing the LCD display, control buttons, and dual USB ports.
Key Features
- UPGRADED MPPT TECHNOLOGY: Detecting the maximum charging current by using innovative MPPT technology with high tracking efficiency of up to 99%.
- PLUG AND PLAY: This charge controller is 12V/24V automatically adapts. Firstly connect the battery, then connect the solar panels. When you first use it, make sure the battery has enough voltage, so that the mppt charge controller can recognize the correct battery type.
- EASY TO READ: Let you know the status and data with LCD Display. You can also switch modes and parameter configurations conveniently and perfectly protect the lithium battery from over-discharge, suitable for home, industrial, commercial, etc.
- SAFE TO USE: Equipped with overcurrent protection, short-circuit protection, inverse connection protection, low voltage, and overcharge protection, and has fully 3-stage MPPT charge management. This 60A solar charge controller will help you improve the system efficiency safely and prolong the life span of the battery.
- TECH SUPPORT: We offer a 12-month guaranty for quality-related issues and technique support. Please feel free to contact us if there is any problem.
Setup and Installation
Follow these steps for proper installation of your solar charge controller. Ensure all connections are secure and observe polarity to prevent damage.
Wiring Diagram

Image: Detailed wiring diagram illustrating connections for the battery, solar panels, and optional inverter/load.
- Connect the battery first: Ensure the battery has sufficient voltage for the controller to recognize the correct battery type. Connect the positive and negative terminals of the battery to the corresponding battery terminals on the controller.
- Connect solar panels: After connecting the battery, connect the positive and negative terminals of your solar panels to the solar panel input terminals on the controller.
- Connect the load (optional): If using a DC load, connect it to the load output terminals.
- Connect an inverter (optional): For AC loads, connect an inverter to the battery terminals, ensuring proper sizing and safety.
Installation Video
Video: Official Depvko video demonstrating the installation process of the solar charge controller, including wiring connections.
Operating Instructions
The controller features an LCD display and three buttons for operation and configuration. Familiarize yourself with these functions for optimal use.
Display and Button Functions
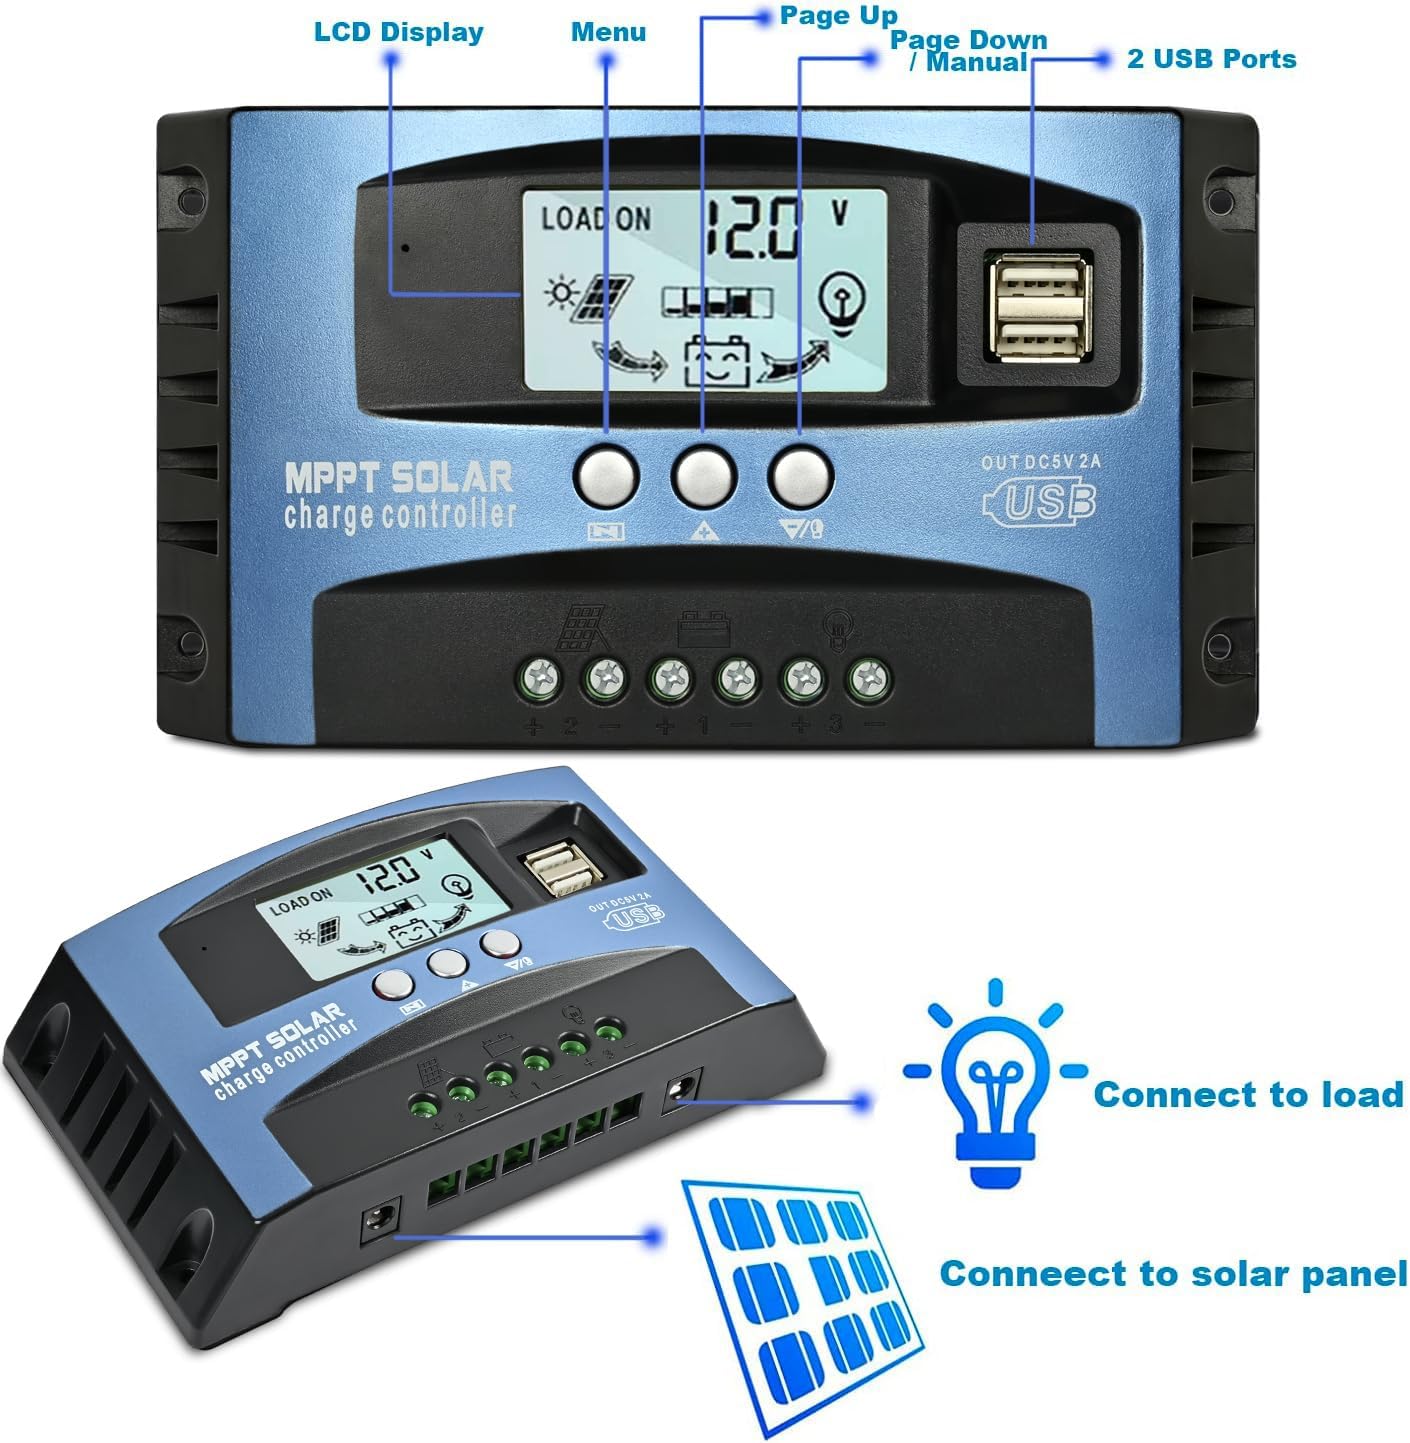
Image: Close-up view of the controller's LCD display and control buttons, indicating their functions.
- LCD Display: Shows real-time status and data such as battery voltage, solar panel charge current, load discharge current, accumulated discharging power, accumulated charging power, and load working mode.
- Buttons:
- Left button: Short press to cycle through the interface parameters.
- Middle button: Long press for 3 seconds to enter settings menu; short press to adjust parameters.
- Right button: Short press to exit setup menu; short press to open/close load output.
Function Declaration

Image: Diagram detailing various display screens and their corresponding functions and settings.
- Discharge Recovery Voltage: Refers to the battery voltage required to restore voltage and open the output.
- Discharge Cut-off Voltage: Refers to the battery discharge voltage when the load is turned off, protecting the battery from over-discharge damage.
- Load Operation Mode:
[24H]Load output 24 hours (except for battery under voltage).[1-15H]Load on after sunset and closed after setting hours.[0H]Dusk to dawn.
Safety and Protection
The Depvko Solar Charge Controller is equipped with multiple safety features to ensure reliable operation and prolong battery life. These protections safeguard both the controller and your connected battery system.

Image: Icons representing the various security protection features of the controller.
- Overcurrent Protection
- Short-circuit Protection
- Inverse Connection Protection
- Low Voltage Protection
- Overcharge Protection
- Fully 3-stage MPPT charge management
Specifications
Detailed technical specifications for the 60A MPPT Solar Charge Controller.
| Feature | Detail |
|---|---|
| Display Type | LCD |
| Manufacturer | Depvko |
| Charging Port Type | USB |
| Product Dimensions | 6.7 x 1.6 x 3.7 inches (17.0 x 4.1 x 9.4 cm) |
| Item Weight | 10.7 ounces (0.3 kg) |
| Item Model Number | P0630 |
| Country of Origin | China |
| Color | Blue |
| Voltage | 12V/24V (Auto-adapt) |
Product Dimensions

Image: Diagram showing the physical dimensions of the solar charge controller.
Maintenance
To ensure optimal performance and longevity of your Depvko Solar Charge Controller, regular maintenance is recommended.
- Keep Clean: Periodically wipe the controller's exterior with a dry, soft cloth to remove dust and debris. Ensure the LCD screen is clear for readability.
- Check Connections: Regularly inspect all wiring connections (battery, solar panel, load) to ensure they are tight and free from corrosion. Loose connections can lead to poor performance or damage.
- Ventilation: Ensure the controller is installed in a well-ventilated area to prevent overheating. Do not block the ventilation slots.
- Environmental Conditions: Avoid exposing the controller to extreme temperatures, direct moisture, or corrosive environments.
Troubleshooting
If you encounter issues with your solar charge controller, refer to the following common troubleshooting tips before contacting support.
- No Display/Power:
- Check battery connections: Ensure the battery is properly connected and has sufficient voltage (the controller requires battery power to operate).
- Verify polarity: Confirm that positive and negative terminals are connected correctly.
- Battery Not Charging:
- Check solar panel connections: Ensure solar panels are correctly wired to the controller.
- Verify solar panel output: Check if the solar panels are receiving adequate sunlight and producing voltage.
- Inspect wiring: Look for any damaged or loose wires between the panels and the controller.
- Load Not Working:
- Check load connections: Ensure the load is correctly connected to the controller's load output.
- Verify load settings: Check the load operation mode settings on the LCD display to ensure it's configured to turn on.
- Battery voltage: The load output may automatically turn off if the battery voltage is too low to protect the battery.
- Inaccurate Voltage Readings:
- Ensure proper wiring: Loose or high-resistance connections can affect voltage readings.
- Check battery health: A faulty battery can cause erratic voltage readings.
If problems persist after following these steps, please contact customer support for further assistance.
Warranty and Support
Depvko offers a 12-month guarantee for quality-related issues with your 60A MPPT Solar Charge Controller from the date of purchase.
For technical support, warranty claims, or any other inquiries, please feel free to contact Depvko customer service. You can find contact information on the official Depvko website or through your purchase platform.


