
1. Introduction
The Godox TT520II Camera Flash is a versatile on-camera electronic speedlite designed for universal compatibility with various DSLR cameras, including Canon, Nikon, Panasonic, Olympus, Pentax, and Fuji. It features 433MHz wireless transmission, an RT transmitter, and 16 channels for flexible shooting. This manual provides detailed instructions for setting up, operating, and maintaining your TT520II flash to ensure optimal performance.
2. What's in the Box
Upon unpacking your Godox TT520II Camera Flash, please verify that all the following items are included:
- Godox TT520II Flash Unit
- RT Remote Transmitter
- Protection Box
- Protection Bag
- User Manual
- Mini Stand
- Gift Kits (may vary)

Image: Contents of the Godox TT520II package, including the flash unit, wireless trigger, and various accessories.
3. Key Features
- Wireless Transmission: Features 433MHz wireless transmission with an RT transmitter and 16 channels for remote triggering.
- Flash Speed: Offers a fast flash speed of 1/300-1/20000s, ensuring sharp and clear images.
- Multiple Flash Modes: Includes M (Manual), S1 (Slave 1), and S2 (Slave 2) modes for enhanced versatility. S1 and S2 modes allow the flash to be triggered by another flash unit.
- Universal Compatibility: Compatible with Canon, Nikon, Panasonic, Olympus, Pentax, Fuji, and other DSLR cameras with a standard hot shoe. Note: This flash does not support TTL (Through-The-Lens) or camera setting functions.
- Power Output: Provides 8 variable flash outputs, ranging from 1/128 to full power, to meet diverse lighting demands.
- Power Saving & Overheat Protection: Equipped with multiple automatic protections to conserve power and prevent overheating.
- Adjustable Flash Head: The flash head can be tilted from -7 to 90 degrees and rotated horizontally for bounce flash effects.
- Built-in Diffuser: Includes a built-in wide-angle diffuser for softer light distribution.
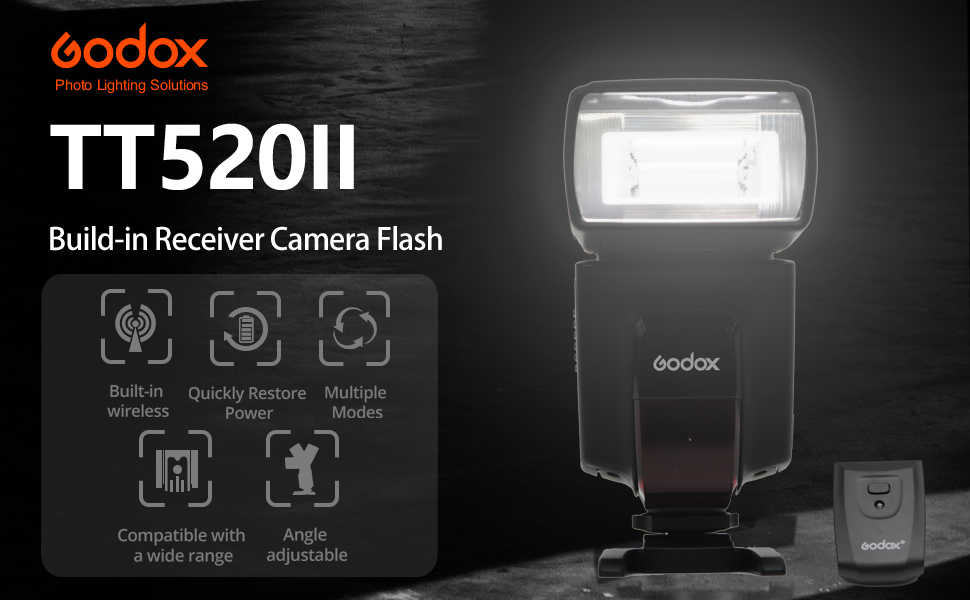
Image: The Godox TT520II flash unit highlighting its built-in wireless receiver, quick power restoration, multiple modes, wide compatibility, and adjustable angle.

Image: Diagram illustrating the adjustable tilt range of the Godox TT520II flash head, from -7 to 90 degrees.
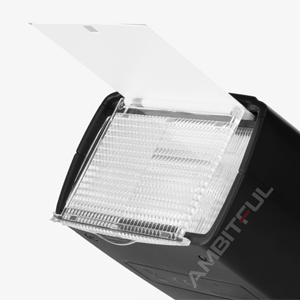
Image: Close-up of the Godox TT520II flash head showing the pull-out wide-angle diffuser.
4. Setup
4.1 Battery Installation
- Open the battery compartment cover located on the side of the flash unit.
- Insert four (4) AA batteries, ensuring correct polarity (+/-).
- Close the battery compartment cover securely.

Image: Close-up of the Godox TT520II flash unit's battery compartment, showing where to insert four AA batteries.
4.2 Attaching to Camera
- Slide the flash unit's hot shoe onto your camera's hot shoe mount.
- Tighten the locking ring or lever on the flash unit to secure it firmly to the camera.

Image: The Godox TT520II flash unit securely mounted on a DSLR camera's hot shoe.

Image: Various hot shoe mounts for different camera brands (Canon, Sony, Nikon, Fuji, Pentax, Olympus), demonstrating the universal compatibility of the Godox TT520II.
4.3 Attaching Wireless Trigger
The included RT Remote Transmitter can be mounted on your camera's hot shoe to wirelessly trigger the TT520II flash unit when it is set to a slave mode.
- Slide the RT Remote Transmitter onto your camera's hot shoe mount.
- Ensure the transmitter is securely locked.
- Power on both the transmitter and the flash unit.
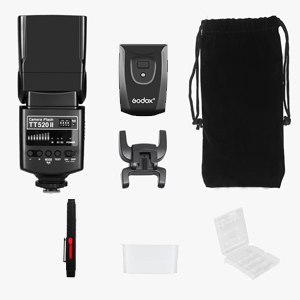
Image: The Godox TT520II flash unit alongside its compact wireless trigger.
5. Operating Instructions
5.1 Power On/Off
To power on the flash unit, slide the ON/OFF switch to the 'ON' position. To power off, slide it to the 'OFF' position.
5.2 Adjusting Flash Output
Use the + and - buttons on the control panel to adjust the flash power output. The output can be set from 1/128 to full power. The LED indicators will show the current power level.
5.3 Selecting Flash Modes
Press the MODE button to cycle through the available flash modes:
- M (Manual Mode): You manually set the flash output power.
- S1 (Slave 1 Mode): The flash will fire in sync with the first flash from a master unit (e.g., your camera's built-in flash). This mode ignores pre-flashes.
- S2 (Slave 2 Mode): The flash will fire in sync with the second flash from a master unit, specifically designed to ignore the pre-flash of a TTL system.

Image: Close-up of the Godox TT520II flash control panel, showing the mode, test, and power adjustment buttons, along with LED indicators for power levels and modes.
5.4 Using Wireless Trigger
When using the RT Remote Transmitter, ensure the TT520II flash unit is set to either S1 or S2 slave mode. The transmitter will send a signal to trigger the flash wirelessly. This allows for off-camera flash setups, providing more creative lighting options.
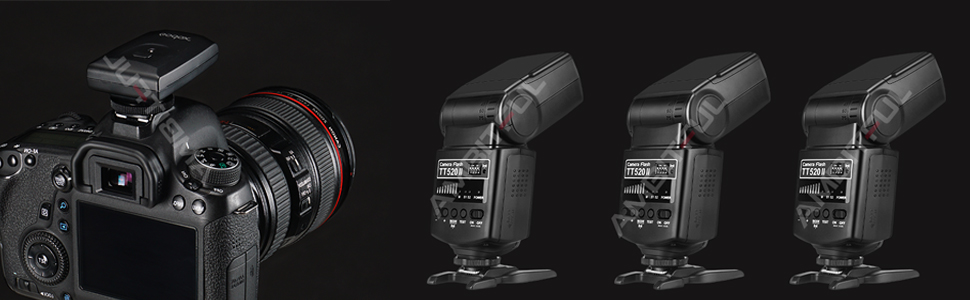
Image: An illustration demonstrating how multiple Godox TT520II flashes can be triggered wirelessly by a single camera-mounted transmitter.
5.5 Video Demonstration
Video: A demonstration of the Godox TT520II Camera Flash, showcasing its features and how it operates with a camera. This video is provided by PRONSTOOR, a seller of the product.
6. Maintenance
- Keep the flash unit dry. Do not handle with wet hands.
- Clean the flash head and body with a soft, dry cloth. Avoid using solvents or harsh chemicals.
- Remove batteries if the flash will not be used for an extended period to prevent leakage.
- Store the flash in a cool, dry place, away from direct sunlight and extreme temperatures.
- Avoid strong impacts or dropping the unit.
7. Troubleshooting
- Flash not firing:
- Check if the flash unit is powered on.
- Ensure batteries are correctly inserted and have sufficient charge.
- Verify the flash is securely mounted on the camera's hot shoe or that the wireless trigger is properly connected and the flash is in a slave mode.
- If using slave mode, ensure the master flash is firing correctly.
- Inconsistent flash output:
- Check battery levels; low batteries can affect output consistency.
- Ensure the flash head is clean and unobstructed.
- Flash overheating:
- Allow the flash unit to cool down if it has been used continuously at high power settings. The unit has built-in overheat protection.
8. Specifications
| Feature | Detail |
|---|---|
| Brand | GODOX |
| Model Number | TT520II |
| Package Dimensions | 8.86 x 3.5 x 2.87 inches |
| Item Weight | 1.06 pounds |
| Batteries | AA batteries required (included) |
| Compatible Mountings | Nikon, Olympus, Panasonic, Pentax, Canon, Fuji |
| Camera Flash Type | External |
| Flash Sync Speed | 1/200 or 1/250 |
| Included Components | Flash, Trigger, Gift Kits |
| Date First Available | November 6, 2022 |
9. Warranty and Support
For warranty information and customer support, please refer to the documentation provided with your product or visit the official GODOX website. Specific warranty terms may vary by region and retailer.