1. Introduction
This manual provides essential instructions for the safe operation, setup, maintenance, and troubleshooting of your Heng Long 1/16 Scale M1A2 Abrams Remote Control Tank. Please read this manual thoroughly before operating the tank to ensure proper function and longevity of the product.

Image: The Heng Long 1/16 Scale M1A2 Abrams RC Tank, its remote control, and the product packaging.
2. Safety Information
Observe the following safety precautions to prevent injury or damage to the product:
- Keep the tank and its components away from open flames and high temperatures.
- This product is recommended for users aged 14 and above. Adult supervision is advised for younger users.
- Do not modify the tank or its remote control. Unauthorized modifications may lead to malfunction and void the warranty.
- Ensure all batteries are installed correctly according to polarity markings.
- Always turn off the tank and remote control when not in use.
- Use only the provided charger and battery pack.
- When operating the firing mechanism, ensure no persons or animals are in the line of fire. Eye protection is recommended.
3. Package Contents
Verify that all items listed below are present in your package:
- Heng Long M1A2 Abrams Tank Model
- 2.4G Remote Control Transmitter
- USB Charging Cable
- Rechargeable Battery Pack (typically 2S 7.4V 1800mAh Li-ion)
- Smoke Oil
- Body Kits / Accessory Parts (e.g., simulated machine gun, commander figure, spare track links)
- Operating Instructions Manual
- Target Board (for firing practice)
- 6mm Plastic BBs (if applicable to your model variant)

Image: Display of all included accessories and components for the tank model.
4. Setup
4.1. Battery Installation
- Tank Battery: Locate the battery compartment on the underside of the tank. Open the cover. Connect the rechargeable battery pack to the tank's power connector. Secure the battery inside the compartment and close the cover.
- Remote Control Batteries: Open the battery cover on the back of the remote control. Insert 6 x 1.5V AA batteries, ensuring correct polarity. Close the cover.

Image: Detail of the tank's battery compartment and power switch.
4.2. Charging the Tank Battery
Connect the rechargeable battery pack to the provided USB charging cable. Plug the USB cable into a suitable USB power source (e.g., computer USB port, USB wall adapter). The indicator light on the charger will show charging status (e.g., red for charging, green for fully charged). Do not overcharge the battery.
4.3. Pairing the Remote Control
Ensure both the tank and the remote control are powered off. First, turn on the tank. Then, turn on the remote control. The remote control should automatically pair with the tank. If pairing fails, turn both devices off and repeat the process. The remote control's indicator light will confirm successful pairing.
4.4. Filling Smoke Oil (if applicable)
Locate the smoke oil reservoir on the tank (refer to the tank diagram in the manual). Carefully add a few drops of the provided smoke oil into the reservoir. Do not overfill. The smoke function can be activated via the remote control.
4.5. Attaching Accessories
Attach any loose accessory parts such as the simulated machine gun, commander figure, or antenna to their designated positions on the tank. Refer to the product images for guidance.
5. Operating Instructions
5.1. Remote Control Overview

Image: Labeled diagram of the 2.4 GHz remote control transmitter.
- Power Indicator: Shows remote control power status.
- Machine Gun Sweep / Sound: Activates machine gun sound effects.
- Simulated Launch / Bullet Shooting: Initiates the main cannon firing sequence (sound, recoil, and projectile launch if equipped).
- Turret 320° Rotating / Barrel Up/Down: Left joystick controls turret rotation and barrel elevation/depression.
- Analogue Emission: Right joystick controls tank movement (forward, backward, turning).
- Smoke Switch: Toggles the smoke generator on/off.
- Start/Stop Button: Powers the tank on/off (after initial pairing).
- Switch to Sound Mode: Changes the tank's sound profile.
- Volume Adjustment: Controls the tank's sound volume.
- Power Switch: Turns the remote control on/off.
5.2. Basic Movement
Use the right joystick on the remote control to maneuver the tank:
- Forward/Backward: Push the joystick forward or pull it backward.
- Turning: Push the joystick left or right to turn the tank.
- Pivot Turn: Push one stick forward and the other backward for a pivot turn.
5.3. Turret and Barrel Control
Use the left joystick on the remote control to operate the turret and main gun:
- Turret Rotation: Push the joystick left or right to rotate the turret up to 320 degrees.
- Barrel Elevation/Depression: Push the joystick forward or backward to raise or lower the main barrel by approximately 30 degrees.

Image: Visual representation of the tank's turret rotation and barrel movement capabilities.
5.4. Sound and Light Functions
The tank features realistic sound effects and LED lights:
- Engine Sounds: The tank will emit engine start, idle, and running sounds.
- Firing Sounds: Machine gun and main cannon firing sounds are activated by their respective buttons on the remote.
- Headlights: The front LED searchlights illuminate during operation.
- Smoke Effect: Activate the smoke generator using the smoke switch on the remote control.

Image: The tank demonstrating its LED searchlights and sound effects.
5.5. Infrared Combat System
The tank is equipped with an infrared combat system for simulated battles with other compatible Heng Long RC tanks. When hit by infrared rays 6 times, the tank will simulate a flameout with vibration effects, indicating it has been disabled. This system supports multiple tanks in a battle scenario.
5.6. Firing Mechanism (BBs)
If your model is equipped with a BB firing mechanism, load 6mm plastic BBs into the designated loading port (refer to the tank diagram). Press the 'Simulated Launch' button on the remote control to fire. Exercise caution and ensure a safe firing environment.
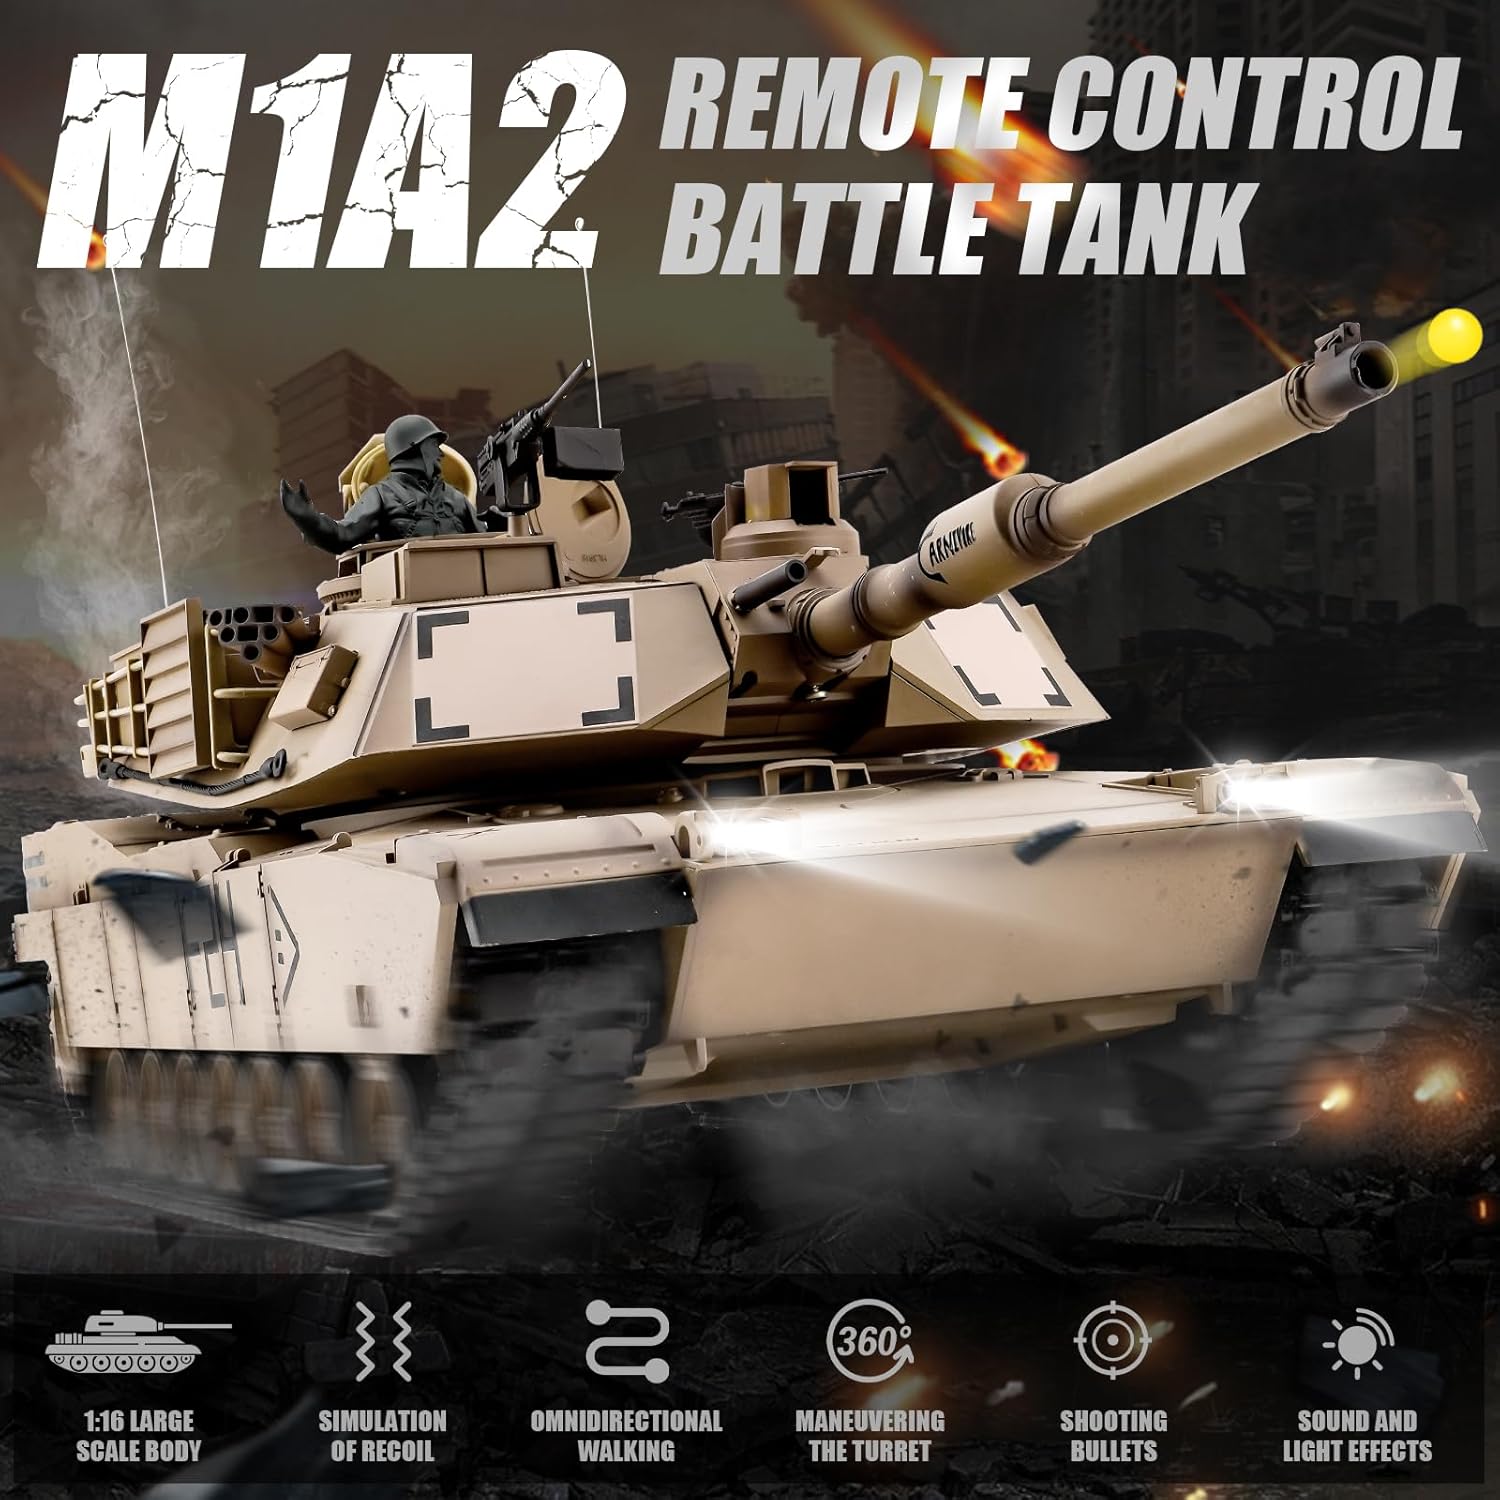
Image: The tank firing a projectile from its main cannon.
6. Maintenance
6.1. Cleaning
After use, gently wipe the tank's exterior with a soft, dry cloth to remove dust and debris. Avoid using water or chemical cleaners, as they may damage electronic components.
6.2. Battery Care
- Always disconnect the battery from the tank when not in use.
- Store batteries in a cool, dry place.
- Do not leave batteries charging unattended for extended periods.
- If the tank will not be used for a long time, remove batteries from both the tank and the remote control.
6.3. Track Maintenance
Periodically inspect the tank tracks for any debris, dirt, or damage. Clean the tracks and drive wheels as needed to ensure smooth operation. Ensure the tracks are properly tensioned.

Image: Detail of the tank's simulated tracks.
6.4. Storage
Store the tank in its original packaging or a protective container in a dry environment, away from direct sunlight and extreme temperatures.
7. Troubleshooting
| Problem | Possible Cause | Solution |
|---|---|---|
| Tank does not respond to remote control. | Low batteries in tank or remote; Not paired; Out of range. | Charge/replace batteries; Re-pair tank and remote; Operate within specified range. |
| Tank moves slowly or erratically. | Low tank battery; Obstruction in tracks. | Recharge tank battery; Clear tracks of debris. |
| Smoke function not working. | No smoke oil; Smoke generator clogged. | Add smoke oil; Gently clean smoke outlet (refer to specific instructions if available). |
| Firing mechanism not working. | No BBs loaded; Mechanism jammed. | Load BBs; Check for obstructions in the barrel. |
| Tank makes unusual noises. | Debris in gears/tracks; Damaged component. | Inspect and clean tracks/gears; Contact support if noise persists. |
8. Specifications
- Model: M1A2 Abrams (Model 3918)
- Scale: 1:16
- Control Frequency: 2.4 GHz
- Tank Dimensions (L x W x H): Approximately 14.5 x 6.5 x 7.5 inches
- Item Weight: Approximately 10.56 pounds
- Recommended Age: 14+ years
- Battery (Tank): 2S 7.4V 1800mAh Li-ion (rechargeable)
- Battery (Remote Control): 6 x AA batteries (not included)
- Turret Rotation: 320 degrees
- Barrel Lift: 30 degrees
- Features: Sound effects, LED lights, smoke effect, infrared combat system, recoil simulation.

Image: Side profile of the M1A2 Abrams RC Tank.
9. Warranty and Support
For any issues, broken parts, or concerns, please contact the seller directly through the platform where the product was purchased. Provide your order details and a description of the issue for prompt assistance. The manufacturer, Heng Long, provides support for their products.
Contacting Seller on Amazon:
- Go to the product listing on Amazon.com.
- Click the seller's name (e.g., 'Fat Uncle') under the 'Add to Cart' button.
- Click the 'Ask a Question' button to send a message.


