1. Introduction
Thank you for choosing the Modway Render 36-Inch Bathroom Vanity. This manual provides essential information for the safe assembly, proper operation, and effective maintenance of your new vanity. Please read all instructions carefully before beginning assembly or use, and retain this manual for future reference.
The Modway Render vanity features a durable MDF and particleboard frame with a smooth oak white laminate finish, complemented by four tapered wood legs. It includes a ceramic sink with an integrated countertop and 8-inch centerset faucet holes (fixtures not included). Ample storage is provided behind two soft-close hinged doors, designed for practical functionality and a clean aesthetic.

Image 1.1: Modway Render 36-Inch Bathroom Vanity, Oak White.
2. Safety Information
Please observe the following safety precautions to prevent injury or damage to the product:
- Assembly is required. Always follow the provided assembly instructions precisely.
- Fixtures (faucet, drain, P-trap) are not included with this vanity. Professional plumbing installation is recommended.
- Be cautious of pinch points when opening and closing the vanity doors.
- Always use appropriate safety gear, such as gloves and eye protection, during assembly.
- Ensure the vanity is placed on a level surface to prevent tipping and ensure proper door alignment.
- Do not overload the shelves or doors, as this may compromise stability and functionality.
3. Package Contents
Verify that all components are present and undamaged before beginning assembly. If any parts are missing or damaged, please contact customer support.
- Vanity Cabinet (MDF and Particleboard frame)
- Ceramic Sink with Integrated Countertop
- Tapered Wood Legs (4x)
- Assembly Hardware (screws, hinges, etc.)
- Assembly Instructions Manual
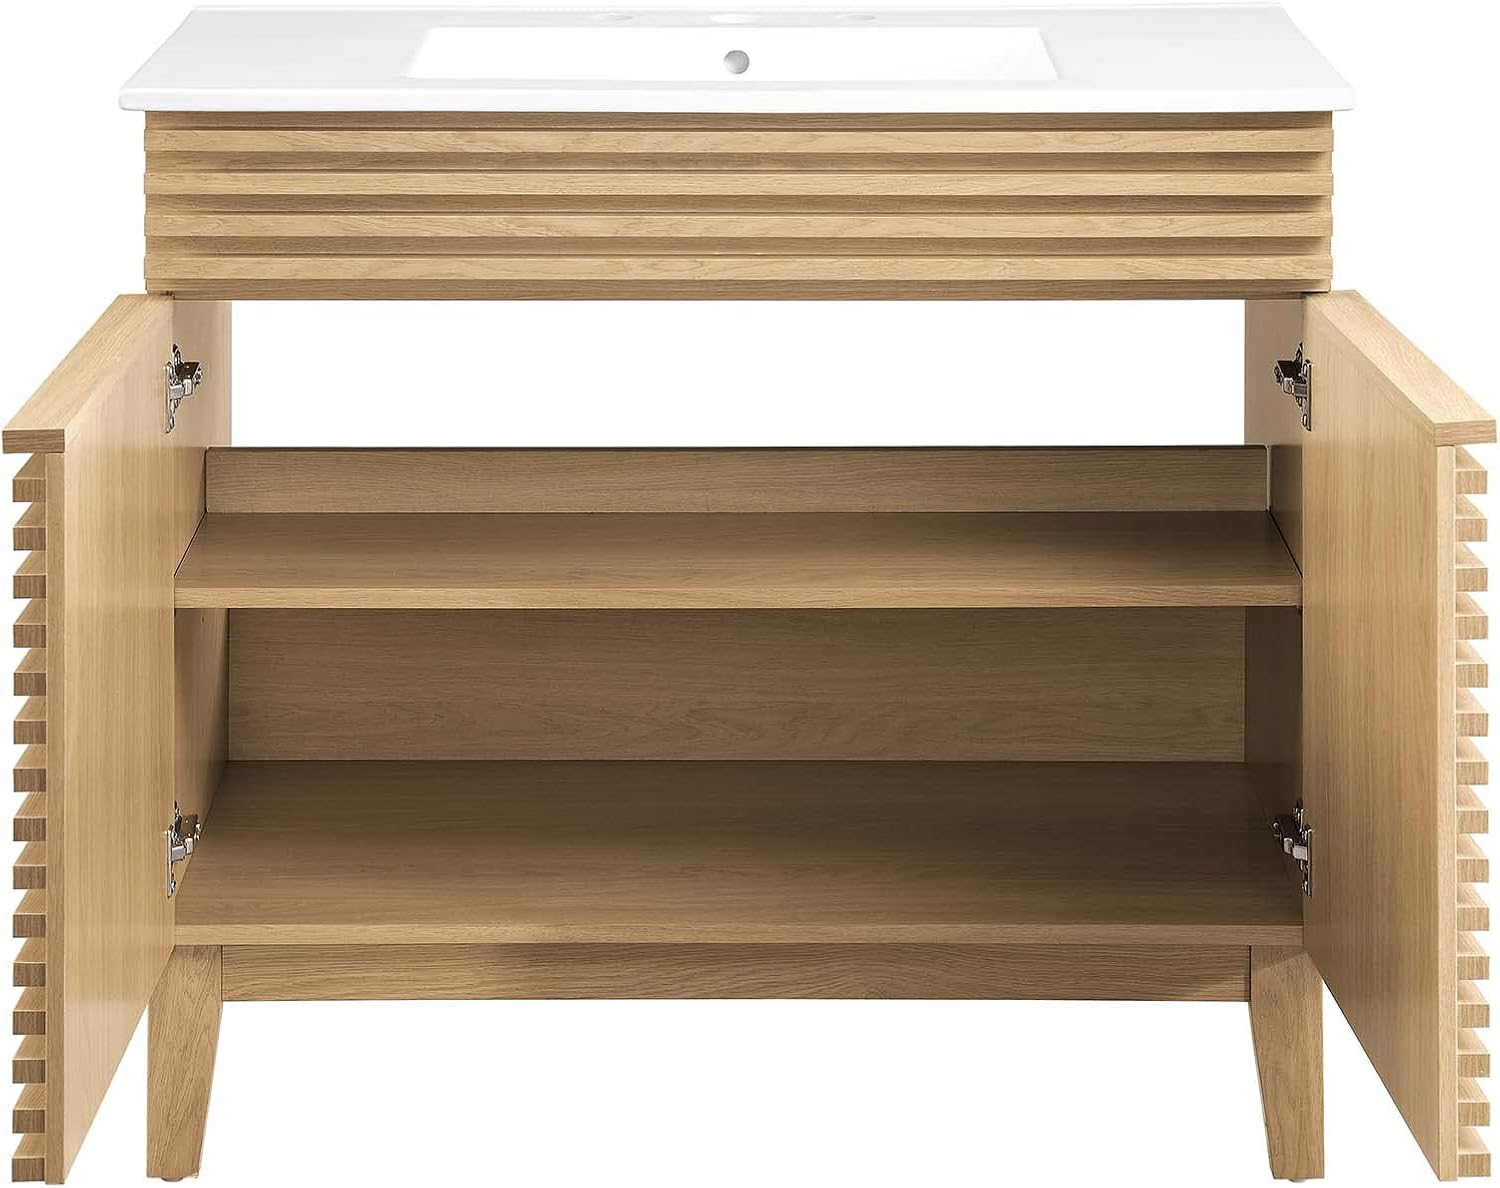
Image 3.1: Interior view of the vanity cabinet with adjustable shelf.
4. Setup and Assembly Instructions
Assembly of the Modway Render vanity is required. Please refer to the separate, detailed assembly instructions included in your package for step-by-step guidance. A general overview of the assembly process is provided below:
- Unpack and Inspect: Carefully remove all components from the packaging. Lay them out on a soft, clean surface to prevent scratches. Verify all parts against the parts list in the separate assembly manual.
- Assemble Cabinet Frame: Follow the instructions to connect the side panels, back panel, and base of the vanity cabinet using the provided hardware.
- Attach Legs: Securely attach the four tapered wood legs to the base of the cabinet.
- Install Doors: Mount the soft-close hinges to the doors and the cabinet frame, then attach the doors. Adjust hinges as needed for proper alignment and smooth operation.
- Place Ceramic Sink: Carefully place the ceramic sink with integrated countertop onto the assembled cabinet. Ensure it is properly aligned and secured according to the assembly instructions.
- Plumbing Installation: Connect your chosen faucet, drain, and P-trap (not included) to the ceramic sink. It is highly recommended to have a qualified plumber perform this step to ensure proper sealing and prevent leaks.
For visual guidance on the product's features and design, please refer to the video below:
Video 4.1: Overview of the Modway Render Bathroom Vanity features.
5. Operating Instructions
The Modway Render vanity is designed for straightforward use in a bathroom environment.
- Door Operation: The vanity features soft-close hinged doors. To open, gently pull the door. To close, push the door until the soft-close mechanism engages, allowing it to close smoothly and quietly. Avoid forcing the doors.
- Sink Usage: Use the ceramic sink for typical bathroom activities. Ensure the faucet is properly installed and sealed to prevent water damage to the vanity.
- Storage: Utilize the internal shelving for organizing bathroom essentials. The adjustable shelf can be repositioned to accommodate items of various heights.
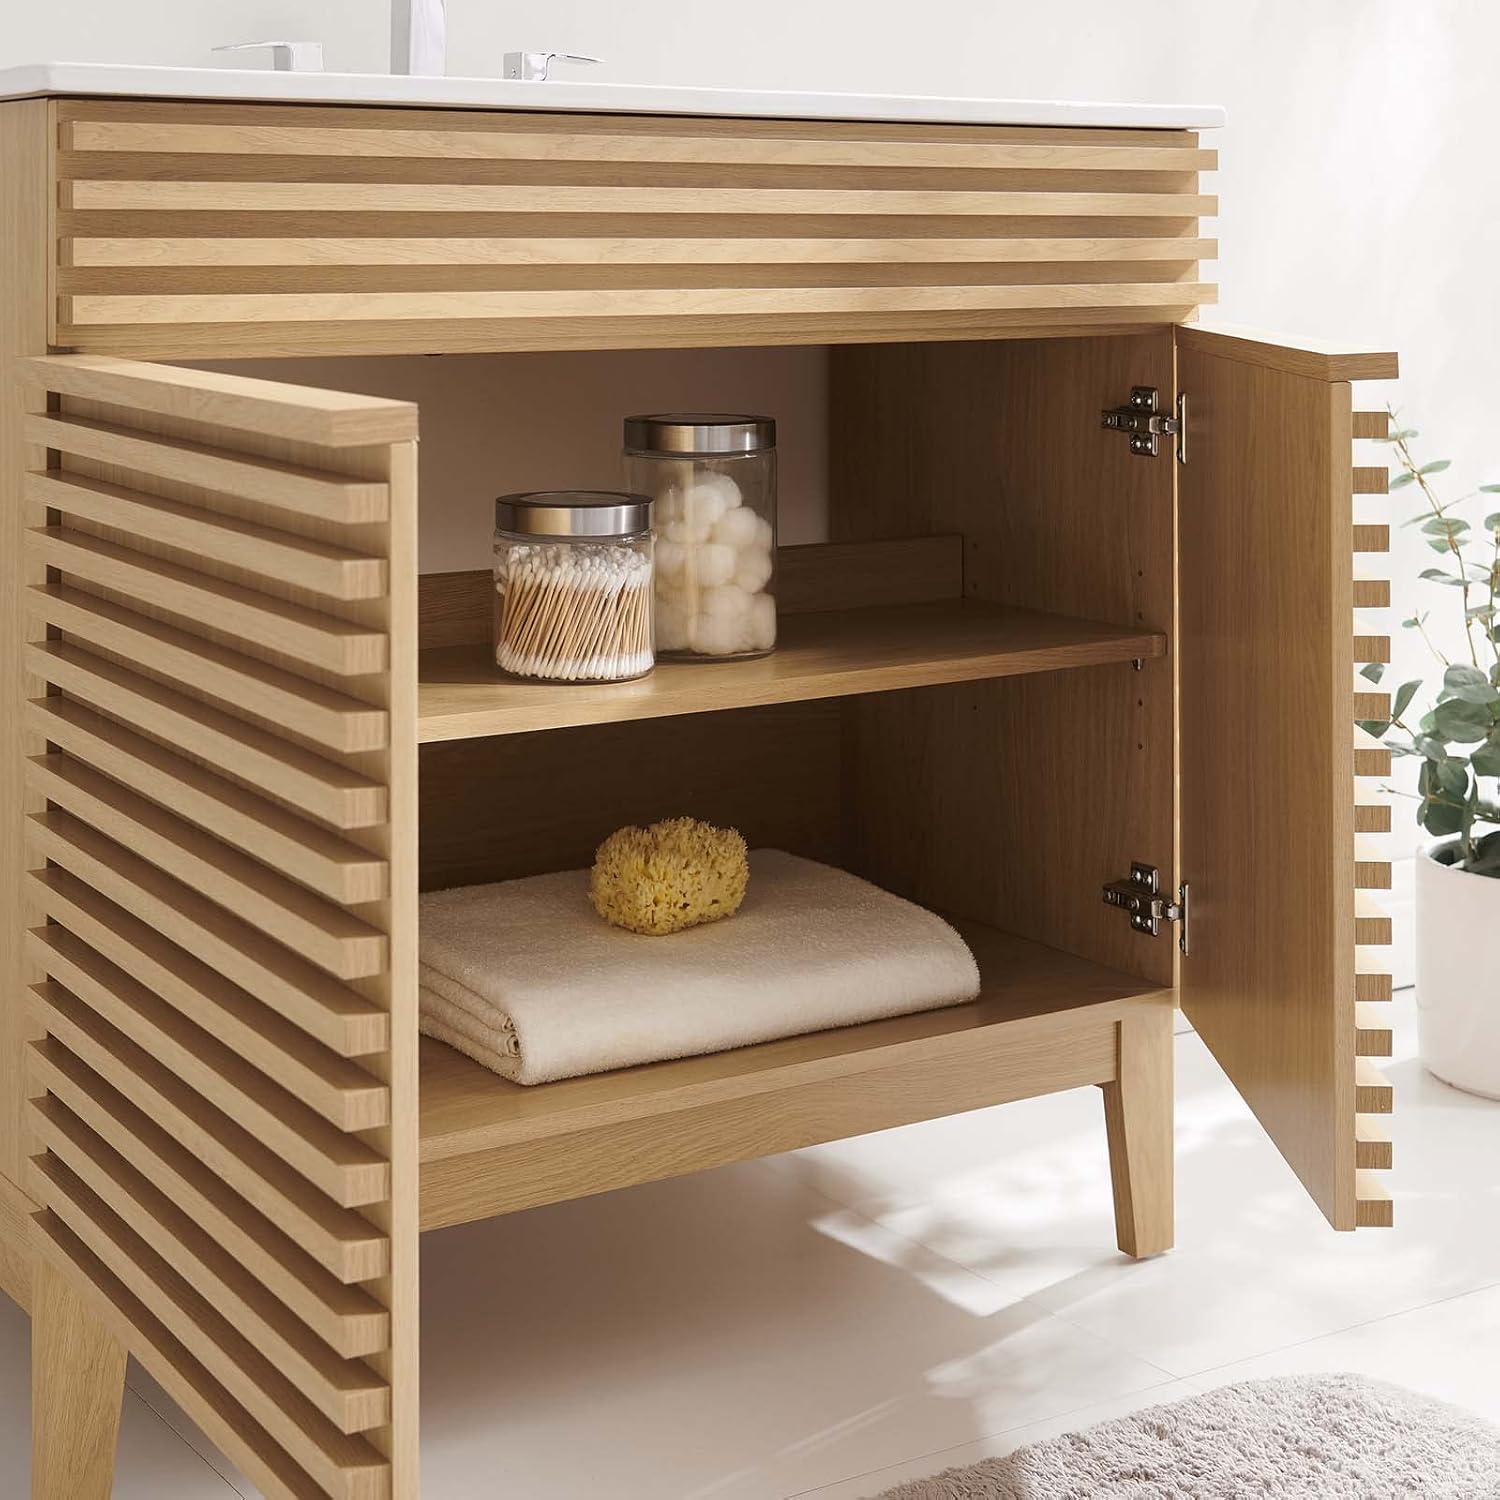
Image 5.1: Internal storage capacity of the vanity.
6. Maintenance
Regular cleaning and proper care will help maintain the appearance and longevity of your vanity.
- Cabinet Cleaning: Wipe the laminate surfaces with a soft, damp cloth. Avoid abrasive cleaners, harsh chemicals, or excessive moisture, which can damage the finish. Dry immediately after cleaning.
- Ceramic Sink Cleaning: Clean the ceramic sink with a non-abrasive bathroom cleaner and a soft sponge or cloth. Rinse thoroughly with water. Avoid using steel wool or highly acidic/alkaline cleaners.
- Spills: Immediately wipe up any water spills or splashes on the vanity surfaces to prevent water damage or staining.
- Hardware: Periodically check all screws and hardware for tightness and re-tighten if necessary.

Image 6.1: Ceramic sink with integrated countertop.
7. Troubleshooting
If you encounter issues with your vanity, refer to the following common solutions:
| Problem | Possible Cause | Solution |
|---|---|---|
| Doors do not close properly or are misaligned. | Loose hinges; uneven floor; improper assembly. | Adjust hinge screws for alignment. Ensure the vanity is on a level surface. Review assembly instructions for correct hinge installation. |
| Water leaks from plumbing. | Improperly sealed connections; loose fittings. | Check all plumbing connections (faucet, drain, P-trap) for tightness and proper sealing. Consult a plumber if leaks persist. |
| Vanity feels unstable or wobbly. | Uneven floor; loose leg attachments. | Ensure the vanity is on a level surface. Tighten all leg attachment screws. |
| Surface damage (scratches, swelling). | Impact; prolonged moisture exposure; harsh cleaners. | Prevent impacts. Wipe spills immediately. Use only recommended cleaning agents. Damage from misuse is not covered by warranty. |
8. Specifications
Key specifications for the Modway Render 36-Inch Bathroom Vanity:
- Model Name: Render
- Model Number: EEI-4437-OAK-WHI
- Brand: Modway
- Color: Oak White
- Dimensions (Overall): 36"W x 18.5"D x 33"H
- Material: Engineered Wood (MDF and Particleboard frame), Ceramic (Top Material)
- Mounting Type: Floor Mount (Freestanding)
- Number of Doors: 2 (Soft-close)
- Number of Shelves: 1
- Sink Type: Integrated Ceramic Sink with 8" Centerset Faucet Holes
- Item Weight: Approximately 35.9 pounds
- Assembly Required: Yes
- UPC: 889654259183, 889654259176

Image 8.1: Dimensional diagram and key features.
9. Warranty
The Modway Render 36-Inch Bathroom Vanity is covered by a one-year warranty against manufacturer defects. This warranty covers defects in materials and workmanship under normal use and service. It does not cover damage resulting from improper assembly, misuse, abuse, accident, alteration, or normal wear and tear. Please retain your proof of purchase for warranty claims.
10. Customer Support
For further assistance, missing parts, or warranty inquiries, please contact Modway customer service. Refer to the contact information provided with your purchase or visit the official Modway website.
Modway Official Website: www.modway.com


