1. Introduction
The Jansite TPMS (Tyre Pressure Monitoring System), model JM-TYH10-EU2, is designed to monitor your vehicle's tire pressure and temperature in real-time. This system helps enhance driving safety by providing timely alerts for abnormal tire conditions. It features a large display, dual charging capabilities, and robust external sensors.
2. Product Features
The Jansite TPMS JM-TYH10-EU2 includes the following key features:
- Large 3.5-inch color display for clear readability of tire data.
- High pressure accuracy to 0.01 Bar/Psi for precise monitoring.
- Removable and 360° rotatable bracket for flexible monitor placement and easy access.
- Dual charging options: integrated solar panel and Type-C USB port.
- Automatic sleep mode and vibration-activated power-on for energy efficiency.
- Six distinct alarm types: High Temperature, High Pressure, Low Pressure, Low Temperature, Low Battery, and Leak Prediction.
- Customizable alarm thresholds to suit individual preferences.
- High-quality pure copper sensors with IP68 waterproof rating, resistant to corrosion and high temperatures.
3. Specifications
| Model | JM-TYH10-EU2 |
| Manufacturer | Jansite |
| Pressure Range | 1.50-6.00 bar (21-87 psi) |
| Batteries | 4 Lithium Polymer batteries (included) |
| Display Size | 3.5 inches |
| Sensor Protection | IP68 Waterproof |
| Charging | Solar / Type-C USB |
| Item Weight | 210 g |
4. Setup
4.1 Monitor Installation
The monitor features a detachable bracket for versatile placement and easy removal for charging or settings adjustment. The bracket allows for 360° rotation to achieve the optimal viewing angle.
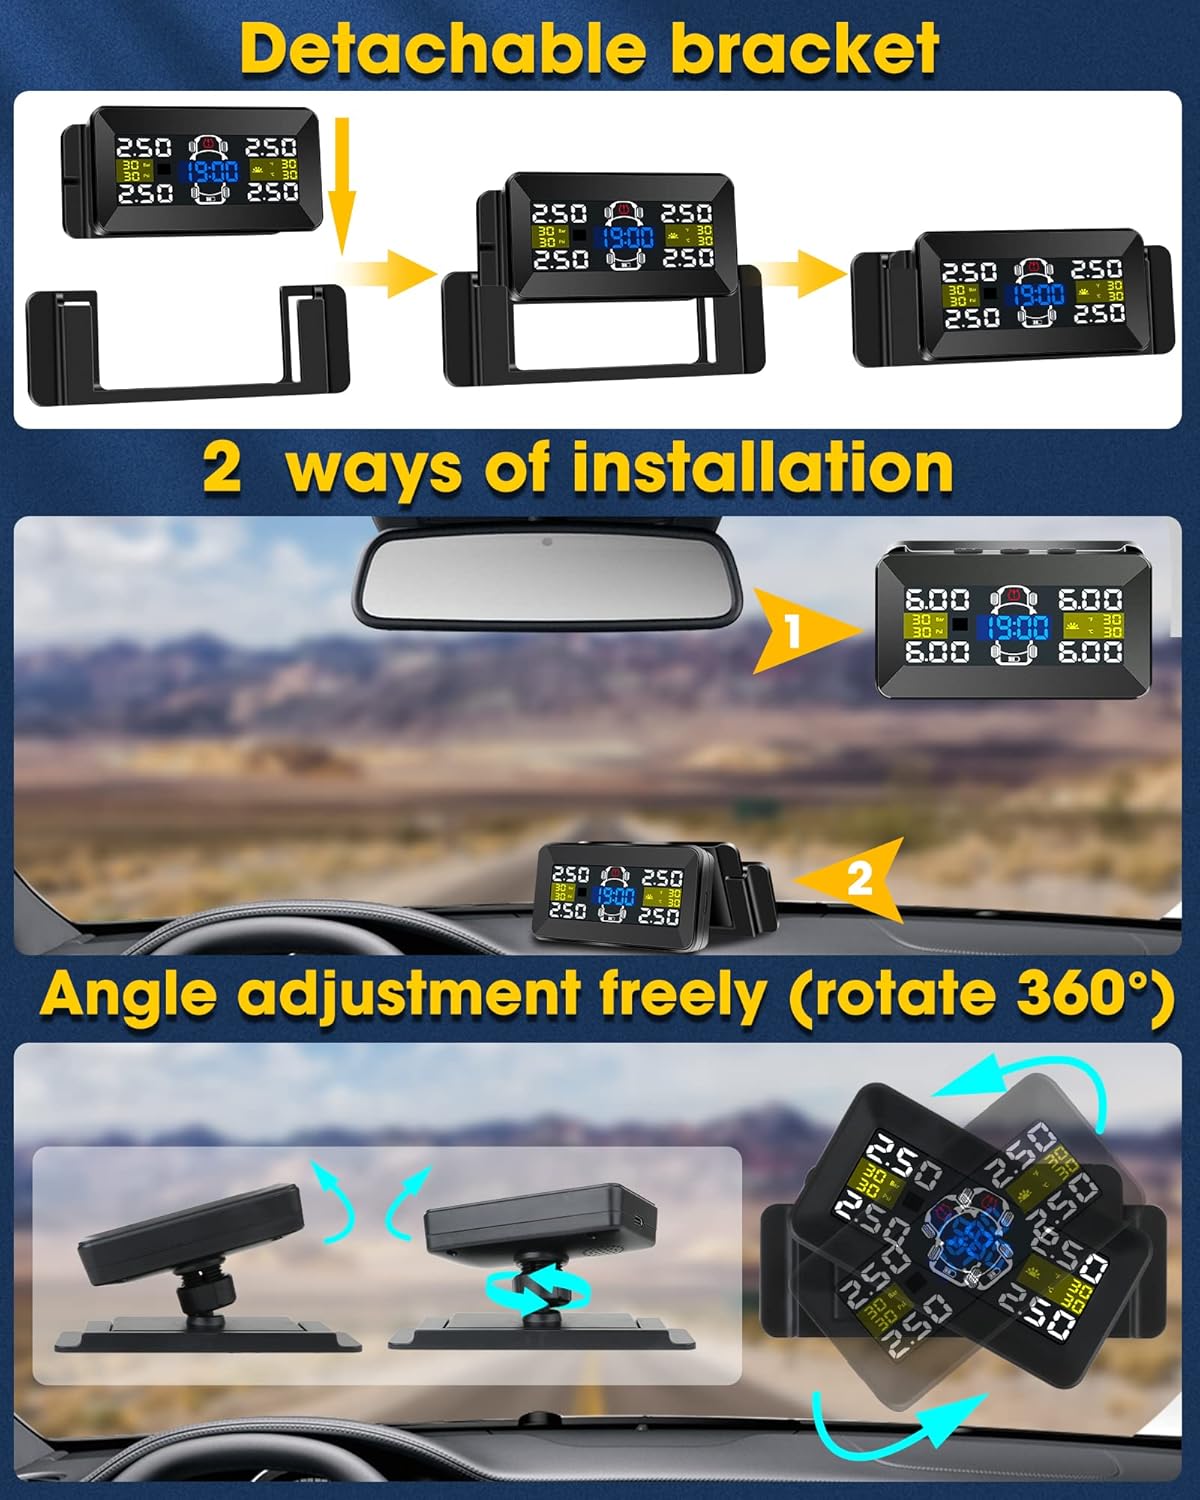
Image: Detachable bracket, two installation methods, and 360-degree angle adjustment.
- Attach the monitor securely to the provided bracket.
- Place the bracket on your dashboard or attach it to your windshield using the appropriate mounting method.
- Adjust the monitor's angle for optimal visibility while driving. The 360° rotation feature allows for precise positioning.
4.2 Sensor Installation
Install the external sensors onto each tire valve stem. Ensure they are tightened securely to prevent air leakage. It is recommended to install sensors quickly to minimize air loss during the process. Each sensor is typically marked for its corresponding tire position (e.g., FL for Front Left, FR for Front Right, etc.).
5. Operating Instructions
5.1 Display Overview
The 3.5-inch color display provides real-time information about your tires, including pressure and temperature. It also shows the system's power status and current time.
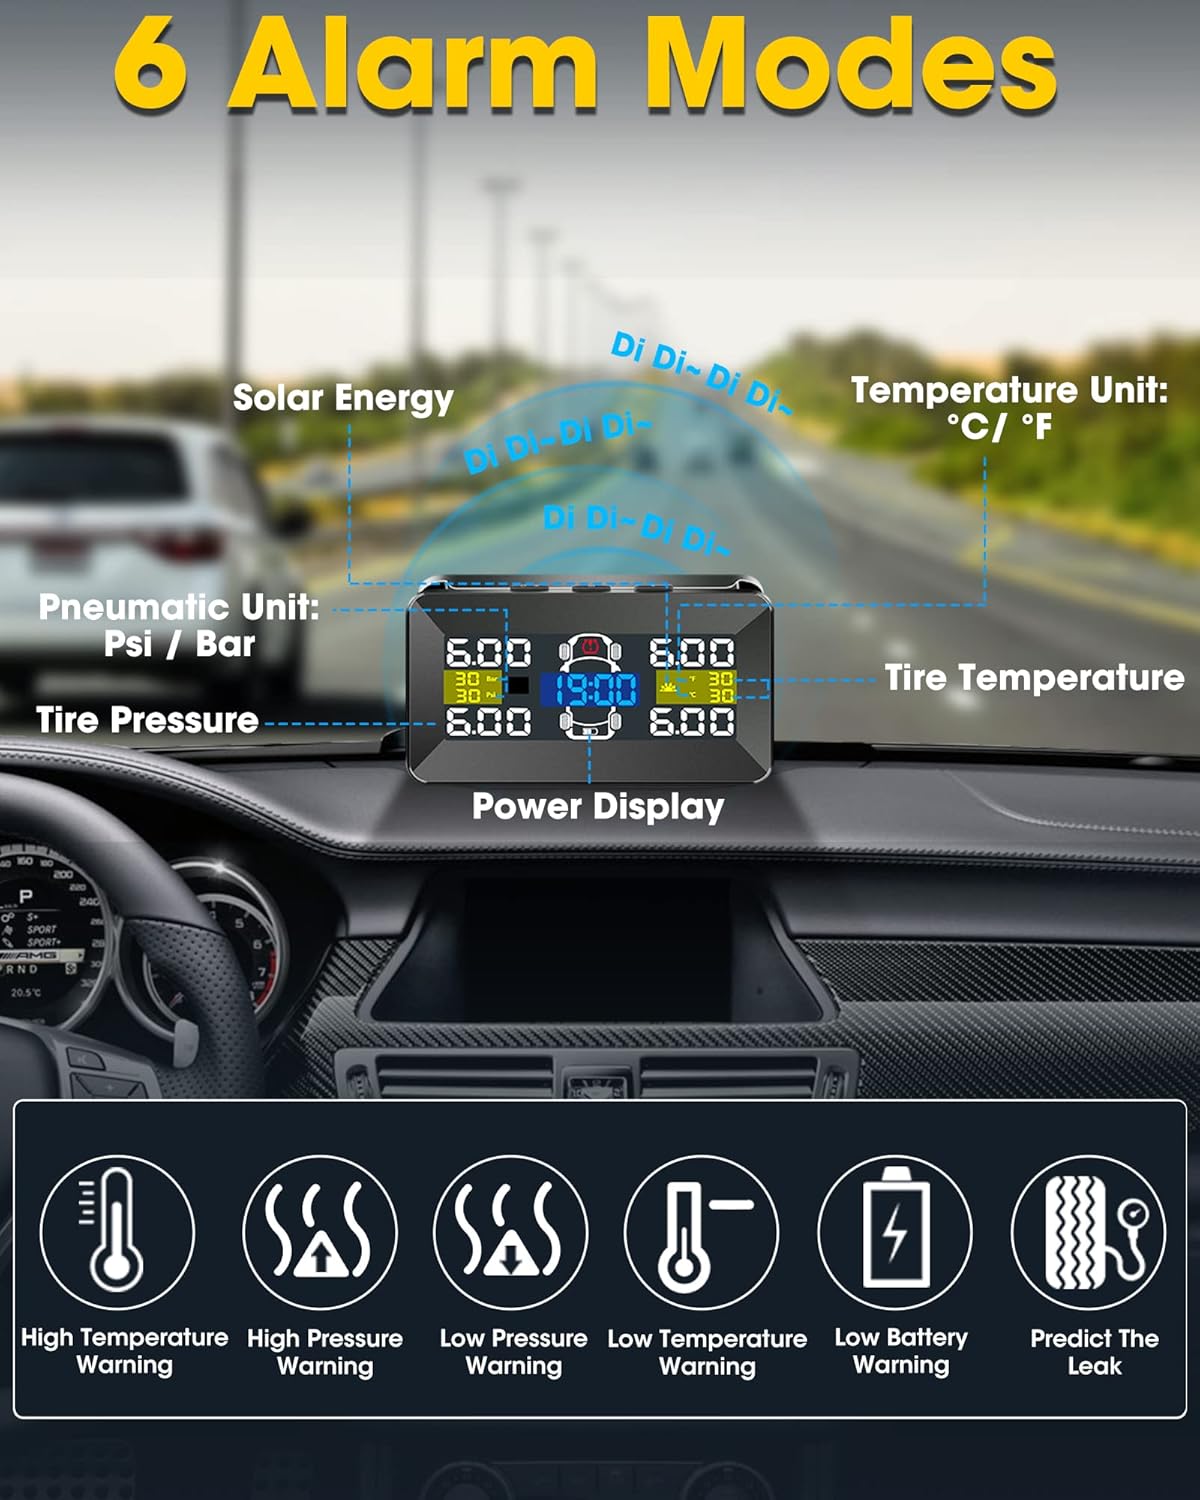
Image: TPMS display showing real-time data and alarm indicators.
5.2 Alarm Modes
The system features six alarm types to alert you to potential tire issues, ensuring timely intervention:
- High Temperature Warning: Alerts when a tire's temperature exceeds a set limit.
- High Pressure Warning: Alerts when a tire's pressure exceeds a set high limit.
- Low Pressure Warning: Alerts when a tire's pressure drops below a set low limit.
- Low Temperature Warning: Alerts when a tire's temperature drops below a set limit.
- Low Battery Warning: Indicates that a sensor's battery is low and requires attention.
- Predict The Leak: Provides an early warning for slow or gradual tire pressure loss.
Alarm thresholds can be customized through the monitor's settings menu. Refer to the device's on-screen instructions for navigation and adjustment.
5.3 Unit Settings
To change pressure units between Psi and Bar, or temperature units between °C and °F, access the system settings menu on the monitor. Follow the on-screen prompts to select your preferred units.
6. Charging
The TPMS monitor supports two charging methods to ensure continuous operation:
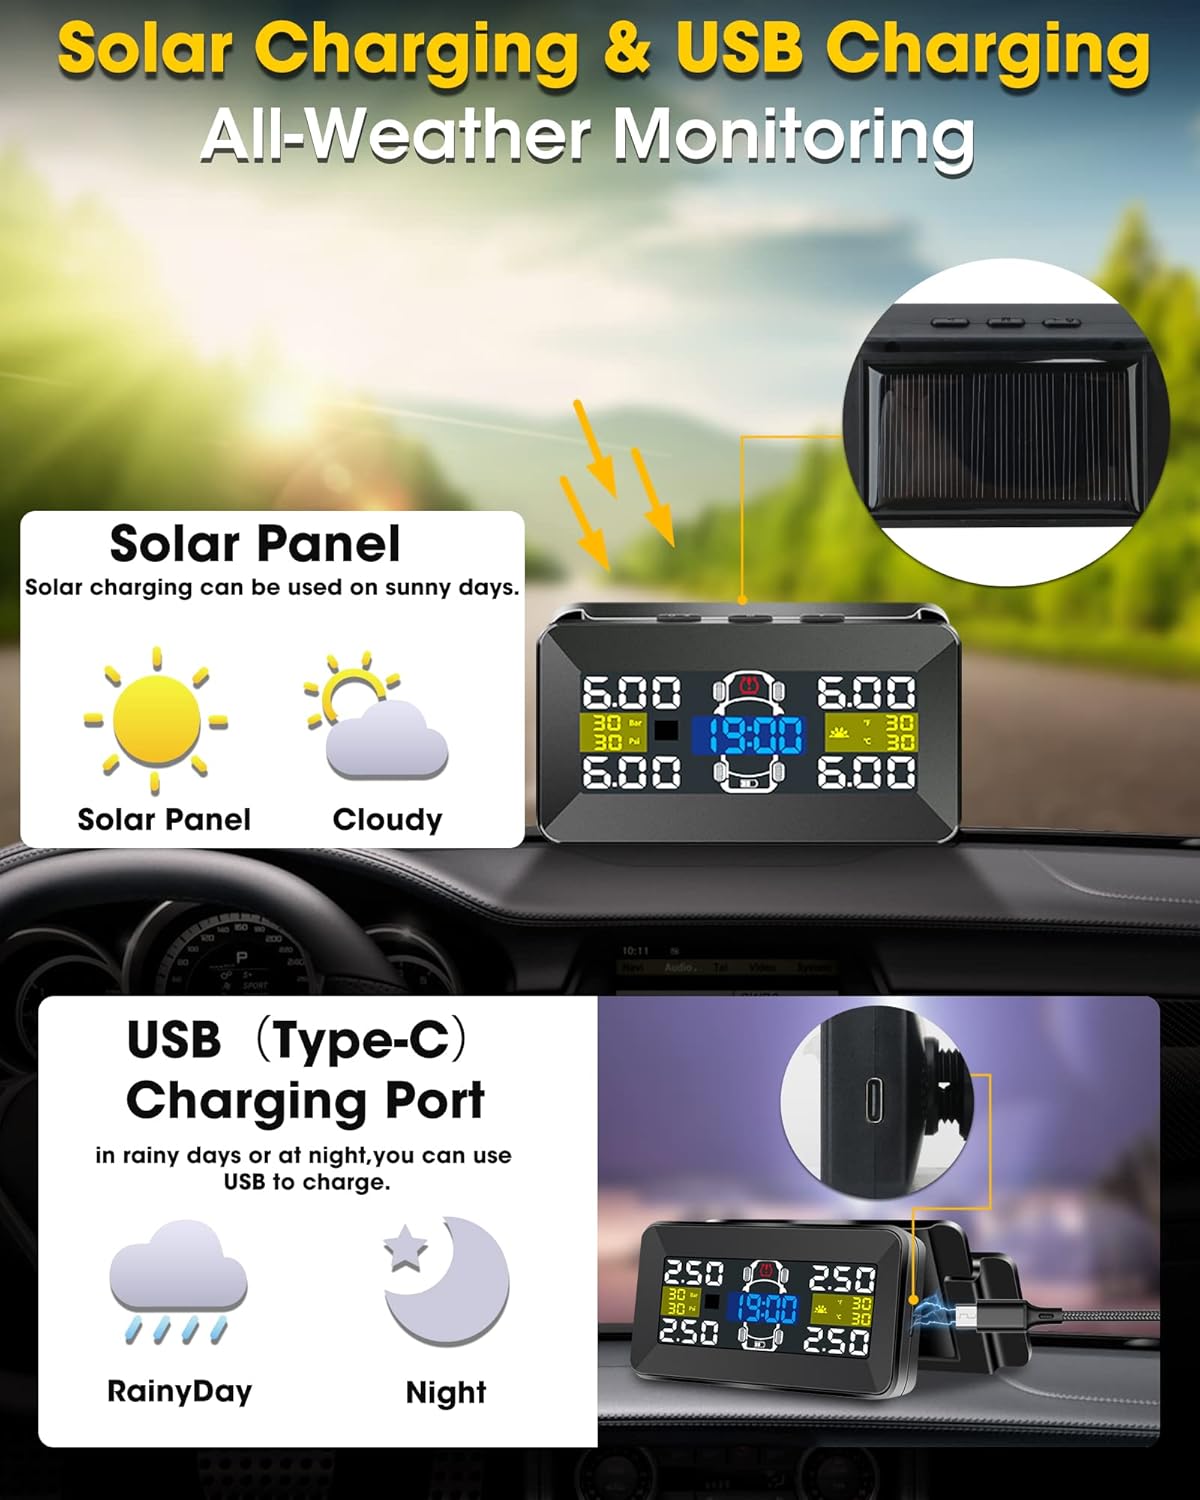
Image: Solar and Type-C USB charging options.
- Solar Charging: The integrated solar panel on top of the monitor charges the internal battery during daylight hours. For optimal charging, ensure the solar panel is clean and exposed to direct sunlight.
- Type-C USB Charging: For periods of low sunlight, during nighttime, or for faster charging, connect the monitor via a Type-C USB cable to a suitable power source (e.g., car charger, USB port).
7. Automatic Functions
The system is designed with intelligent power management features to conserve battery life and provide convenience:

Image: Vibration-activated power-on and automatic power-off features.
- Vibration Power-on: The monitor automatically powers on when it detects vibration, such as opening a car door or starting the engine. Manual power-on is not required for daily use.
- Auto Power-off: If no vibration is detected for approximately 5 minutes, the monitor will automatically enter sleep mode to conserve battery power. To utilize this feature, avoid manually turning off the display.
8. Maintenance
To ensure the longevity and optimal performance of your Jansite TPMS, follow these maintenance guidelines:
- Keep the monitor and sensors clean. Regularly wipe the solar panel to ensure efficient charging.
- Avoid exposing the monitor to extreme temperatures for prolonged periods when not in use, as this can affect battery life and display performance.
- Periodically check the sensor caps for tightness to prevent air leaks.
- If a sensor battery runs low, replace it according to the instructions provided with the replacement battery or contact customer support.
9. Troubleshooting
If you encounter issues with your TPMS, refer to the following troubleshooting guide:
| Issue | Solution |
|---|---|
| Display is dim or unreadable. | Adjust screen brightness in the settings menu. Ensure the solar panel is clean and exposed to sufficient light, or charge the monitor via the Type-C USB port. |
| Sensor not displaying data. | Check that the sensor is securely installed on the tire valve. Verify that the sensor battery is not low. Re-pair the sensor with the monitor if necessary (refer to device settings for pairing instructions). |
| Inaccurate pressure readings. | Ensure sensors are correctly installed and tightened. Compare readings with a reliable manual tire pressure gauge. If discrepancies persist, recalibrate sensors or contact support. |
| Monitor not turning on automatically. | Ensure the vibration detection feature is enabled in the settings. Check the monitor's battery level and charge if low. |
10. Warranty and Support
The Jansite TPMS JM-TYH10-EU2 comes with a one-year warranty from the date of purchase. A 30-day return policy is also available, subject to the terms and conditions of your purchase platform.
For technical support, warranty claims, or any product-related inquiries, please contact Jansite customer service through your purchase platform or the official Jansite website. Please have your model number (JM-TYH10-EU2) and proof of purchase ready when contacting support.


