1. Introduction
Thank you for choosing the Best Choice Products 4.5ft Pre-Lit Snow Flocked Artificial Christmas Tree. This manual provides essential information for the safe and proper assembly, operation, maintenance, and storage of your new Christmas tree. Please read these instructions carefully before beginning assembly and retain them for future reference.
2. Safety Information
- For indoor use only. Do not use this product outdoors.
- Keep away from heat sources, open flames, and direct sunlight.
- Ensure all electrical connections are secure and properly insulated.
- Do not overload electrical outlets.
- Keep children and pets away from the tree during assembly and disassembly.
- Avoid placing the tree in high-traffic areas where it could be easily knocked over.
- Unplug the tree from the power source when not in use or before performing any maintenance.
3. Package Contents
Verify that all components are present before assembly:
- Tree Sections (A, B, C - quantity may vary by model height)
- Metal Tree Stand
- Foot Switch for Lights
- Assembly Guide (this document)
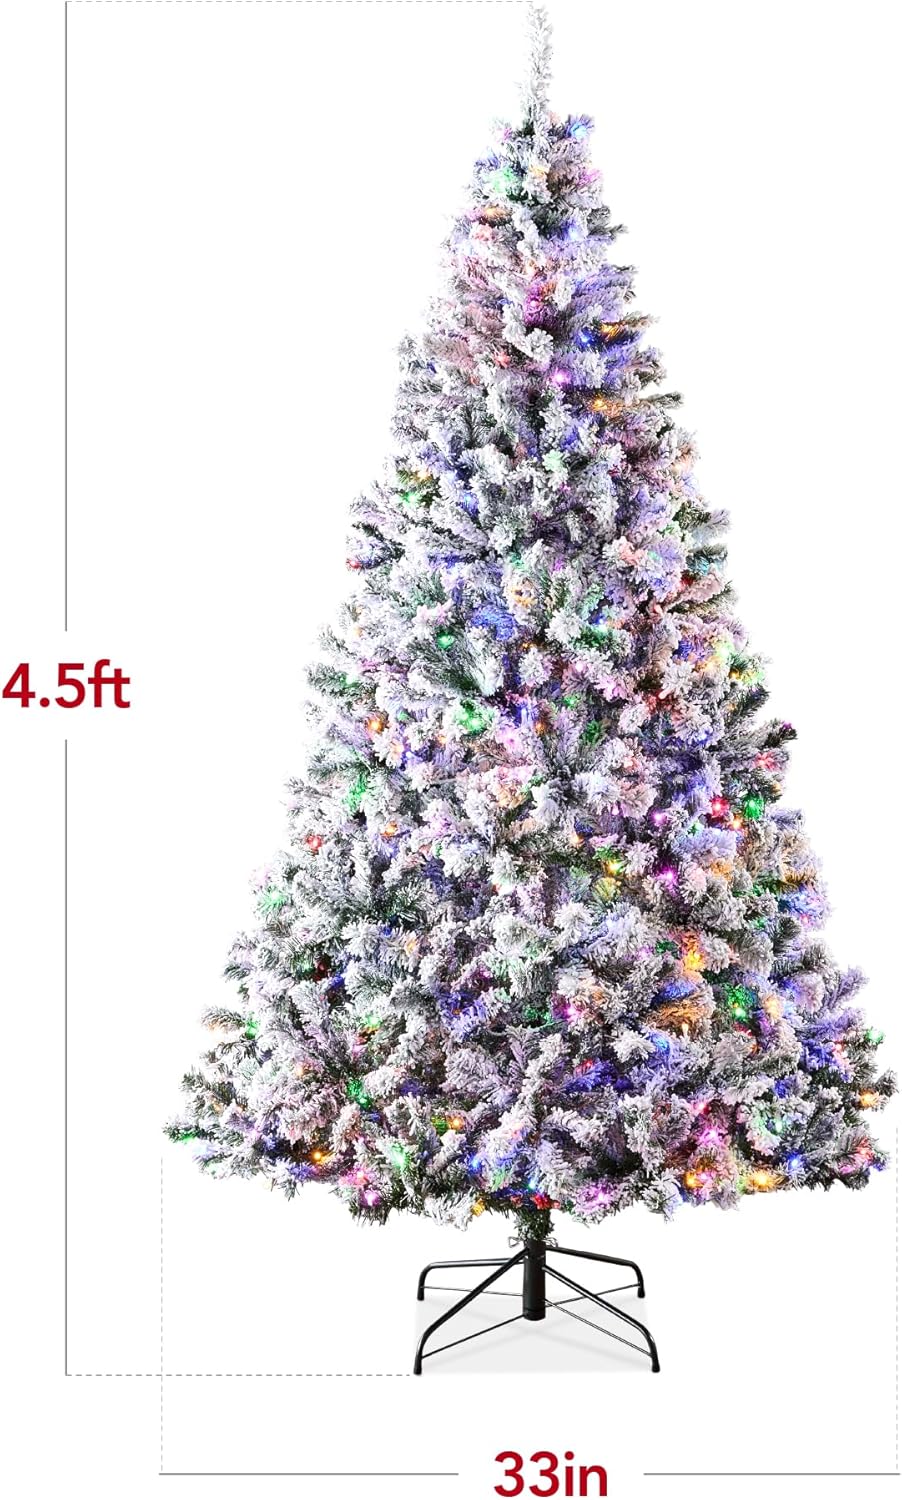
Figure 1: Tree dimensions for the 4.5ft model, indicating a height of 4.5 feet and a base diameter of 33 inches.
4. Assembly Instructions
Follow these steps to assemble your artificial Christmas tree:
- Prepare the Stand: Unfold the metal tree stand and place it on a flat, stable surface. Tighten the eye bolt on the stand to secure the base.
- Insert Bottom Section: Carefully insert the largest tree section (usually marked 'A' or the bottom section) into the tree stand. Ensure it is firmly seated and the eye bolt is tightened to hold it upright.
- Connect Middle Section(s): Insert the next tree section (e.g., 'B') into the top of the previous section. Connect any integrated light wires between sections.
- Attach Top Section: Place the smallest tree section (usually marked 'C' or the top section) onto the last assembled section. Connect any integrated light wires.
- Fluff the Branches: Starting from the bottom section and working your way up, gently spread out each branch and individual tip. Adjust them to fill any gaps and create a full, natural appearance. This process is crucial for the tree's aesthetic.

Figure 2: Example of a fully fluffed and decorated tree, demonstrating a lush and full appearance.

Figure 3: The sturdy metal stand supporting the base of the tree, ensuring stability.
5. Operating Instructions
Your pre-lit Christmas tree features 2-in-1 LED lights with multiple settings.
- Power Connection: Once the tree is fully assembled and fluffed, plug the power cord into a standard electrical outlet.
- Using the Foot Switch: Locate the integrated foot switch on the power cord. Press the foot switch to cycle through the various light sequences.
- Light Sequences: The tree offers 9 unique light sequences, including options for white lights, multicolor lights, and various flashing or fading patterns. Continue pressing the foot switch until you find your desired setting.

Figure 4: Detail of the multi-color LED lights embedded within the snow-flocked branches.
6. Maintenance
- Cleaning: To clean the tree, gently dust the branches with a soft, dry cloth. Do not use liquid cleaners or abrasive materials, as these may damage the flocking or lights.
- Light Replacement: This tree uses integrated LED lights. If a light string fails, check for loose connections. Individual LED bulbs are generally not user-replaceable. Contact customer support if issues persist.
- Flocking Care: The snow-flocked finish may shed slightly during initial setup and handling. This is normal. Avoid excessive handling of flocked areas to preserve the appearance.

Figure 5: Close-up of the snow-flocked branches, illustrating the delicate nature of the finish.
7. Storage
Proper storage will help maintain the tree's condition for future seasons:
- Disassembly: Unplug the tree. Reverse the assembly steps, carefully detaching each section and disconnecting any light wires.
- Compress Branches: Gently compress the branches of each section to reduce their volume.
- Packaging: Store the tree sections and stand in their original packaging or a dedicated Christmas tree storage bag.
- Storage Location: Store in a cool, dry place away from direct sunlight and extreme temperatures.
8. Troubleshooting
- Lights Not Working:
- Ensure the power cord is securely plugged into an outlet.
- Check all connections between tree sections for proper seating.
- Verify the foot switch is pressed to an active light sequence.
- Check for tripped circuit breakers.
- Tree Appears Sparse:
- The tree requires thorough 'fluffing' of branches during initial setup. Spend time adjusting each individual branch tip to fill gaps and create a full shape.
- Tree is Unstable:
- Ensure the metal stand is fully unfolded and placed on a level surface.
- Tighten the eye bolt on the stand to firmly secure the bottom tree section.
9. Specifications
| Brand | Best Choice Products |
| Model Number | SKY6539 |
| Product Dimensions | 30"D x 30"W x 54"H (4.5ft height) |
| Color | Green (with Snow Flocking) |
| Material | 100% PVC tips, metal stand |
| Item Weight | 9.8 Pounds |
| Tip Count | 400 |
| Light Type | Pre-Lit LED (2-in-1 White and Multicolor) |
| Recommended Use | Indoor |
| UPC | 842957105656 |
10. Warranty and Support
For warranty information or customer support, please refer to the Best Choice Products official website or contact their customer service department directly. Keep your purchase receipt for any warranty claims.


