
1. Introduction
This manual provides essential information for the safe and effective operation of your OWON XDM1041 Digital Multimeter. Please read this manual thoroughly before using the device to ensure proper functionality and to prevent damage or injury. The XDM1041 is a high-precision 55,000-count bench-style digital multimeter designed for various electrical measurements in laboratories, factories, and educational settings.
2. Safety Information
Always observe the following safety precautions to prevent electric shock, fire, or personal injury.
- Do not use the multimeter if it appears damaged or is not operating properly.
- Ensure the correct function and range are selected before making measurements.
- Do not exceed the maximum input limits for any measurement function.
- Use caution when working with voltages above 30V AC RMS, 42V peak, or 60V DC. These voltages pose a shock hazard.
- Always connect the common (COM) test lead before connecting the live test lead. Disconnect the live test lead first.
- Replace fuses only with the specified type and rating.
- Keep hands and fingers behind the probe barriers during measurements.
- Refer to local and national safety codes.
3. Package Contents
Verify that all items are present in your package:
- OWON XDM1041 Digital Multimeter
- Test Leads
- Power Cord
- USB Cable
- User Manual (this document)
- Spare Fuse
4. Product Overview
The OWON XDM1041 is a portable bench multimeter featuring a 3.5-inch high-resolution LCD TFT display. It offers 55,000 counts and a DC voltage accuracy of up to 0.05%. Key features include True RMS AC voltage/current measurement, data logging, and SCPI support for PC remote control.
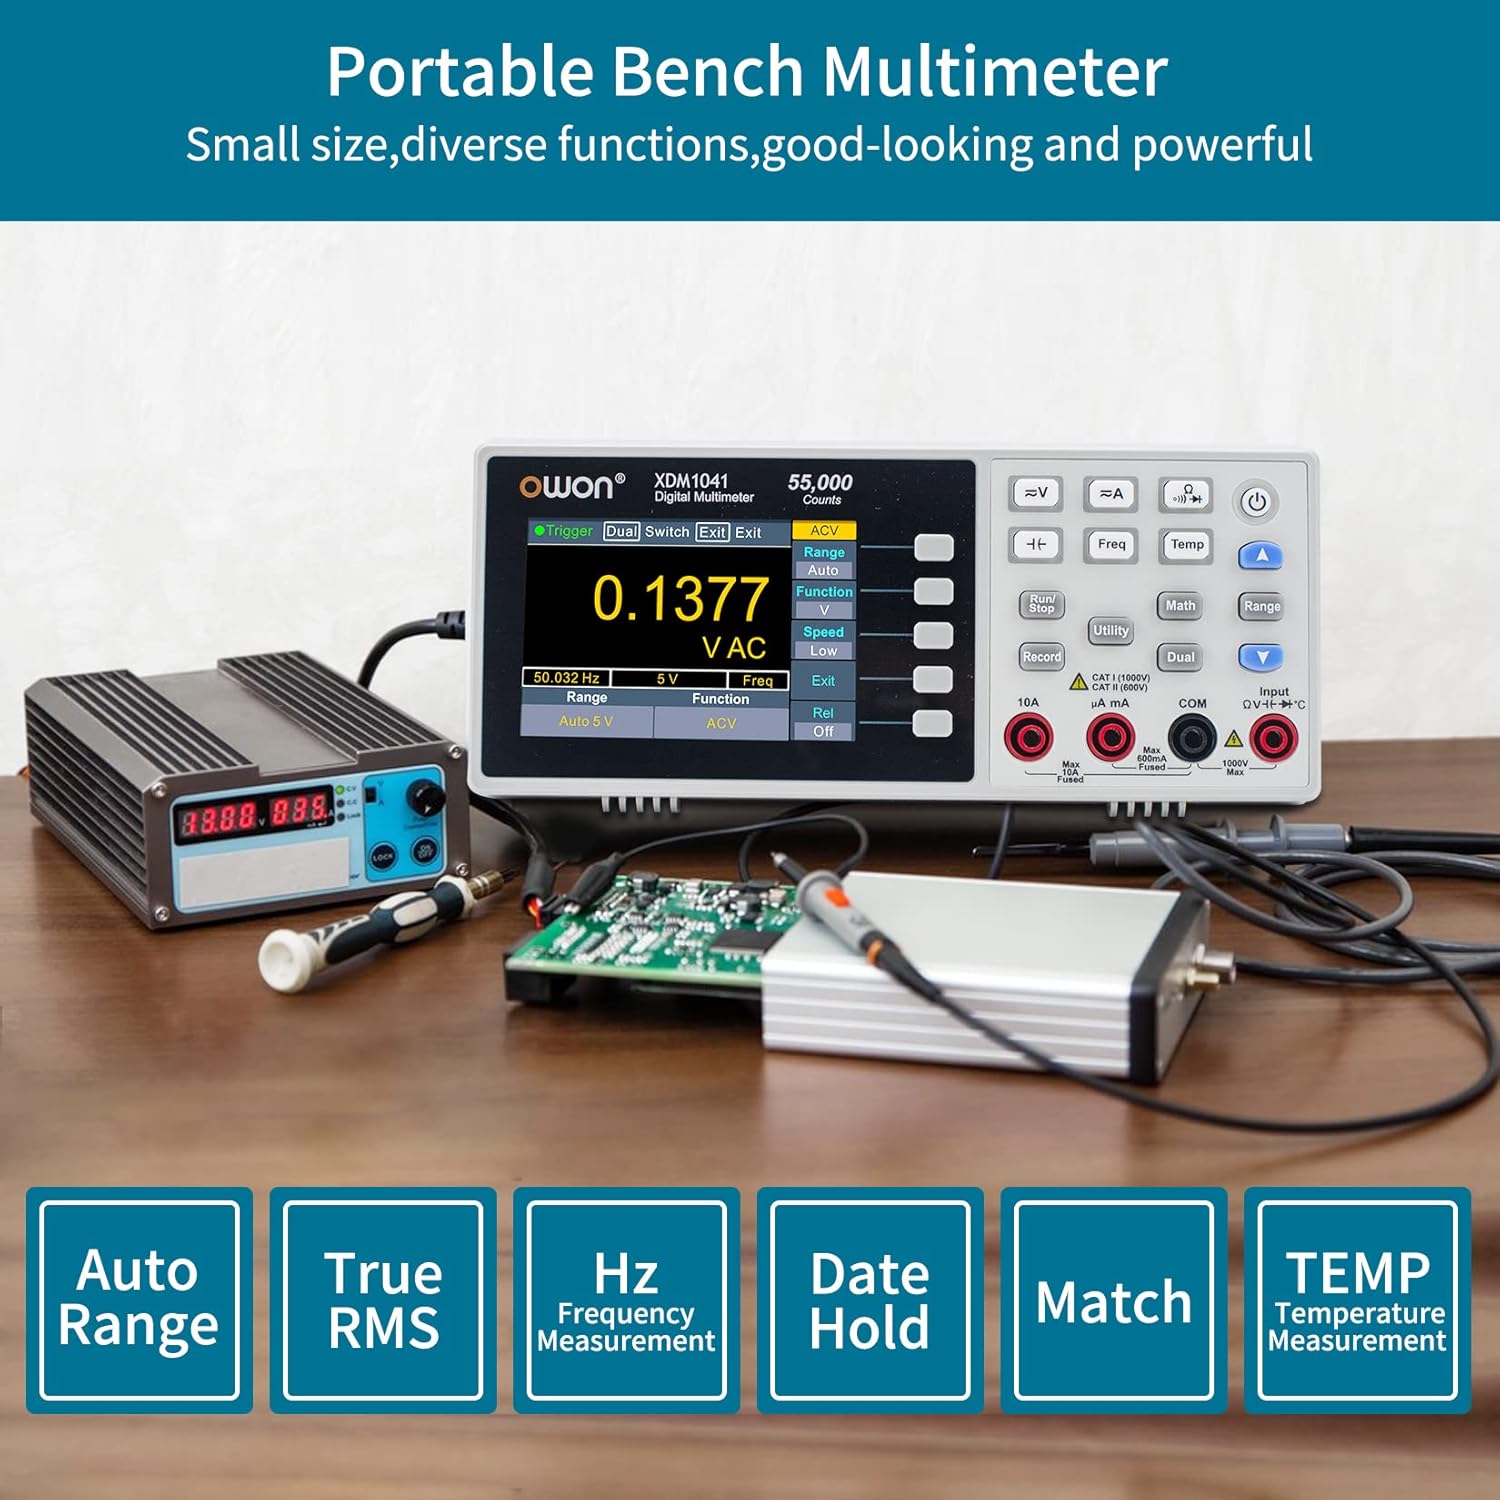
Figure 4.1: OWON XDM1041 Digital Multimeter showcasing its display and measurement functions like Auto Range, True RMS, Frequency, Data Hold, Match, and Temperature Measurement.
4.1 Front Panel Layout

Figure 4.2: Detailed view of the XDM1041 front panel, highlighting (01) Measurement Function Keys, (02) Operation Keys, (03) Power Button, (04) Range/Direction Keys, (05) Input Terminals, and (06) Menu Selection Keys.
4.2 Rear Panel Connections

Figure 4.3: Rear view of the XDM1041, indicating the universal 90V-240V AC power connector, USB device port, and line fuse location.
5. Setup
Follow these steps for initial setup:
- Connect Test Leads: Insert the black test lead into the COM terminal and the red test lead into the appropriate input terminal (e.g., VΩmA for voltage, resistance, or low current; 10A for high current).
- Connect Power: Plug the power cord into the AC input on the rear panel of the multimeter, then connect it to a suitable power outlet (90-240V AC).
- Power On: Press the power button on the front panel to turn on the device.

Figure 5.1: Example of connecting the XDM1041 to a circuit for measurement. The black lead is connected to COM, and the red lead is connected to the voltage/resistance/current input.
6. Operating Instructions
The XDM1041 offers various measurement functions. Select the desired function using the dedicated buttons on the front panel.
6.1 Basic Measurements
- Voltage (DCV/ACV): Press the =V or ~V button. Connect test leads in parallel with the circuit or component.
- Current (DCA/ACA): Press the =A or ~A button. Connect test leads in series with the circuit. Ensure correct input terminal (mA or 10A).
- Resistance (Ω): Press the Ω button. Connect test leads across the component. Ensure the circuit is de-energized.
- Capacitance (F): Press the F button. Connect test leads across the capacitor. Ensure the capacitor is discharged before testing.
- Diode Test (->|): Press the ->| button. Connect test leads across the diode.
- Continuity Test ()))): Press the ))) button. Connect test leads across the circuit path. An audible tone indicates continuity.
- Temperature (Temp): Press the Temp button. Connect a K-type thermocouple (not included) to the input terminals.
6.2 Advanced Functions
- Data Logging: The multimeter supports manual or automatic recording of measured data to internal memory. This data can be retrieved and processed using PC software.
- SCPI Support: The XDM1041 supports SCPI commands, allowing remote control of the multimeter via the USB port using PC software.
- Dual Line Display: The 3.5-inch LCD supports dual-line display, showing primary and secondary measurement parameters simultaneously.
- MAX/MIN/Average Measurement: Use the Math function to display maximum, minimum, and average values over a measurement period.
- Relative Measurement (REL): This function allows you to set the current reading as a reference and display subsequent measurements as a deviation from this reference.


Figure 6.1: Examples of advanced display modes: Data logging table (left) and MAX/MIN/Average measurement (right).

Figure 6.2: The XDM1041 communicating with a computer via its USB port, allowing for remote control and data transfer.
7. Maintenance
Proper maintenance ensures the longevity and accuracy of your multimeter.
7.1 Cleaning
Wipe the case with a damp cloth and mild detergent. Do not use abrasives or solvents. Ensure the device is powered off and disconnected from all circuits before cleaning.
7.2 Fuse Replacement
The XDM1041 is equipped with a replaceable fuse for protection against overcurrent. If the multimeter fails to measure current or shows an error, the fuse may need replacement.
- Ensure the multimeter is powered off and disconnected from the AC power supply and all measurement circuits.
- Locate the fuse box on the rear panel, typically under the AC input.
- Carefully open the fuse compartment.
- Remove the old fuse and replace it with a new fuse of the exact same type and rating (e.g., F1AL 250V). A spare fuse is usually included.
- Close the fuse compartment securely.
Warning: Using an incorrect fuse type can damage the multimeter and pose a safety hazard.
8. Troubleshooting
If you encounter issues with your XDM1041, refer to the following common problems and solutions:
| Problem | Possible Cause | Solution |
|---|---|---|
| No display when powered on | No power, faulty power cord, or internal issue. | Check power connection. Ensure the power outlet is functional. If problem persists, contact support. |
| Cannot measure current | Blown fuse, incorrect input terminal, or incorrect function selected. | Check and replace the fuse (see Section 7.2). Ensure test leads are in the correct current input terminals (mA or 10A). Verify the current measurement function is selected. |
| Inaccurate readings | Incorrect range, poor test lead connection, or environmental factors. | Ensure auto-ranging is enabled or select an appropriate manual range. Check test lead connections for tightness. Avoid strong electromagnetic interference. |
| USB communication failure | Incorrect USB cable, driver issue, or software configuration. | Ensure the correct USB cable is used. Install the latest drivers and software from the OWON website. Check PC software settings. |
9. Specifications
Below are the key technical specifications for the OWON XDM1041 Digital Multimeter:
- Display: 3.5-inch TFT LCD, 480x320 pixels, with backlight
- Counts: 55,000
- DC Voltage Accuracy: Up to 0.05%
- AC Voltage/Current: True RMS measurement, bandwidth 20 Hz - 1 kHz
- Reading Rate: Up to 65 readings per second
- Measurement Functions: DC/AC Voltage, DC/AC Current, Resistance, Capacitance, Diode Test, Continuity Test, Temperature, Frequency (AC+Hz), MAX/MIN/Average, Relative (REL)
- Data Logging: Internal memory for measured data
- Interface: USB (for PC communication and SCPI support)
- Power Source: AC 90-240V (XDM1041 model)
- Dimensions (L x W x H): Approximately 25 x 10 x 10 cm (9.84 x 3.94 x 3.94 inches)
- Weight: Approximately 453.59 grams (1 lb)

Figure 9.1: The XDM1041 multimeter with its approximate dimensions: 7.87 inches (length), 2.51 inches (width), and 3.4 inches (height).
10. Warranty Information
Warranty information for the OWON XDM1041 Digital Multimeter is typically provided with the product packaging or available on the official OWON website. Please refer to these sources for detailed terms and conditions regarding your product's warranty.
11. Support
For technical assistance, product inquiries, or service, please contact OWON customer support. Refer to the contact information provided in your product packaging or visit the official OWON website for the most up-to-date support resources.
OWON Official Website: www.owon.com (This is a placeholder, actual URL may vary)


