Introduction
Thank you for purchasing the Nedis Alarm Clock with Wireless Charger. This device combines a digital alarm clock with a Qi-certified wireless charging pad, a USB-A charging port, a dimmable display, dual alarm settings, and a color-changing night light. This manual provides essential information for safe and efficient use of your new device.
Safety Information
- Read all instructions carefully before use.
- Keep the device away from water, moisture, and extreme temperatures.
- Do not attempt to disassemble or repair the device yourself. Refer all servicing to qualified personnel.
- Ensure the power adapter used is compatible with the device's power requirements. For fast charging, a QC3.0 power adapter (not included) is recommended.
- Avoid placing metal objects on the wireless charging pad, as this may interfere with charging or cause overheating.
Package Contents
- Nedis Alarm Clock with Wireless Charger (Model WCACQ30WT)
- Power Adapter (if included, otherwise sold separately)
- User Manual
Product Overview
Familiarize yourself with the various components of your alarm clock:

Image 1: Front View. This image displays the front of the alarm clock, featuring the large digital time display and the touch-sensitive control buttons located above it. The buttons include controls for display brightness, time setting, and alarm adjustments.
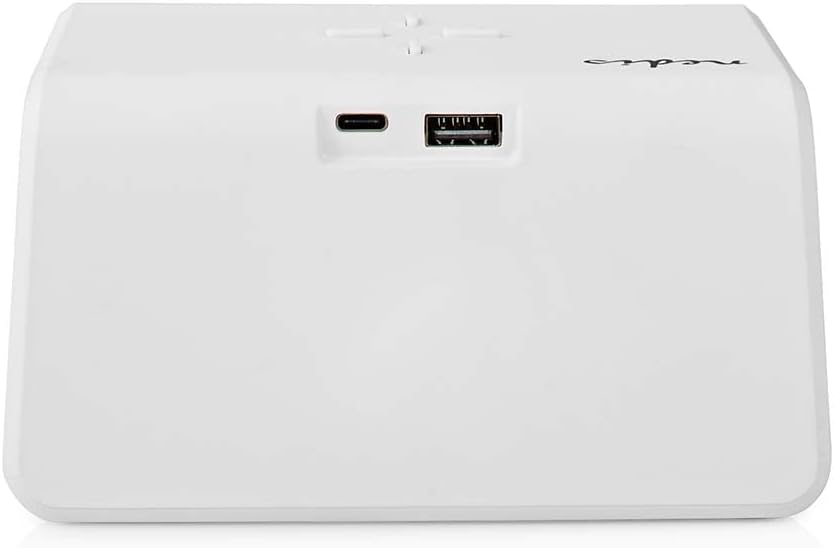
Image 2: Rear View. The back of the alarm clock is shown, highlighting the USB-C port for power input and a standard USB-A port for charging external devices.
- Digital Display: Shows time, alarm status, and other indicators.
- Control Buttons: (Located on top)
- Light Button: Controls night light.
- Time/Alarm Set Button: For setting time and alarms.
- +/- Buttons: Adjust values.
- Wireless Charging Pad: (Top surface) For Qi-compatible devices.
- USB-C Input: (Rear) For connecting the power adapter.
- USB-A Output: (Rear) For charging other devices via cable.
- Night Light Panel: (Side/Rear) Emits ambient light.
Setup
- Connect Power: Plug the provided power adapter into the USB-C input port on the back of the alarm clock. Connect the other end to a wall outlet. The display will light up.
- Initial Time Setting: The clock may display a default time. Proceed to the 'Operating Instructions' section to set the correct time.
Operating Instructions
1. Setting the Time
- Press and hold the Time/Alarm Set button (usually marked with a clock icon) until the hour digits start flashing.
- Use the + or - buttons to adjust the hour.
- Press the Time/Alarm Set button again to switch to minute adjustment. The minute digits will flash.
- Use the + or - buttons to adjust the minutes.
- Press the Time/Alarm Set button once more to confirm and exit time setting mode.
2. Setting Alarms (Alarm 1 and Alarm 2)
This device supports two independent alarm times.
- Press the Time/Alarm Set button once to enter Alarm 1 setting mode. The alarm icon and hour digits for Alarm 1 will flash.
- Use the + or - buttons to adjust the hour for Alarm 1.
- Press the Time/Alarm Set button again to switch to minute adjustment for Alarm 1.
- Use the + or - buttons to adjust the minutes for Alarm 1.
- Press the Time/Alarm Set button again to confirm Alarm 1 and move to Alarm 2 setting mode (if applicable). Repeat steps 2-4 for Alarm 2.
- After setting Alarm 2, press the Time/Alarm Set button to confirm and exit alarm setting mode.
- To activate/deactivate an alarm, short press the Time/Alarm Set button until the desired alarm icon (e.g., 'AL1' or 'AL2') appears or disappears on the display.
3. Snooze Function
When an alarm sounds, press any button (except the alarm off button, if present) to activate the snooze function. The alarm will temporarily stop and sound again after a few minutes (typically 5-10 minutes, refer to specific model details if available). To turn off the alarm completely, press the designated alarm off button or follow the instructions for deactivating the alarm.
4. Wireless Charging (Qi)
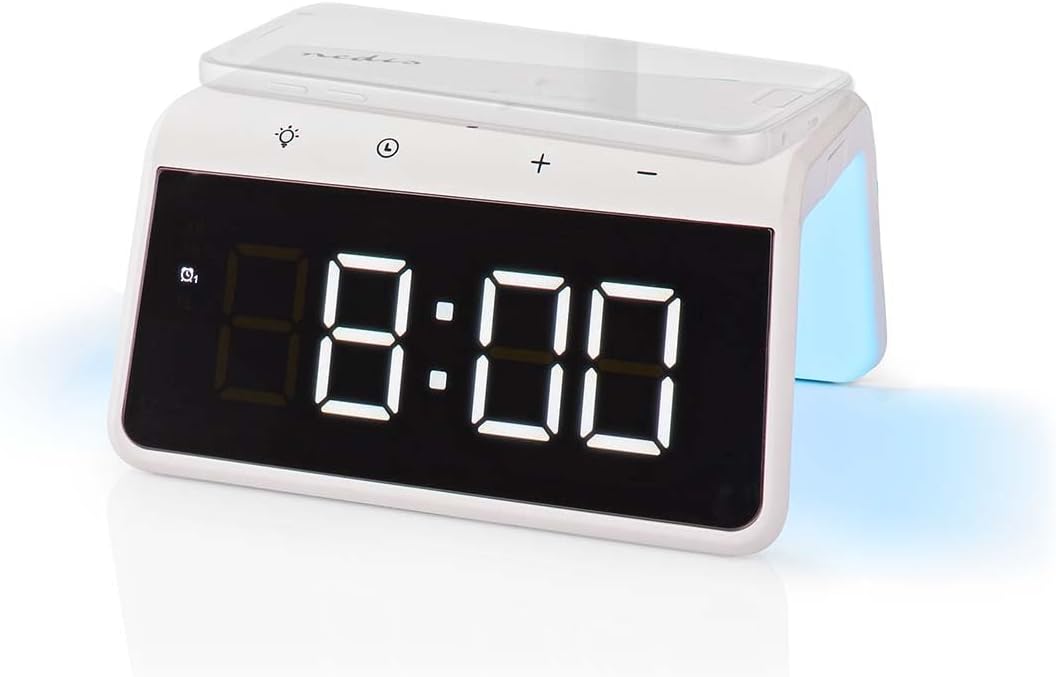
Image 3: Wireless Charging. A smartphone is shown resting on the top surface of the alarm clock, which functions as a Qi wireless charging pad.
- Place your Qi-compatible smartphone or device directly onto the wireless charging pad located on the top surface of the alarm clock.
- Ensure the device is centered on the charging pad for optimal performance.
- A charging indicator (e.g., an icon on the display or an LED light) will typically illuminate to confirm that charging has begun.
- The charger supports 5W, 7.5W, 10W, and 15W output, automatically adjusting to your device's requirements. For 15W fast charging, a QC3.0 power adapter (not included) is required.
5. USB-A Charging Output
The alarm clock features an additional USB-A port for charging devices that are not Qi-compatible or for simultaneous charging.
- Connect your device's USB charging cable to the USB-A output port on the back of the alarm clock.
- Connect the other end of the cable to your device.
- Charging will begin automatically.
6. Night Light Function

Image 4: Night Light. This image shows the side of the alarm clock with its integrated night light emitting a soft glow.
- Press the Light button (usually marked with a light bulb icon) to turn the night light on or off.
- Repeatedly press the Light button to cycle through different color modes or to set a specific color. The night light can display a diverse changing color palette.
- The night light can be set to remain on or to be manually activated as needed.
7. Display Brightness Adjustment
The digital display features dimmable backlighting for comfortable viewing in various lighting conditions.
- Look for a dedicated brightness button or a combination of buttons (e.g., a short press of the Light button or +/- buttons when not in setting mode) to adjust the display brightness.
- Cycle through available brightness levels (e.g., high, medium, low, off).
Maintenance
- Cleaning: Wipe the device with a soft, dry, or slightly damp cloth. Do not use abrasive cleaners or solvents.
- Storage: When not in use for extended periods, unplug the device and store it in a cool, dry place.
Troubleshooting
- Device not powering on: Ensure the power adapter is securely connected to both the alarm clock and a working power outlet.
- Wireless charging not working:
- Verify your device is Qi-compatible.
- Ensure your device is centered on the charging pad.
- Remove any thick phone cases or metal objects between the phone and the charging pad.
- USB-A charging not working: Check the USB cable for damage and ensure it is properly connected to both the alarm clock and your device.
- Alarm not sounding: Ensure the alarm is activated (check for the alarm icon on the display) and the volume is not set to zero (if adjustable).
- Display too dim/bright: Adjust the display brightness using the dedicated controls.
Specifications
| Feature | Specification |
|---|---|
| Model Number | WCACQ30WT |
| Brand | NEDIS |
| Product Dimensions | 14 x 3.81 x 7 cm |
| Item Weight | 242 Grams |
| Wireless Charging Output | 5W / 7.5W / 10W / 15W (Qi Certified) |
| USB-A Output | Yes |
| Display Type | Digital |
| Special Features | Alarm, Charging Port, Dimmable Display, Night Light (Color Changing) |
| Power Source | Corded Electric |
| Color | White |
Warranty and Support
Nedis products are manufactured to high quality standards. In the unlikely event of a defect during the warranty period, please contact your retailer for support. The warranty period is subject to the terms and conditions of the retailer and local consumer laws.
For further assistance or technical support, please refer to the official Nedis website or contact their customer service directly. Keep your purchase receipt as proof of purchase.


