
ROVOMKO V6(MKO26)
Contents
ROVOMKO Projector User Manual
Model: V6(MKO26)
1. Safety Instructions
Please read all safety instructions carefully before using the projector. Keep this manual for future reference.
- Do not block ventilation openings. Ensure adequate airflow around the projector.
- Do not expose the projector to rain or moisture to prevent fire or electric shock.
- Use only attachments/accessories specified by the manufacturer.
- Unplug the projector during lightning storms or when unused for long periods.
- Avoid direct eye exposure to the projector lens when the lamp is on.
2. Package Contents
Verify that all items are present in the package:
- 1 x ROVOMKO V6(MKO26) Native 1080p WiFi Bluetooth Projector
- 1 x Power Cable
- 1 x HDMI Cable
- 1 x 3-in-1 AV Cable
- 1 x Remote Control
- 1 x Projector Lens Cover
- 1 x User Manual
- 1 x Portable Storage Bag
3. Product Overview
The ROVOMKO V6(MKO26) is a compact and powerful projector designed for versatile home entertainment. It features native 1080P resolution with 4K support, dual-band 2.4G/5G WiFi, and bidirectional Bluetooth 5.1 for enhanced connectivity.
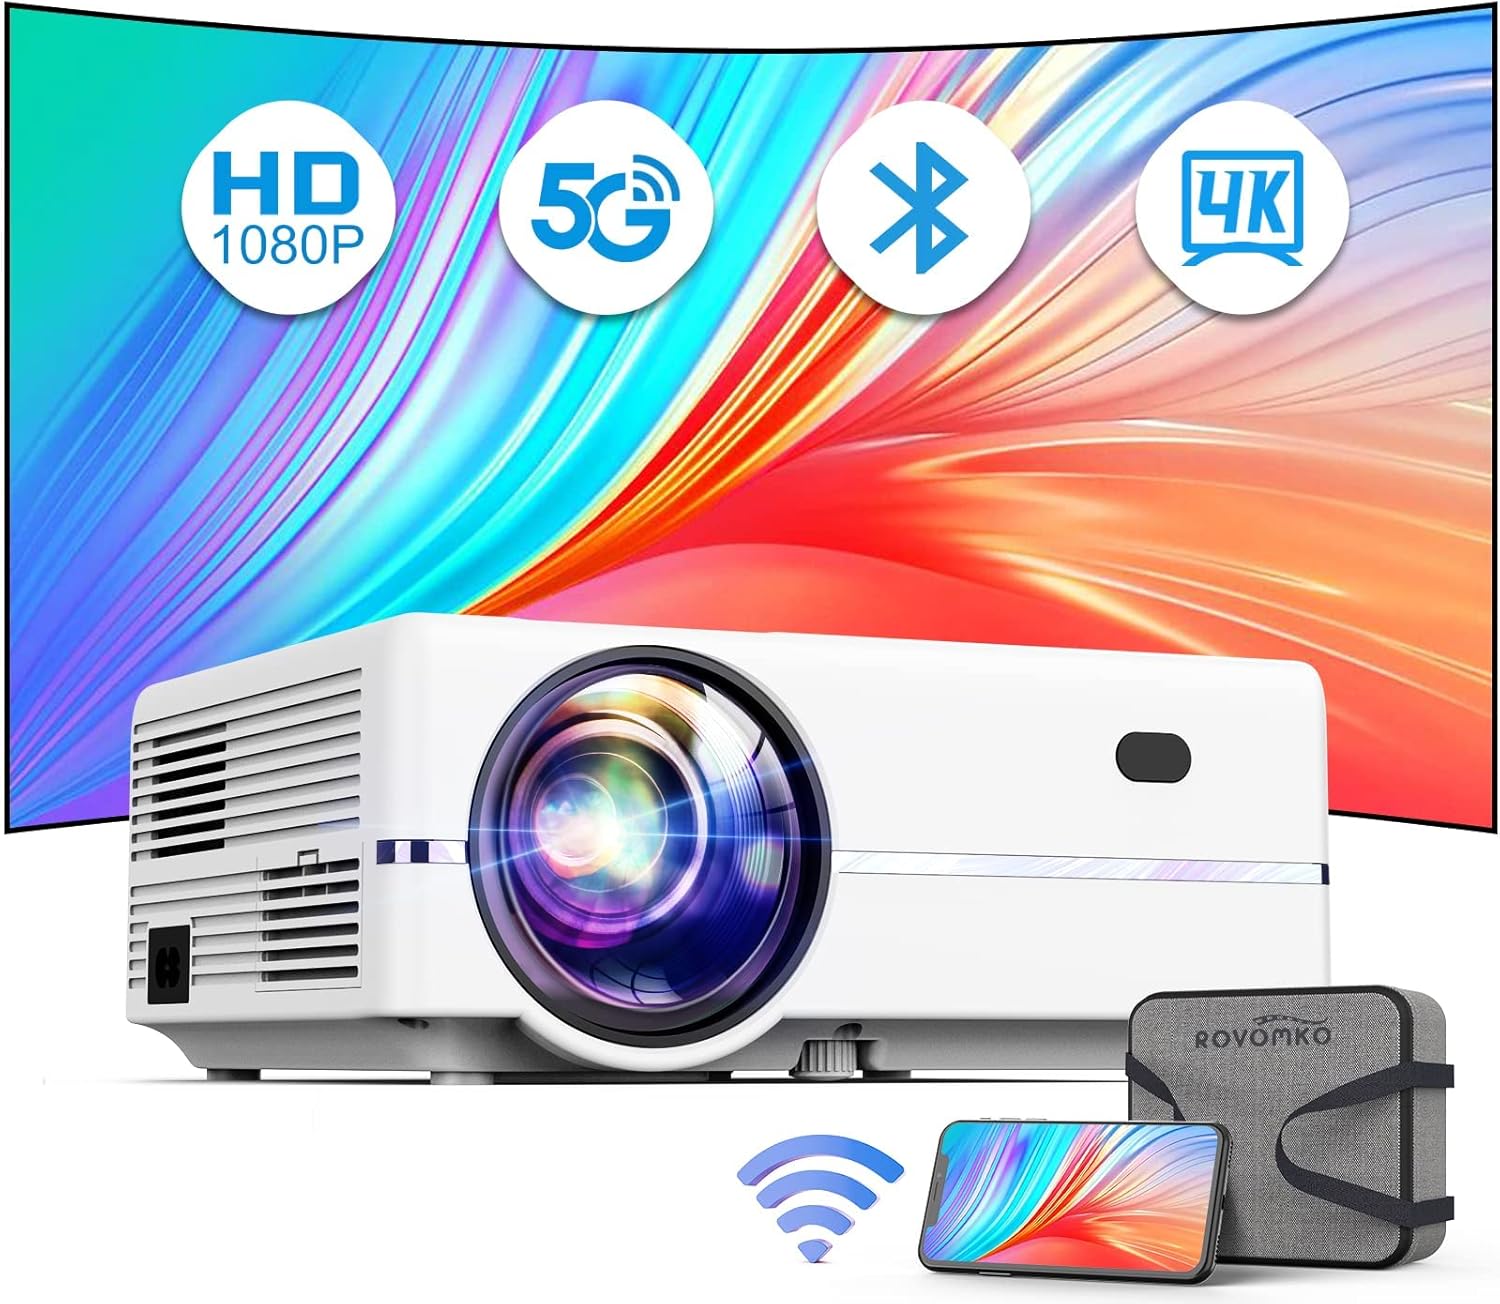
Image: Front view of the ROVOMKO V6(MKO26) Projector, highlighting its key features including native 1080P resolution, 5G WiFi, Bluetooth connectivity, and 4K support. A smartphone and carrying bag are also shown, emphasizing portability and wireless capabilities.
Key Features:
- Native 1080P Resolution & 4K Support: Delivers clear and sharp images.
- 5G & 2.4G Dual-Band WiFi: Provides faster and more stable wireless connections.
- Bidirectional Bluetooth 5.1: Connects to external speakers or acts as a Bluetooth speaker itself.
- Screen Mirroring: Supports wireless and wired mirroring for iOS and Android devices.
- Compact Design: Portable and easy to carry.
- Long Lamp Life: Up to 120,000 hours.
4. Setup Guide
4.1 Placement
Place the projector on a stable, flat surface. Ensure there is enough distance from the projection surface (wall or screen) to achieve your desired screen size. The projector supports a maximum display of 350 inches.
4.2 Power Connection
Connect the provided power cable to the projector's power input and then to a power outlet.
4.3 Focus and Keystone Correction
Use the focus ring on the projector lens to sharpen the image. Adjust the keystone correction (if available) to correct trapezoidal distortion, ensuring a rectangular image.
4.4 Mounting Options
The projector supports various mounting options including ceiling mount, table mount, wall mount, and tripod. The ceiling mounting screw size is M6*10mm.

Image: Diagram illustrating the projector's features such as 100%-75% zoom capability, compact size (compared to a phone and tablet), support for tripod mounting, and various installation methods including ceiling and table mounts.
5. Operating Instructions
5.1 Power On/Off
Press the power button on the projector or the remote control to turn the unit on or off.
5.2 Input Source Selection
Use the 'Source' button on the remote or projector to cycle through available input sources (HDMI1, HDMI2, AV, USB, VGA).
5.3 Bluetooth Connection (Bidirectional)
The projector supports Bluetooth 5.1 for both transmitting and receiving audio.
- Connecting to External Speakers: Enable Bluetooth on the projector and search for available devices. Select your Bluetooth speaker to connect.
- Using as a Bluetooth Speaker: Enable the projector's Bluetooth receiver mode. Connect your phone or tablet to the projector via Bluetooth to use it as a standalone speaker.

Image: Illustration of the projector's bidirectional Bluetooth 5.1 functionality, demonstrating its ability to connect to external Bluetooth audio devices and also to receive audio from a phone to act as a Hi-Fi speaker.
5.4 WiFi Connection (2.4G/5G Dual-Band)
Connect the projector to your home WiFi network for wireless features.
- Navigate to the WiFi settings on the projector.
- Select your desired 2.4G or 5G network from the list.
- Enter the password to connect.

Image: Visual representation of the projector's 5G/2.4G WiFi dual-band capability, showing faster and more stable connection speeds compared to single-band WiFi, enabling smooth streaming from mobile devices.
5.5 Screen Mirroring (Wireless & Wired)
Mirror your smartphone or tablet screen to the projector.
- Wireless Mirroring: Ensure both the projector and your device are connected to the same WiFi network. Select the screen mirroring option on your device (e.g., AirPlay for iOS, Wireless Projection for Android) and choose the projector from the list.
- Wired Mirroring (iOS): Connect your iOS device directly to the projector's USB port using its original USB data cable for a stable and fast connection.

Image: Step-by-step guide for connecting iOS and Android devices to the ROVOMKO MKO26 projector via wireless screen mirroring, showing the interface for selecting the projector.
5.6 Zoom Function
Adjust the screen size from 100% to 75% using the remote control without physically moving the projector.
6. Connectivity Options
The ROVOMKO projector offers a wide range of connectivity ports to integrate with various devices:
- HDMI Ports (x2): For connecting laptops, gaming consoles, TV sticks, and other HDMI-enabled devices.
- USB Ports (x2): For connecting USB drives for media playback or wired screen mirroring (for iOS).
- AV Port: For connecting older devices using the included 3-in-1 AV cable.
- VGA Port: For connecting computers with VGA output.
- 3.5mm Audio Jack: For connecting external wired speakers or headphones.

Image: An illustration showcasing the wide compatibility of the ROVOMKO Projector, depicting various devices such as smartphones, tablets, laptops, gaming consoles, and speakers, along with the projector's available input ports (USB, AV, HDMI, VGA).
7. Picture Quality & Eye Protection
The projector incorporates advanced technology for superior image quality and user comfort.
- Enhanced Brightness & Color: Features a patent-pending exclusive light path system and high-quality LED bulb, resulting in 25% brightness improvement and wider color gamut compared to similar products.
- Low Blue Light & Diffuse Reflection: Utilizes diffuse light refractive technology to protect your eyes from blue light stimuli, providing a more comfortable viewing experience.

Image: A comparison showing the difference between viewing with and without low blue light, illustrating how the projector's diffuse reflection technology protects eyes for a more comfortable viewing experience.
8. Maintenance
8.1 Cleaning
- Lens: Use a soft, lint-free cloth specifically designed for optical lenses. Do not use abrasive cleaners.
- Exterior: Wipe the projector's exterior with a soft, dry cloth.
- Ventilation Vents: Periodically clean the ventilation vents to prevent dust buildup, which can affect performance and lead to overheating. Use a soft brush or compressed air.
8.2 Lamp Life
The projector's LED lamp has an estimated lifespan of up to 120,000 hours, designed for long-term use without frequent replacement.
9. Troubleshooting
9.1 Fan Noise
A certain level of fan noise is normal for projectors due to heat dissipation. For optimal audio experience, it is recommended to place the projector at least 1 meter away or connect external Bluetooth speakers.
9.2 Image Blur / Dirty Spots
Ensure the focus ring is properly adjusted. If dirty spots appear, gently clean the lens as described in the Maintenance section. If the issue persists, contact customer support.
9.3 Laptop Connection Resolution
When connecting a laptop via HDMI, you may need to manually adjust the screen resolution on your laptop. Navigate to Display Settings (Windows) or System Preferences > Displays (macOS) to set the resolution to 1920x1080 or a compatible setting.
9.4 Power On Delay
If the projector experiences a significant delay in powering on, ensure the power cable is securely connected and try a different power outlet. If the problem continues, contact customer support.
9.5 Missing Accessories
If any accessory is missing from your package, please contact ROVOMKO customer support for a free replacement.
10. Technical Specifications
| Feature | Specification |
|---|---|
| Brand | ROVOMKO |
| Model | V6(MKO26) |
| Display Technology | LCD |
| Native Resolution | 1920 x 1080 |
| Supported Resolution | Up to 3840 x 2160 (4K) |
| Image Brightness | 18000 lm (Lumens) |
| Image Contrast Ratio | 12000:1 |
| Aspect Ratio | 16:9 |
| Noise Level | 15 dB |
| Connectivity | 5G/2.4G WiFi, Bluetooth 5.1 |
| Hardware Interface | HDMI (x2), USB (x2), AV Port, VGA, 3.5mm Audio |
| Lamp Life | 120,000 Hours |
| Power Source | Corded Electric |
| Wattage | 70 watts |
| Product Dimensions | 21.08 x 18.03 x 8 cm |
| Item Weight | 1.27 kg |
11. Warranty and Support
ROVOMKO is committed to providing high-quality products and excellent customer service.
- After-Sale Service: We provide 36 months of after-sale service support.
- Lifetime Repair Service: Enjoy lifetime repair service support from our professional technical team.
- Contact Support: If you encounter any issues or have questions, please do not hesitate to contact our customer support team. We are dedicated to resolving any problems to your satisfaction.
Ask a question about this manual
Ask about setup, troubleshooting, compatibility, parts, safety, or missing instructions. Manuals+ will review the question and use this page’s manual context to help answer it.