1. Introduction
Thank you for choosing the Lenovo Professional Bluetooth Rechargeable Mouse. This manual provides essential information for setting up, operating, maintaining, and troubleshooting your new mouse. Designed for comfort and efficiency, this mouse features a sculpted right-handed form, programmable buttons, a dynamic scroll wheel, and a long-lasting rechargeable battery.
2. What's in the Box
- Lenovo Professional Bluetooth Rechargeable Mouse
- Type-A to Type-C Charging Cable
- Publications and Documents (Warranty, Safety Information)
3. Product Overview
Familiarize yourself with the components of your Lenovo Professional Bluetooth Rechargeable Mouse.
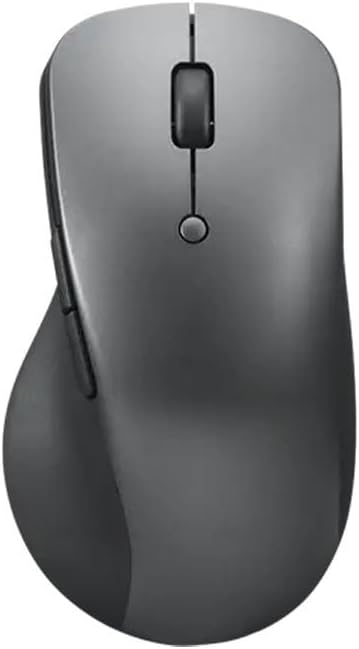
Figure 3.1: Top view of the Lenovo Professional Bluetooth Rechargeable Mouse. This image displays the ergonomic design, the left and right click buttons, the scroll wheel, and the central DPI button.
- Left Click Button: Standard primary mouse function.
- Right Click Button: Standard secondary mouse function.
- Scroll Wheel: Provides 2-way scrolling (up/down) and can be configured for speed. Also functions as a middle click button.
- DPI Button: Allows on-the-fly adjustment of mouse sensitivity (DPI) in three stages, up to 4000 DPI via software.
- Side Buttons: Two programmable buttons located on the left side for custom shortcuts.
- USB-C Charging Port: Located at the front of the mouse for recharging the internal battery.
- Bluetooth Pairing Button: Located on the underside of the mouse, used for initiating Bluetooth pairing and cycling between paired devices.
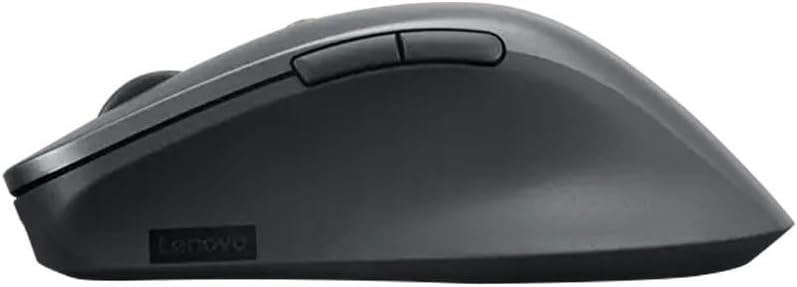
Figure 3.2: Side view of the mouse, highlighting the two programmable side buttons and the ergonomic contour designed to reduce thumb fatigue.
4. Setup
4.1. Charging the Mouse
- Locate the USB-C charging port at the front of the mouse.
- Connect the provided Type-A to Type-C charging cable to the mouse and to a USB power source (e.g., computer USB port, USB wall adapter).
- The mouse will begin charging. A full charge provides up to 3 months of use.

Figure 4.1: The Lenovo Professional Bluetooth Rechargeable Mouse connected to its USB-C charging cable.
4.2. Pairing via Bluetooth
The mouse supports Bluetooth 5.1 and Swift Pair for quick connection.
- Ensure your computer's Bluetooth is enabled.
- Turn on the mouse (if it has a power switch, typically on the underside).
- Press and hold the Bluetooth pairing button on the underside of the mouse for a few seconds until the LED indicator starts blinking, indicating it's in pairing mode.
- On your computer, go to Bluetooth settings and search for new devices. Select "Lenovo Professional Mouse" from the list.
- Follow any on-screen prompts to complete the pairing process.
Note: The Bluetooth pairing button also allows you to cycle between multiple paired devices. A short press will switch to the next paired device.
5. Operating Instructions
5.1. Basic Operation
- Clicking: Use the left and right buttons for primary and secondary clicks.
- Scrolling: Use the scroll wheel to navigate vertically. The scroll speed can be configured via software.
5.2. DPI Adjustment
The mouse features an on-the-fly DPI adjustment button, allowing you to change cursor sensitivity without opening software settings. Press the DPI button (located below the scroll wheel) to cycle through three preset DPI stages. The maximum DPI is 4000, configurable via software.
5.3. Programmable Buttons
The side buttons and the top button (DPI button) are programmable. You can customize these buttons to perform specific shortcuts or functions using the appropriate Lenovo mouse software (available for download from the official Lenovo support website).
6. Maintenance
- Cleaning: Use a soft, dry cloth to clean the mouse. For stubborn dirt, slightly dampen the cloth with water or a mild cleaning solution. Avoid harsh chemicals or abrasive materials.
- Sensor Care: Keep the optical sensor on the underside of the mouse clean and free from dust or debris to ensure accurate tracking.
- Battery Care: To prolong battery life, avoid fully discharging the mouse frequently. Recharge when the low battery indicator appears.
7. Troubleshooting
- Mouse not connecting via Bluetooth:
- Ensure the mouse is charged and powered on.
- Verify Bluetooth is enabled on your computer.
- Put the mouse into pairing mode by pressing and holding the Bluetooth button on the underside.
- Remove any previous pairings of the mouse from your computer's Bluetooth settings and attempt to pair again.
- Try restarting your computer and the mouse.
- Mouse cursor is erratic or not moving:
- Check the battery level and charge the mouse if necessary.
- Ensure the optical sensor on the underside is clean and unobstructed.
- Use the mouse on a suitable surface. Blue optical sensors track on most surfaces, but highly reflective or transparent surfaces may cause issues.
- If connected via Bluetooth, ensure there are no strong interferences.
- Programmable buttons not working:
- Ensure you have installed the latest Lenovo mouse software for customization.
- Check the software settings to confirm the buttons are configured correctly.
8. Specifications
| Brand | Lenovo |
| Series | Professional |
| Model Number | 4Y51J62544 |
| Connectivity Technology | Bluetooth 5.1, Wireless |
| Movement Detection Technology | Optical (Blue optical sensor) |
| DPI | Up to 4000 DPI (three stages adjustable) |
| Battery Life | Up to 3 months (rechargeable) |
| Power Source | Battery Powered (1 Lithium Polymer battery included) |
| Item Weight | 3.36 ounces |
| Product Dimensions (LxWxH) | 2.8 x 5.1 x 0.1 inches |
| Operating System Compatibility | Windows 10, Windows 11 |
| Color | Storm Gray |
9. Warranty and Support
The Lenovo Professional Bluetooth Rechargeable Mouse comes with a three-year long-term warranty. For warranty claims, technical support, or further assistance, please visit the official Lenovo support website or contact your local Lenovo service provider. Keep your proof of purchase for warranty validation.
For additional resources and software downloads, please visit: support.lenovo.com