Introduction
This manual provides essential instructions for the safe installation, operation, and maintenance of your Huilefu 144W Dimmable Gold Plating 6-Ring LED Flush Mount Ceiling Light. Please read this manual thoroughly before installation and retain it for future reference.
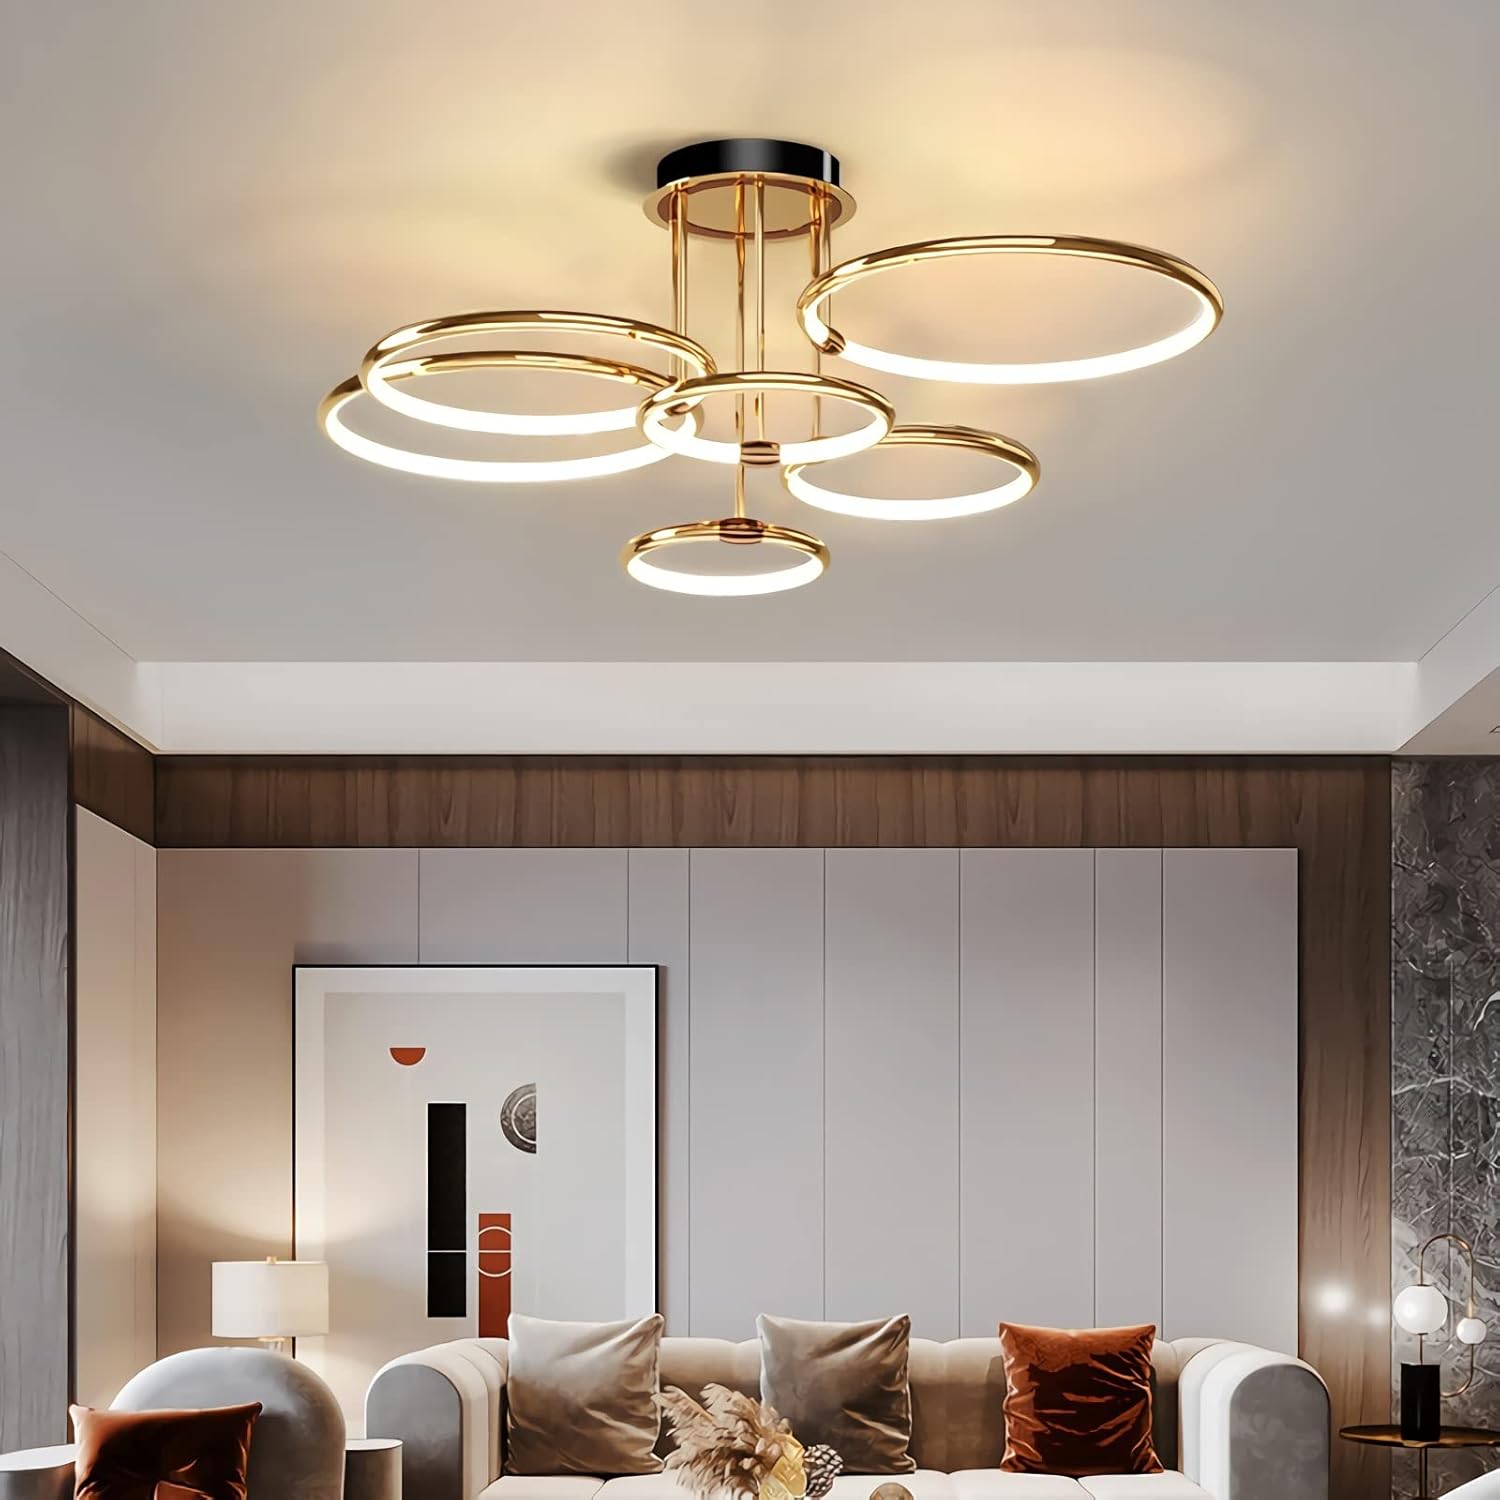
Image: The Huilefu 6-Ring LED Flush Mount Ceiling Light, featuring a gold-plated finish and six illuminated rings, installed in a contemporary living room setting.
Safety Information
- Always turn off the power at the main circuit breaker before beginning installation.
- Consult a qualified electrician if you are unsure about the installation process.
- Ensure all electrical connections are secure and comply with local electrical codes.
- Do not attempt to modify the light fixture.
- Handle components with care to avoid damage.
Package Contents
Verify that all components are present and undamaged before proceeding with installation.
- Ceiling Light Chassis
- LED Light Rings (6 units)
- Mounting Hardware (screws, nuts, wire connectors)
- Remote Control
- Instruction Manual

Image: Detailed view of the light fixture's components, highlighting the wrought iron ceiling plate, silicone lampshade, aluminum alloy lampshade, and brushed metal accents.
Specifications
| Feature | Detail |
|---|---|
| Brand | Huilefu |
| Model Number | Huilefu-001 |
| Product Dimensions | 104 x 104 x 39 cm |
| Item Weight | 4 Kilograms |
| Wattage | 144 watts |
| Voltage | 110 Volts (AC) |
| Lighting Method | LED |
| Number of Light Sources | 6 Rings |
| Control Method | Remote |
| Installation Type | Flush Mount |
| Special Feature | Dimmable |

Image: Product dimensions illustrating the overall width (104 cm), height (39 cm), and base diameter (20 cm) of the light fixture.
Setup and Installation
Follow these steps carefully to install your ceiling light. Professional installation is recommended if you are unfamiliar with electrical wiring.
- Prepare the Light Rings:
Thread the wires from each light ring through the screw tubes. Cut any bundled thin ropes with scissors and slowly tighten the attached screw tube onto the lamp body. - Attach Rings to Chassis:
Insert the top of the screw tube through the chassis and secure it by tightening the nut from the inside. Ensure all nuts are tightly fastened. - Connect Terminals:
Connect the terminals from the light rings to the LED driver. Ensure all terminals are plugged in tightly to prevent loose connections. - Mount to Junction Box:
Install the crossbar to the ceiling junction box. Connect the household electrical wires to the light fixture's wires (live to live, neutral to neutral, ground to ground). Secure the light fixture to the crossbar.
Video: This video demonstrates the assembly and installation process for a 6-ring LED ceiling light, including connecting the rings, securing them to the chassis, and mounting the fixture to the ceiling.
Operating Instructions
Your Huilefu ceiling light is controlled by a remote. The remote allows for brightness and color temperature adjustments.
- Power On/Off: Use the dedicated ON/OFF buttons on the remote.
- Brightness Adjustment: Use the 'Bright+' and 'Dark-' buttons to increase or decrease the light intensity.
- Color Temperature Adjustment: Use the 'Warm Light' and 'White Light' buttons to cycle through different color temperatures (e.g., warm white, neutral white, cool white).
- Mode Selection: Some remotes may offer preset modes like 'Night Mode' or specific color temperature settings. Refer to your remote's specific buttons.

Image: Illustration of the remote control functions, demonstrating how to adjust brightness and switch between warm, neutral, and white light settings.
Video: This video demonstrates the dimmable functions of a 6-ring LED ceiling light, showcasing changes in brightness and color temperature using a remote control.
Maintenance
- Cleaning: Disconnect power before cleaning. Use a soft, dry cloth to wipe the fixture. Do not use abrasive cleaners or solvents.
- Bulb Replacement: The LED light source is integrated and not user-replaceable. If the LEDs fail, contact customer support.
- Inspection: Periodically check for any loose connections or signs of damage.
Troubleshooting
| Problem | Possible Cause | Solution |
|---|---|---|
| Light does not turn on | No power, loose wiring, faulty remote. | Check circuit breaker. Verify wiring connections. Replace remote batteries. |
| Light flickers | Loose wiring, incompatible dimmer switch (if applicable). | Check wiring. Ensure dimmer switch is LED-compatible. |
| Remote not working | Dead batteries, remote out of range, interference. | Replace batteries. Ensure remote is within operating range. Remove obstructions. |
Warranty and Support
Warranty and specific support information for this product were not available in the provided data. Please refer to the product packaging or contact the retailer/manufacturer directly for details regarding warranty coverage and customer support services.


