
1. Introduction
Thank you for choosing the BILIPALA DN6501 CO2 Monitor. This device is designed to accurately measure carbon dioxide (CO2) concentration, temperature, and relative humidity in indoor environments. By providing real-time data and an adjustable alarm, it helps you maintain optimal air quality for improved comfort and well-being. Please read this manual thoroughly before using the device to ensure proper operation and longevity.

Image 1.1: The BILIPALA DN6501 CO2 Monitor showing its main display with CO2, temperature, and humidity values.
2. Product Overview
2.1 Key Features
- High-Precision NDIR Sensor: Accurately measures CO2 concentration from 400 to 5000 ppm with an accuracy of +/- 50 ppm.
- 3-in-1 Monitoring: Displays CO2 levels, ambient temperature, and relative humidity simultaneously.
- Adjustable CO2 Alarm: Provides an audible and visual alert when CO2 levels exceed a user-defined threshold.
- Air Quality Indicator: Color-coded display (Good, Normal, Poor) for quick assessment of CO2 levels.
- Temperature Unit Selection: Switch between Celsius (°C) and Fahrenheit (°F).
- Adjustable Display Brightness: Three levels of brightness (100%, 50%, 5%) for comfortable viewing in various lighting conditions.
- Max/Min Record: Tracks the highest and lowest CO2, temperature, and humidity readings.
- Real-time Clock: Displays current date and time.

Image 2.1: Illustration of the high-precision NDIR sensor technology used in the monitor, highlighting its measurement range and accuracy.
2.2 Package Contents
- BILIPALA DN6501 CO2 Monitor
- USB-C Power Cable
- Power Adapter (USB wall charger)
- User Manual (this document)
3. Setup
3.1 Powering the Device
The BILIPALA DN6501 CO2 Monitor requires continuous power for its CO2 detection function to operate correctly. It can be powered using the included USB-C cable and power adapter.
- Connect the USB-C end of the cable to the DC IN 5V port on the back of the monitor.
- Plug the USB-A end of the cable into the provided power adapter.
- Insert the power adapter into a standard wall outlet.
Note: While the device may have a battery compartment, batteries are not included, and the CO2 detection function will not operate correctly on battery power alone. Continuous power via the adapter is required for accurate CO2 readings.

Image 3.1: Connecting the power adapter to the monitor's DC IN 5V port.
3.2 Initial Calibration
The NDIR CO2 sensor typically performs an automatic baseline calibration (ABC) in fresh air conditions. For optimal accuracy, it is recommended to place the monitor in a well-ventilated area (e.g., near an open window) for at least 24 hours upon first use or after prolonged storage. The device will self-calibrate during this period.
3.3 Placement
Place the monitor in the area where you wish to measure air quality. Avoid placing it directly next to heat sources, air vents, or in direct sunlight, as this can affect temperature and humidity readings. Ensure it is on a stable, flat surface.
4. Operating Instructions
4.1 Understanding the Display
The large digital display shows the following information:
- CO2 Concentration: Large numerical value in parts per million (PPM).
- Air Quality Indicator: Color-coded (Good, Normal, Poor) based on CO2 levels.
- Temperature: Current ambient temperature in °C or °F.
- Humidity: Current relative humidity percentage.
- Date and Time: Current date and time.

Image 4.1: The monitor displaying the three main metrics: CO2, Temperature, and Humidity.
4.2 CO2 Level Interpretation
The monitor provides a visual indication of air quality based on CO2 levels:
- Good (Green): 400-700 PPM
- Normal (Yellow): 701-1000 PPM
- Poor (Red): 1001-5000 PPM
High CO2 levels can indicate poor ventilation, leading to drowsiness, reduced concentration, and other health issues. Regular ventilation is recommended when levels are in the 'Normal' or 'Poor' range.

Image 4.2: Visual guide to CO2 concentration levels and their general impact on indoor air quality.
4.3 Button Functions
The monitor features several touch-sensitive buttons on the front panel:
- SET/12H/24H: Press to enter settings mode. In settings, use to confirm. Long press to switch between 12-hour and 24-hour time format.
- ▲/°C/°F/CAL: Press to increase values in settings. Long press to switch between Celsius and Fahrenheit. In fresh air, long press to initiate manual calibration (refer to section 4.7).
- ▼/MEM/CLEAR: Press to decrease values in settings. Long press to view Max/Min records. In Max/Min view, long press to clear records.
- Alarm Icon: Press to toggle the CO2 alarm on/off. Long press to enter alarm setting mode.
- Light Bulb Icon: Press to cycle through display brightness levels (100%, 50%, 5%).
4.4 Setting Date and Time
- Press the SET button once to enter time setting mode. The year will start flashing.
- Use the ▲ and ▼ buttons to adjust the year. Press SET to confirm and move to the next setting (month, day, hour, minute).
- Repeat step 2 for month, day, hour, and minute.
- After setting the minutes, press SET to exit the time setting mode.
4.5 Adjusting Display Brightness
Press the Light Bulb Icon button repeatedly to cycle through the three brightness levels: 100% (brightest), 50% (medium), and 5% (dimmest).

Image 4.3: The three adjustable brightness levels of the display.
4.6 Setting the CO2 Alarm
The monitor features an audible and visual alarm that activates when CO2 levels exceed a preset threshold.
- Long press the Alarm Icon button to enter alarm setting mode. The current alarm threshold will flash.
- Use the ▲ and ▼ buttons to adjust the desired CO2 alarm threshold (e.g., 1000 PPM, 1200 PPM).
- Press the Alarm Icon button again to confirm the setting and exit.
- To toggle the alarm sound on or off, short press the Alarm Icon button. When the alarm is active, an alarm symbol will appear on the display.
When the alarm is triggered, the CO2 value will flash, the air quality indicator will turn red (if not already), and an audible beep will sound.

Image 4.4: The monitor indicating a 'Poor' CO2 level and an active alarm.
4.7 Manual Calibration (CAL)
While the device features automatic calibration, a manual calibration can be performed if you suspect inaccurate readings or after prolonged use in a consistently high CO2 environment. This should only be done in a fresh air environment (e.g., outdoors or near an open window) where the CO2 concentration is known to be approximately 400 PPM.
- Place the monitor in a fresh air environment.
- Long press the ▲/°C/°F/CAL button until 'CAL' appears on the display.
- The device will begin the calibration process, which may take a few minutes. Do not move the device during this time.
- Once calibration is complete, the display will return to normal operation.
5. Maintenance
5.1 Cleaning
To clean the monitor, gently wipe the display and casing with a soft, dry, or slightly damp cloth. Do not use abrasive cleaners, solvents, or immerse the device in water. Ensure no liquid enters the ventilation openings.
5.2 Sensor Care
The NDIR CO2 sensor is designed for long-term stability. To maintain its accuracy, avoid exposing the device to extreme temperatures, high humidity, or corrosive gases. Do not block the ventilation holes on the device, as this can impede air circulation to the sensor.
6. Troubleshooting
| Problem | Possible Cause | Solution |
|---|---|---|
| Device does not power on. | No power connection or faulty adapter/cable. | Ensure the USB-C cable is securely connected to both the monitor and the power adapter, and the adapter is plugged into a working wall outlet. Try a different USB power source if available. |
| CO2 readings appear inaccurate or stuck. | Sensor requires calibration or is obstructed. | Perform a manual calibration in fresh air (refer to section 4.7). Ensure ventilation holes are not blocked. Avoid placing the device in areas with strong air currents or direct exhalation. |
| Temperature/Humidity readings are incorrect. | Device placed near heat/cold sources or in direct sunlight. | Relocate the monitor away from direct sunlight, heating/cooling vents, or other sources of extreme temperature/humidity. Allow time for readings to stabilize. |
| Alarm does not sound when CO2 is high. | Alarm is disabled or threshold is too high. | Short press the Alarm Icon button to ensure the alarm is enabled (alarm symbol visible). Long press the Alarm Icon button to check and adjust the alarm threshold to a lower value if necessary. |
| Date/Time cannot be set or is incorrect. | Incorrect button sequence or temporary glitch. | Follow the instructions in section 4.4 carefully. If the issue persists, try disconnecting and reconnecting power to reset the device, then attempt to set the date/time again. |
7. Specifications
| Parameter | Value |
|---|---|
| Model Number | DN6501 |
| CO2 Measurement Range | 400 - 5000 PPM |
| CO2 Accuracy | ±50 PPM |
| Temperature Measurement Range | Not explicitly stated, typically 0-50°C (32-122°F) for indoor devices. |
| Humidity Measurement Range | Not explicitly stated, typically 0-99% RH for indoor devices. |
| Product Dimensions | 14.5 x 4.1 x 8.6 cm (5.7 x 1.6 x 3.4 inches) |
| Product Weight | 300 g (0.66 lbs) |
| Power Input | DC 5V, 1A (via USB-C) |
| Certifications | CE, ETL, GS, FCC |
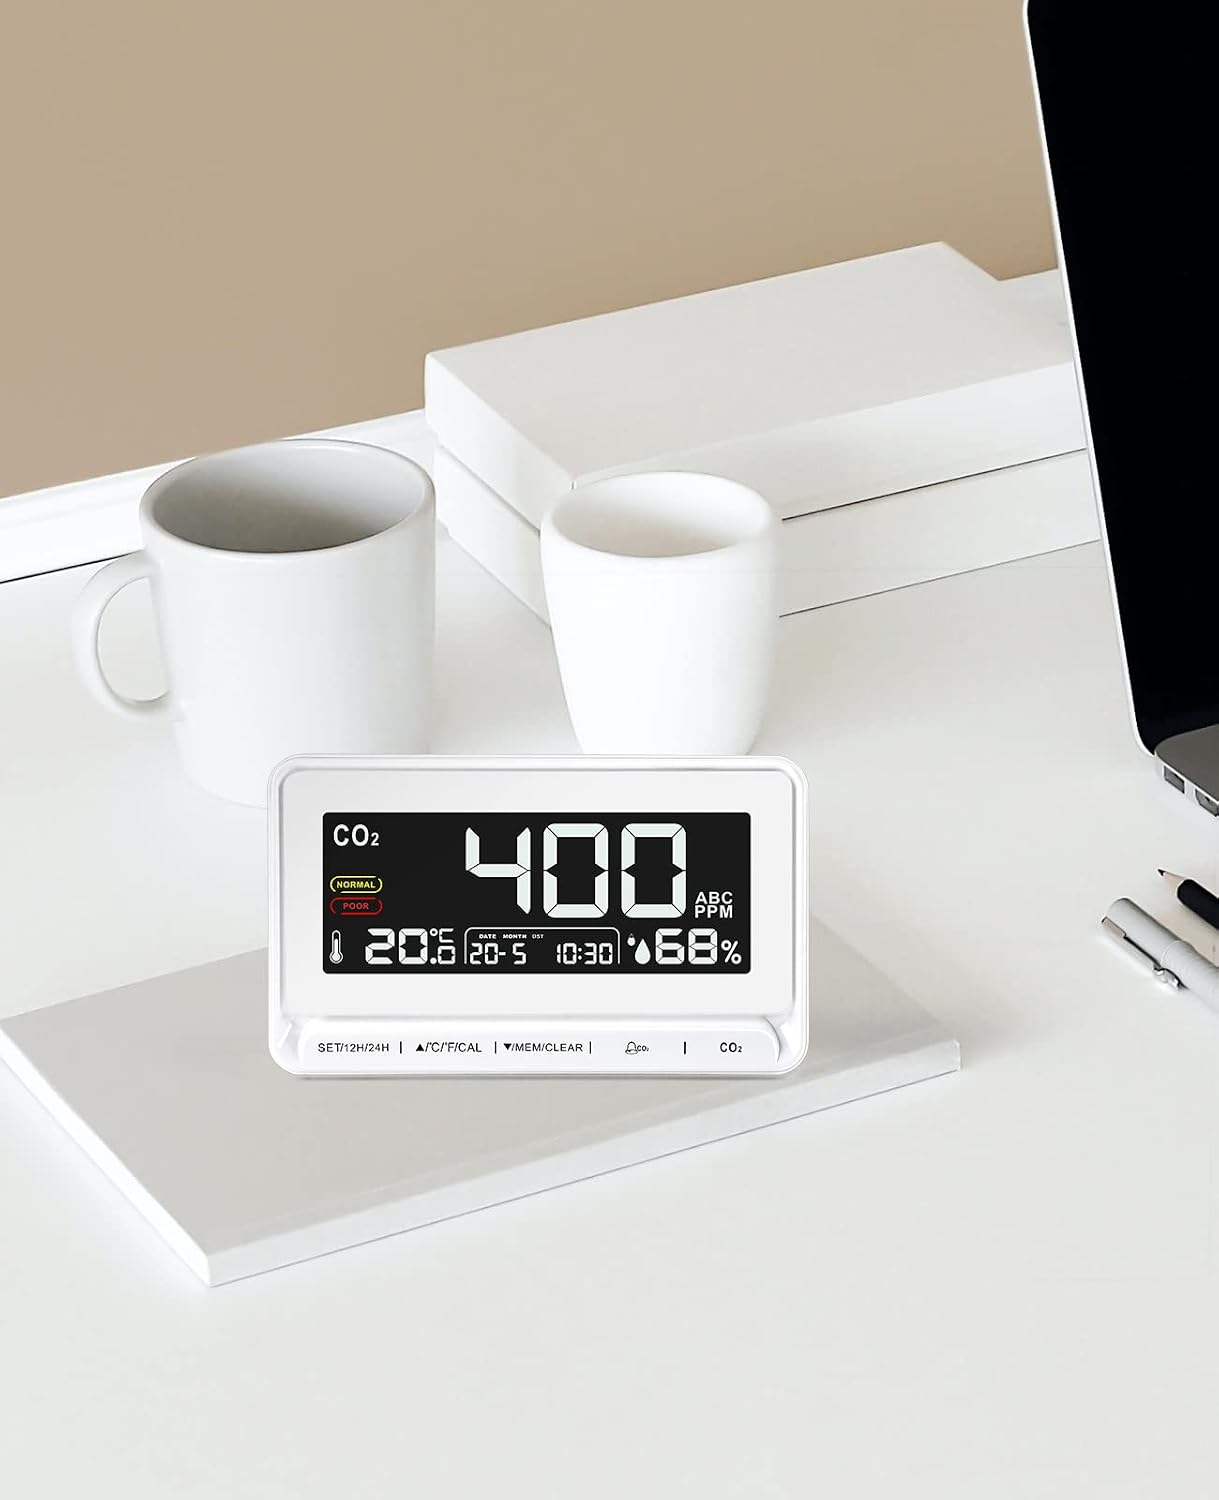
Image 7.1: Physical dimensions of the BILIPALA DN6501 CO2 Monitor.

Image 7.2: Compliance certifications for the product, including CE, ETL, GS, and FCC.
8. Warranty and Support
BILIPALA products are manufactured to high-quality standards. For warranty information, technical support, or any questions regarding your DN6501 CO2 Monitor, please refer to the contact information provided with your purchase or visit the official BILIPALA website. Please retain your proof of purchase for warranty claims.