
1. Introduction
Thank you for choosing the WANAI Countertop Ice Maker. This manual provides essential information for the safe and efficient operation, maintenance, and troubleshooting of your new ice maker. Please read these instructions thoroughly before first use and retain them for future reference.

Image 1.1: The WANAI Countertop Ice Maker, shown with an ice scoop and a basket full of bullet-shaped ice cubes. The unit is black with a silver top and a transparent lid.
2. Important Safety Instructions
- Ensure the ice maker is placed on a stable, level surface, away from direct sunlight and heat sources.
- Do not immerse the appliance, power cord, or plug in water or other liquids.
- Supervise children when the appliance is in use.
- Unplug the ice maker from the power outlet before cleaning or when not in use.
- Do not operate any appliance with a damaged cord or plug, or after the appliance malfunctions or has been damaged in any manner.
- Use only potable water in the ice maker.
- Keep the ventilation openings clear of obstructions.
- This appliance is intended for household use only.
- Before first use, clean the ice maker machine and keep it in an upright position for 24 hours.
3. Product Overview
3.1 Key Features
- Fast Ice Production: Produces 9 bullet-shaped ice cubes in 6-8 minutes.
- High Capacity: Up to 33 lbs (14.97 kg) of ice in 24 hours.
- Two Ice Sizes: Offers small and large bullet ice cubes.
- Self-Cleaning Function: Automated cleaning cycle for convenience.
- Intelligent Sensors: Ice full and water shortage indicators.
- Compact Design: Portable for various settings like home, kitchen, office, or parties.

Image 3.1: Visual representation of the ice maker's capabilities, including a 1.76 lbs basket capacity, 33 lbs daily production, 2.1L water reservoir, and 9 ice cubes in 6-8 minutes.
3.2 Control Panel
The control panel is located on the top of the ice maker and features indicator lights and a power button.
- ICE-MAKING Indicator: Illuminates when the unit is actively making ice.
- ADD WATER Indicator: Illuminates when the water level in the reservoir is low, prompting a refill.
- ICE FULL Indicator: Illuminates when the ice basket is full, and the unit will pause ice production.
- POWER Button: Turns the unit on/off and initiates the self-cleaning function.
- Ice Cube Size Selection: Allows selection between small and large ice cubes.

Image 3.2: Close-up of the ice maker's control panel, highlighting the indicators for ice making, water shortage, ice full, and the power button, along with the ice cube size selection.
4. Setup and First Use
- Unpacking: Carefully remove the ice maker from its packaging. Remove all packing materials, including any tape or protective film.
- Placement: Place the ice maker on a flat, stable, and level surface. Ensure there is adequate ventilation around the unit (at least 4 inches of space on all sides). Avoid placing it near heat sources or in direct sunlight.
- Stabilization: Allow the unit to stand upright for at least 24 hours before plugging it in. This allows the refrigerant to settle.
- Initial Cleaning: Before making ice for consumption, it is recommended to clean the interior of the ice maker. Refer to the "Self-Cleaning Function" section for instructions.
- Power Connection: Plug the ice maker into a grounded electrical outlet.
5. Operating Instructions
5.1 Making Ice
- Add Water: Open the lid and fill the water reservoir with potable water up to the "MAX" fill line. Do not overfill.
- Power On: Press the POWER button to turn on the ice maker. The "ICE-MAKING" indicator will illuminate.
- Select Ice Size: Press the ice cube size selection button (usually indicated by small/large icons) to choose your desired ice cube size. The default setting is typically small.
- Ice Production: The ice maker will begin the ice-making cycle. The first batch of ice may take slightly longer. Subsequent batches will be ready in approximately 6-8 minutes.
- Ice Full: When the ice basket is full, the "ICE FULL" indicator will light up, and the ice maker will automatically pause production. Remove ice from the basket to resume operation.
- Add Water Reminder: If the "ADD WATER" indicator illuminates, the water reservoir is low. Add more water to continue ice production.
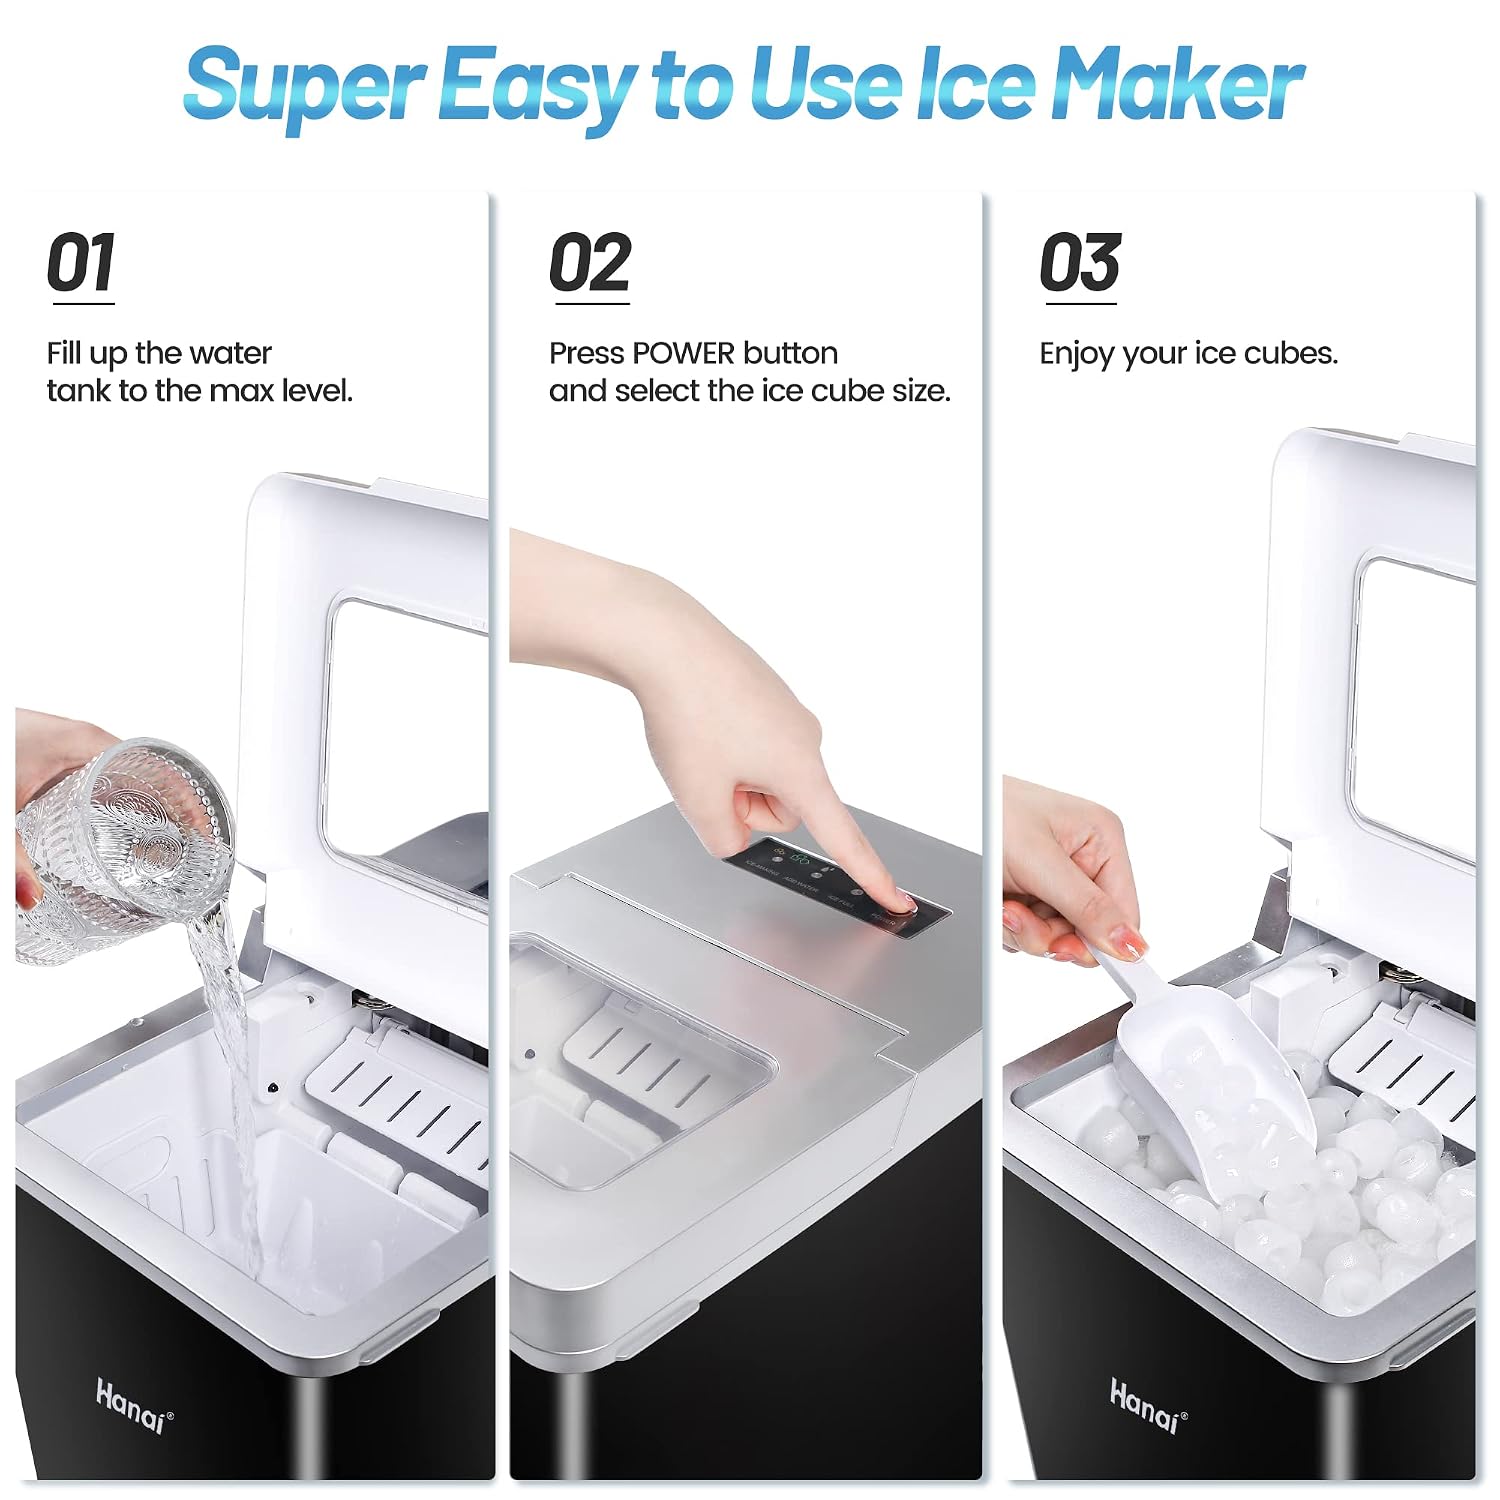
Image 5.1: Step-by-step guide showing how to fill the water tank, press the power button to start, and then scoop out the ready ice cubes.
5.2 Ice Cube Sizes
The WANAI ice maker produces bullet-shaped ice cubes in two sizes:
- Small Size: Ideal for quickly chilling drinks without diluting them too much.
- Large Size: Suitable for longer-lasting cooling in beverages or for use in ice buckets.

Image 5.2: Visual comparison of the two available ice cube sizes (small and large) in beverages.
6. Self-Cleaning Function
The self-cleaning function helps maintain the hygiene of your ice maker by circulating water through its internal components. It is recommended to use this function regularly.
- Empty the Unit: Ensure the ice basket is empty and drain any remaining water from the reservoir.
- Add Water: Fill the water reservoir with clean, potable water up to the "MAX" line.
- Initiate Cleaning: With the unit plugged in, press and hold the POWER button for approximately 5-10 seconds. The self-cleaning cycle will begin and run for about 15 minutes.
- Drain Water: After the cleaning cycle is complete, unplug the unit and drain the water from the reservoir using the drain plug located at the bottom or side of the unit.
- Rinse (Optional): For thorough cleaning, you may repeat the process with fresh water to rinse out any residue.

Image 6.1: Diagram illustrating the self-cleaning process, activated by holding the power button for 10 seconds, and showing the manual drain plug.
7. Maintenance
7.1 Regular Cleaning
- Exterior: Wipe the exterior of the ice maker with a soft, damp cloth. Do not use abrasive cleaners or solvents.
- Interior: Regularly perform the self-cleaning cycle. For manual cleaning, unplug the unit, remove the ice basket, and wipe the interior with a soft cloth dampened with a mild detergent solution. Rinse thoroughly with clean water and drain.
- Ice Scoop and Basket: Wash the ice scoop and basket with warm, soapy water, rinse, and dry thoroughly.
7.2 Storage
If the ice maker will not be used for an extended period:
- Perform a self-cleaning cycle and drain all water.
- Unplug the unit and allow it to dry completely.
- Store the ice maker in a cool, dry place, away from direct sunlight.
8. Troubleshooting
Before contacting customer support, please refer to the following common issues and solutions:
| Problem | Possible Cause | Solution |
|---|---|---|
| Ice maker not working / Lights blinking. | No power; Water level low; Ice basket full. | Check power connection; Add water if "ADD WATER" indicator is on; Remove ice if "ICE FULL" indicator is on. |
| "ADD WATER" indicator is on. | Water reservoir is empty or below minimum level. | Fill the water reservoir with potable water up to the MAX line. |
| "ICE FULL" indicator is on. | Ice basket is full. | Remove ice from the basket. The unit will resume ice production automatically. |
| Ice cubes are small or cloudy. | Water temperature too high; Mineral deposits in water. | Use colder water; Perform a self-cleaning cycle; Use filtered water. |
| Ice melts quickly. | Ice maker is not a freezer; Ambient temperature too high. | Transfer ice to a freezer for storage; Operate in a cooler environment. |
| Unusual noise during operation. | Normal compressor operation; Unit not level. | Ensure the unit is on a level surface. If noise persists and is excessive, contact support. |
9. Specifications
| Feature | Detail |
|---|---|
| Model Name | Countertop Ice Maker |
| Manufacturer Reference | WBJ-15B |
| Product Dimensions (L x W x H) | 37.49 x 23.37 x 31.19 cm (14.76 x 9.2 x 12.28 inches) |
| Daily Ice Production | Up to 33 lbs (14.97 kg) |
| Ice Production Cycle | 6-8 minutes per 9 cubes |
| Wattage | 105 watts |
| Voltage | 110 Volts |
| Refrigerant | R600a |
| Noise Level | Less than 35dB (as per product information) |

Image 9.1: Diagram illustrating the compact dimensions of the WANAI Ice Maker.
10. Warranty and Support
WANAI is committed to providing quality products and customer satisfaction.
- Warranty: This product comes with a 12-month warranty from the original purchase date.
- Technical Support: Lifetime technical service support is available.
- Contact: If you have any questions or require assistance with your WANAI Countertop Ice Maker, please contact customer support. Refer to your purchase documentation for contact details.