
Luqeeg MQ6186
Contents
Luqeeg 61 Keys Keyboard Piano Instruction Manual
Model: MQ6186
1. Introduction
Thank you for choosing the Luqeeg 61 Keys Keyboard Piano. This digital music keyboard is designed to provide an engaging and educational musical experience for beginners and children. It features 61 keys, a built-in speaker, and a microphone, making it suitable for learning and creative play. This manual provides detailed instructions on how to set up, operate, and maintain your keyboard piano.

Image: The Luqeeg 61 Keys Keyboard Piano, showcasing its compact design, 61 keys, control panel, and the included microphone and USB power cable.
2. Important Safety Information
- Power Source: Use only the specified power adapter or batteries (not included) for operation. Ensure the voltage matches the product requirements.
- Water and Moisture: Do not expose the keyboard to water or excessive moisture. Keep it away from sinks, bathtubs, or any wet environments.
- Ventilation: Do not block any ventilation openings. Ensure proper airflow around the instrument to prevent overheating.
- Cleaning: Disconnect the power before cleaning. Use a soft, dry cloth. Do not use liquid cleaners or aerosol sprays.
- Children: This product is designed for children, but adult supervision is recommended during use, especially when connecting power or accessories.
- Handling: Avoid dropping the instrument or subjecting it to strong impacts.
3. Package Contents
Please check the package contents to ensure all items are present:
- Luqeeg 61 Keys Keyboard Piano (MQ6186)
- Microphone
- USB Power Cable
- Instruction Manual (this document)

Image: The keyboard piano displayed alongside its wired microphone, illustrating the main components included in the package.
4. Setup
4.1 Powering the Keyboard
The keyboard can be powered by either the included USB power cable or batteries.
- USB Power: Connect the USB power cable to the DC 5V input port on the back of the keyboard. Plug the other end into a compatible USB power adapter (not included) or a USB port on a computer.
- Battery Power: Locate the battery compartment on the bottom of the keyboard. Insert the required number of 'AA' batteries (not included), ensuring correct polarity.
4.2 Connecting the Microphone
Plug the microphone's 3.5mm jack into the microphone input port on the keyboard.
4.3 Connecting Headphones (Optional)
For private practice, you can connect headphones to the 3.5mm headphone jack on the keyboard. This will mute the built-in speakers.

Image: A detailed view of the keyboard's side panel, highlighting the various input and output ports for power, microphone, and headphones.

Image: The keyboard piano shown with a smartphone and laptop, illustrating its capability for flexible connection to peripheral devices.
5. Operating Instructions
5.1 Power On/Off
Press the POWER button to turn the keyboard on or off.
5.2 Volume Control
Use the VOLUME +/- buttons to adjust the overall sound level.
5.3 Tones (Instrument Sounds)
The keyboard features 16 different tones. Press the TONE +/- buttons to cycle through the available instrument sounds. The selected tone number will be displayed on the LED screen.
5.4 Rhythms
There are 6 rhythms available. Press the RHYTHM +/- buttons to select a rhythm. Press START/STOP to begin or end the rhythm playback.
5.5 Demo Songs
The keyboard includes 6 demo songs. Press the DEMO button to play through the demo songs. Press it again to stop.
5.6 Teaching Function
The teaching function assists beginners in learning songs. Refer to the specific teaching modes (e.g., Single Finger, Follow) indicated on the control panel and follow the instructions on the LED display.
5.7 Recording and Playback
To record your performance:
- Press the REC button. The LED display may indicate recording mode.
- Play your desired melody on the keys.
- Press PLAY to listen to your recorded performance.
5.8 Programming Function
The programming function allows you to create custom rhythm patterns.
- Press the PROG button.
- Press the rhythm pads or keys to input your desired sequence.
- Press PLAY to hear your programmed rhythm.
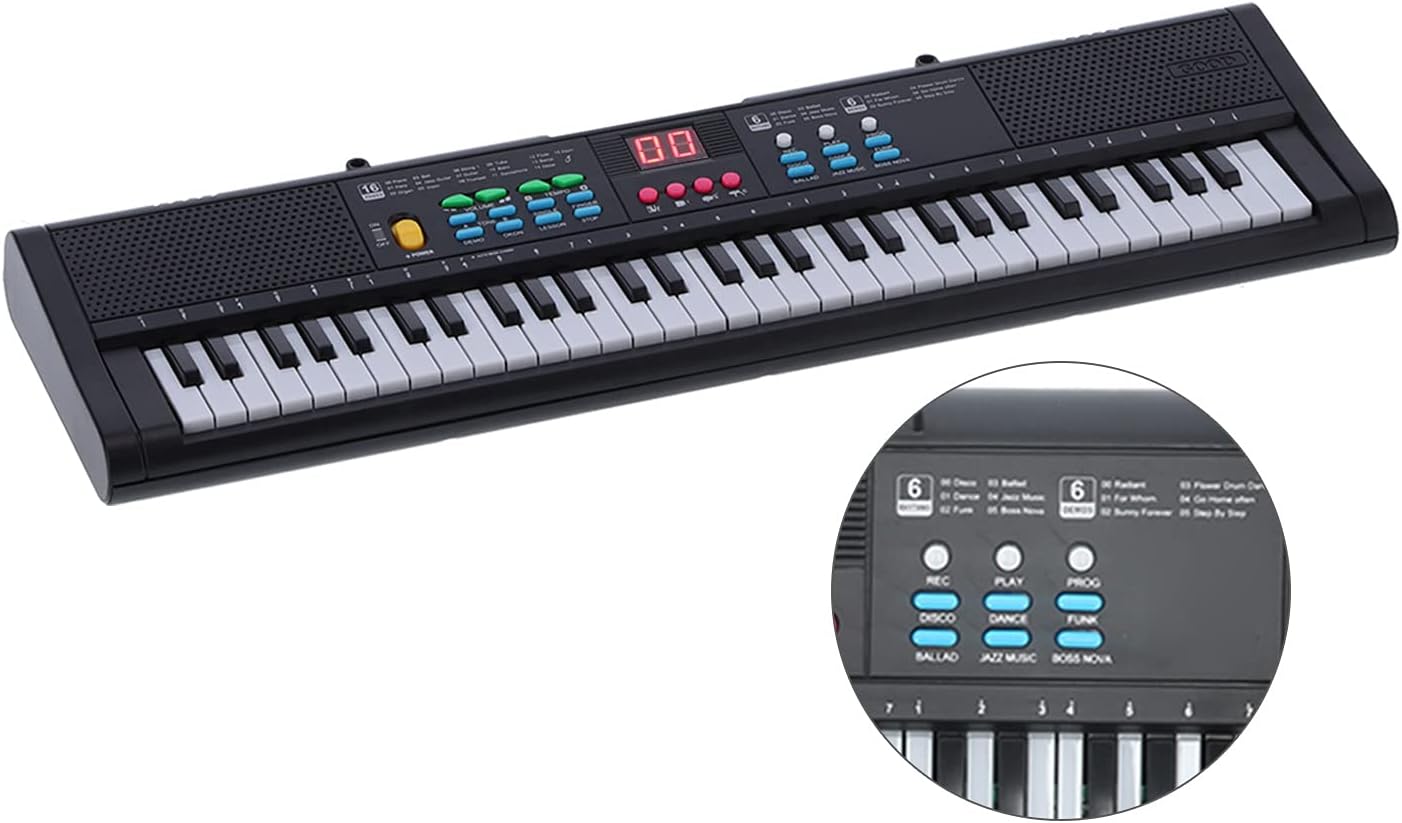
Image: A detailed shot of the keyboard's control panel, highlighting the buttons for recording, playback, programming, and different rhythm styles like Disco, Dance, Jazz Music, and Boss Nova.

Image: The keyboard piano is shown with two smaller inset images. One inset depicts a child learning to play the piano with an instructor, and the other shows a sound mixing board, indicating the keyboard's multiple functions including teaching and sound effect control.
6. Maintenance
- Cleaning: Use a soft, dry, lint-free cloth to wipe the surface of the keyboard. For stubborn dirt, slightly dampen the cloth with water and then wipe dry immediately. Do not use abrasive cleaners, waxes, or solvents.
- Storage: When not in use for extended periods, store the keyboard in a cool, dry place away from direct sunlight and extreme temperatures. If using batteries, remove them before long-term storage to prevent leakage.
- Handling: Always handle the keyboard with care. Avoid placing heavy objects on it or dropping it.
7. Troubleshooting
| Problem | Possible Cause | Solution |
|---|---|---|
| No sound | Power off; Volume too low; Headphones connected; Batteries drained. | Ensure power is on; Increase volume; Disconnect headphones; Replace batteries or use USB power. |
| Keys not responding | Power off; Malfunction. | Ensure power is on. If problem persists, contact customer support. |
| Microphone not working | Microphone not fully plugged in; Microphone faulty. | Ensure microphone is securely plugged into the correct port. Test with another microphone if available. |
| LED display is blank | Power off; Malfunction. | Ensure power is on. If problem persists, contact customer support. |
8. Specifications
- Model: MQ6186
- Number of Keys: 61
- Tones: 16
- Rhythms: 6
- Demo Songs: 6
- Features: Teaching function, Sound effect control, Recording, Programming, Chord function, Adjustable volume/beat
- Connectivity: 3.5mm Microphone Jack, 3.5mm Headphone Jack, USB Type A (for power)
- Power Source: Corded Electric (USB 5V), Battery Powered (AA batteries, not included)
- Material: Non-environmental plastic
- Dimensions: Approximately 22.68 x 6.06 x 1.73 inches (57.6 x 15.4 x 4.4 cm)
- Weight: Approximately 1.41 pounds (0.64 kg)
9. Warranty and Support
Luqeeg offers a one-year return and exchange policy for this product. For any issues, questions, or support needs, please contact your retailer or the manufacturer directly. Please retain your proof of purchase for warranty claims.
Ask a question about this manual
Ask about setup, troubleshooting, compatibility, parts, safety, or missing instructions. Manuals+ will review the question and use this page’s manual context to help answer it.